2006 Dodge Dakota Quad Cab 4wd SLT - "Rumble"

  • HTML tutorial

CR-Venturer

Rank VI
Launch Member

Traveler III

3,372
Ardrossan, AB, Canada
First Name
Jas
Last Name
Spr
Member #

16340

Updated photo showing the repaired body damange. Pic taken on our expedition to the Rockies Sept 2023:
IMG_20230910_194204.jpg

Far from body shop perfect, but it's way less noticeable and won't rust away now.

My text task is going to be to disassemble the bed rack and swap the uprights from side to side, so that the bins are on the driver's side and the tools and recovery gear on the passenger side. This will allow the spare wheel to be centered in the bracket once again and further to the passenger side of the vehicle.
 

CR-Venturer

Rank VI
Launch Member

Traveler III

3,372
Ardrossan, AB, Canada
First Name
Jas
Last Name
Spr
Member #

16340

Got the uprights swapped over today with the help of a neighbor and a couple of very tall homemade sawhorses I had around. Just put the saw horses in the bed to support the tent and the top of the bed rack, then unbolted the uprights and swapped sides, then bolted it all back together.

Took a bit of fussing around with stuff, but we got it all done in just under an hour. Now I can see a bit better out the back, my spare tire is centered on its mount again, and when I eventually get an awning, the bins will be under the awning :)
media.jpg
 
Last edited:

CR-Venturer

Rank VI
Launch Member

Traveler III

3,372
Ardrossan, AB, Canada
First Name
Jas
Last Name
Spr
Member #

16340

I made a minor improvement to one of my side bins today, adding a shelf in the middle. It's about half the depth of the bin. I may try using this bin to hold my camp kitchen stuff, but even if I don't end up going with that setup, the shelf is really nice to have.media.jpg
 

CR-Venturer

Rank VI
Launch Member

Traveler III

3,372
Ardrossan, AB, Canada
First Name
Jas
Last Name
Spr
Member #

16340

Big day for Rumble today. I installed the Evergear 270 degree batwing awning from Princess Auto today. Cost me $233 Canuck bucks, shipped to my door, taxes in. I've been considering this since the expedition in September of last year, and at that price with free shipping, I couldn't say no. As I type this, I'm out bush camping with my 5 year old son and making great use of it :)media.jpg
media.jpg
 
Last edited:

CR-Venturer

Rank VI
Launch Member

Traveler III

3,372
Ardrossan, AB, Canada
First Name
Jas
Last Name
Spr
Member #

16340

Rumble is currently in the garage undergoing repairs. I'm doing basically the entire front end suspension: struts, upper control arms with ball joints, complete tie rods, sway bar links and lower ball joints.

I hit a bit of a snag with the lower strut bolt as there's no way on this planet it's coming out without an impact, but my buddy has one and I'm borrowing it tonight, so should be good to go after that.media.jpg
 
Last edited:
  • Sad
Reactions: Sparksalot

Sparksalot

Rank VI
Launch Member

Influencer III

4,312
Bastrop County, TX, USA
First Name
Rex
Last Name
Drake
Member #

19540

Ham/GMRS Callsign
KI5GH
Service Branch
Air Force
Rumble is currently in the garage undergoing repairs. I'm doing basically the entire front end suspension: struts, upper control arms with ball joints, complete tie rods, sway bar links and lower ball joints.

I hit a bit of a snag with the lower strut bolt as there's no way on this planet it's coming out without an impact, but my buddy has one and I'm borrowing it tonight, so should be good to go after that.View attachment 285110
IMG_3767.jpeg
 

CR-Venturer

Rank VI
Launch Member

Traveler III

3,372
Ardrossan, AB, Canada
First Name
Jas
Last Name
Spr
Member #

16340

Rumble is currently in the garage undergoing repairs. I'm doing basically the entire front end suspension: struts, upper control arms with ball joints, complete tie rods, sway bar links and lower ball joints.

I hit a bit of a snag with the lower strut bolt as there's no way on this planet it's coming out without an impact, but my buddy has one and I'm borrowing it tonight, so should be good to go after that.View attachment 285110
View attachment 285111
Right? Especially in rusty Edmonton, metal parts have a tendency to amalgamate into a single chunk of iron oxide. In the case of the lower bolt, though, a lot of the problem is the lack of room to use the +5 Pipe of Leverage on the breaker bar.
 
  • Sad
Reactions: Sparksalot

Sparksalot

Rank VI
Launch Member

Influencer III

4,312
Bastrop County, TX, USA
First Name
Rex
Last Name
Drake
Member #

19540

Ham/GMRS Callsign
KI5GH
Service Branch
Air Force
Right? Especially in rusty Edmonton, metal parts have a tendency to amalgamate into a single chunk of iron oxide. In the case of the lower bolt, though, a lot of the problem is the lack of room to use the +5 Pipe of Leverage on the breaker bar.
That's where a lift would be so nice.
 
  • Like
Reactions: CR-Venturer

CR-Venturer

Rank VI
Launch Member

Traveler III

3,372
Ardrossan, AB, Canada
First Name
Jas
Last Name
Spr
Member #

16340

The sweet, sweet taste of victory.

The first serious battle was getting the tie rod end out of the steering knuckle. I had to cut it off with a sawzall and press it out with a ball joint press. It shot across the room like a champagne cork lol
media.jpg

The bottom shock mount bolt was an absolute bear to get out. It took a solid three minutes with the high torque impact (to say nothing of gallons of penetrating oil) just to budge it. Then trying to get the bolt out was a nightmare. Persistence and some very creative use of a ball joint press won the day, however the bolt was horribly rusted and slightly bent, so I had to cut the head off to drive it out backwards. I ordered a new one from the dealer. Assembled some while waiting for the chance to drive to town for it.
media.jpg
(Breaker bar with +5 Pipe of Leverage bending like a licorice stick)
media.jpg
RIP shock mount bolt - it was rusted to crap and slightly bent.
media.jpg
Sweet, sweet victory. Next the shock bolt goes in and the knuckle goes back on.
 
Last edited:
  • Like
Reactions: Mekcanix

CR-Venturer

Rank VI
Launch Member

Traveler III

3,372
Ardrossan, AB, Canada
First Name
Jas
Last Name
Spr
Member #

16340

Finished the driver side and started on the passenger side. Once again the Sawzall proved the MVP as the tie rod and the bottom ball joint flatly refused to come out of the knuckle. Used the ball joint press again to great effect.media.jpg
 

CR-Venturer

Rank VI
Launch Member

Traveler III

3,372
Ardrossan, AB, Canada
First Name
Jas
Last Name
Spr
Member #

16340

Sweet victory. Rumble rides again. The fresh suspension rides beautifully, and no more horrible squeaking from the ball joints.

The new springs ride noticeably higher than the old worn out ones, so Rumble is showing a little squat.
media.jpg
media.jpg
Next mod will be a set of helper springs in the back end.
 

CR-Venturer

Rank VI
Launch Member

Traveler III

3,372
Ardrossan, AB, Canada
First Name
Jas
Last Name
Spr
Member #

16340

Finished installing the helper springs in the rear, and wow, what a difference! With the new suspension up front and the springs in back, it feels like a new truck. Almost completely eliminated the sag in the rear as well, which is great.

Before:
media.jpg
And after:
media.jpgmedia.jpg
I might tighten up the helpers on the driver's side a little bit more. I think that side was worse in terms of sag.

I'm currently playing with the idea of fitting a JK winch bumper on the Dakota. The mounts are very similar, and I think it may be possible to fit it with a DIY adapter plate.
 

CR-Venturer

Rank VI
Launch Member

Traveler III

3,372
Ardrossan, AB, Canada
First Name
Jas
Last Name
Spr
Member #

16340

Not technically a rig upgrade, but a minor improvement to the RTT setup; got a set of magnetic LED lights with USB charging and motion sensor option, as well as a hanging organizer. The red bar is an old broken metal broom handle that just so happened to fit perfectly across the tent. The two lights and the organizer were $20 each, all in.
media.jpg
media.jpg
media.jpg
 
Last edited:

CR-Venturer

Rank VI
Launch Member

Traveler III

3,372
Ardrossan, AB, Canada
First Name
Jas
Last Name
Spr
Member #

16340

So, I had a crazy idea I wanted to test out. So far, it looks extremely promising that it might work. Can anyone guess what it is? (No, it's not fitting a cardboard bumper, you jokers...)
media.jpg
media.jpg
media.jpg
 
Last edited:
  • Like
Reactions: Mekcanix

CR-Venturer

Rank VI
Launch Member

Traveler III

3,372
Ardrossan, AB, Canada
First Name
Jas
Last Name
Spr
Member #

16340

Keen eyed observers may have noticed that the bolt hole pattern on the carboard matches a jeep. Yes, I can fit a jeep bumper on my truck with very minor mods (drilling four holes in the front bumper mounts to accommodate the shorter vertical of the jeep bumper mounts.

I may do this, however the repair of the transfer case took precedent, and Rumble has been fitted with a new-to-me transfer case with only 128k kms on it, as opposed to the 350k or so on the truck. I had to replace both U-joints in the rear drive shaft while I was at it, but Rumble is riding smoothly and 4wd has never felt so good!
 

CR-Venturer

Rank VI
Launch Member

Traveler III

3,372
Ardrossan, AB, Canada
First Name
Jas
Last Name
Spr
Member #

16340

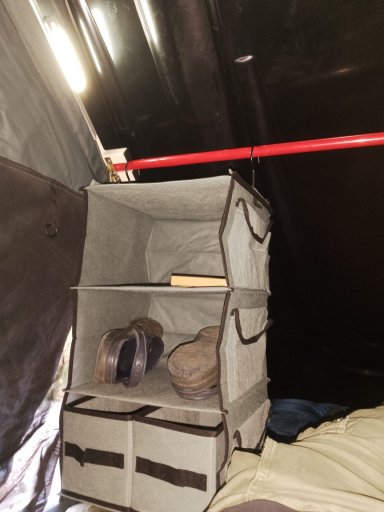
My summer season had a rather rough start. I went out for an overnight camp out on the crown land not far from home and found much to my dismay, that my tent was very wet inside and my mattress was soaked. I was extremely baffled by this, as I've had it out in heavy rains even while deployed, and never had water get in. I was forced to drag the mattress out and dry it by the fire, and wipe out the inside as best I could with the rags I had on board, and a bit of paper towel.
wet1.jpg
wet2.jpg
I checked it thoroughly when I got home and could see no way for water to get in. In talking later with a buddy of mine, he said he had the same issue with his Alucab tent, and it was caused by sudden changes in the weather producing large amounts of condensation. Hopefully a one off, but he installed vents on his tent to equalize the pressure, so I may give that a try.

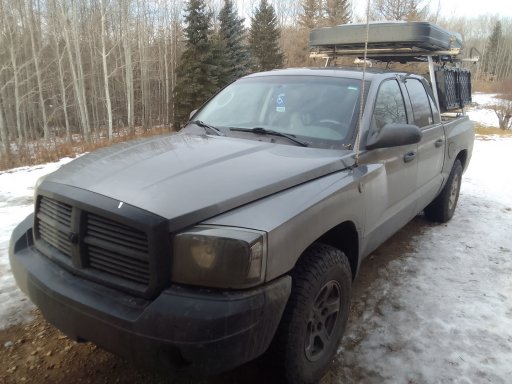
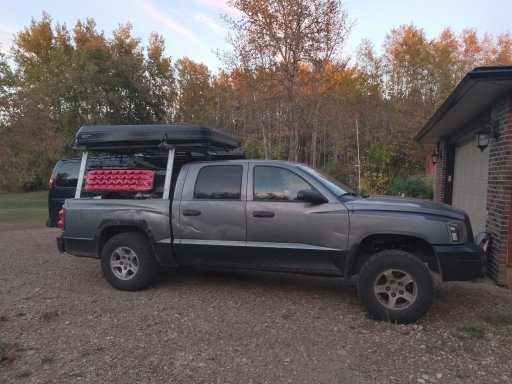
Going from bad to worse, when I got home from the trip, I realized to my even greater dismay that the two front uprights of my bed rack had cracked at the top, one completely detached and one about 2/3s detached:
crack1.jpg
crack2.jpg
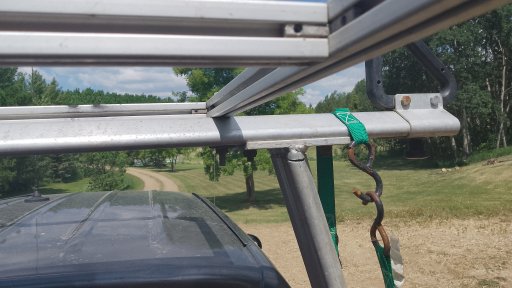
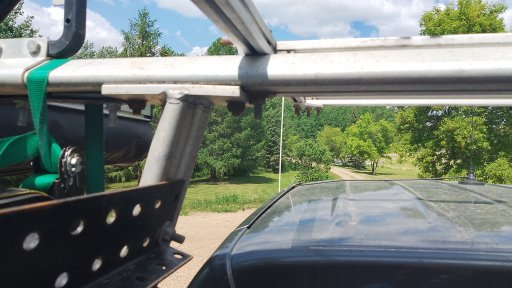
In thinking about this issue and how it could have happened, I figured that the side to side motion with the rooftop tent on put too much stress on these joints. I considered several options, like completely replacing my setup with something different, but I really like this setup and money is very tight. I also considered replacing the uprights and rebuilding the custom stuff onto the new ones, but even this was $218 if it was on sale, and more like $350 if not. I figured that even if I did buy new uprights, I would still want to add some bracing to the rack to prevent any side to side motion, and thus alleviate this cracking issue. In the end, I decided to "repair" the rack and add the bracing. Down the road, if I decide to replace the uprights, the bracing can very easily be added in from the start, preventing this situiaton from occuring again. After some thinking, I drew up a design based on aluminum angle and flat bar, bolted together and bolted through the top of the cross bar, through the brace, into the upper edge of the trussing:
brace2.jpg
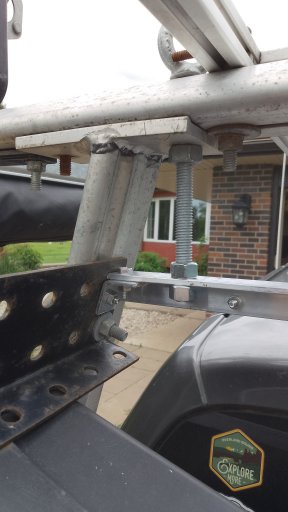
You can also see in this photo the steel reinforced expoxy I used to glue the cracked uprights back together. Not perfect, but it's something.
brace3.jpg
This photo was taken just before the last flat bar was put in place and all the nuts torqued using the trusty german torque spec, "Gudentight."
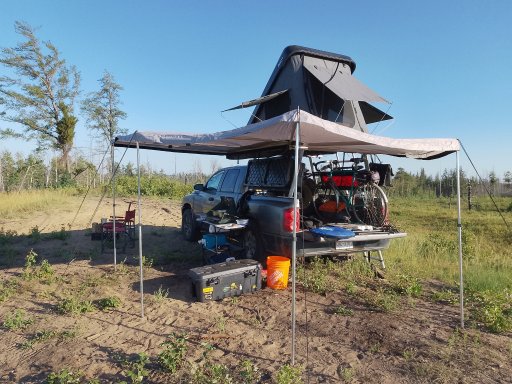
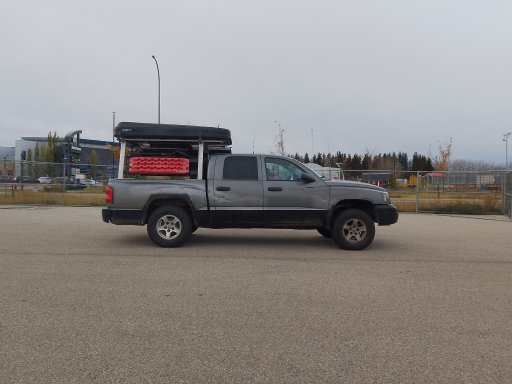
The rack is now absolutely rock solid with zero side to side movement.

When taking the tent off, I had a friend come over and help me, but he's going through some difficult things right now, so I didn't want to trouble him. I came up with a novel solution to do it myself:

Lunch1.jpg
Lunch3.jpg
Lunch2.jpg
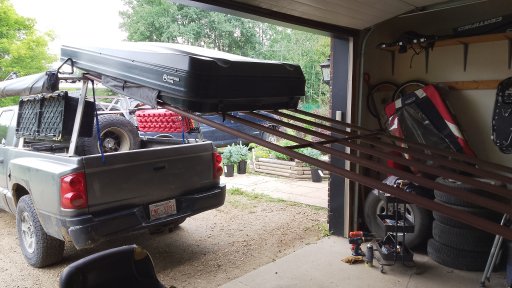
That's a farm gate we had laying around the property. I strapped it to the end of the bed rack with the blue straps, wrapped the chain around the sawhorse to secure it, and slid the tent up into position.

Cost of the repair/bracing was $90 for everything I had to buy, but that included the epoxy and a 240+ piece nut and bolt assortment, part of which I still have, so really it was less money.

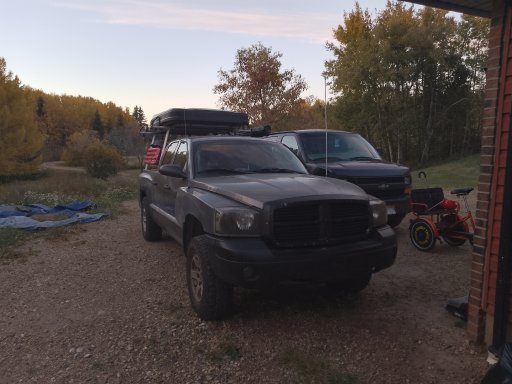
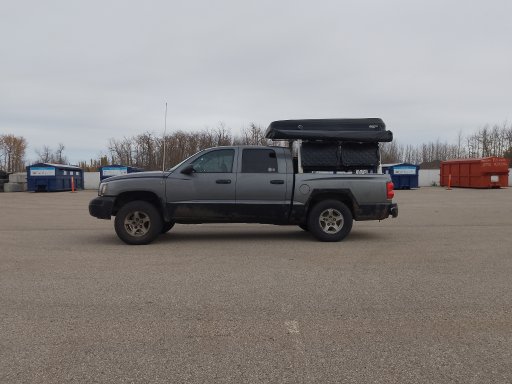
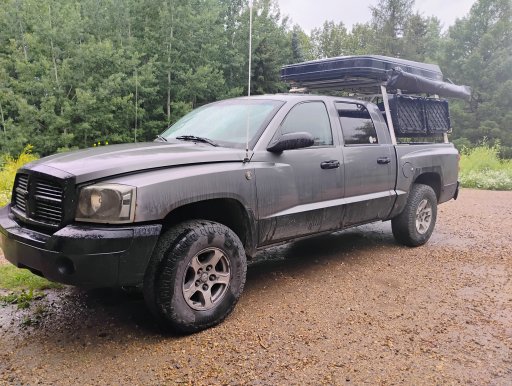
Rumble is ready to ride again!
 
Last edited: