2006 Dodge Dakota Quad Cab 4wd SLT - "Rumble"

  • HTML tutorial

CR-Venturer

Rank VI
Launch Member

Traveler III

3,372
Ardrossan, AB, Canada
First Name
Jas
Last Name
Spr
Member #

16340

Hello fellow Overlanders!

Due to a confluence of unforseen circumstances, I was forced to give up my cherished 1999 Honda CR-V adventure rig and purchase a new vehicle. As we recently moved to an acreage in the country, I had a need for a pickup for the first time in my life for hauling hay, fence materials, etc. etc. that are inevitably needed around a homestead. I wanted to avoid the monstrously huge trucks such as F-250's, Dodge Rams, GMC Sierras, etc in favour of a more mid size truck that fits into narrow trails more easily, but the wife was adamant that it had to have a proper sized back seat, no jump seats or half doors, which ruled out the old Ford Ranger, which probably would have been my first choice otherwise.

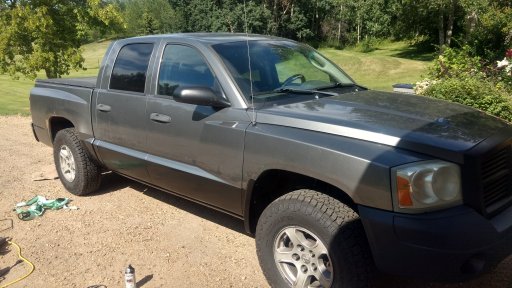
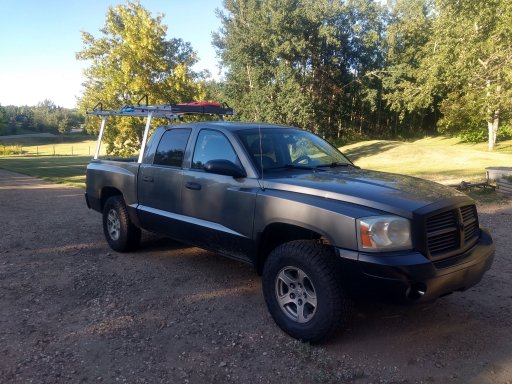
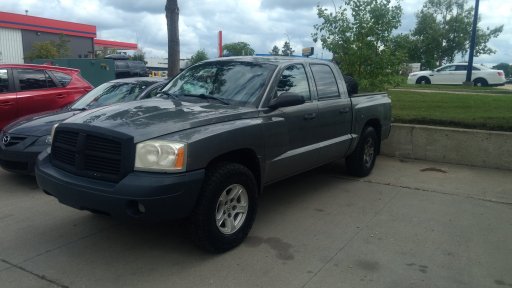
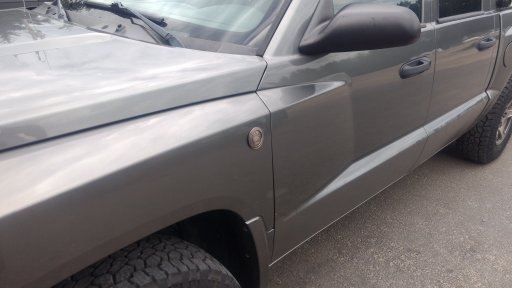
If I was rich, my first choice would have been a Toyota Tacoma, perhaps a 2015 or similar vintage. Sadly, I am not rich, and my mortgage is pretty huge nowadays since I had to lock in the rate, and so I was left with a budget of $5000 with which to meet all these criteria. The end result was a 2006 Dodge Dakota, purchased for $4250 with 308k kms on the clock. It's been debaged by some previous owner, however some research indicates it's the SLT trim level with the optional 4.7L V8 engine which puts out about 235HP and 290LB-FT of torque.

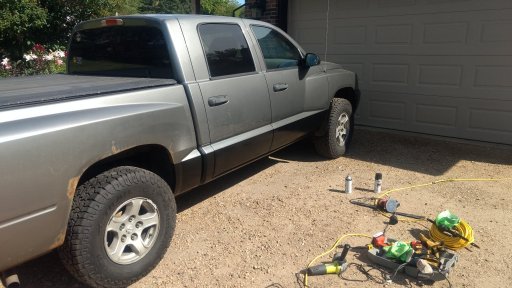
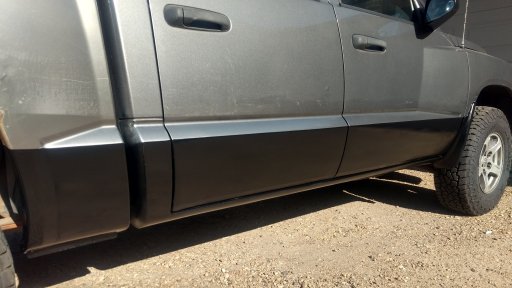
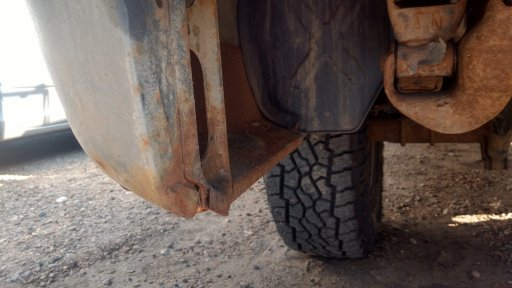
It came with snow tires on, so my first move was to fit a set of brand new all terrain tires on it:
Newshoes.jpg
Ideally, it would have been nice to fit 33's, which is possible with a bit of a lift and a little trimming, however there was a need to get proper tires on and with time and money limited, I decided to go with 265/75/16's, which was one of the factory sizes available on this truck originally. This one was fitted with 245/70/16's from the factory, so even this modest increase in size is an improvement. They give me 1 full inch more clearance, so that's nice, and they don't rub without needing a lift or any other suspension changes.

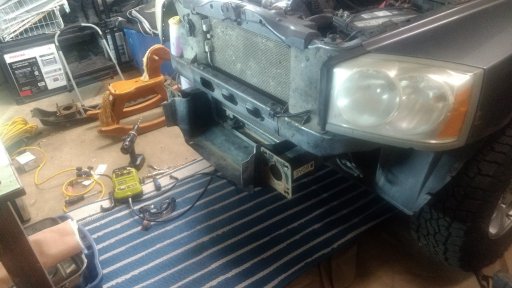
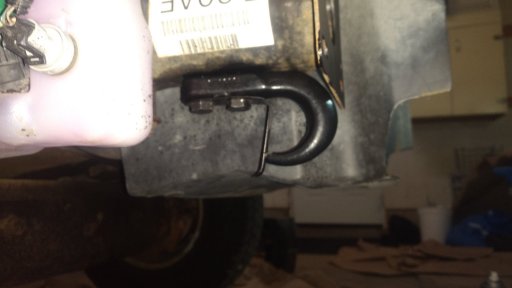
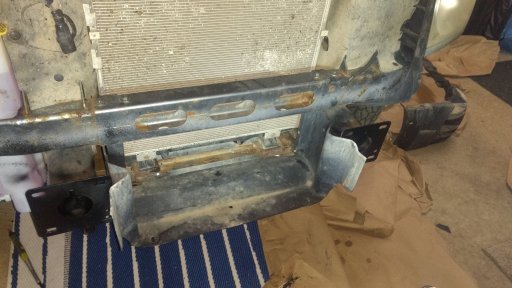
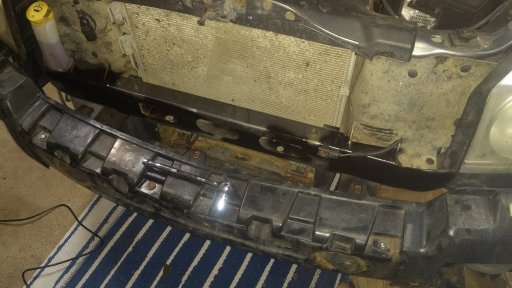
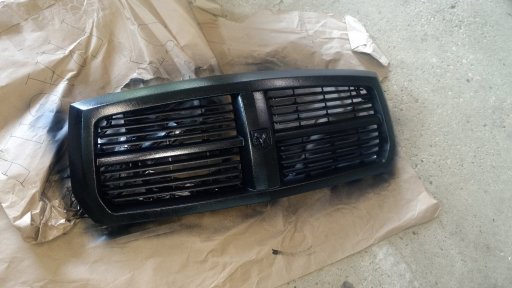
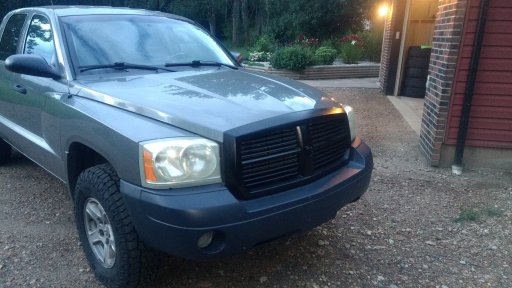
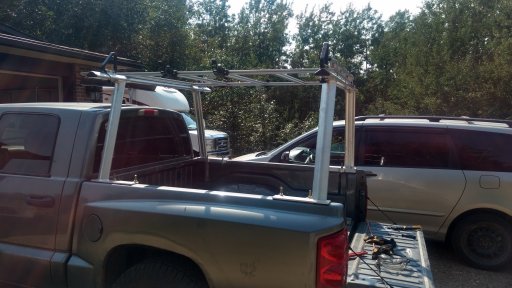
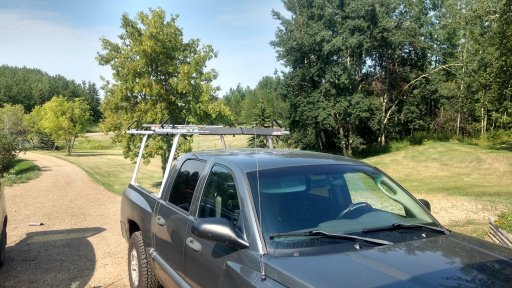
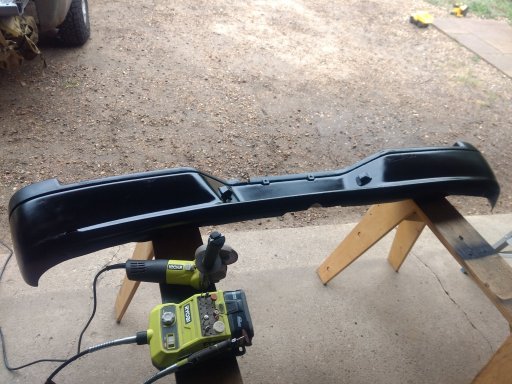
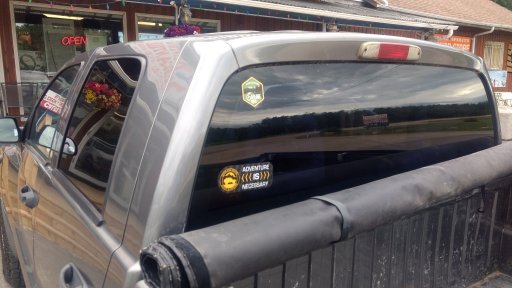
Next mod was the most critical:
IMG_20220719_175857606.jpg
IMG_20220719_175846967.jpg

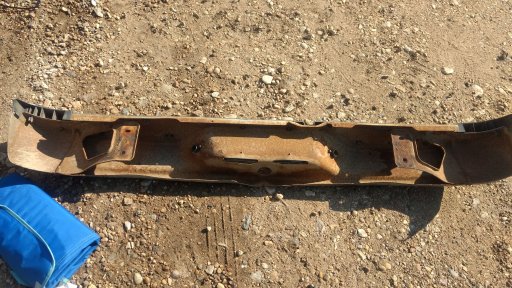
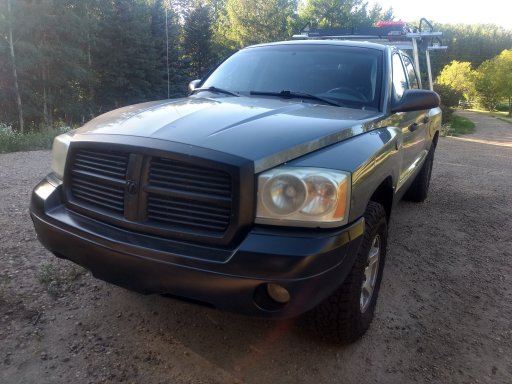
My next planned mod is to bolt up the pair of 10k lb rated recovery hooks to the front frame rails, fix a burnt out turn signal bulb, and then to extend the diff breathers. There is some minor rust on the lower rockers and doors as well as the wheel wells of the box that I plan to blast with a wire brush on the angle grinder and then spray the lower section of the doors, box and bumper with the tried and true Tremclad Rust in Semi-gloss black, which should result in a pretty sweet looking two tone paint job that will hopefully stave off the truck being eaten by rust. I don't know what they use on the roads here around Edmonton, but there are some nasty rust-eaten vehicles cruising around here and I don't want to let my truck get that bad.

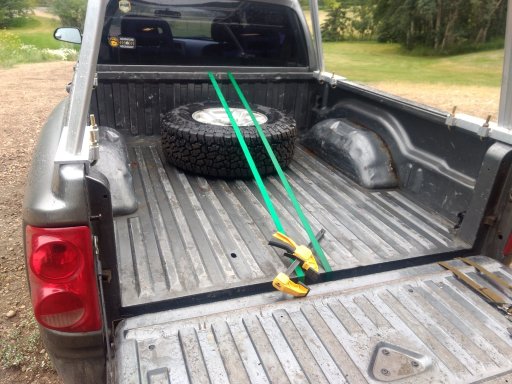
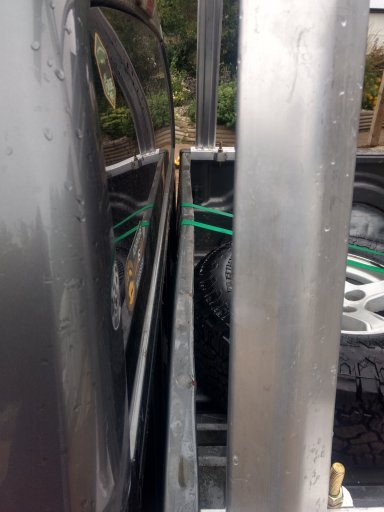
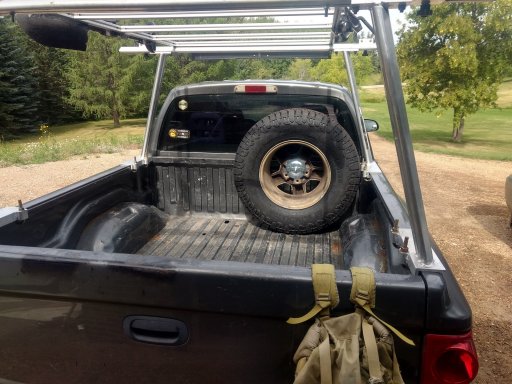
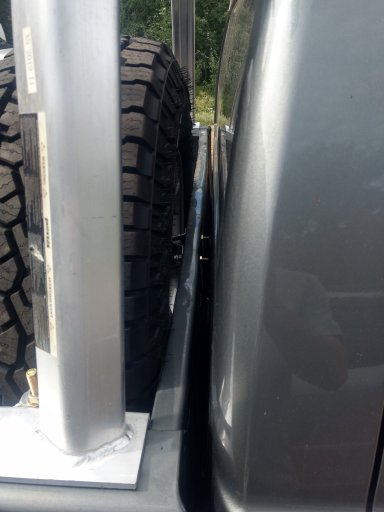
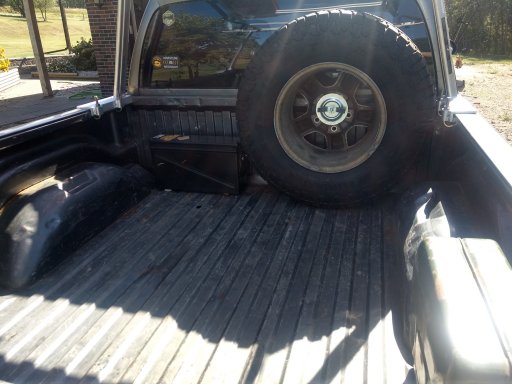
After that, I have plans to buy a bed rack and modify it by combining it with the custom aluminum roof rack off of Ganbaru, including a holder for the CRV table which I salvaged from my old rig, as well as adding a spare tire holder to the front of the truck bed (against the bed rail under the rear window on the passenger side) as currently the factory spare location won't work.

As for a name, I'm undecided and open to suggestions, although I am considering the name "Old Chief Smoke" after one of the famous Dakota indian chiefs of olden times, and in keeping with the smoky grey paint and interior, as well as the fact that like most of my cars it's...old.

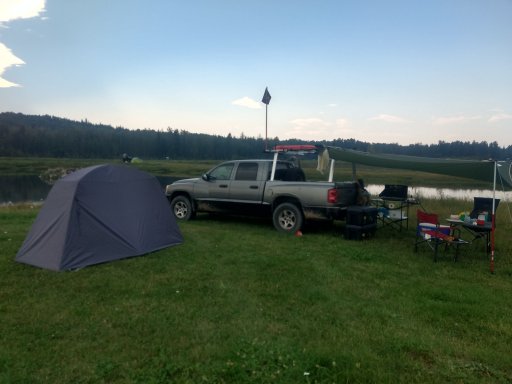
Stay tuned for more updates as things progress, although progress may be somewhat slow due to financial constraints in these trying times. Cheers all and keep adventuring!
 
Last edited:

CR-Venturer

Rank VI
Launch Member

Traveler III

3,372
Ardrossan, AB, Canada
First Name
Jas
Last Name
Spr
Member #

16340

My first mod was to install a pair of 10,000 lb recovery hooks:
IMG_20220731_172154948.jpg
IMG_20220801_001544208.jpg
The body member that runs in front of the radiator was pretty rusty, and since I was blasting the holes in the frame rails inside and out with anti-rust paint as well as the ends of the frame rails where the bumper bolts on, I figured I might as well address some of the worst rust on this beam to try and extend the life of the vehicle.

Before:
IMG_20220801_001813424.jpg

After:
IMG_20220801_234350407.jpg
The radiator support under the feet is rusted out completely, and would take some more serious efforts and dismantling to address, so I decided to leave that for now and revisit later, perhaps when I fit a steel winch bumper.

While I was at it, I decided to touch up the grille. Some previous owner had blacked out the chrome grille with some cheap bedliner type stuff that was looking tired and had chipped in a few places. I just went over it with a decent coat of the semi-gloss rust paint. This stuff is awesome and I've used it extensively on Ganbaru previously, so I trust the durability of it. For a quick and dirty touch up, I think the grille looks much better now:

IMG_20220804_160306365.jpg

IMG_20220804_211656322.jpg

Next up is blasting the rocker panels with an angle grinder fitted with a wire brush to eliminate all the nasty rust that's there. So far I believe the rust is only superficial, so I think some good polishing should get rid of most of it, then I'm hitting the whole lower edge of the doors and rockers with the same Tremclad rust semi-gloss black. I found a pic of a guy's truck who did the exact same paint scheme, and it looks awesome. Very excited for that.

The truck also got an engine code two weeks after I bought it, and it idles a bit rough and has a bit of a gasoline smell when I first start it, so I'm taking it in to the mechanic on the 9th to hopefully rectify whatever the issue is. I would really like to get it running perfectly.

Next mods I plan to do:

Bigger gas tank - this thing was fitted with a 15 gallon tank (about 68L), which is insane given the standard tank on the Dakota is 22Gal (about 84L), and Ganbaru had a 60L tank!

Aluminum bed/ladder rack which I will combine with the roof rack from Ganbaru and other bits to make a sweet overlanding rack.

Spare tire mount in the front of the bed on the passenger side, since I can't use the factory location.

More to come!
 

CR-Venturer

Rank VI
Launch Member

Traveler III

3,372
Ardrossan, AB, Canada
First Name
Jas
Last Name
Spr
Member #

16340

I wish I had my 98 Dakota sport now. I had it lifted with 32" tires, WAAG guard, tail light guards and side steps, action cap on the back, v8 under the hood! It was the perfect truck IMO.
I really like those 2nd gen Dakotas, and I considered getting one before I bought this one. I really love the styling on my third gen the best.

It has a similar size and setup to a Tacoma, but a fraction of the cost. The local Toyota dealership wanted $66k+ for a base model Tacoma with crappy street tires!
 

NCFireGuy

Rank VI
Member

Influencer I

3,012
West Jefferson, North Carolina, USA
First Name
Marc
Last Name
Bouchard
Member #

29282

Service Branch
Retired Fire/EMS
I wish I had my 98 Dakota sport now. I had it lifted with 32" tires, WAAG guard, tail light guards and side steps, action cap on the back, v8 under the hood! It was the perfect truck IMO.
I loved my 98 and my 05 Dakota. They where great trucks
 

CR-Venturer

Rank VI
Launch Member

Traveler III

3,372
Ardrossan, AB, Canada
First Name
Jas
Last Name
Spr
Member #

16340

Rust remediation phase 1 has begun:
IMG_20220810_160228971_HDR.jpg
IMG_20220810_160413781.jpg
IMG_20220810_172703683_HDR.jpg
2 coats so far of Tremclad Rust Semi-Gloss black. I used this paint on all the trim and wheels of Ganbaru and found it exceptionally durable, especially for it's affordable price. I will probably add another coat.

I tried to remove the rear bumper in order to do the back corners and rear of the box, but the nuts and bolts holding the bumper on have become one, so I'll have to go to plan B to get those off. It may involve an angle grinder.

Phase 1 will consist of doing the lower part of the truck all the way around in black as shown, and most likely the front and back bumpers as well. It will be a while before I can afford a steel bumper and winch for the Dakota, so I might as well make it look good in the meantime.

Phase 2 will consist of getting a paint matched rattle can from Lordco/Napa/wherever as well as a can of clear coat and addressing some of the small rust spots on the upper part of the body.
 
  • Like
Reactions: Mekcanix

CR-Venturer

Rank VI
Launch Member

Traveler III

3,372
Ardrossan, AB, Canada
First Name
Jas
Last Name
Spr
Member #

16340

I spent a couple of hours battling with the horrendously rusted bolts holding my rear bumper on. I managed to get two off, but the other two are stuck fast and now rounded off. I resorted to attacking the nut on one of them with the angle grinder to grind through the side of it and split it off. That's an ongoing process.

I also mounted the sweet aluminum rack I picked up. I had been looking at this rack on Princess Auto (kinda the Canadian Harbor Freight, for those not familiar) which they sell for $289.99. I was hoping it would go on sale, but then I scored the exact same rack for only $100 barely used from Kijiji! I was very stoked.
IMG_20220819_151817437_HDR.jpg
I placed the rack from Ganbaru on top as a test fit and to figure out how I was going to mount it, set up the awning bar etc. It looks like it will work out nicely and be a pretty sweet setup. I plan to bolt some cross bars between the uprights about mid way between the upper rack and the bed rail to mount my recovery boards, and I may put some kind of case or toolbox mounted on the opposite side. Then I need to figure out how I'm going to mount my spare. I was thinking I would bolt a tire carrier to the back wall of the bed, but I noticed that it's been bowed in toward the cab at some point in the past, so room may be tight. I might have to re-think where to put it. I also plan to bolt a pair of aluminum C-channels to the underside of the top rack to slip the CR-V table into. The only downer was that my wind faring doesn't seem to be long enough anymore...
IMG_20220819_151835847_HDR.jpg
Going to attack those bolts again tomorrow and hopefully get them off. Then I can continue the rust remediation project.
 

Enthusiast III

1,212
Grand Falls-Windsor, NL, Canada
First Name
Steve
Last Name
Adams
I spent a couple of hours battling with the horrendously rusted bolts holding my rear bumper on. I managed to get two off, but the other two are stuck fast and now rounded off. I resorted to attacking the nut on one of them with the angle grinder to grind through the side of it and split it off. That's an ongoing process.

I also mounted the sweet aluminum rack I picked up. I had been looking at this rack on Princess Auto (kinda the Canadian Harbor Freight, for those not familiar) which they sell for $289.99. I was hoping it would go on sale, but then I scored the exact same rack for only $100 barely used from Kijiji! I was very stoked.
View attachment 238543
I placed the rack from Ganbaru on top as a test fit and to figure out how I was going to mount it, set up the awning bar etc. It looks like it will work out nicely and be a pretty sweet setup. I plan to bolt some cross bars between the uprights about mid way between the upper rack and the bed rail to mount my recovery boards, and I may put some kind of case or toolbox mounted on the opposite side. Then I need to figure out how I'm going to mount my spare. I was thinking I would bolt a tire carrier to the back wall of the bed, but I noticed that it's been bowed in toward the cab at some point in the past, so room may be tight. I might have to re-think where to put it. I also plan to bolt a pair of aluminum C-channels to the underside of the top rack to slip the CR-V table into. The only downer was that my wind faring doesn't seem to be long enough anymore...
View attachment 238544
Going to attack those bolts again tomorrow and hopefully get them off. Then I can continue the rust remediation project.
For the bolts on the bumper, you need a zip wheel if you don't have one on your grinder. The other thing you can do is use a Dremel with a cutting wheel and cut down through the bolt and then cold chisel it off. I had to do this with a customers Honda valkarye. The exhaust mount nuts were rusted and rounded off, So I went very slowly with the Dremel, until almost all the way through and then popped it open with a chisel. Worked great and no damage to the bolt end.
 
  • Like
Reactions: CR-Venturer

CR-Venturer

Rank VI
Launch Member

Traveler III

3,372
Ardrossan, AB, Canada
First Name
Jas
Last Name
Spr
Member #

16340

For the bolts on the bumper, you need a zip wheel if you don't have one on your grinder. The other thing you can do is use a Dremel with a cutting wheel and cut down through the bolt and then cold chisel it off. I had to do this with a customers Honda valkarye. The exhaust mount nuts were rusted and rounded off, So I went very slowly with the Dremel, until almost all the way through and then popped it open with a chisel. Worked great and no damage to the bolt end.
I'm planning on replacing the bolts and nuts with brand new ones anyways, so I don't need to be careful about damaging them. That's basically the concept I'm going with, though - cut through the nut and split it open.
 

CR-Venturer

Rank VI
Launch Member

Traveler III

3,372
Ardrossan, AB, Canada
First Name
Jas
Last Name
Spr
Member #

16340

I forgot to mention that I had the front passenger CV axle replaced at the mechanic due to a ripped open boot, and in the process found out that actually this truck has had a pretty significant spacer lift applied prior to me buying it, perhaps 3 or 4 inches. The mechanic had a heck of a time getting the thing out, and I ended up paying about double what it should have cost in labour, but the guy is extremely fair and only charged me about half what it actually took.

The downside of all this is that the lift is a bit too much for the CV's and they are not very happy if I go above 100 or 110 on the freeway, and start wobbling. It's not that bad, but it's definitely not ideal for many reasons. The mechanic said that the struts are getting long in the tooth anyway, so when I need to replace them, I'll probably try to find some proper lift struts perhaps with a little less lift, and/or I may end up doing a diff drop.

As I think about it, this axle wobble is similar to what I experienced with Ganbaru after doing a 2" lift spacer, but before I did the 1/4" engine drop, so a very slight diff drop might solve the issue. Further consideration and investigation will be necessary.
 
  • Like
Reactions: Sparksalot

CR-Venturer

Rank VI
Launch Member

Traveler III

3,372
Ardrossan, AB, Canada
First Name
Jas
Last Name
Spr
Member #

16340

So, finally managed to make some progress on the truck after so many delays.

After a 3 day battle, I managed to get the bumper off by basically annihilating the rust welded bolts that held it on. Looking pretty rusty underneath.IMG_20220824_170102148.jpg
IMG_20220824_170050775_HDR.jpg
Today, I attached the awning mount and buzzed off as much of the rust as I could from the bumper and applied a coat of paint. Unfortunately one bubble of rust turned out to be a small hole about the size of an almond. I'm thinking I'm probably going to tape behind it and apply JB weld to fill it, then sand and paint. Other than that, the bumper isn't too bad.IMG_20220827_162456920.jpg
When I removed my tonneau cover to put my rack on, I discovered that a previous owner had bashed the front of the bed so that it was bowed out and almost touched the cab. Some ratchet strap body work fixed that right up and now she's almost perfectly straight. I also marked the spots where I will drill for the spare tire carrier.
IMG_20220827_162506139.jpg
IMG_20220827_162516109_HDR.jpg
Tomorrow, I will drill for the spare tire mount and get it bolted up, and start attacking the rust on the frame, hitch, and the lower part of the body and bed. Then paint, and reinstall the tailgate and bumper.
 
  • Like
Reactions: Sparksalot

CR-Venturer

Rank VI
Launch Member

Traveler III

3,372
Ardrossan, AB, Canada
First Name
Jas
Last Name
Spr
Member #

16340

Got the spare mounted up to the bed rail using an Erickson spare tire mount kit. It's a little on the dodgy side, to be honest (no pun intended) but since all the weight of the spare is being supported by the bed and the bracket is just holding it in place, against the bed rail, I figure it should probably be fine. I'll keep an eye on it. Looks decent I think. Significantly cheaper than several of the options I looked at. Less than $20 I think.
IMG_20220828_123301795_HDR.jpg
IMG_20220828_123250022_HDR.jpg
 
  • Like
Reactions: Sparksalot

CR-Venturer

Rank VI
Launch Member

Traveler III

3,372
Ardrossan, AB, Canada
First Name
Jas
Last Name
Spr
Member #

16340

I was thinking about a name for the rig tonight, and another possible option came to me: "Rumble"

This is because it recently developed a leak in a piece of flex pipe that had been used to repair the exhaust, letting out the lovely throaty rumble of the 4.7L V8. I think it sounds fantastic. My wife hates it and is making me fix the pipe lol

But perhaps I should immortalize the sweet, sweet sound of 8 cylinders of V8 power in the name...
 
  • Love
Reactions: Sparksalot

CR-Venturer

Rank VI
Launch Member

Traveler III

3,372
Ardrossan, AB, Canada
First Name
Jas
Last Name
Spr
Member #

16340

Phase 1 of rust remediation: Complete.
IMG_20220901_181351378_HDR.jpg
IMG_20220901_181558070_HDR.jpg
I suppose that the fender flares I plan to put on to hide the rust on the wheel wells at the back will wait till phase 2, as I don't have the money right now. Also, unfortunately the rust was MUCH worse than I first suspected. What I thought was just minor rust peeking through the paint was actually, in some places, a previous bondo repair gone bad. I suspect the previous owner did not eliminate all the rust before applying the bondo, and so the rust began to eat its way through the previous repair, and in places I actually opened holes in the body work when I attacked with the wire brush.

This is very unfortunate, but I don't have the time and resources at the moment to tackle a proper repair of this major issue. Had it been just surface rust as I thought (as indeed it was on the passenger side), this would have been a perfectly adequate fix, but as it is, I may need to cut out large pieces and either back with mesh and bondo over them, or even try to arrange to have new panel welded on. That's something for down the road. For now, the truck is my Monet - good from afar, but far from good lol.

I also added a lockable tool box in the bed beside the spare, which was Ganbaru's center console repurposed:
IMG_20220901_125510112_HDR.jpg
For the moment, it's a temporary install. It's bolted through an existing factory hole in the bed and a pre-existing hole in the bottom of the box. I did it this way for now in order to get it done quickly and so that I could move it if I decide I don't like it in this spot. You can see a jerry can in the front right of the pic that's just sitting there for now, but I will probably rig up a way to attach this in future. I like this spot for it, and might even add another on the other side.

Tomorrow, off to Alberta Outdoor Adventure Expo!
 
  • Like
Reactions: Mekcanix

CR-Venturer

Rank VI
Launch Member

Traveler III

3,372
Ardrossan, AB, Canada
First Name
Jas
Last Name
Spr
Member #

16340

Back from the expo. It was a blast even though I was forced to cut it short due to RL commitments.
IMG_20220904_122812021_HDR.jpg

I managed to get the truck out for a little shakedown run around some forestry roads and tracks on the north side of Hwy 16, and unfortunately they confirmed that indeed the CV's are at an unacceptable angle. The amount of snap crackle pop coming from them under flex and full crank, especially while backing, was disconcerting to say the least. I didn't break anything, thankfully, but this issue really needs to be remedied. The mechanic mentioned that he felt the struts were soon due for replacement, so the very next project will be new struts with a more reasonable lift, about 2" probably. I think the tires should still clear fine even with reduced lift in the front.

The challenges that come with buying old trucks...

Also, I decided as I listened to the beautiful music of the 4.7L V8 leaking from the hole in the exhaust that I am indeed going to dub my truck "Rumble" to commemorate that beautiful sound when the exhaust is fixed.

On the way home, I popped into the scale near our house and discovered that the vehicle as loaded for the trip weighs 2450kg or 5600lbs. Leaving some room for expansion, a 9k or 9500 winch should do the trick, once I get to shopping for one.
 
  • Like
Reactions: jscusmcvet

jscusmcvet

Rank V
Founder 500
Launch Member

Enthusiast III

2,273
North Carolina
First Name
John
Last Name
Caliri
Member #

0191

Service Branch
USMC Veteran
Glad you are posting about this. I just recently picked up a 2010 Dakota TRX4 and have been trying to find any info... which as you know is scarce. I had to replace my 2003 Tundra as my primary driver/camper carrier/family trip vehicle. I love the 4.7 and the gas mileage in comparison. I am jus working hard to find examples of built Dakotas and then make decisions about what I want to do. Keep posting!
 
  • Like
Reactions: CR-Venturer

CR-Venturer

Rank VI
Launch Member

Traveler III

3,372
Ardrossan, AB, Canada
First Name
Jas
Last Name
Spr
Member #

16340

Glad you are posting about this. I just recently picked up a 2010 Dakota TRX4 and have been trying to find any info... which as you know is scarce. I had to replace my 2003 Tundra as my primary driver/camper carrier/family trip vehicle. I love the 4.7 and the gas mileage in comparison. I am jus working hard to find examples of built Dakotas and then make decisions about what I want to do. Keep posting!
It definitely seems like the third gen is an underappreciated platform, which is too bad because I really like mine.

Recently we've been hit by the onslaught of winter, so I haven't had much time to work on it. I rigged up and painted some cross bars for the side of the rack, to make a carrier for the maxtrax, but I just haven't had time to bolt them up.

I'm also playing with ideas on how to deal with the excessive lift problem in the front, because the axles are very, very unhappy currently. The rebel in me keeps whispering "Solid Axle Swap" but that's a big project to take on, and definitely outside the scope of my ability to take on solo.

Cheers and thanks for posting!
 
  • Like
Reactions: jscusmcvet

jscusmcvet

Rank V
Founder 500
Launch Member

Enthusiast III

2,273
North Carolina
First Name
John
Last Name
Caliri
Member #

0191

Service Branch
USMC Veteran
I have not decided whether to lift or not. It looks like all that is available are spacer lifts. Is that what you have found? I would like just a bit more ground clearance, but don't want to do damage to the long term drive ability of the truck.
 

CR-Venturer

Rank VI
Launch Member

Traveler III

3,372
Ardrossan, AB, Canada
First Name
Jas
Last Name
Spr
Member #

16340

I have not decided whether to lift or not. It looks like all that is available are spacer lifts. Is that what you have found? I would like just a bit more ground clearance, but don't want to do damage to the long term drive ability of the truck.
Spacer lifts are fairly easy to come by, as the strut top is the same as the same gen Ram. From what I know of IFS in general, 2" is pretty safe. Before I bought mine, someone did a spacer close to 4" of lift, which is really too much. In my case they combined it with a spring over axle lift in the back.

I'm debating over going with a smaller spacer to go for closer to 2" of lift vs SAS.

If you went with a 2" lift, everything I know says it's safe, but no promises
 
  • Like
Reactions: jscusmcvet