1988 HJ75 Landcruiser Troopy build

  • HTML tutorial

Ob1

Rank VI
Launch Member

Influencer I

3,057
Palo Alto, CA, USA
First Name
Ofer
Last Name
Bruhis
Member #

17919

Ham/GMRS Callsign
KD6UKE
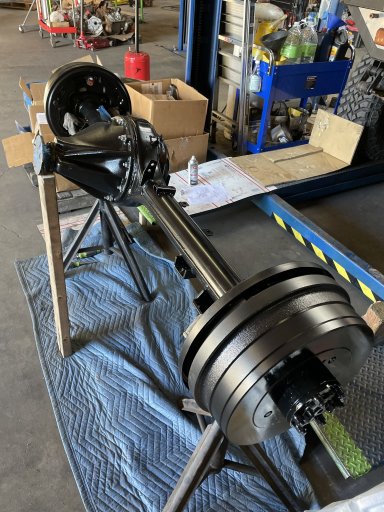
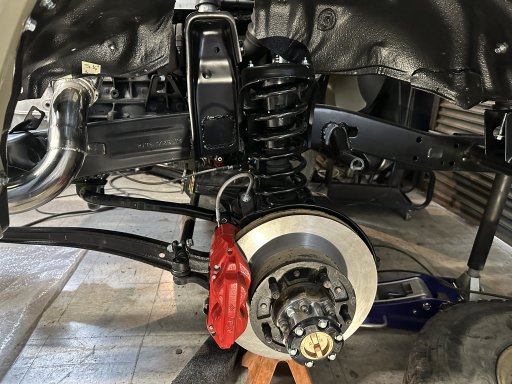
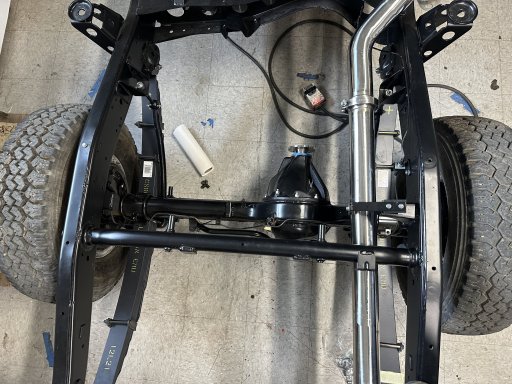
Frame is back from the paint shop. Debating to paint it white for incoming Halloween. Also spent a night in the Mojave on the way to Flagstaff. Now waiting for the axles to be rebuilt and added Eaton lockers. This is the point in time that we start assembling.


D59F9FB6-0417-4505-8361-1DEB07F5D06E.jpeg9CB0815D-4F54-4F59-BC77-024E90F44E16.jpeg471222F4-19BD-46F9-9610-2F334387CD56.jpegBE5EB685-1B20-41AB-A582-42A0D0CDAB50.png
 

Ob1

Rank VI
Launch Member

Influencer I

3,057
Palo Alto, CA, USA
First Name
Ofer
Last Name
Bruhis
Member #

17919

Ham/GMRS Callsign
KD6UKE
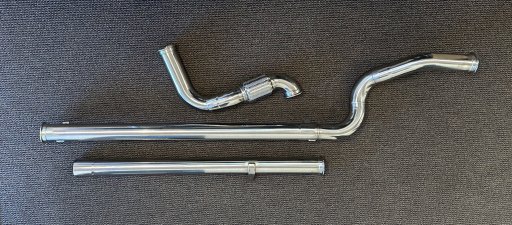
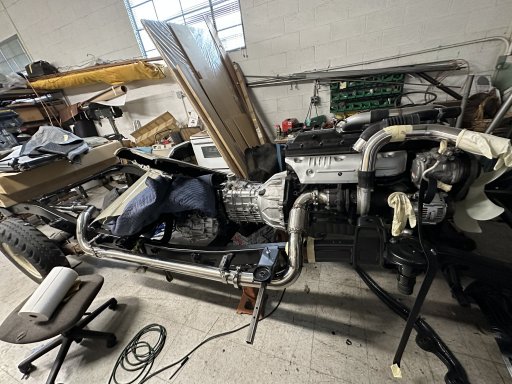
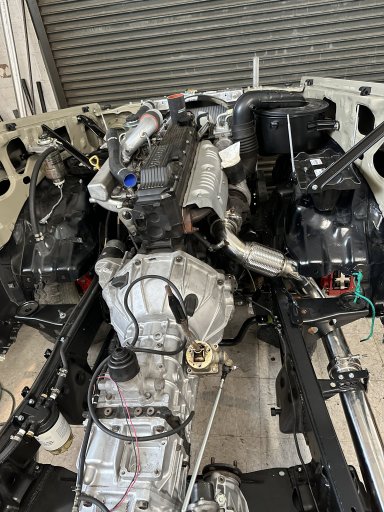
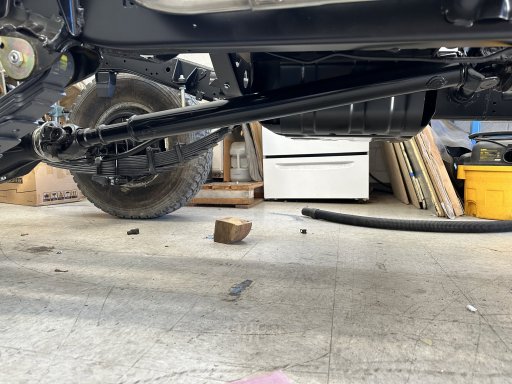
A bit of update. Installed the driver train and cut the 3” stainless exhaust. Got it TIG welded at a shop for $360. A steal!!! Total cost was $650. All with V bands. Also for now installed the old rear axle. Georg at Valley Hybrids finished the rear FF axle but still need to convert to 6 lugs. We want to use 80 series wheels. Front axle was modified for the offset of the radius arm by Jason at Trail Tailor in Redding. These two guys are just amazing people AND FRIENDS!!!!
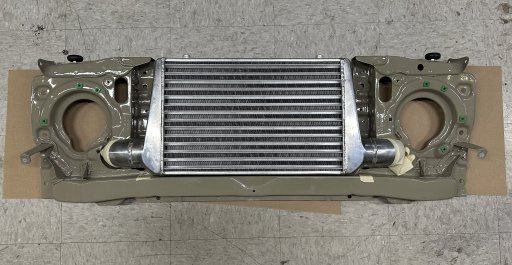
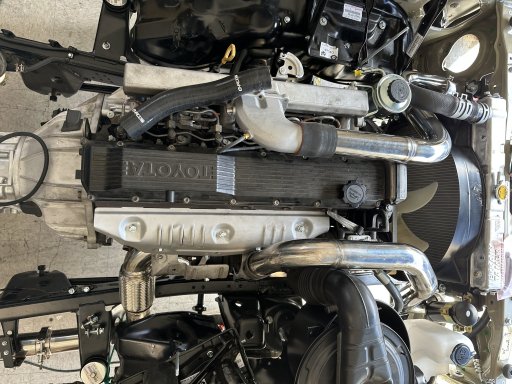
Also stared working on the intercooler. It’s tight on this narrow nose. I’ll have the intercooler 2.5” pipes and the 4” snorkel pipes from stainless TIG welded at the same place.
D0B027E0-D59D-4AEE-8100-0A2BBDCFC903.jpegB69BB30C-AB2D-4B59-B438-34E8186D12B2.jpeg54C132B9-843A-47AA-8C2F-4AAE7B24D484.jpeg69B47137-5858-4E4C-B031-882C1A857194.jpegA861C950-B4BA-4501-A061-DEA5F5735C0C.jpeg
 

Ob1

Rank VI
Launch Member

Influencer I

3,057
Palo Alto, CA, USA
First Name
Ofer
Last Name
Bruhis
Member #

17919

Ham/GMRS Callsign
KD6UKE
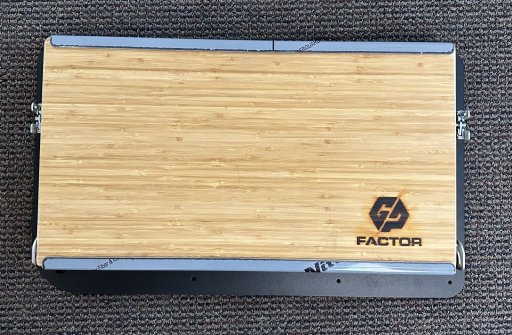
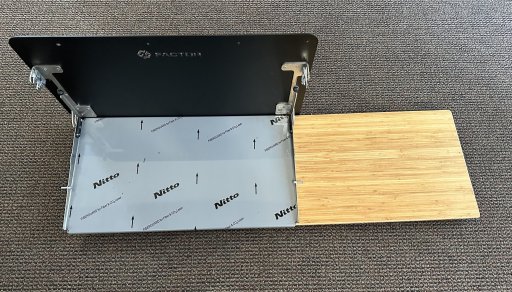
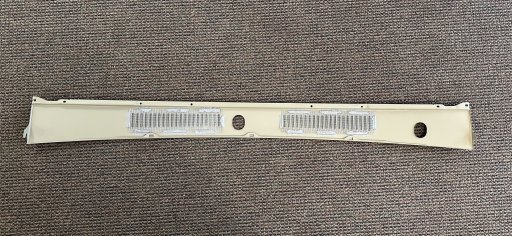
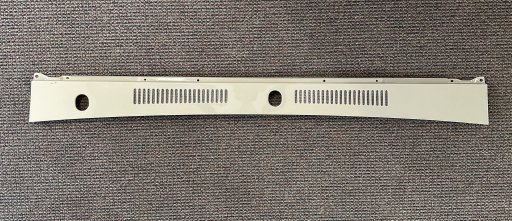
Just got the folding table that attaches to the rear door from GP Factor. I did not remove the protection off the stainless. I can not say enough good things about the product. It's more than what I expected. Also I attached a stainless mesh under the vents in front of the windshield using aluminum epoxy. The car does not have a cabin filter, so I figured to have some protection.
IMG_9565.JPGIMG_9566.JPGIMG_9567.JPGIMG_9568.JPG
 

Ob1

Rank VI
Launch Member

Influencer I

3,057
Palo Alto, CA, USA
First Name
Ofer
Last Name
Bruhis
Member #

17919

Ham/GMRS Callsign
KD6UKE
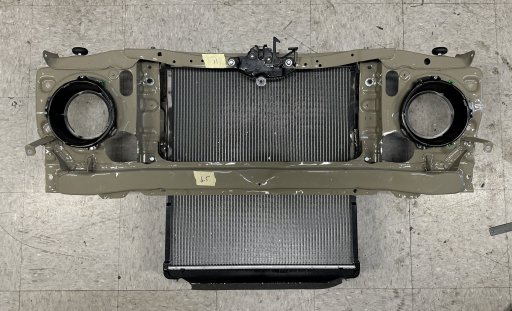
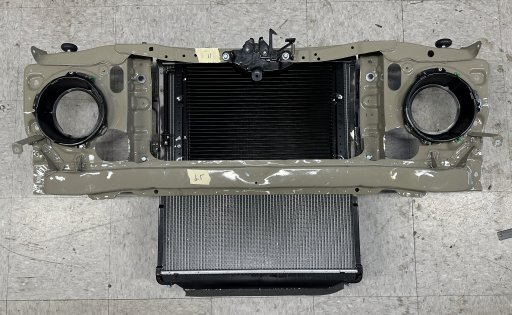
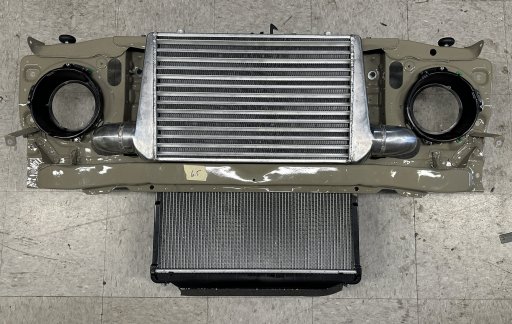
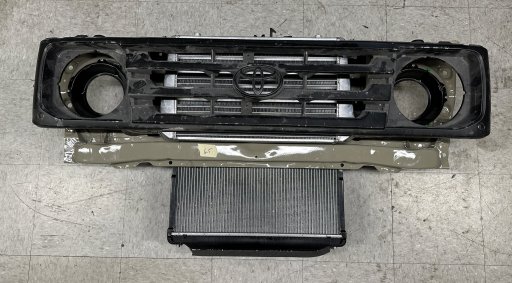
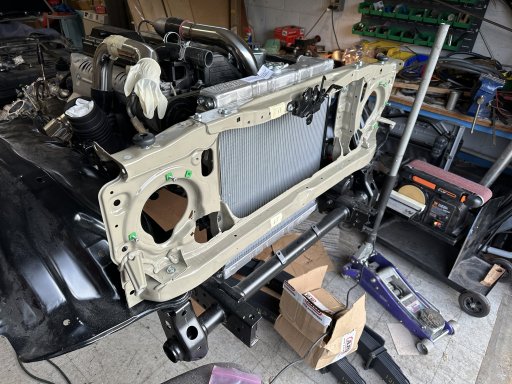
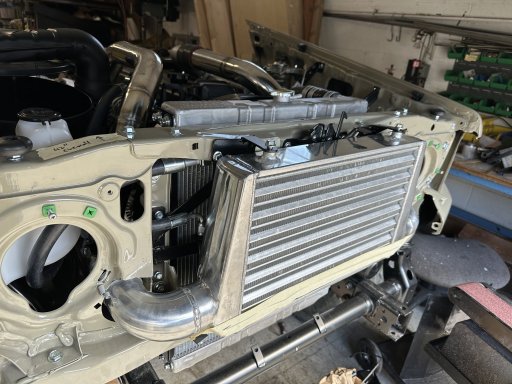
Been working fitting the 3 radiators in place. HVAC. The engine rad is from a 78/79 landcruiser so a bit different and bigger so had to modify the bracket. Have an OEM but have on order a Terrain Tamer from Australia. The AC condenser came with a kit for the troopy that I got from my friend and will need a bracket. Fitting the intercooler will require a custom grill because it needs to be much thinner.

All in all it is an international rig.
Parts and source...
-- HJ75 from Nicaragua
-- 1HDT engine came from JDM
-- H151 transmission came from England
-- rear doors from UAE
-- Driver door from Austin
-- Passenger door from Canada
-- front axle (coil suspension) from 79 mine truck
-- rear FF axle from Valley Hybrids and mine truck parts
-- front coil parts/frame brackets from Japan4x4
-- rear fenders from Japan4x4
-- low/high shifter from Venezuela
-- adjustable steering column from TX.
-- seats from a BMW M3
-- complete wire harness from Europe.
-- instrument cluster from Indonesia
-- fender flares from Australia
-- AC and all the heater assembly/ducks from TX
-- Cruise control 80 series (servo, computer, etc) from Toy connection
-- speed sensor (both mechanical and electrical) from @Trail Tailor in Redding.
-- most parts fabricated and sourced from Amazon, etc.


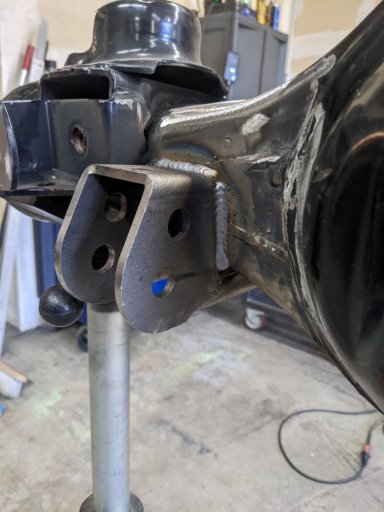
So now brackets…
E29A41E0-6B12-416D-80BB-8664612015D1.jpegE84D7208-494B-4FFB-B90F-8DBBF1285071.jpegCF695E45-C3E6-49FE-BD92-44452D62E661.jpeg64A248CA-E82A-4AA5-BAB0-8CE61005836A.jpeg
 

Ob1

Rank VI
Launch Member

Influencer I

3,057
Palo Alto, CA, USA
First Name
Ofer
Last Name
Bruhis
Member #

17919

Ham/GMRS Callsign
KD6UKE
This is looking amazing Ofer!
Thanks Michael. Hope you and Corrie and Miguel are doing well. Happy new Year!!! We need to go out in the wilderness. I'll cook you guys dinner (*** Michelin). ;-)
 

Ob1

Rank VI
Launch Member

Influencer I

3,057
Palo Alto, CA, USA
First Name
Ofer
Last Name
Bruhis
Member #

17919

Ham/GMRS Callsign
KD6UKE
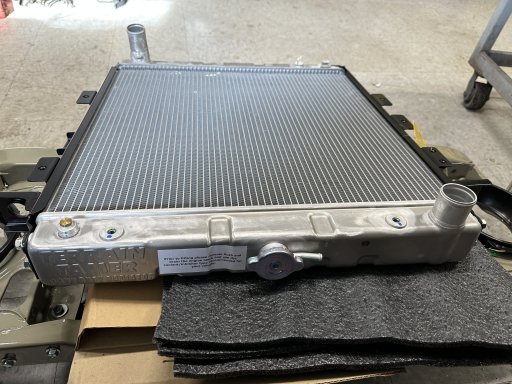
Just got the Terrain Tamer radiator. The radiator mounts will me modified to mount on the narrow nose 70.

We were trying to figure out the 6 lugs conversion. ALL worked out on the rear axle except the flange of the rear axle shaft is 104mm in diameter, and the hole in the center the wheel is 101mm. It can all be assembled but the wheel will not mount on. It can all be machined, but at that point there are too many custom parts and I hate getting stuck somewhere and looking for a machine shop on top of a Toyota dealer... Decision to stay with 5 lugs.

I'm headed north this weekend to do solo snow camping in ID, MT and WA. 3 red flares, means I need support. Be back in 2 weeks so by then I hope the axles will be ready.

I decided to go with BP51 shocks.

IMG_9619.JPG5FF6EB72-2AF6-42AC-AF94-EDFAE0F98903.jpeg
 
Last edited:

Sea Diamond

Rank III

Enthusiast III

800
First Name
Sea
Last Name
Diamond
Just got the Terrain Tamer radiator. The radiator mounts will me modified to mount on the narrow nose 70.

We were trying to figure out the 6 lugs conversion. ALL worked out on the rear axle except the flange of the rear axle shaft is 104mm in diameter, and the hole in the center the wheel is 101mm. It can all be assembled but the wheel will not mount on. It can all be machined, but at that point there are too many custom parts and I hate getting stuck somewhere and looking for a machine shop on top of a Toyota dealer... Decision to stay with 5 lugs.

I'm headed north this weekend to do solo snow camping in ID, MT and WA. 3 red flares, means I need support. Be back in 2 weeks so by then I hope the axles will be ready.

I decided to go with BP51 shocks.

View attachment 248284View attachment 248324
What a great build...totally professional...that goes for your documentation as well. Looking fwd to watchin' it all come together.
Well done!
 
  • Like
Reactions: Ob1

Ob1

Rank VI
Launch Member

Influencer I

3,057
Palo Alto, CA, USA
First Name
Ofer
Last Name
Bruhis
Member #

17919

Ham/GMRS Callsign
KD6UKE
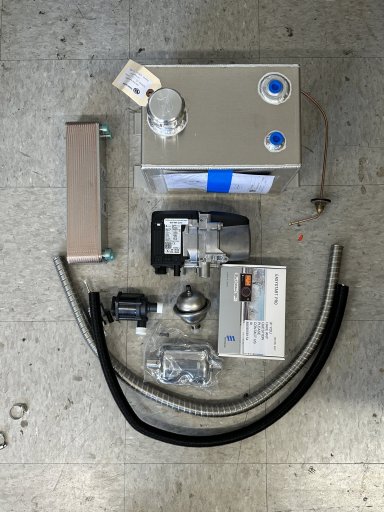
Just got the hydronic diesel heater system bits. Some assembly required. I still need the water to air + fan heat exchange. It will be a separate 3 gallos glycol system insulated, 3 gallons will give it enough mass so the heater run cycles will be longer. I need to figure our the best layout for a tray with a cover under the body behind the fuel tank. The breather will run high probably into the cab for water crossings. I did not include the photo of the whole kit (wires, brackets, hoses, etc.)
IMG_9702.JPG
 

Ob1

Rank VI
Launch Member

Influencer I

3,057
Palo Alto, CA, USA
First Name
Ofer
Last Name
Bruhis
Member #

17919

Ham/GMRS Callsign
KD6UKE
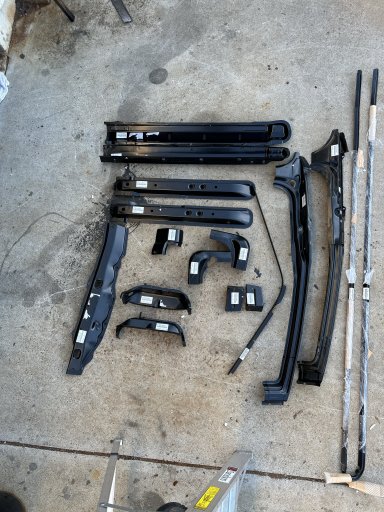
Got some LEGO parts for the body. OEM body parts from Japan4x4. Dave provides amazing service. Quick, reliable and with a smile. I think except the frame rails, it’s all ‘new’ parts on this build.

Parts are headed to the body shop. Next month it will be 12 months since it left us on this journey to be repaired.

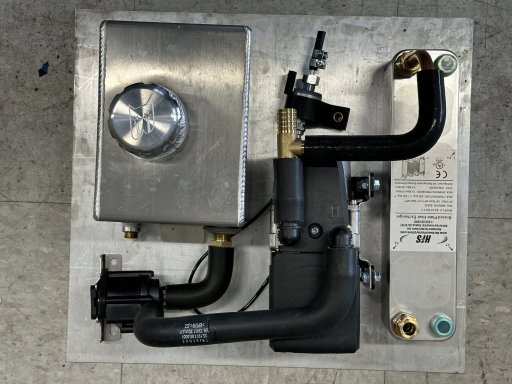
I also ordered aluminum panels to support and protect the heater module. It will have the Espar heater, fuel pump, coolant pump, heat exchange and the coolant tank. I ended up ordering a 1 gallon tank. Figured the 3 gallons was too big. Photos to follow.
A84CE9A1-D12B-49A6-A0FC-1102A85697C2.jpeg
 

GLOCKer

Rank IV

Pathfinder II

1,209
Marietta, Georgia, USA
First Name
John
Last Name
Battersby
Damn, I am so jealous of this project! It's like watching the coolest model car kit being assembled! Still needs the wheels it deserves. LOL
 
  • Like
Reactions: Ob1

Ob1

Rank VI
Launch Member

Influencer I

3,057
Palo Alto, CA, USA
First Name
Ofer
Last Name
Bruhis
Member #

17919

Ham/GMRS Callsign
KD6UKE
Ran the brake lines and working on the sway bar in the front. Since I moved the radius arm brackets out .8", I have to build new brackets on the axle for the sway bar. Just more metal work. I also ordered battery trays and now noticed that the 80 series cruise control servo will not fit. I have to measure and see if I can move the right battery tray closer to the firewall and fit the CC servo between the air box and battery.

IMG_9952.JPGIMG_9954.JPGIMG_9957.JPG
 

Ob1

Rank VI
Launch Member

Influencer I

3,057
Palo Alto, CA, USA
First Name
Ofer
Last Name
Bruhis
Member #

17919

Ham/GMRS Callsign
KD6UKE
Started laying out the hydronic diesel heater module. It will be attached to the frame behind the fuel tank driver side. I’ll build an aluminum cover for it with a few holes. One connector for the heater control and 4 pipe fittings. 2 pipes with the heated coolant going to a water to air radiator to heat the cabin and 2 for instant hot water.

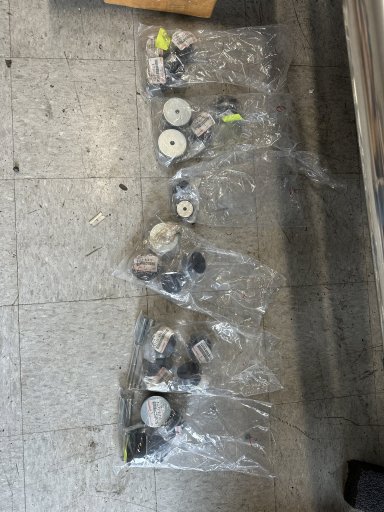
Also the intercooler system is ready for the final TIG welding. I’ll post photos when it’s done. Also I installed the body mounts.

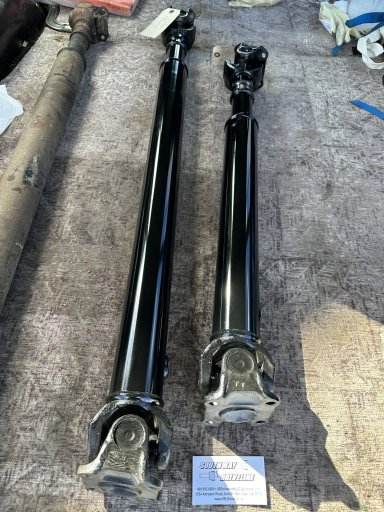
I got the driveshafts. One had a bad splines so a donated 80 series was used. All new OEM bearings and balanced. Hope I measured it correctly.

3C628BCF-E0A5-423C-B7B5-37AB9D9B0287.jpegDCCD29BB-9A1E-4E86-AACD-5BBCCBF8941A.jpeg8FFC29FD-E26F-485D-9305-531D1194F4AE.jpeg80107FC0-A847-46A4-84C3-F9B86E6D4BC6.jpeg
 

Ob1

Rank VI
Launch Member

Influencer I

3,057
Palo Alto, CA, USA
First Name
Ofer
Last Name
Bruhis
Member #

17919

Ham/GMRS Callsign
KD6UKE
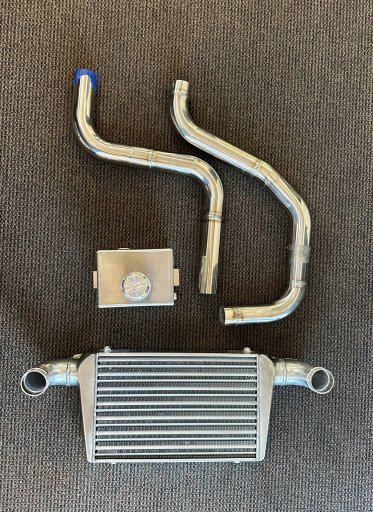
Got the parts from the TIG welder. Aluminum was to modify the intercooler radiator and add ports to the diesel coolant tank. Stainless was to weld the intercooler piping. The piping will be fine bead blasted to look like the aluminum intake manifold. $250 total cost for welding. The whole intercooler cost including parts less than $650. I'm happy.
IMG_0098.jpgIMG_0100.JPGIMG_0102.JPG