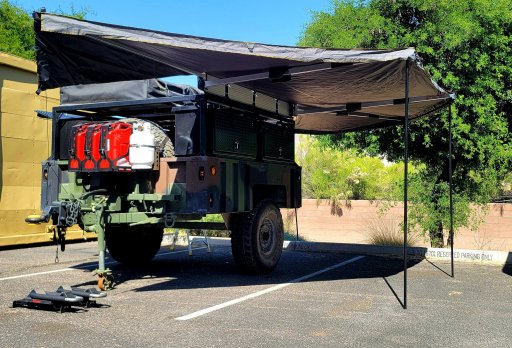
M1102 Trailer Build

  • HTML tutorial

Phillysteak

Rank IV

Enthusiast III

1,116
Arizona
First Name
Philip
Last Name
Haasnoot
Member #

24385

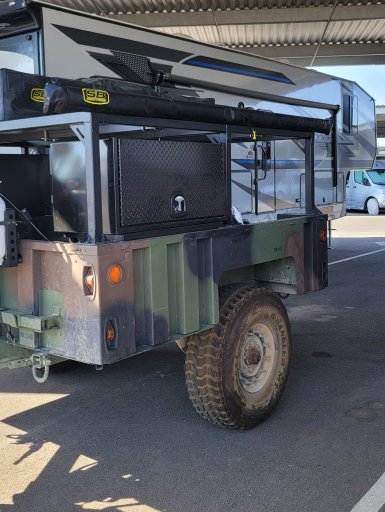
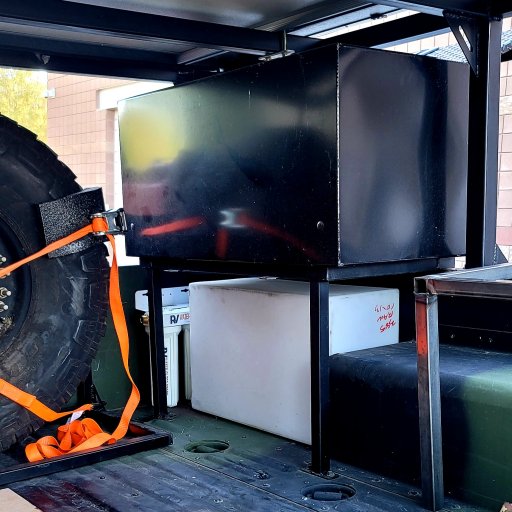
Between my consulting busy season and furiously cleaning the homestead for my families first visit to AZ I haven't had a whole lot of time to work on the trailer. However with the weather warming up I'm itching to get it ready for the road. I was able to mount the first tool box and I'm happy with the design for the support structure. I like how the 16 gallon tank fits, probably could have snuck in a 20 gallon into that spot but having more room for plumbing is the better move.
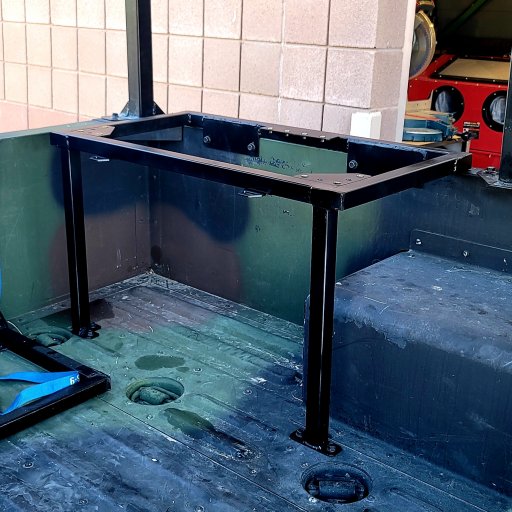
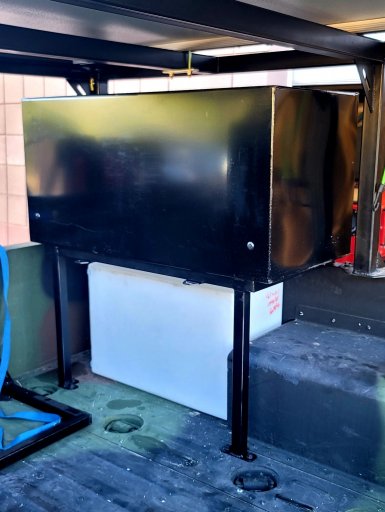
20210403_154949.jpg20210403_161952.jpg20210403_162027.jpg

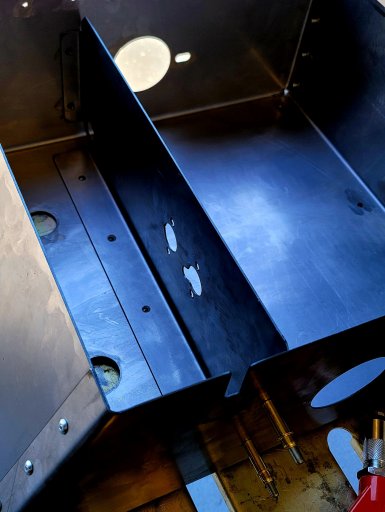
Before installing the second box I decided to work on the diesel heater box to get that out of the way. Happy with how it's coming out so far, still need to bend up the door before I paint it:

20210404_141040.jpg

Picked up a wireless backup/rear view camera, I'm hoping the refresh rate is high enough so I can use it as a rear-view camera when in transit. If the refresh is low I'll have to find a better option.

20210403_170206.jpg
 

Attachments

Phillysteak

Rank IV

Enthusiast III

1,116
Arizona
First Name
Philip
Last Name
Haasnoot
Member #

24385

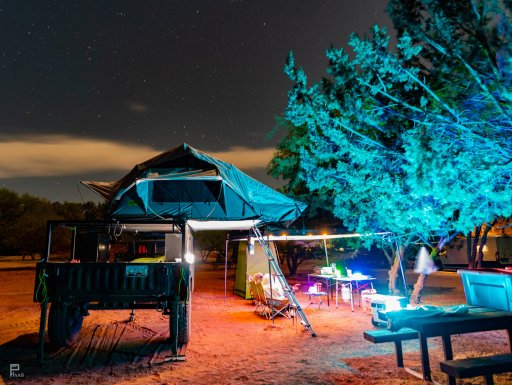
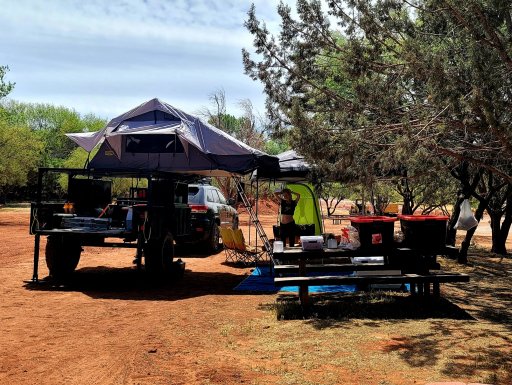
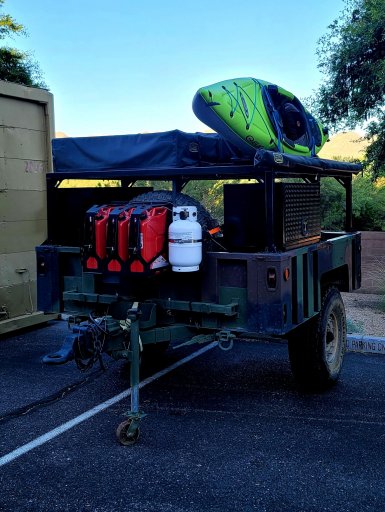
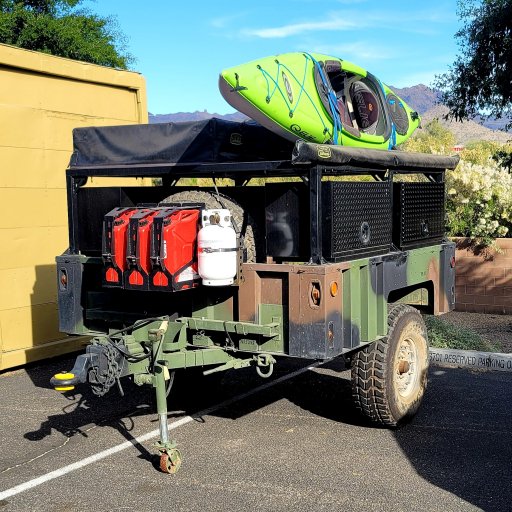
Took the trailer out for the first overnight camping trip now that I finally found time to finish welding up the tool box support frames. We drove up the I-17 to Sedona and being the first time up such a steep grade I took it at a steady 75mph without any issues. I definitely need to get moving on adding the lift kit to the WK2 to level out the trailer, also working on bumping up my WK2 tire size as well. Even with the trailer putting more weight on the hitch than I'd like she rode great, minimal bouncing when loaded and tracked straight even in heavy cross winds. Fuel rack worked great, the 10lb propane tanks were definitely the way to go over the 20lb.

_DSC9858.jpg

Had 24mph sustained winds for most of the day Saturday, aside from having to stake guide ropes for pop up awning it went pretty smoothly. The Camp Chef 14" griddle even worked with heavy winds and I was very happy with it overall, brought back memories of cooking at my grandfathers deli in NY when I was younger. 75 degrees and sunny during the day, dropped to 44 degrees at night and made me wish I had the time to get the diesel heater up and running

Finally found a good source for HMMV tires/rims at a reasonable price so a spare tire is on the way which will alleviate some of my stress taking this rig further out from the valley.

Next items I'm adding shortly:
1. 16 gallon water tank mounts and pump/filter system
2. Propane water heater
3. Diesel Tent heater mounted
4. Driver side Awning (Picked up a used Smittbilt 8'x6.5' awning cheap)

I'm also thinking of making a compact swamp cooler for the tent now that the valley is warming up.
 

Attachments

Phillysteak

Rank IV

Enthusiast III

1,116
Arizona
First Name
Philip
Last Name
Haasnoot
Member #

24385

Another unexpected pause on the trailer build thanks to your local HOA. I got a nastygram for having the trailer in the driveway, then another because the tent could barely be seen over the fence when coming down the road. So the trailer had to sit on a buddies property for a week until I could find a RV parking spot for it to live until I move. With the trailer parking sorted out I wanted to get an awning mounted being the valley is over 100 degrees.

20210606_160709.jpg

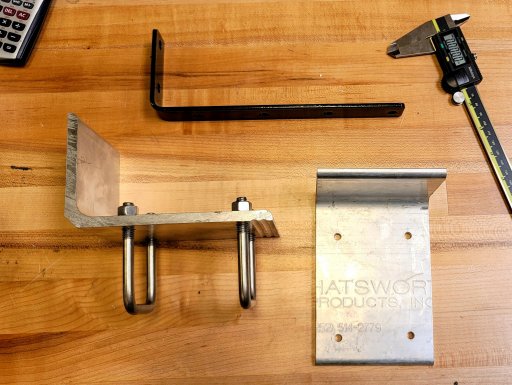
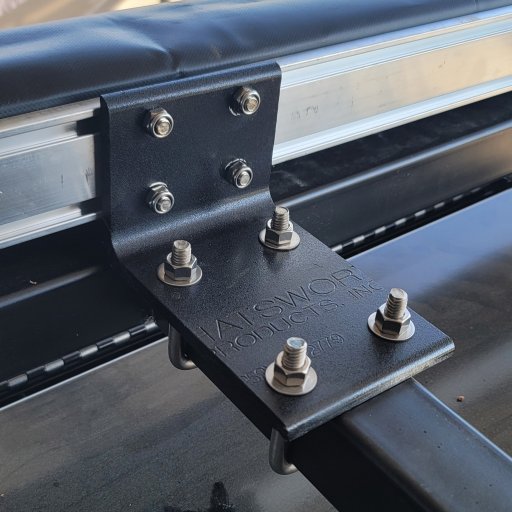
I still want to mount a batwing 270 deg awning but couldn't pass up a brand new Smittybilt awning I got from offerup. I'm sure the factory mounts would work fine for most but they just didn't sit right with me, too thin and I didn't want to drill into the frame to mount the awning which I'm planning to swap out down the road anyway. I had a few beefy sections of angle aluminum taken from decommissioned server racks which worked perfectly.

20210606_132519.jpg

Mounted the awning without much of an issue, getting the bolts into the extruded track on the Smittybilt awning was the hardest part. Once the bolts are past the vinyl cover it's smooth sailing. Just need to get some nylock nuts for the U-bolts and it's all set.

20210606_160610.jpg
 
  • Like
Reactions: MarioT'sCJResto

MarioT'sCJResto

Rank V
Launch Member

Contributor II

1,567
12157
First Name
Christopher
Last Name
Laboy
Member #

22985

Rack welding completed and decided to paint it before I started mounting everything. Four cans of Krylon fusion in Satin black did the trick, my welds won't win any awards but they'll hold. Tomorrow the Smittybilt XL Gen2 tent gets mounted for a test run, excited to get it out in the wild and free up garage space.

View attachment 183124

I've been working on the side boxes and rear storage boxes. Side boxes will probably be made from 0.08" thick aluminum with riveted construction, although I do have a spool gun for my MIG and might just stop being a baby about learning how to use it to weld these boxes rather than rivet them. On the rear of the trailer I'm planning to build one "wet" box, I love kayaking so I wanted a space to store wet gear away from everything else. The other rear box is for the diesel heater, the heater is on the way so once I get my hands on it to take dimensions I can finalize these boxes.

View attachment 183126

I need to work on the mounts for the gas cans and propane, probably going to downsize to two 11 pound propane tanks. Being able to roll into a big box store and swap the tank would be convenient, but even some home depots around me are completely out of 20lb propane tanks at the moment; So going with 11lb tanks and having them refilled will work fine. I figure in the winter I can swap out one 5 gal jerry can for diesel to run the heater, but in Arizona that would only be for a few months and then I can switch back. I've been racking my head for a better spot to mount a spare tire, but for now it seems like the front of the trailer cargo area is the most secure spot. I plan to mount the tire to a rack bolted to the trailer which will also help support the fuel/propane rack. Originally I was going to remove the stabilizers that come on the M1102 trailers so I can mount the fuel rack lower, but they are very well built and I opted to leave them; The only down side is the fuel rack will have to be mounted 6-8 inches higher.

View attachment 183125
Are you kidding me, please let me know when you are taking orders here. Can't wait to see the final build
 
  • Like
Reactions: Phillysteak

Phillysteak

Rank IV

Enthusiast III

1,116
Arizona
First Name
Philip
Last Name
Haasnoot
Member #

24385

"Life comes at you fast" would be a good way to summarize the past few months. Landlord gave me just 2 weeks notice of a +$1000 per month rent increase in the middle of an awful rental market here in Phoenix which threw a major wrench into my trailer build progress. With the move behind me and cooler weather it was time to get the trailer back to the shop to work.

I was planning to mount the remaining two tool boxes so I can get to work on the electrical system but my C25 tank ran dry an hour after the weld supply shops closed for the weekend. So the tool box mounting will be happening over the course of the week instead. My goal is to get the tool boxes mounted by the end of the week and begin wiring/plumbing over the weekend.

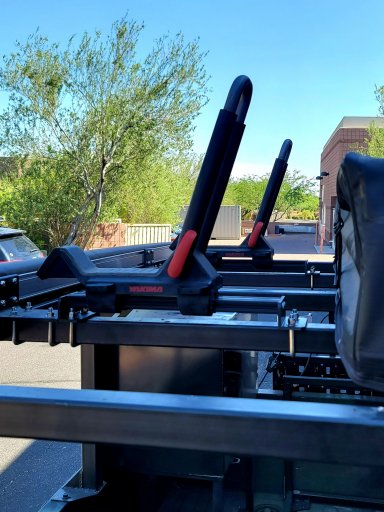
I added two accessory rail sections for the kayak mounts:
20210705_150849.jpg

The Smittybilt awning will do for now, but once I can source a 270 Degree awning it will be swapped out quickly. I'm not a fan of the Smittbilt design and trying to set up the awning with one person is difficult. But for the price it will have to do for now.

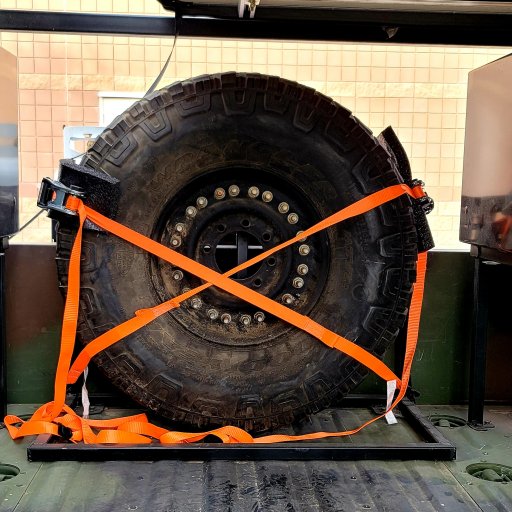
The spare tire is mounted although I may need to sew some cross straps to keep the ratchet straps in place, I may weld on a few additional hard points to change the geometry of the straps and keep them from slipping.
20211009_170559.jpg

Next up is figuring out where I can mount the dual stage water filter and dual pump setup for the water system.

20211009_163407.jpg

I was also a bit bummed that the propane water heater won't fit properly if mounted inside the storage box. I'm trying to figure out if it will be better to mount the propane heater to the back of the tool box on the inside of the trailer (still exposed to the elements when driving) or if it will be better to stow the heater during transit and hang it on the exterior of the trailer when we are at camp.
 

smritte

Rank V
Launch Member

Member III

2,827
Ontario California
First Name
Scott
Last Name
SMR
Member #

8846

Ham/GMRS Callsign
KO6BI
or if it will be better to stow the heater during transit and hang it on the exterior of the trailer when we are at camp.
When I was done with mine, I realized it wouldn't fit anywhere without sacrificing something else. Then I realized I only use it on longer trips. I made a mount and just hang it when I need it. It doesn't go with me all the time.
 
  • Like
Reactions: Phillysteak

tjk775

Rank V
Launch Member

Advocate III

2,258
Reno, NV
First Name
Trevor
Last Name
K
Member #

13608

Tent heater is on the way so it's time to get the fuel can and spare tire mounting in order before I build the storage boxes. I was originally going to bolt the jerry can and propane holders onto the frame of the trailer but opted to build a sub-frame to take the load of the fuel off the front sheet metal of the trailer.

View attachment 184924

Once the rack is fitted up to the trailer I'll finalize the mounting tabs, sticking with 3/8-16 rivnuts for fastening to the trailer itself.
View attachment 184927

During my search for jerry can mounts I found a few I really liked, but I can't bring myself to purchase jerry can holders for $120-150 a piece; So I spun this up in CAD. Plasma cut and welded 16 gauge steel:

View attachment 184930

..... how do i get a copy of these dxf files?
 
  • Like
Reactions: Phillysteak

Phillysteak

Rank IV

Enthusiast III

1,116
Arizona
First Name
Philip
Last Name
Haasnoot
Member #

24385

Nothing like a holiday deadline to force me to make some progress, the family wants to camp out for Thanksgiving this year; so I'm thankful for the beautiful welding weather we are having here in AZ. I was finally able to get the remaining two storage boxes mounted to their sub frames, at this point the bulk of the welding is finished (for now) and I can focus on adding the electrical/water subsystems after thanksgiving.

20211121_142804.jpg

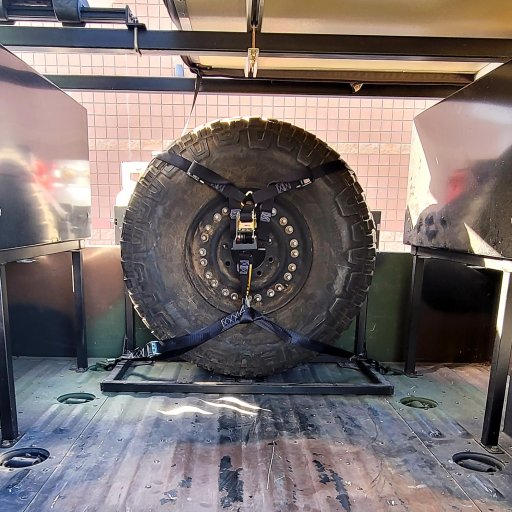
During the last trip I discovered my spare tire harness concept was just flat out not going to work. On-road it's fine, but the straps migrate south even on mild dirt roads and I ended up laying the tire flat in the bed for most of the trip to keep the 37" monster from breaking something.

20211121_085751.jpg

I purchased a spare tire ratchet harness from Amazon, combined with a cambuckle strap and a triangular D ring to form a 4 point restraint. Going to weld on some additional mounting points to the fuel rack down the road but this has held up great so far.

20211121_142944.jpg

Hopefully I can get the diesel heater mounted tomorrow and working before the thanksgiving trip, but worst case scenario we have a queen sized 0 degree sleeping bag that will keep us toasty. The Solar Generator will be used to power the diesel heater this trip but I have a 5kW lithium pack designed for the trailer, just trying to source enough LiFePo4 cells to build it.
 

tjk775

Rank V
Launch Member

Advocate III

2,258
Reno, NV
First Name
Trevor
Last Name
K
Member #

13608

Three quick cuts with the sawzall and a bit of manual negotiations with the box tubing; The Fuel rack frame fit properly over the front lip of the trailer. I'll need to change the hardpoints that mount the frame to the bed before finishing the welds, but the four hardpoints in the front lined up perfectly so rivnuts were installed. I decided to stick with 3/8-16 hardware to limit the number of tools I need in order to keep the trailer up and running off road; I used 3/8-16 bolts to mount the tent rack frame to the trailer as well.

View attachment 186310

Hopefully tomorrow after work I can finish welding the frame and get a few coats of satin black paint on it. I've been holding off on welding the jerry can mounts to force myself to stay focused on the rack.


THE CUT FIILES FOR THE FUEL CAN HOLDER?
 

Enthusiast III

473
Nebraska
First Name
Aaron
Last Name
LaGrange
Service Branch
Go Army! Beat Navy!
Between my consulting busy season and furiously cleaning the homestead for my families first visit to AZ I haven't had a whole lot of time to work on the trailer. However with the weather warming up I'm itching to get it ready for the road. I was able to mount the first tool box and I'm happy with the design for the support structure. I like how the 16 gallon tank fits, probably could have snuck in a 20 gallon into that spot but having more room for plumbing is the better move.
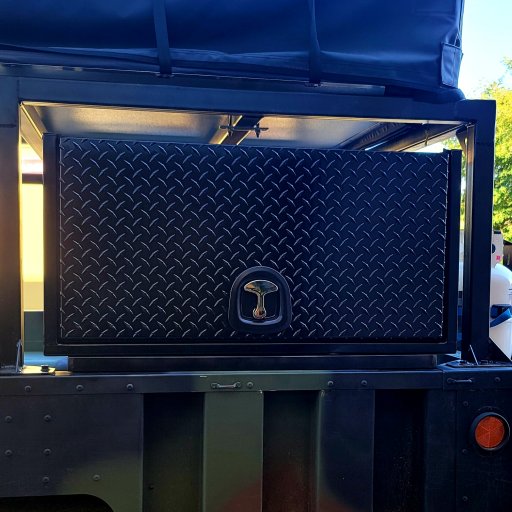
View attachment 193746View attachment 193747View attachment 193748

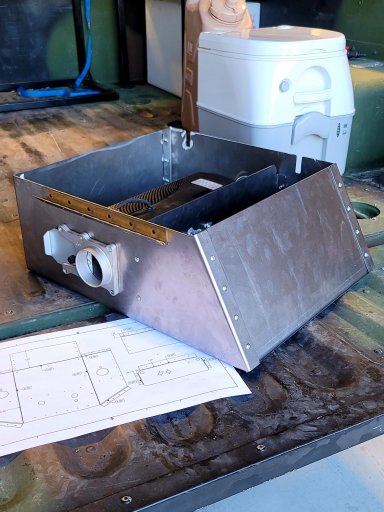
Before installing the second box I decided to work on the diesel heater box to get that out of the way. Happy with how it's coming out so far, still need to bend up the door before I paint it:
View attachment 193750

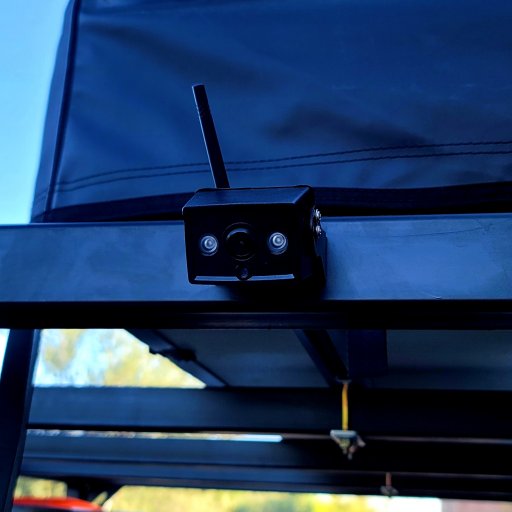
Picked up a wireless backup/rear view camera, I'm hoping the refresh rate is high enough so I can use it as a rear-view camera when in transit. If the refresh is low I'll have to find a better option.
View attachment 193751
How'd that backup camera work for you?
 

Phillysteak

Rank IV

Enthusiast III

1,116
Arizona
First Name
Philip
Last Name
Haasnoot
Member #

24385

@Flyfishin.aa.ron So far so good on the backup camera, refresh rate is a tad slow for highway driving. Anything above 60 Mph and you'll start to notice the refresh rate, enough to bother me at least.
 

Phillysteak

Rank IV

Enthusiast III

1,116
Arizona
First Name
Philip
Last Name
Haasnoot
Member #

24385

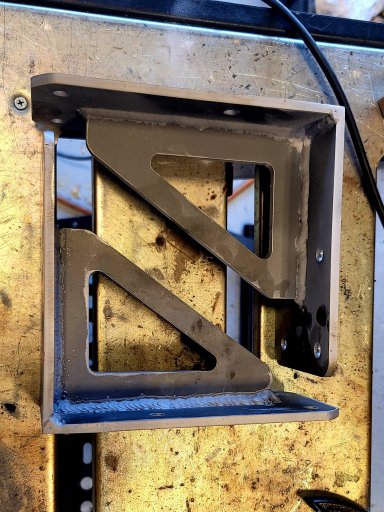
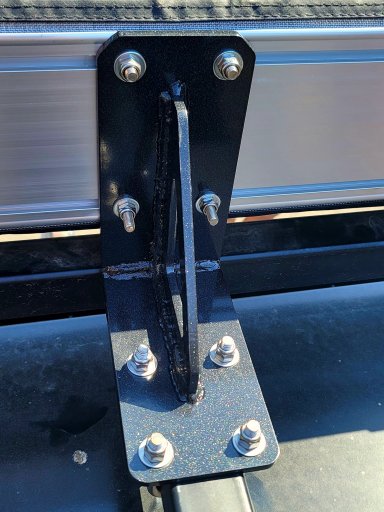
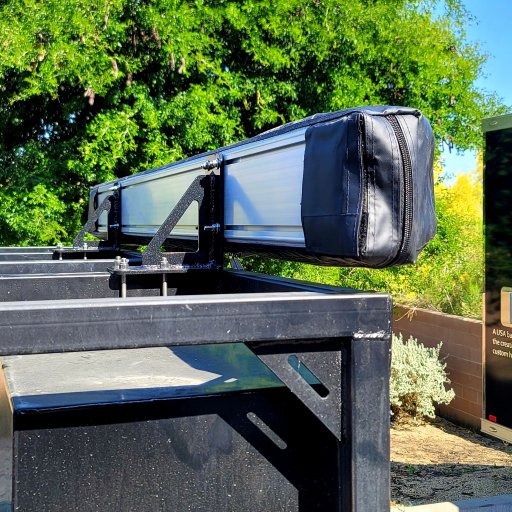
Well I tried to satiate my desire to add a 270 Degree awning with the Smittybilt but it just wasn't cutting it. Pulled the trigger on an OVS awning and I was extremely impressed with the build quality. The provided mounts were phenomenally manufactured but just wouldn't work for my bizarre application (Que Plasma Cutting sounds).

I've had two end cuts of 1/4" thick hot rolled steel sitting around for a few years, always just too small to use but fortunately just the right size for these mounts. I was a bit impatient and couldn't wait for my BK01 powdercoat to arrive, so the mounts got the metal flake treatment.

20220423_123937.jpg 20220423_145243.jpg

I stuck with the U-Bolt mounting system of the old awning which worked out great. Overall the system is solid and I don't feel the need to add a third support in the middle:

20220423_151641.jpg

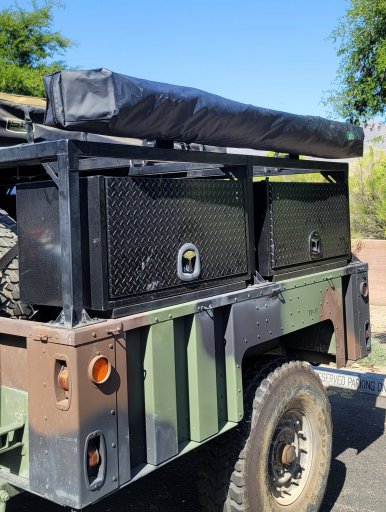
Overall it sticks out an additional 4" compared to the Smittybilt but considering the amount of coverage it's well worth it. Very impressed with both the build quality of the awning and the included components. They provide plenty of guide ropes, additional poles, and stakes for windy conditions.

20220423_151630.jpg

20220423_150304.jpg

Next up is relocating the spare tire, I purchased a winch but to mount the tire properly I'll need to pick up some additional 1" SQ tubing and weld a frame together. The electrical subsystem is also up next, all of the components have been sitting patiently for me to finally install them. I might take this opportunity to remove all of the tool boxes and make touch up the paint in a few spots first.
 
  • Like
Reactions: Sparksalot