1965 International Travelall Panel Build

  • HTML tutorial

PNW EXPLR

Local Expert Southeast Washington, USA
Member
Investor

Explorer I

4,285
Kennewick, WA, USA
First Name
Michael
Last Name
Denniston
Member #

3030

Ham/GMRS Callsign
KJ7LYZ
Today I worked on removing the old stock yoke and replaced it with a new forged 1410 unit. Had to grind down a socket to fit the tight clearance to get the nut off the old one. Also installed a new pinion seal while I was there.
IMG_2370.jpeg
IMG_2371.jpeg
 
Last edited:
  • Like
Reactions: SkunkedGorilla

PNW EXPLR

Local Expert Southeast Washington, USA
Member
Investor

Explorer I

4,285
Kennewick, WA, USA
First Name
Michael
Last Name
Denniston
Member #

3030

Ham/GMRS Callsign
KJ7LYZ
Today I got the 14 Bolt Shave done. Just took my time with a 5" cut off disc. Wasn't to bad, think it took about 30 min.

IMG_2362.jpeg

IMG_2379.jpeg

IMG_2380.jpeg
 
  • Like
Reactions: SkunkedGorilla

PNW EXPLR

Local Expert Southeast Washington, USA
Member
Investor

Explorer I

4,285
Kennewick, WA, USA
First Name
Michael
Last Name
Denniston
Member #

3030

Ham/GMRS Callsign
KJ7LYZ
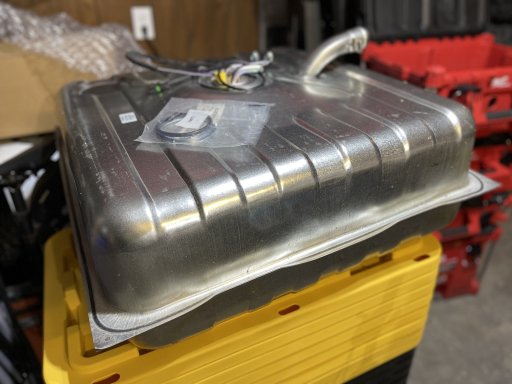
The International had a 14 gallon saddle tank in it. Not in great condition but no leaks. I knew I would eventually swap to a bigger one but was gunna run it. Well, I discovered that the pickup line was completely clogged with rust. So, instead of putting any effort into fixing it, I decided just to get a new one. I reached out to the guys over at Binder Boneyard and they said a Chevy blazer tank would fit between the frame rails. I found this 31 gallon tank for less then $150. I also ordered up the intank pump and sender unit as well. I couldn't find the PSI specs on the pump so once I get it all hooked up I will put a gauge on it. I have read that the 8.1's like close to 60 psi.
IMG_2372.jpeg
 

shortbus4x4

Rank II

Enthusiast III

473
Yeah it's TBI so no good for you.
Here's a link that Larry did for his 8.1 swap, lots of reading. See post #24 for the fuel pump parts.
 
  • Like
Reactions: PNW EXPLR

PNW EXPLR

Local Expert Southeast Washington, USA
Member
Investor

Explorer I

4,285
Kennewick, WA, USA
First Name
Michael
Last Name
Denniston
Member #

3030

Ham/GMRS Callsign
KJ7LYZ
Yeah it's TBI so no good for you.
Here's a link that Larry did for his 8.1 swap, lots of reading. See post #24 for the fuel pump parts.
Thanks for the link. His thread is an amazing resource for guys doing an 8.1 swap. I have actually printed that entire thread out and made a reference book with it!
 

PNW EXPLR

Local Expert Southeast Washington, USA
Member
Investor

Explorer I

4,285
Kennewick, WA, USA
First Name
Michael
Last Name
Denniston
Member #

3030

Ham/GMRS Callsign
KJ7LYZ
I added a drain plug to the rear diff cover.

Started by laying out hole location. Then used a hole saw.

IMG_2391.jpeg
Used a fab mag to hold the O'let,


IMG_2392.jpeg
Tig welded the inside,
IMG_2393.jpeg
Then the outside.
IMG_2396.jpeg

I opt'd to keep it raw metal with a few coats of 2000* clear coat just cuz it looks cool!
69051368118__33B75358-901F-497B-A2B1-939B8218E791.fullsizerender.JPG
 

PNW EXPLR

Local Expert Southeast Washington, USA
Member
Investor

Explorer I

4,285
Kennewick, WA, USA
First Name
Michael
Last Name
Denniston
Member #

3030

Ham/GMRS Callsign
KJ7LYZ
Thanks for the link. His thread is an amazing resource for guys doing an 8.1 swap. I have actually printed that entire thread out and made a reference book with it!
Ordered up the A/C Delco EP381 Fuel Pump. Its challenging these days to sort through all of the fake BS parts out there. Was tempted to buy the $50 EP381 but when all the other EP381's are $125 I figured the $50 one was a fake.
 
  • Like
Reactions: SkunkedGorilla

Marty_d3f81b

Rank III
Member

Enthusiast III

646
Medford, Jackson County, Oregon, United States
First Name
Marty
Last Name
LaDuke
Member #

30854

Thanks for the link. His thread is an amazing resource for guys doing an 8.1 swap. I have actually printed that entire thread out and made a reference book with it!
Ordered up the A/C Delco EP381 Fuel Pump. Its challenging these days to sort through all of the fake BS parts out there. Was tempted to buy the $50 EP381 but when all the other EP381's are $125 I figured the $50 one was a fake.
yep. If it’s too good to be true. Forgo!
 

PNW EXPLR

Local Expert Southeast Washington, USA
Member
Investor

Explorer I

4,285
Kennewick, WA, USA
First Name
Michael
Last Name
Denniston
Member #

3030

Ham/GMRS Callsign
KJ7LYZ
Some pretty good progress today.

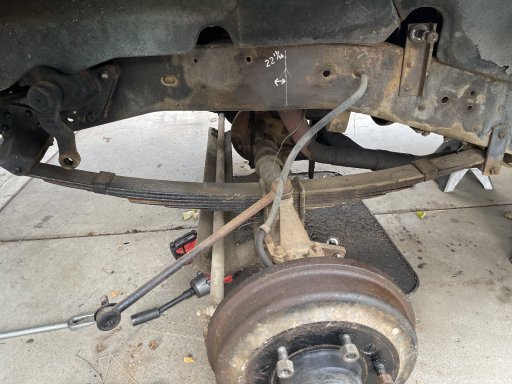
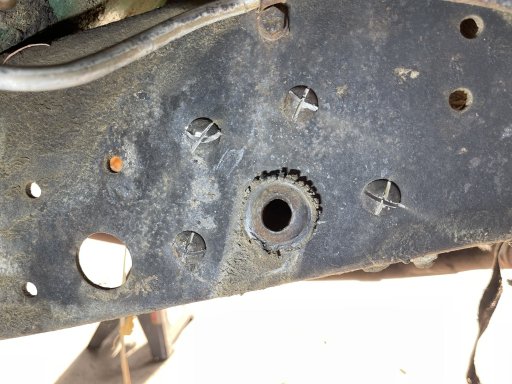
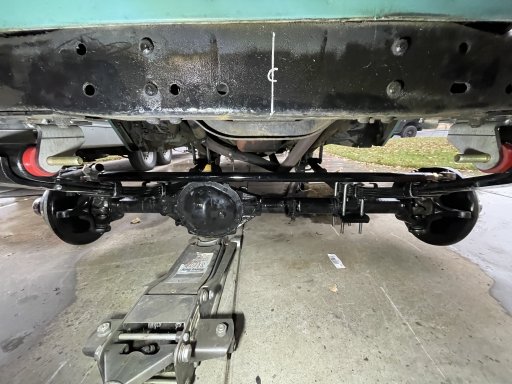
Started by getting the tires off and leveled the rig. Located centerline of the existing axle and scribbed it for later reference. Pulled the shocks and the steering arm.
IMG_2412.jpeg
IMG_2413.jpeg

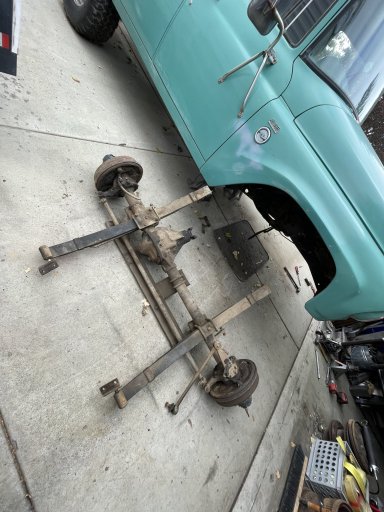
Impacted the leaf spring bolt out and drug the old axle out.
IMG_2414.jpeg

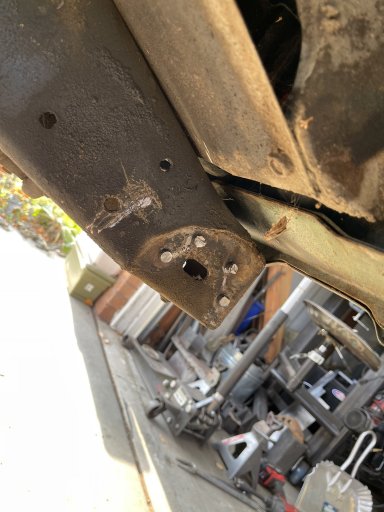
Then, after a bit more measuring and marking, I started cutting the 57 year old rivets and beating the old brackets off with a BFH and chisel.
IMG_2415.jpeg

IMG_2416.jpeg
The same process was used on the rivets that hold the old bracket for the shackles. A new bracket will be located in the further set of holes to allow for the use of the longer Chevy leaf springs.
IMG_2419.jpeg
 

Attachments

  • Like
Reactions: SkunkedGorilla

PNW EXPLR

Local Expert Southeast Washington, USA
Member
Investor

Explorer I

4,285
Kennewick, WA, USA
First Name
Michael
Last Name
Denniston
Member #

3030

Ham/GMRS Callsign
KJ7LYZ
Pulled the old manual steering box out. Obviously it will not be reused.
IMG_2421.jpeg

Then cleaned up the areas of the frame that I will be working on tomorrow.

IMG_2422.jpeg

IMG_2423.jpeg
 

PNW EXPLR

Local Expert Southeast Washington, USA
Member
Investor

Explorer I

4,285
Kennewick, WA, USA
First Name
Michael
Last Name
Denniston
Member #

3030

Ham/GMRS Callsign
KJ7LYZ
Another good day considering it was raining ice!
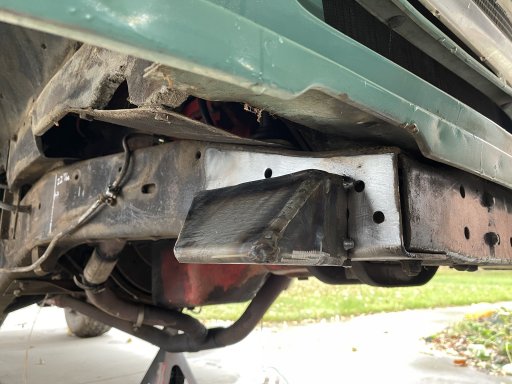
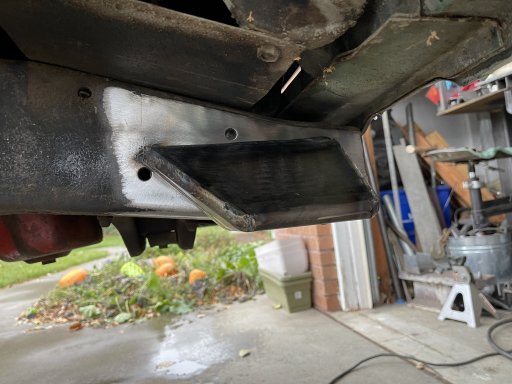
Started by verifying yesterdays math. Got the outriggers tacked on.
IMG_2430.jpegIMG_2429.jpeg

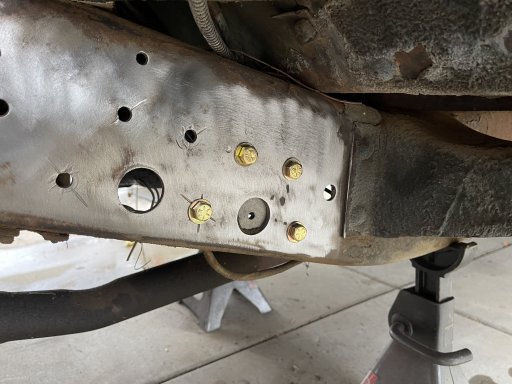
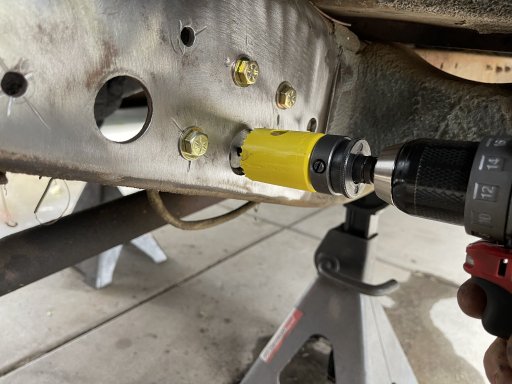
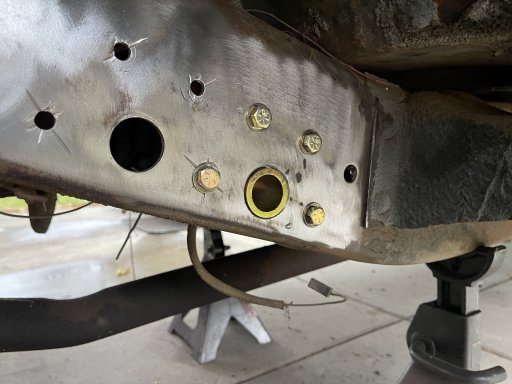
Then I moved to the rear section of the spring mounts. Here I am using a hole jig that came with the kit from IH Parts America. The jig allows you to make the hole larger. This second hole is what the 2WD Travelalls use. Why IH decided that 2wd models needed longer leafs and 4wd's needed shorter is beyond my reasoning.
IMG_2432.jpegIMG_2433.jpeg

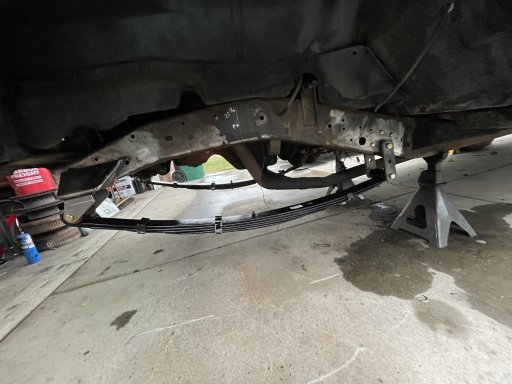
Mounted the new bracket and the new leaf pack.
IMG_2436.jpegIMG_2437.jpeg

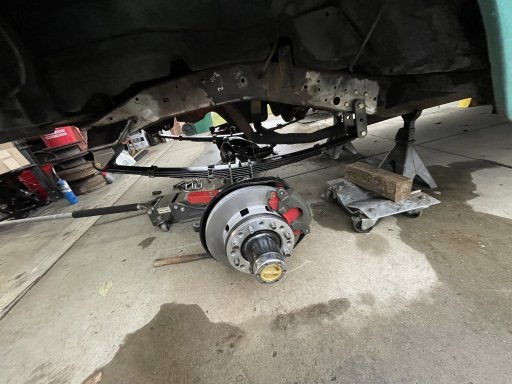
Next I rolled the new axle under the front end. I used what u-bolts I had on hand. I over looked ordering a new set of plates and u-bolts. Gunna do that tonight. The correct ones will be flipped putting the plate on the top of the axle.
IMG_2439.jpegIMG_2440.jpeg