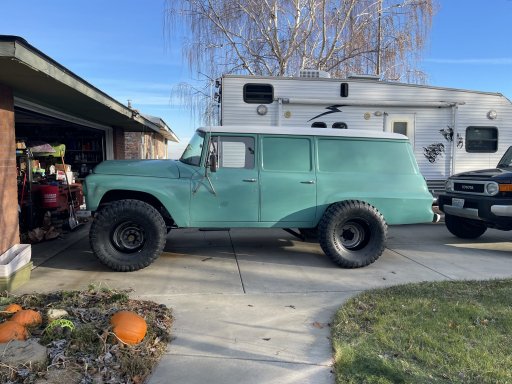
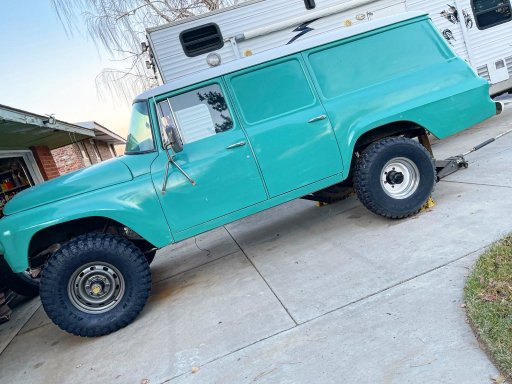
1965 International Travelall Panel Build

  • HTML tutorial

PNW EXPLR

Local Expert Southeast Washington, USA
Member
Investor

Explorer I

4,285
Kennewick, WA, USA
First Name
Michael
Last Name
Denniston
Member #

3030

Ham/GMRS Callsign
KJ7LYZ
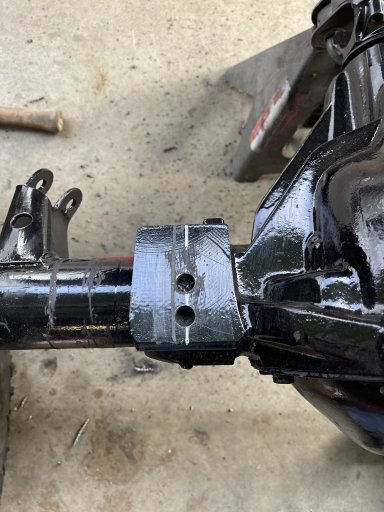
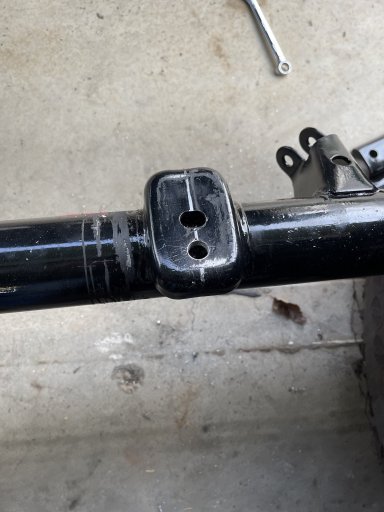
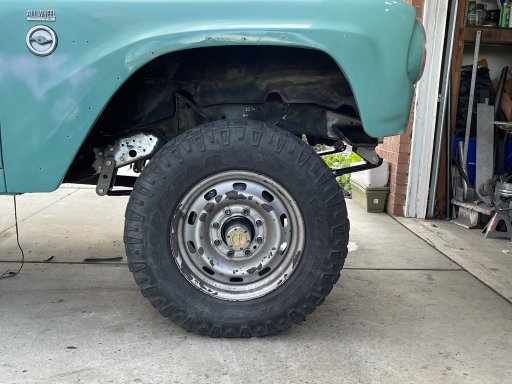
Pulled the front axle back out today. When I installed the new spring perches, I installed them on the same center line as the original. The tire was a little forward in the wheel well. My concern was when I go to a larger tire, that it may rub the front part of the fender. I drilled new alignment holes in the axle spring perches which will place the axle 1" farther back which looks more centered.

IMG_2487.jpegIMG_2488.jpeg
IMG_2491.jpegIMG_2490.jpeg

IMG_2492.jpeg
 

PNW EXPLR

Local Expert Southeast Washington, USA
Member
Investor

Explorer I

4,285
Kennewick, WA, USA
First Name
Michael
Last Name
Denniston
Member #

3030

Ham/GMRS Callsign
KJ7LYZ
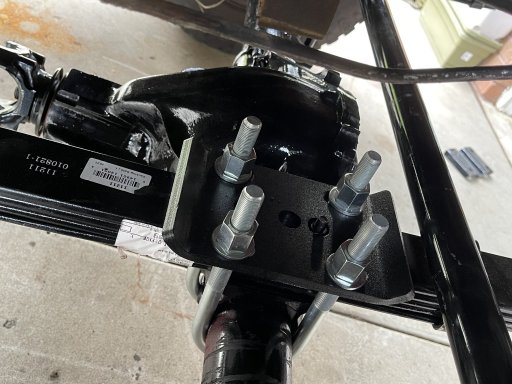
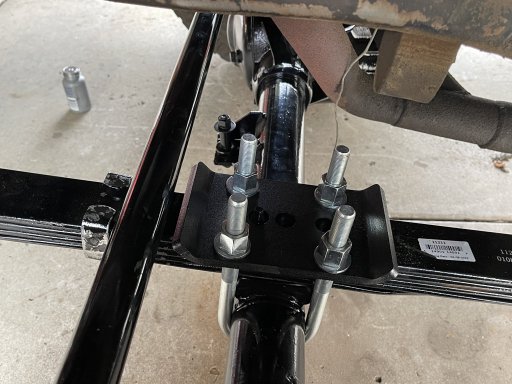
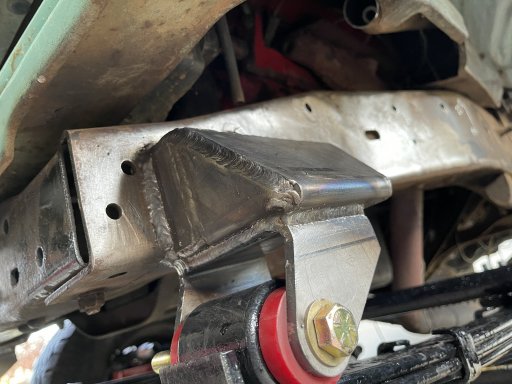
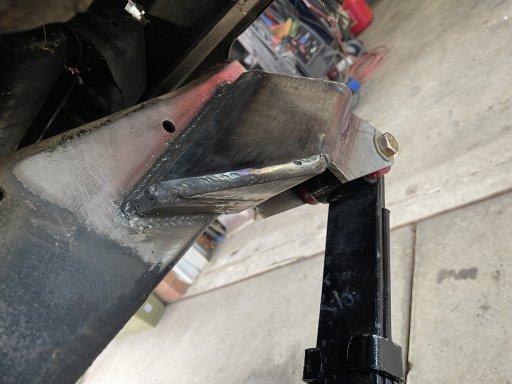
I am glad I was able to finish welding the spring brackets yesterday. Snow is starting to fall today and I am not a fan of lying in snow to weld!

I wish I would have waited till I got more wire for the MIG instead of stick welding the bracket seams. Would have looked better if it was all MIG. Not my best work but not terrible considering it was in position and a bit cramped.
IMG_2495.jpeg

IMG_2493.jpeg
Thinking I will probably add a couple gussets on the top to prevent any flex on the center section of the frame rails.
 

PNW EXPLR

Local Expert Southeast Washington, USA
Member
Investor

Explorer I

4,285
Kennewick, WA, USA
First Name
Michael
Last Name
Denniston
Member #

3030

Ham/GMRS Callsign
KJ7LYZ
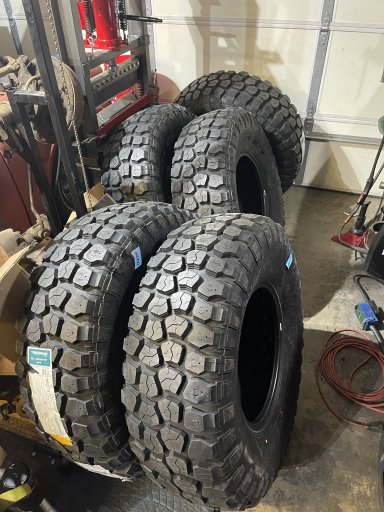
Tires showed up today. Need to get the two used tires removed from the wheels, and get them sandblasted. The old coating is flaking so I am thinking that will be the best and easiest way to wrap them for paint even though it will take a bit longer and cost probably $40.

in the mean time, here are the 37's. The ring will lift about 2" more with the tire diameter increase which will hopefully allow enough clearance in the front. The rear still needs the axle swapped and the leaf spring brackets modified and then it will match the front.

IMG_2503.jpeg

IMG_2502.jpeg
 

PNW EXPLR

Local Expert Southeast Washington, USA
Member
Investor

Explorer I

4,285
Kennewick, WA, USA
First Name
Michael
Last Name
Denniston
Member #

3030

Ham/GMRS Callsign
KJ7LYZ
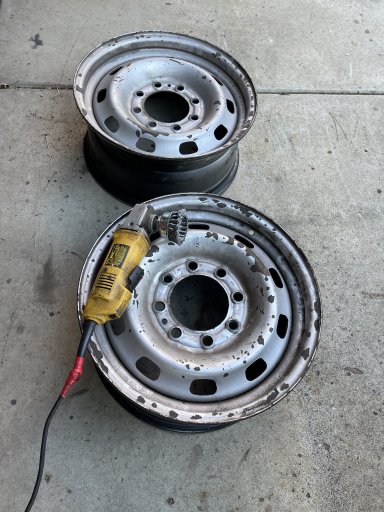
Today I took two of the rims and tires down to the tire shop to get separated. I brought the rims home and spent some time getting the old flaky paint off.
IMG_2509.jpeg

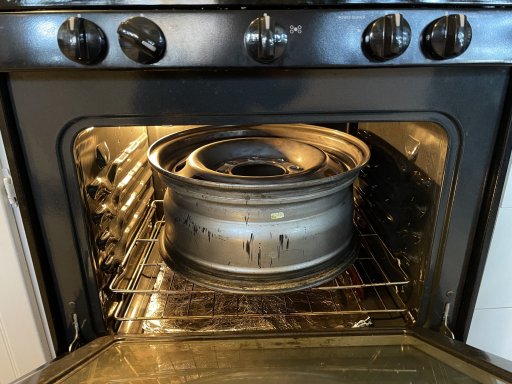
Then I placed them in the oven at 170* until good and warm. This get all of the moisture out of the metal before painting.
IMG_2510.jpeg

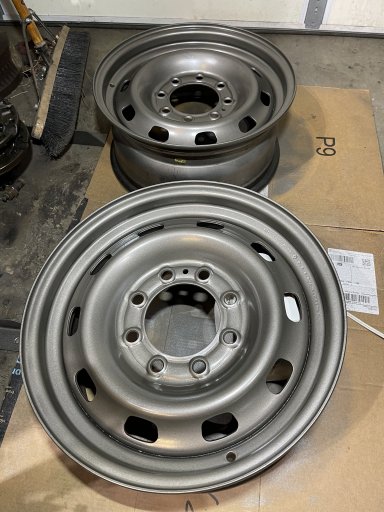
Then I sprayed them with a self etching primer, then a few coats of engine paint. I kept these warm to speed up the drying process.
IMG_2512.jpeg

Was able to get them back to the tire shop before closing and had the 37's mounted. I gotta say, the 37's are looking mighty right!
The rears are 33's and I had to jack them 1" off the ground so it would be level. Next is the rear axle swap and prep & paint on the other two wheels.
F8A81548-CAFB-4A22-8102-8FBA9147FD15.jpg
 

PNW EXPLR

Local Expert Southeast Washington, USA
Member
Investor

Explorer I

4,285
Kennewick, WA, USA
First Name
Michael
Last Name
Denniston
Member #

3030

Ham/GMRS Callsign
KJ7LYZ
Wow, that is looking good and you're making good progress on it.
Hey, Thanks. Trying to do something everyday, even if only 30 minutes. Sometimes there is not much to show after 6 hours of solid work but it all need to get done.

Next I need to grind off the leaf spring mounts on the new 14 bolt to get ready for the rear axle swap.
 
  • Like
Reactions: shortbus4x4

PNW EXPLR

Local Expert Southeast Washington, USA
Member
Investor

Explorer I

4,285
Kennewick, WA, USA
First Name
Michael
Last Name
Denniston
Member #

3030

Ham/GMRS Callsign
KJ7LYZ
It's been challenging to get things done out in the elements, so I have been looking for other things to make progress on.

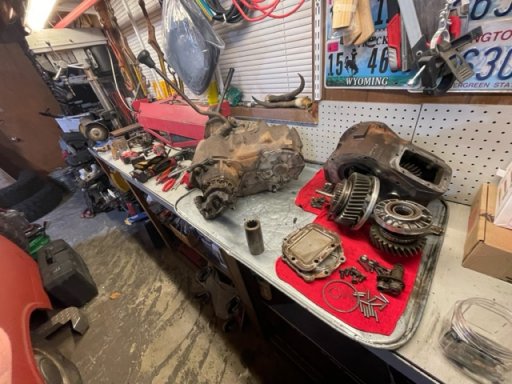
Started tearing apart the 203 & 205 transfer cases.
ADB1E58A-2406-49CC-ABF9-6914F2A878E5.jpeg

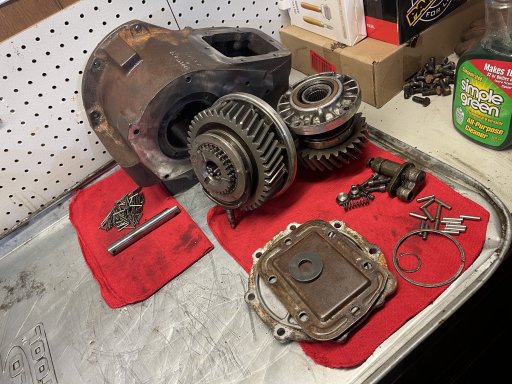
Here is the NP203 Hi/Low Range box separated. These are the only pieces I will need from the 203... actually both shafts will need to be replaced.

IMG_2563.jpeg

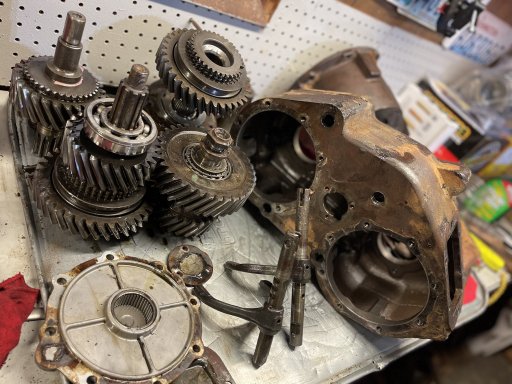
Next I tore down the 205. it will be getting 32 spline inputs & outputs which will require machining the 80mm input bearing to a 90mm bearing,
IMG_2571.jpeg
 

SkunkedGorilla

Rank III

Advocate II

800
Cochrane, AB, Canada
First Name
Andrew
Last Name
Korczak
Epic vehicle choice to building, and from the photos looks like a pretty straight solid body and frame.

Your well on your way with this build and it's coming along fantastic can't wait to see it hit the trails.
I have a question for you though, being on an overland forum, do you plan to outfit this rug as an overlander? What are your plans for the inside of this rig, it's got a lot of potential to outdit this as a epic adventure rig one could call a home on wheels
 

PNW EXPLR

Local Expert Southeast Washington, USA
Member
Investor

Explorer I

4,285
Kennewick, WA, USA
First Name
Michael
Last Name
Denniston
Member #

3030

Ham/GMRS Callsign
KJ7LYZ
Epic vehicle choice to building, and from the photos looks like a pretty straight solid body and frame.

Your well on your way with this build and it's coming along fantastic can't wait to see it hit the trails.
I have a question for you though, being on an overland forum, do you plan to outfit this rug as an overlander? What are your plans for the inside of this rig, it's got a lot of potential to outdit this as a epic adventure rig one could call a home on wheels
Thanks Andrew.

The interior will get a mild build. Probably a counter along the driver side with a couple drawers for storage and thinking a bench that can fold down to a sleeping platform.

I do plan to drive this rig on some long cross country trips. So with that in mind, everything I am doing has to be built to be reliable. Plus, I want to be able to get parts anywhere if something were to break. That is why I chose to go with the GM drivetrain instead of keeping the International drivetrain. Not saying the international stuff is bad, cuz its not, I actually drove my old Scout II from Southern California thru Denver to Georgia and Texas, its just hard to get parts for the International drivetrain.
 
  • Love
Reactions: SkunkedGorilla

SkunkedGorilla

Rank III

Advocate II

800
Cochrane, AB, Canada
First Name
Andrew
Last Name
Korczak
Thanks Andrew.

The interior will get a mild build. Probably a counter along the driver side with a couple drawers for storage and thinking a bench that can fold down to a sleeping platform.

I do plan to drive this rig on some long cross country trips. So with that in mind, everything I am doing has to be built to be reliable. Plus, I want to be able to get parts anywhere if something were to break. That is why I chose to go with the GM drivetrain instead of keeping the International drivetrain. Not saying the international stuff is bad, cuz its not, I actually drove my old Scout II from Southern California thru Denver to Georgia and Texas, its just hard to get parts for the International drivetrain.
You have a Solid build happening, I'm sure with the quality of this build, this rig will have no problem doing its extended purpose. Nice choice on the GM drive train and planning on having readily available parts across the country. Makes life easier if shit happens.

Looking forward to watching this build progress, really digging your rig, and the build quality you have going.

Have a Mery Christmas and New Year!
 
  • Like
Reactions: PNW EXPLR

PNW EXPLR

Local Expert Southeast Washington, USA
Member
Investor

Explorer I

4,285
Kennewick, WA, USA
First Name
Michael
Last Name
Denniston
Member #

3030

Ham/GMRS Callsign
KJ7LYZ
Soaked the 205 in simple green extreme overnight then threw it in the dishwasher set on "pots & pans" with a hot wash. That cleaned it up really good. Hit it with a cup brush then wiped it down with acetone. Heated it up with a torch then sprayed it with oxide red primer. The 203 is next.
IMG_2601.jpeg
 

PNW EXPLR

Local Expert Southeast Washington, USA
Member
Investor

Explorer I

4,285
Kennewick, WA, USA
First Name
Michael
Last Name
Denniston
Member #

3030

Ham/GMRS Callsign
KJ7LYZ
Well it's not much, but, it was something,

Ran the 203 range box thru the dish....cough...parts washer for an hour. Now it's ready to wire wheel the flash rust off and prime.
IMG_2610.jpeg
IMG_2611.jpeg

Also cleaned up the 205 tag and reinstalled.....some will never understand my OCD...
IMG_2612.jpeg
IMG_2613.jpeg
 

PNW EXPLR

Local Expert Southeast Washington, USA
Member
Investor

Explorer I

4,285
Kennewick, WA, USA
First Name
Michael
Last Name
Denniston
Member #

3030

Ham/GMRS Callsign
KJ7LYZ
Oh, and I got the 203/205 doubler kit and additional shafts I will need ordered from Northwest Fab...8 week lead time:disrelieved:. So I ordered an additional 90mm input shaft bearing for the 32 spline input so I can get the 205 case to the machine shop to get bored. They have a 6 week lead time. With any luck all the parts will be back around the same time mid February.....man that seems far away!
 

SkunkedGorilla

Rank III

Advocate II

800
Cochrane, AB, Canada
First Name
Andrew
Last Name
Korczak
Well it's not much, but, it was something,

Ran the 203 range box thru the dish....cough...parts washer for an hour. Now it's ready to wire wheel the flash rust off and prime.
glad I'm not the only one using the parts washer... you wouldn't by chance be using the kitchen work bench as well would you.

I'm in the same boat as you waiting on parts... my Slip yoke on my rear drive shaft is said to be discontinued, and waiting 6 weeks for a hopeful compatible replacement out of the states. So only have front wheel drive for the time being.
 

PNW EXPLR

Local Expert Southeast Washington, USA
Member
Investor

Explorer I

4,285
Kennewick, WA, USA
First Name
Michael
Last Name
Denniston
Member #

3030

Ham/GMRS Callsign
KJ7LYZ
glad I'm not the only one using the parts washer... you wouldn't by chance be using the kitchen work bench as well would you.

I'm in the same boat as you waiting on parts... my Slip yoke on my rear drive shaft is said to be discontinued, and waiting 6 weeks for a hopeful compatible replacement out of the states. So only have front wheel drive for the time being.
Fortunately I have plenty of bench space in the garage.

What yoke are you in search of?
Slip yoke's are not the best option for off road. As I am sure you are aware of, they tend to dis-attach when flexed out.

Have you thought about going to a fixed yoke with the slip in the shaft? Don't know what rig your working with...
 
  • Like
Reactions: eriefisher