What Did You Do With Your Rig Today?

  • HTML tutorial

Advtres

Rank VI
Member
Investor

Steward I

4,122
Hollister, CA, USA
First Name
Lizabeth
Last Name
Deliriumskid
Member #

30725

Ham/GMRS Callsign
KN6STB
Did some boring stuff, oil change, wash - wax, vacuumed, cleaned the windows and put in a new air filter.
Found 25 cents, an air freshener and a patch that decided it didn't want to be next to the other ones, glue solved the commitment to diversity.

A few weeks ago I added extra lights to my front bumper, I had always said, I don't need lights, I never drive into any sites at night...
well the last few trips, that is exactly what happened, so a few extra lumens is welcome especially when out in the middle of the middle of nowhere trying to find a campsite.
 

danwyandt

Rank VII
Member
Investor

Trail Mechanic III

6,159
Burnsville, NC, USA
First Name
Daniel
Last Name
Wyandt
Member #

29878

Ham/GMRS Callsign
WRTJ513
Upgraded the power to weight ratio in the battery department.
Removed 2 68 lb optima agm batteries and replaced with 200 ah of lithium goodness at 47 lbs.
4 times the runtime and saved about 90lbs. Also added in the Redarc DCDC charger.
 

Attachments

UncleTiny78

Rank I

Contributor II

124
Fargo, ND, USA
First Name
Timothy
Last Name
Rodger
Jeep Storage #2.jpg
About to embark on a 2 week road trip to Glacier NP, Idaho and the Sawtooth mountains, and then Grand Teton NP on the way back to North Dakota. This is the most dialed in I've been with my setup. Got a Smittybilt RTT and an awning, and then basically everything else I have is right here. The recent thing I've done with my rig is build that little platform you see in the picture so I can store a few things underneath that I typically like to grab first when I pull into a spot.
 

roots66

Local Expert, Texas USA
Launch Member
Member

Member III

3,477
Weir, TX, USA
First Name
Mike
Last Name
Roots
Member #

16968

Service Branch
USAF
Took the cross bars off and returned them because after just under three weeks of driving with nothing more than an empty basket on paved roads, two of the supports snapped in half. A little pissed to say the least.

IMAG2670.jpgIMAG2668.jpgIMAG2669.jpg
 
Last edited:
  • Wow
Reactions: Shahn

Sea Diamond

Rank III

Enthusiast III

800
First Name
Sea
Last Name
Diamond
  • Like
Reactions: roots66

MOAK

Rank V
Launch Member

Off-Road Ranger I

2,865
Wherever we park it will be home !!
First Name
Donald
Last Name
Diehl
Member #

0745

Ham/GMRS Callsign
WRPN 506
Did a little maintenance on the '66 VW in preparation for my trip to Kansas in a week. Adjusted the valves, filed and gapped the points, cleaned the contacts in the distributor cap, and adjusted the timing. Still need to change the oil and set up the sleeping platform and it should be good to go.

Distributor apart to clean and adjust points and clean contacts on cap and rotor.


Setting the timing with a test light. The timing on these engines (well with stock parts anyway) is set statically. Turn the engine until the 10 degree BTDC mark on the crank pulley lines up with the case seam, then turn the distributor until the points just open (test light illuminates), then tighten distributor clamp and test rotate a couple times to make sure the adjustment is holding.


Valve cover removed. Turn each cylinder to TDC and adjust valves to .006".
Sometimes I miss those days working on my 66 and keeping it running smooth. Have you considered a Bosch 009 mechanical distributor. I had one, as well as a dual port progressive Weber carb and a remote oil filter.
 

reaver

Rank VI
Member

Explorer I

3,680
Caldwell, ID, USA
First Name
Brian
Last Name
McGahuey
Member #

23711

Ham/GMRS Callsign
GMRS WRMV941
Spent all day fighting with the passenger side leaf spring in the Xterra. We finally got it all out back together at around 7:30pm.

Then tried to tackle the driver side....

We were unsuccessful, and threw in the towel for the day at about 11pm.

I went back out the morning, and managed to get it out back together. My buddy made it back over at about 11am.

Before, I had my shackles maxed out, and my leaf springs were sitting pretty flat.


After putting the 3 additional leaves in each on each side:


Steward I

2,159
Nisku, Alberta, Canada
First Name
Chris
Last Name
Westfall
Member #

25752

Ham/GMRS Callsign
RamRunner78
Finally installed the bed rack, using my reconditioned roof basket, lights from my old truck. Installed and painted my rotopax from my old truck, installed new black traction boards. All the match my black in black theme.
 

Attachments

reaver

Rank VI
Member

Explorer I

3,680
Caldwell, ID, USA
First Name
Brian
Last Name
McGahuey
Member #

23711

Ham/GMRS Callsign
GMRS WRMV941
Replaced the battery in my X. Now it should be good.

Getting things packed up for the trip this weekend.

Now.... If only I could find my case with my SD cards....
 
  • Like
Reactions: Shahn and roots66

roots66

Local Expert, Texas USA
Launch Member
Member

Member III

3,477
Weir, TX, USA
First Name
Mike
Last Name
Roots
Member #

16968

Service Branch
USAF
Drove to/from Houston to pick up my eldest kid and a truck load of stuff to store in prep for their move to Colorado. That was 8 hours I'll never get back. Good news is I get to do it again this weekend. :tired:
 

Downs

Rank V
Launch Member

Member III

2,827
Hunt County Texas
First Name
Joshua
Last Name
Downs
Member #

20468

Ham/GMRS Callsign
KK6RBI / WQYH678
Service Branch
USMC 03-16, FIRE/EMS
Whew haven't updated on the YJ in a while. Haven't covered this project as close as the CJ5 or 2A.

Drove an hour north and scooped up the correct style of steel wheel for this year and trim package. I was about to give up and buy some refurbs from ROCKAUTO but stumbled across these for 60 dollars for a set of 4. I was very surprised when I picked them up, they had some cobwebs and grass stuck on them but overall if they hadn't had wheel weights still on them, I would have never guessed they had ever been used. They didn't even have tire gunk on the bead sealing areas from previous tires. Even had 3 of the 4 center caps.

I hauled them back threw them in the back of the YJ then ran to Discount Tire and had them mount and balance a new set of Goodyear Wrangler Trailrunners, I currently run these on my XJ for daily use, and they have been great on road and decent enough off pavement. I've always got my mud terrains on a seperate set of steel wheels for the times I'll be spending more time off than on road.

On the downside I lost one of my hubcaps. It looks like one of their workers forgot to snug down the screws, it got launched going down the road and got destroyed by a passing car. I have a request to them now to look at replacing it. I had spares on the wheels they took off so I stole another one from the off road tire set.

Stock Steelies.jpg

Prior to that.

Got some more work done on the YJ yesterday. A decent chunk. Buttoned up the rear end and refilled, changed fluids in Trans and T-case. Found the wrong fluid in the T-Case. Not entirely sure what it was, but it wasn't ATF. Refilled with the proper fluid there and changed the trans out to 15W40. GL4 80W90 is a **** to find locally and my old online source the cost has gone up dramatically. Later in the AX5s life they would respec it for engine oil anyway and on a viscosity chart 15W40 is really close (a little heavier) than 80W90.

The previous owners had put a metal shift knob in. When I removed it, I saw why. They had broken off the threaded part of the shifter at some point and just put some aftermarket part on it instead. I ground down what was left of the stud flush with the top of the shifter then took a metric bolt that fit the OEM replacement knob I had and cut that down to the length I needed so all I had was a stud, then I welded that as square as I could to the top of the shift handle, cleaned it up with a flap wheel and hit it with a little paint then installed the replacement knob.

My brother was here (who I bought this from) and we took the Jeep out for a 20-minute drive on back roads. When I got back, I found the front driver's brake was sticking. I pulled the wheel off and disassembled it and found where the pads ride on the knuckle had notches worn in them preventing the inside pad from backing off of the rotor. It's also not uncommon for these calipers to stick, but I decided I would fix the notches and try again. So out came the little HF flux core welder again, and I filled the notches in, then took the flap disc and ground them down and profiled them to match up with the rest of the area. Threw everything back together after a bit of brake grease and pumped the brakes back up. They seem to be releasing now, but I was unable to take it back out for a test drive at that time, so not sure if I'll need to swap calipers yet.

I'm still waiting for some shift tower parts, oil pressure sensor, I still need to figure out the rear brake lights as far as going back to the standard style Wrangler taillights, and I still have some cleaning to do in various areas and I need to get my "Fat 50" ammo can mounted as a center storage between the seats but overall she's coming together nicely.
A couple of days ago, I replaced the brake caliper on the driver's side of the YJ. It was for sure sticking, but it was a little better with the notches filled in. Day before yesterday I replaced the alternator, which was making good power output but had a bearing going on in the rear and was making a squealing/squeaking noise at anything engine speeds over idle. I also put a new oil pressure sensor in. For whatever reason one of the previous owners decided to remove the oil pressure sensor and replace it with a bolt with about 1 inch of RTV slathered around it. The oil pressure gauge in the cap was pegged out so I figured the sensor was broken, didn't expect to find it completely gone, ha.

What's wild is they spent more time/effort with their "Fix" than just putting a new sensor in.
 

Carnage_95YJ

Rank VII
Member

Expedition Master I

5,325
Matthews, North Carolina
First Name
Eric
Last Name
Casaburro
Member #

30727

Whew haven't updated on the YJ in a while. Haven't covered this project as close as the CJ5 or 2A.

Drove an hour north and scooped up the correct style of steel wheel for this year and trim package. I was about to give up and buy some refurbs from ROCKAUTO but stumbled across these for 60 dollars for a set of 4. I was very surprised when I picked them up, they had some cobwebs and grass stuck on them but overall if they hadn't had wheel weights still on them, I would have never guessed they had ever been used. They didn't even have tire gunk on the bead sealing areas from previous tires. Even had 3 of the 4 center caps.

I hauled them back threw them in the back of the YJ then ran to Discount Tire and had them mount and balance a new set of Goodyear Wrangler Trailrunners, I currently run these on my XJ for daily use, and they have been great on road and decent enough off pavement. I've always got my mud terrains on a seperate set of steel wheels for the times I'll be spending more time off than on road.

On the downside I lost one of my hubcaps. It looks like one of their workers forgot to snug down the screws, it got launched going down the road and got destroyed by a passing car. I have a request to them now to look at replacing it. I had spares on the wheels they took off so I stole another one from the off road tire set.

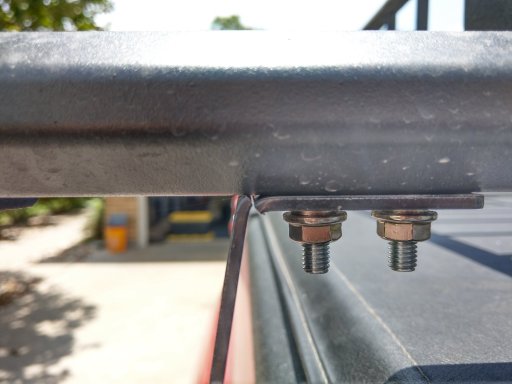
View attachment 258892

Prior to that.

Got some more work done on the YJ yesterday. A decent chunk. Buttoned up the rear end and refilled, changed fluids in Trans and T-case. Found the wrong fluid in the T-Case. Not entirely sure what it was, but it wasn't ATF. Refilled with the proper fluid there and changed the trans out to 15W40. GL4 80W90 is a **** to find locally and my old online source the cost has gone up dramatically. Later in the AX5s life they would respec it for engine oil anyway and on a viscosity chart 15W40 is really close (a little heavier) than 80W90.

The previous owners had put a metal shift knob in. When I removed it, I saw why. They had broken off the threaded part of the shifter at some point and just put some aftermarket part on it instead. I ground down what was left of the stud flush with the top of the shifter then took a metric bolt that fit the OEM replacement knob I had and cut that down to the length I needed so all I had was a stud, then I welded that as square as I could to the top of the shift handle, cleaned it up with a flap wheel and hit it with a little paint then installed the replacement knob.

My brother was here (who I bought this from) and we took the Jeep out for a 20-minute drive on back roads. When I got back, I found the front driver's brake was sticking. I pulled the wheel off and disassembled it and found where the pads ride on the knuckle had notches worn in them preventing the inside pad from backing off of the rotor. It's also not uncommon for these calipers to stick, but I decided I would fix the notches and try again. So out came the little HF flux core welder again, and I filled the notches in, then took the flap disc and ground them down and profiled them to match up with the rest of the area. Threw everything back together after a bit of brake grease and pumped the brakes back up. They seem to be releasing now, but I was unable to take it back out for a test drive at that time, so not sure if I'll need to swap calipers yet.

I'm still waiting for some shift tower parts, oil pressure sensor, I still need to figure out the rear brake lights as far as going back to the standard style Wrangler taillights, and I still have some cleaning to do in various areas and I need to get my "Fat 50" ammo can mounted as a center storage between the seats but overall she's coming together nicely.
A couple of days ago, I replaced the brake caliper on the driver's side of the YJ. It was for sure sticking, but it was a little better with the notches filled in. Day before yesterday I replaced the alternator, which was making good power output but had a bearing going on in the rear and was making a squealing/squeaking noise at anything engine speeds over idle. I also put a new oil pressure sensor in. For whatever reason one of the previous owners decided to remove the oil pressure sensor and replace it with a bolt with about 1 inch of RTV slathered around it. The oil pressure gauge in the cap was pegged out so I figured the sensor was broken, didn't expect to find it completely gone, ha.

What's wild is they spent more time/effort with their "Fix" than just putting a new sensor in.
Looking good!
 
  • Like
Reactions: Downs

slowlane

Rank II

Enthusiast III

443
Wisconsin USA
First Name
Tim
Last Name
Bender
Sometimes I miss those days working on my 66 and keeping it running smooth. Have you considered a Bosch 009 mechanical distributor. I had one, as well as a dual port progressive Weber carb and a remote oil filter.
I enjoy the simplicity of the old VW. Yeah, it requires a bit more maintenance than a newer vehicle, but I don't mind the routine valve adjustments etc. that it takes to keep the car in good tune. After doing it for so long, I've become pretty efficient with the maintenance tasks. As for the engine, I've just always kept it stock. It's a '65 40hp 1200, so it's actually smaller than what would have been in the car originally. I'm not planning on putting any upgrades on this engine. I'm just hoping to get it back together good enough to get another couple of years out of it while I build a more powerful engine. 1600 dual port-based is the plan. Ideally 80-90 hp.