Princess the 97 XJ...

  • HTML tutorial

Greg Galbo

Rank V
Launch Member

Enthusiast III

1,798
York, PA, USA
First Name
Gregory
Last Name
Galbo
Member #

2758

I would like to start out by saying I did not name the car that (haha). My jeep club that I was in at the time of purchase was responsible for that. Ok, onto the build...

I am 21 years old and in college, so this is not a high budget build by a long shot. I have, however, managed to get a lot done in my one year of ownership.

So lets start with the basics...

It is a 1997 Jeep Cherokee Sport 4x4
4.0L
AW4 Auto
NP231 Transfer Case
Dana 30 front, Chrysler 8.25 rear
Stock 3:55 gears
No ABS
Purchased with 160,000 miles.

IMG_1021.JPG

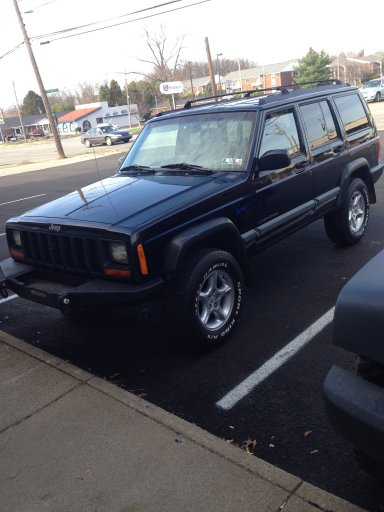
This is the first picture I took of her right after we signed the paperwork.
IMG_1015.JPG

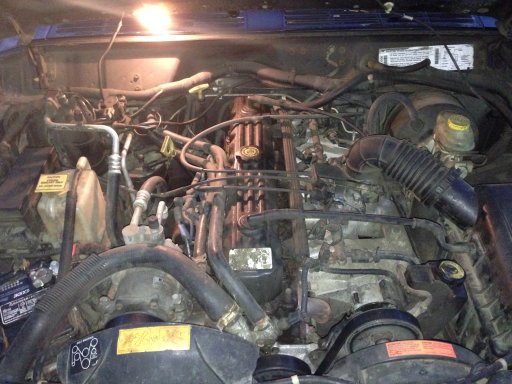
I wanted to include a picture of where I began with the engine bay the day I bought it. I am quite OCD about cleanliness especially in the engine bay so I plan on making quite a bit of changes to this old 4.0 mainly geared towards fuel economy and how efficiently I can make it run with this kind of mileage... and of course I will improve the looks a bit as well.
IMG_2015.JPG

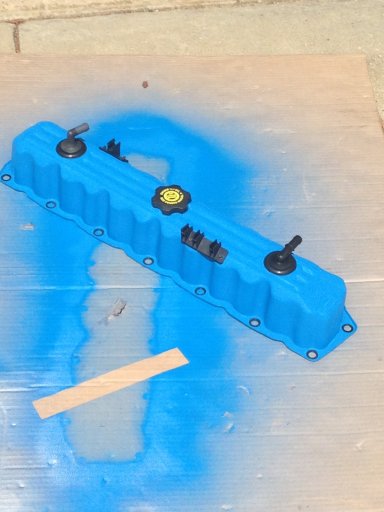
I decided to begin with a valve cover gasket because it would not only allow me to stop a leak but also improve the looks a bit and more importantly inspect the rockers and springs looking for things such as even distribution of oil on top of the rockers. All was well so I decided to try something new and sand and paint the valve cover a professional grade wrinkle blue color.
IMG_2266.JPG

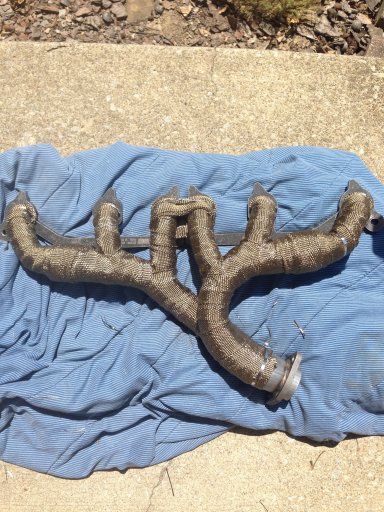
Next up was to tackle the famous cracked stock manifold! I chose a Dorman manifold and decided to wrap it with titanium heat wrap in hopes of stopping heat soak. It functioned great for about 8 months when all of the welds failed on the manifold. I have since moved to an ATP performance header and so far it is working out great!
IMG_2097.JPG

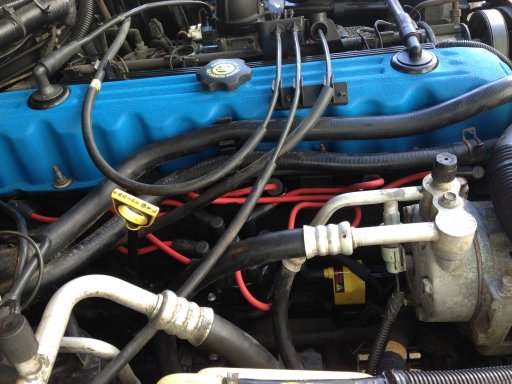
After that I wanted to take a look at the ignition system. So a set of champion plugs, and Accel wires, cap, rotor and super coil were installed.
IMG_2300.JPG

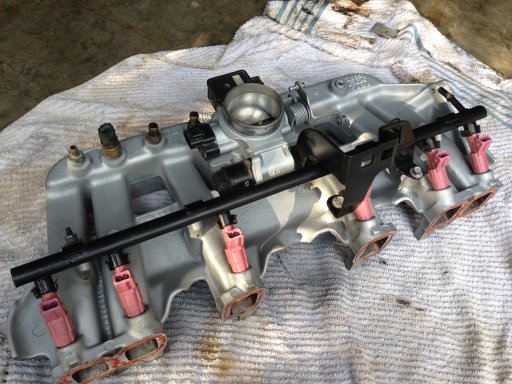
I then decided to put my trust in the forums and give a shot at upgrading my injectors. So with a lot of research on flow rates and such I ended up with Bosch 4-hole injectors out of a Volvo. They are pt. #0280155832 This is one of my favorite mods. I also cleaned the throttle body and intake manifold.
IMG_2351.JPG

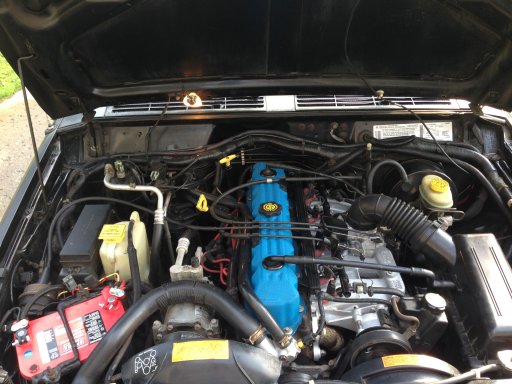
Once an optima red top and K&N air filter were installed the engine bay is finally getting on track! Can you tell I like color?
 

Attachments

Last edited:

Greg Galbo

Rank V
Launch Member

Enthusiast III

1,798
York, PA, USA
First Name
Gregory
Last Name
Galbo
Member #

2758

My XJ started off that colour as well, what's next for yours?
Next on the list is a roof rack to hold a tent. I am currently in the process of sourcing tubing for the rack that me and my friend are going to fabricate!
 
  • Like
Reactions: F4T XJ

Greg Galbo

Rank V
Launch Member

Enthusiast III

1,798
York, PA, USA
First Name
Gregory
Last Name
Galbo
Member #

2758

What's up brother? Killer rig. Nice work. I am 21 and also in college. I've got an XJ as well. Welcome to the forums! Mine is an 89 XJ Laredo.View attachment 13045 View attachment 13046
Awesome man!! I love the older body style but I've always been scared of the renix era motors. How has yours been? And where are you located? Seems somewhere north by the pictures haha and my rig looks different now I will try to get an updated pic up soon! Thanks!


Sent from my iPhone using OB Talk
 

Greg Galbo

Rank V
Launch Member

Enthusiast III

1,798
York, PA, USA
First Name
Gregory
Last Name
Galbo
Member #

2758

Believe it or not I am in Southern California, just north of LA. Had some good snow for the first time in a while lately. In terms of the remix motors, I've never had an issue. My 4L Inline 6 is super similar to the newer models. There's less computer stuff so generally they're super easy to work on. The low-end torque is greater which is a benefit for off-roading. A downside is the lack of aftermarket support for the older Renix engine, however parts can still be found and are generally super cheap. Newer engines definitely have more power at higher ends for sure.
I guess all of the vacuum lines look intimidating to me but that's good to hear! How many miles on yours and what's the lift height,wheels,etc


Sent from my iPhone using OB Talk
 

Overland-Indiana

Overland Bound - Midwest Regional Ambassador
Launch Member

Influencer II

3,316
Kokomo
Member #

0750

I would like to start out by saying I did not name the car that (haha). My jeep club that I was in at the time of purchase was responsible for that. Ok, onto the build...

I am 20 years old and in college, so this is not a high budget build by a long shot. I have, however, managed to get a lot done in my one year of ownership.
It is a 1997 Jeep Cherokee Sport 4x4
4.0L
Auto
NP231 Transfer Case
Dana 30 front, Chrysler 8.25 rear
169,000 miles currently. Bought with 160,000

List of what I have done....bear with me here:
1. Sony radio
2. Bumper bull bar (came with front bumper already)
3. factory 3-switch panel for fog light switch
4. LED fog lights
5. added full size spare
6. Mag light and mount
7. CB radio
8.Valve cover gasket and paint
9. Thermostat and paint
10. Plaid Headliner
11. Factory overhead console
12. Full ignition tune-up & upgrade (plugs, wires, cap, rotor, coil)
13. LED Light Bar on bumper
14.Upgraded exhaust manifold and heat wrapped
15. Trail rated badge and trail hawk badge both painted blue to match
16. cleaned and painted throttle body and intake
17. Upgraded fuel injectors (4-hole)
18. Fixed floor surface rust
19.9,500 lb winch
20. optima red top battery
21. Repaired rear quarter rust and undercoated entire under side
22. New Firestone AT tires 30"
23. Factor 55 Prolink
24. O2 sensors
25. New Catalytic Converter
26. Overland Bound Emblem!!!!
27. Fire Extinguisher
28. Full First Aid Kit
29. Rear Aux power outlet
30. Custom paracord grab handles
31. 4wd light indicator switch
32. Re-wired both door panel switch boards. (power windows and locks)
33. New water temperature sensor
34. K&N Air Filter
35. Passenger door mirror and rear view mirror replaced (both fell off)

I'll include a few pictures, but I'll try not to overload. I probably will, though. There's you're warning.
View attachment 12910
The first day I had her
View attachment 12918
Original engine bay... I hate dirt. Scroll down to see how the same engine bay looks now.
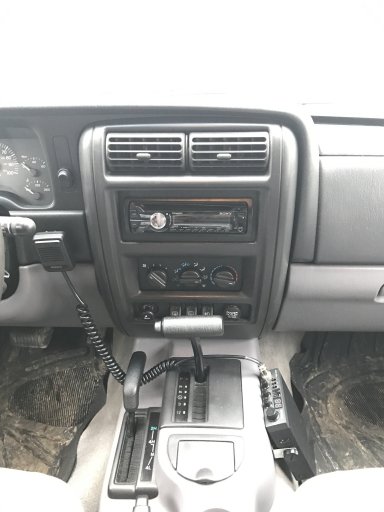
View attachment 12921
Showing my current radio, CB, and 3-switch panel set up
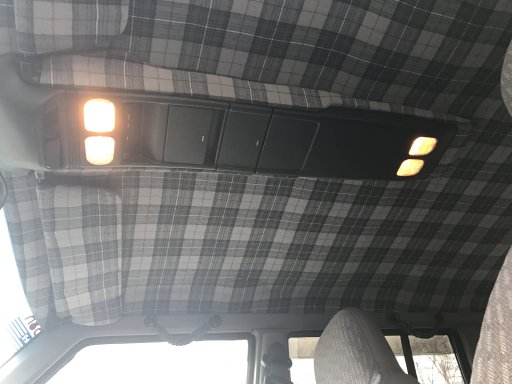
View attachment 12923
Plaid Headliner and Overhead Console along with sun visors
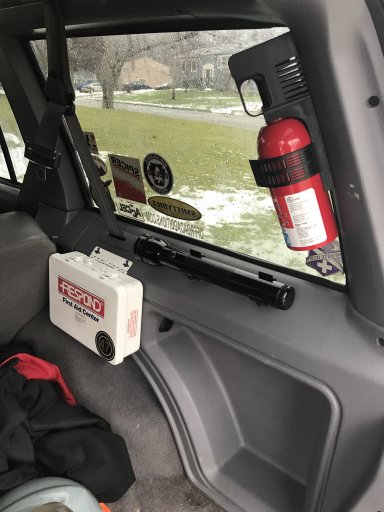
View attachment 12925
Mag Light, First Aid, Fire Extinguisher and Aux Power Outlet all mounted in the rear up high and easily accessible.
View attachment 12932
On to the engine work...valve cover off and painted VHT Wrinkle blue.
View attachment 12935
New Manifold wrapped with titanium Heat wrap
View attachment 12934
Full ignition tune up all with Accel parts
View attachment 12942
Cleaned and painted intake, throttle body and fuel rail. Volvo 4-hole injectors installed also
View attachment 12946
Completed engine bay. Fully degreased and cleaned. Added a optima red top and a K&N high flow air filter


Welcome! Very cool XJ, i have a 2001 XJ and love it! Keep up the good work.
 
  • Like
Reactions: Greg Galbo

Overland-Indiana

Overland Bound - Midwest Regional Ambassador
Launch Member

Influencer II

3,316
Kokomo
Member #

0750

Thanks, man! It's definitely in my top 3 favorite mods for my XJ. Gives it a unique look. I had the idea pop into my head one day but I couldn't find anything online. However, I eventually stumbled across one HERE. It's only for 1984-1995 XJs. Not sure how hard it would be to make it fit a 2001. I don't know how different the rear windows are.
I'll have to check into that... I really like the way it looks!
 

Greg Galbo

Rank V
Launch Member

Enthusiast III

1,798
York, PA, USA
First Name
Gregory
Last Name
Galbo
Member #

2758

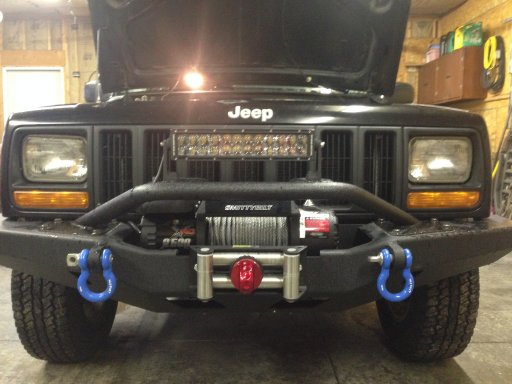
IMG_2786.JPG The next upgrades I added were a Smittybilt 9,500 pound winch with a factor 55 prolink and a new 14" LED light bar to the bull bar on my bumper. There are also two LED pods under the bumper that provide low enough light to be able to be used as street legal fog lights
 
  • Like
Reactions: Overland-Indiana

Greg Galbo

Rank V
Launch Member

Enthusiast III

1,798
York, PA, USA
First Name
Gregory
Last Name
Galbo
Member #

2758

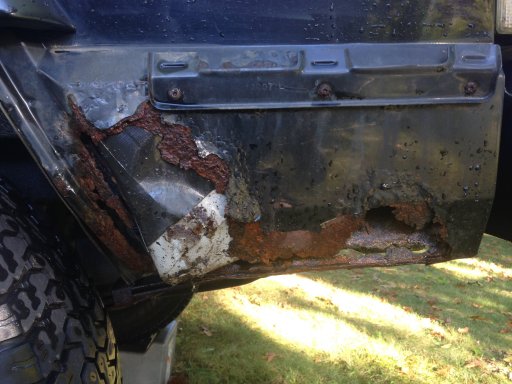
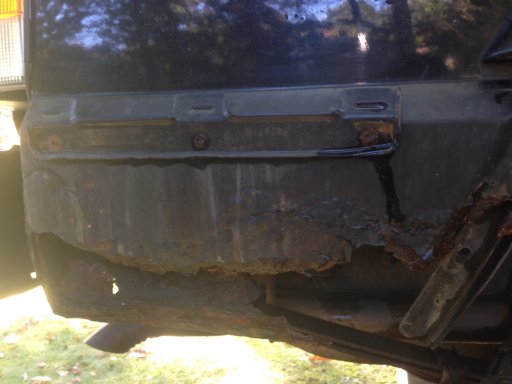
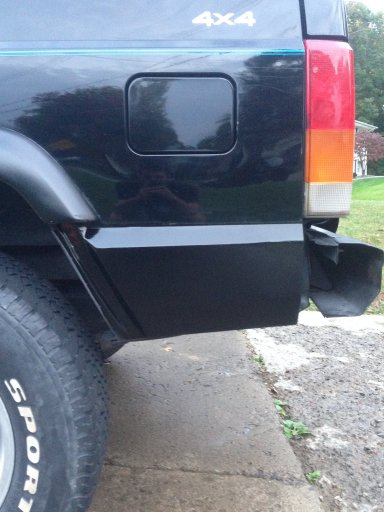
I then moved on to the part I was dreading the most. Pulling the rear bumper end caps to see how bad the rust really was.... here is the driver side.
IMG_2579.JPG
 
  • Like
Reactions: Overland-Indiana

Greg Galbo

Rank V
Launch Member

Enthusiast III

1,798
York, PA, USA
First Name
Gregory
Last Name
Galbo
Member #

2758

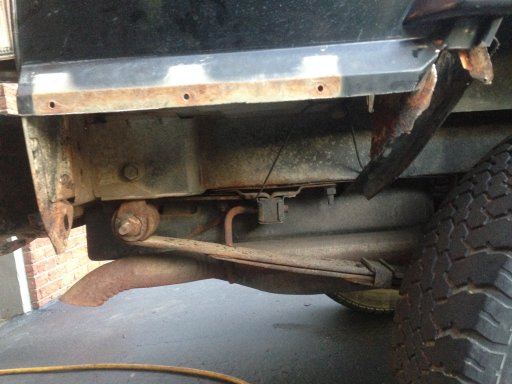
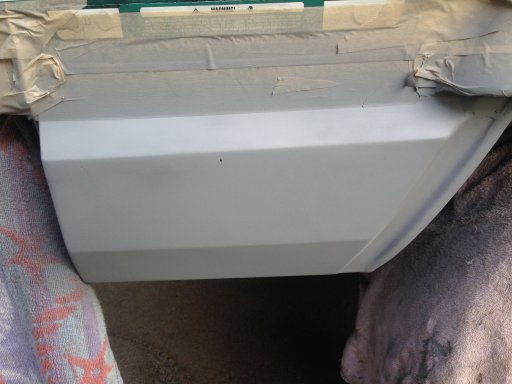
I Immediately ordered two factory replacement panels and began to design a new inner piece that wouldn't collect water and mud so it would not rust again. Here is the passenger side cut out completely.
IMG_2583.JPG
 
  • Like
Reactions: Overland-Indiana

Greg Galbo

Rank V
Launch Member

Enthusiast III

1,798
York, PA, USA
First Name
Gregory
Last Name
Galbo
Member #

2758

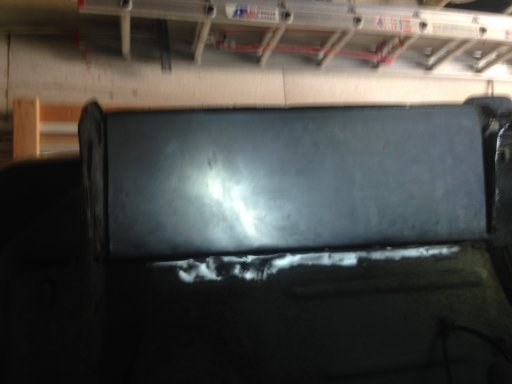
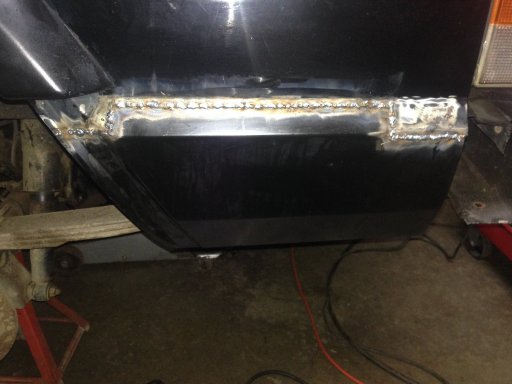
Finally we welded on the outer pieces along with a support bar by the wheel well. This allows for as much or more strength than factory but no place for the mud and salt to collect. I am hopeful that I will never have to re-visit this problem again!
IMG_2600.JPG
 

Greg Galbo

Rank V
Launch Member

Enthusiast III

1,798
York, PA, USA
First Name
Gregory
Last Name
Galbo
Member #

2758

Man... That sucks. I got VERY lucky to have pretty much no rust on my XJ, especially for being an Indiana vehicle with all the salt we put on the roads. Look forward to seeing it fixed!! Keep up the pics!
Yes you are lucky!! I got pretty much scammed by the previous owner.... I was told a lot of things that were not true on this vehicle but all my life I always wanted to keep my first vehicle no matter what. So that means fixing all of the rust! It also has rocker rust that was covered with bondo when purchased it...It will be fixed next summer. More pics on the way!!