PNW Exploration Rig
- Thread starter Shallow Water Steve
- Start date
-
Guest, UPDATE We went through the site migration runbook and completed all steps. We will need to complete the migration next week, but will leave the forums up for the weekend. A few days after maintenance, a major upgrade revision to the forum site will occur.


S
SubeeBen
Guest
VERY VERY NICE ! Lovely build & looks set up very nice. Hats off to you & your workmanship. Looking forward to your input & future progress.
We just had a baby girl, who I can't wait to take camping (trips already planned to the Redwoods and Klamath NF in 3 weeks), but for the next 3 weeks I'm home and off work. So in between diaper changes and passing out on my face from exhaustion intermittently, I get to play with the truck.
Probably have two trips left before the winter when its full ski mode, and less camping, so it's time to get the worklist together. I'm going to order parts slowly and try to drag my projects out over the winter to avoid boredom and more importantly save the money I don't really have. Did not anticipate how expensive it is to keep a little human alive.
The wife bought off on the following:
ARB CKMA12 onboard air setup
Ham Radio Install
Rock Sliders
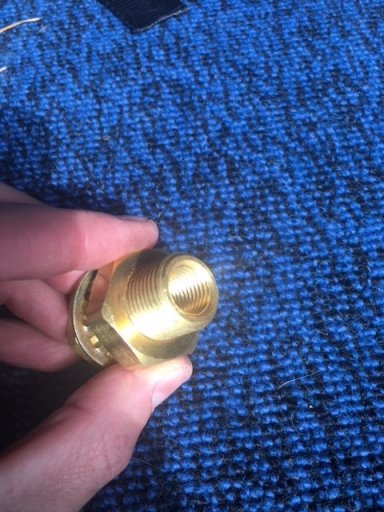
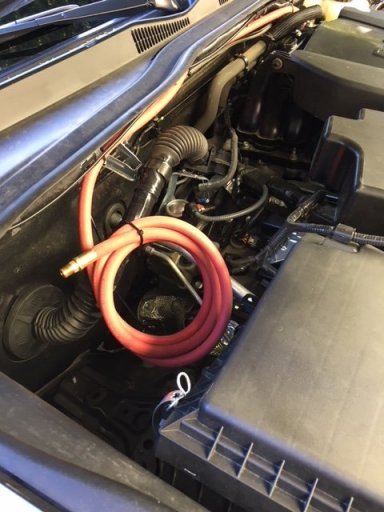
So lets start with onboard air. I searched high and low for the perfect fitting for running air into the bed and I finally found it. I want one fitting where I can attach a hose to hit all 4 tires. I'll use a quick fist mounted to the bed rail or cap to keep a hose and ARB digital inflator hooked up full time most likely.
Its 1/4in NPT female on both sides so perfect for adding a QD and an air hose.
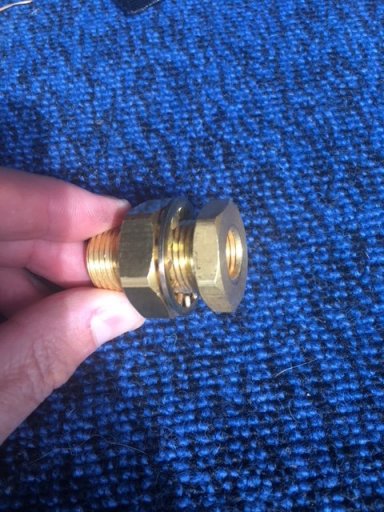
I looked at running a semi-rigid polyurethane air hose like something used in garage applications and decided against it due to a lack of flexibility and I'm glad I did. I went with the Goodyear 25ft hose. Made in the USA, solvent and UV resistant. Should last for a long time.
A 3/4in hole saw makes quick work of prepping the bed for the air outlet.
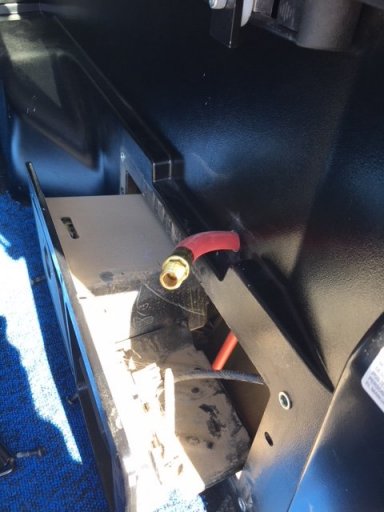
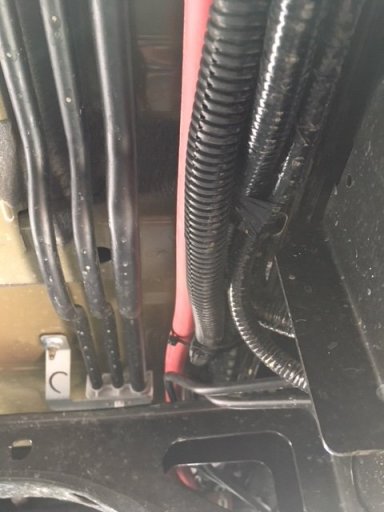
I was originally going to run the hose down the passenger side, however, it would run right by the exhaust the whole way. I ended up running it down the passenger side tail light harness which goes behind the spare tire and meets up with the main harness to the back of the truck that runs down the driver side. This is the same way I ran my wiring harness for all my lights and aux outlets.
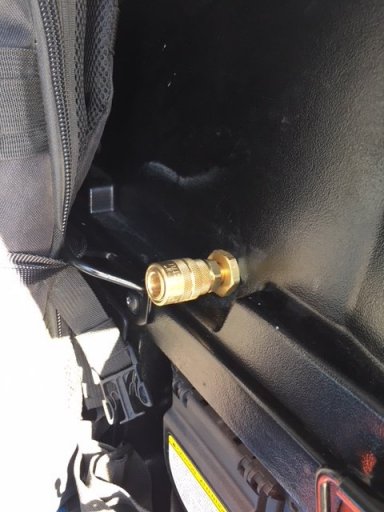
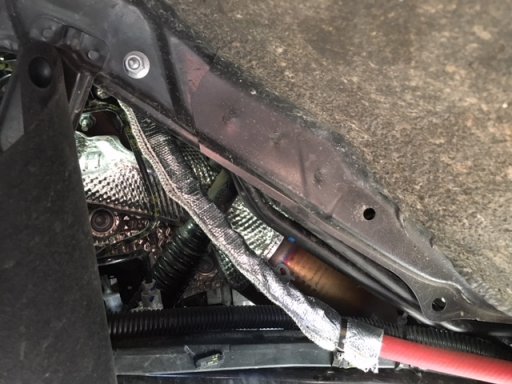
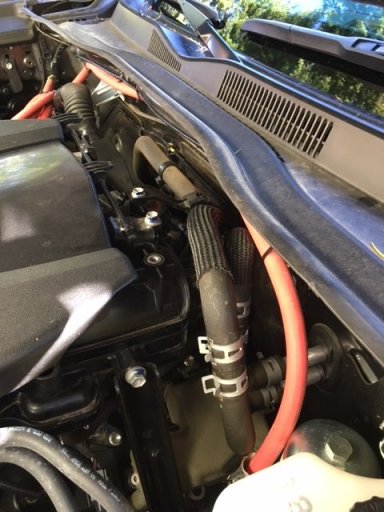
Some heat shield was necessary for when the air hose enters the engine compartment.
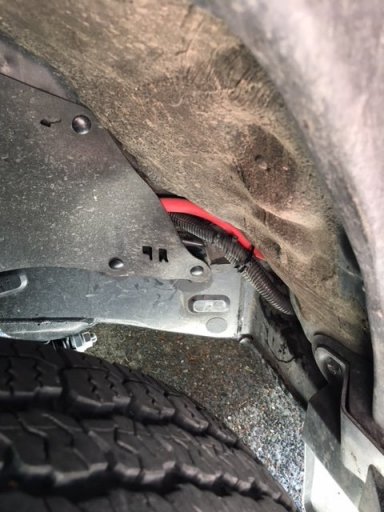
Front driver wheel well w/ splash guard pulled back
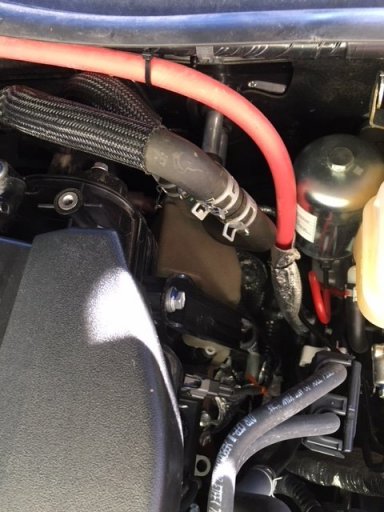
Here's where it enters the engine compartment. Running it along the wire run at the top of the hood (you'll see the CB coax from the last post). Its coiled up and awaiting a Slee bracket, 1lb ARB tank, and CKMA 12 compressor. I'm going to eventually cut the excess and use a barb fitting to get the proper length directly to the outlet of the air tank.
Probably have two trips left before the winter when its full ski mode, and less camping, so it's time to get the worklist together. I'm going to order parts slowly and try to drag my projects out over the winter to avoid boredom and more importantly save the money I don't really have. Did not anticipate how expensive it is to keep a little human alive.
The wife bought off on the following:
ARB CKMA12 onboard air setup
Ham Radio Install
Rock Sliders
So lets start with onboard air. I searched high and low for the perfect fitting for running air into the bed and I finally found it. I want one fitting where I can attach a hose to hit all 4 tires. I'll use a quick fist mounted to the bed rail or cap to keep a hose and ARB digital inflator hooked up full time most likely.
Its 1/4in NPT female on both sides so perfect for adding a QD and an air hose.
I looked at running a semi-rigid polyurethane air hose like something used in garage applications and decided against it due to a lack of flexibility and I'm glad I did. I went with the Goodyear 25ft hose. Made in the USA, solvent and UV resistant. Should last for a long time.
A 3/4in hole saw makes quick work of prepping the bed for the air outlet.
I was originally going to run the hose down the passenger side, however, it would run right by the exhaust the whole way. I ended up running it down the passenger side tail light harness which goes behind the spare tire and meets up with the main harness to the back of the truck that runs down the driver side. This is the same way I ran my wiring harness for all my lights and aux outlets.
Some heat shield was necessary for when the air hose enters the engine compartment.
Front driver wheel well w/ splash guard pulled back
Here's where it enters the engine compartment. Running it along the wire run at the top of the hood (you'll see the CB coax from the last post). Its coiled up and awaiting a Slee bracket, 1lb ARB tank, and CKMA 12 compressor. I'm going to eventually cut the excess and use a barb fitting to get the proper length directly to the outlet of the air tank.


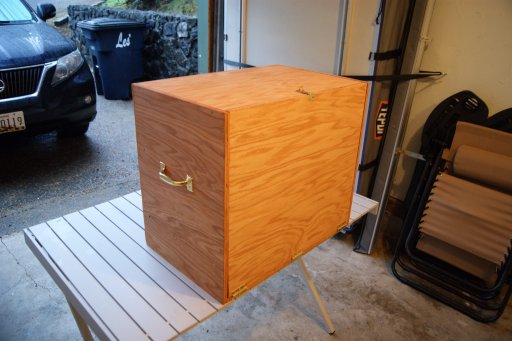
Had a rainy day and a buddy with a table saw so I was able to knock a chuck box off my winter to-do list. Looking forward to folding down the tailgate and having easy access to everything versus digging around in a Tupperware that usually has stuff piled on top of it.

Enthusiast III
That's a really nice chuck box, reminds me of the ones we used in Scouts. Nice work.View attachment 74837View attachment 74838View attachment 74839
Had a rainy day and a buddy with a table saw so I was able to knock a chuck box off my winter to-do list. Looking forward to folding down the tailgate and having easy access to everything versus digging around in a Tupperware that usually has stuff piled on top of it.
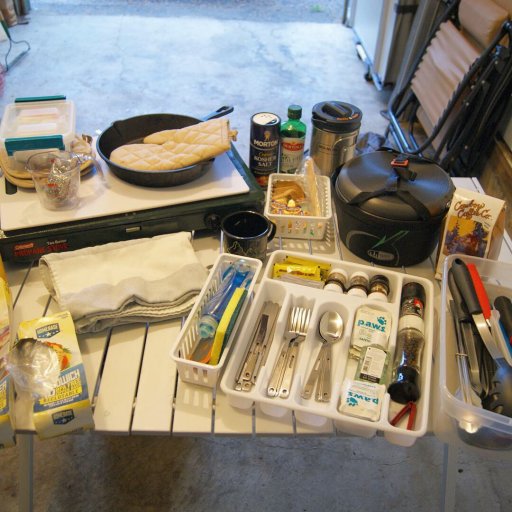
Thanks! My dad got us that Coleman stove when I was a Cub Scout. I’ve considered getting a new one so many times but can’t let the classic go.That's a really nice chuck box, reminds me of the ones we used in Scouts. Nice work.
Excellent Rig/Build/story etc! Congratulations on the new Child ,
Welcome to Oregon!
Welcome to Oregon!
Enthusiast III
That's funny because my fiance upgraded me to that stove a few years back. I'd been using one of the white gas models my parents got when I was a Cub Scout. We use the propane model regularly, my only real complaint is the lack of fine adjustment in the burners.Thanks! My dad got us that Coleman stove when I was a Cub Scout. I’ve considered getting a new one so many times but can’t let the classic go.
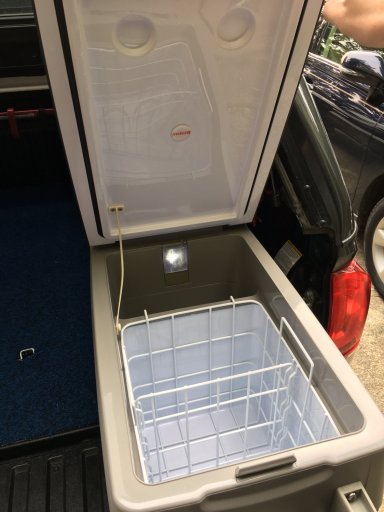
Well thanks to a decent tax return I picked up an IndelB 41A from Equipt1 and am fabbing up a fridge slide this week and pulled the trigger on an ARB OME lift. Should have some good updates to this thread in the next few weeks. Was also stoked to get signed on as a Rago Fabrication brand rep, so if anyone needs a discount, DM me.
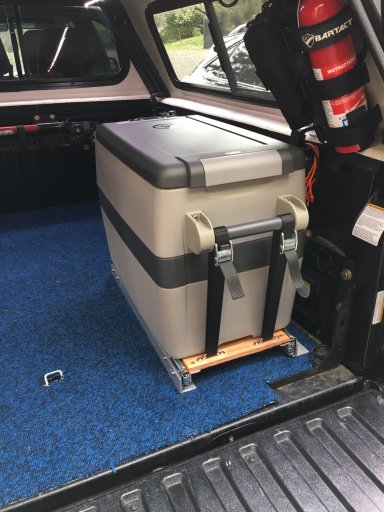
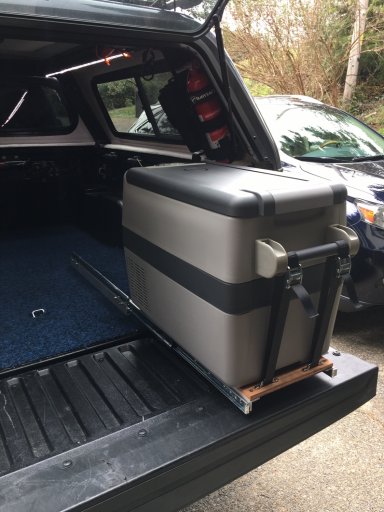
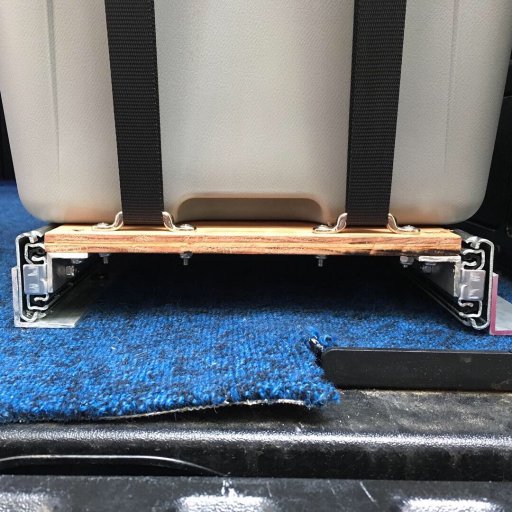
Here she is in all her glory. The slide cost me $90 between the angle aluminum, hardware, and heavy duty 250lb slides from amazon. I wanted a really small fridge slide footprint so this turned out perfect.

Traveler II
Great build! Looking forward to seeing what y'all do as a family.
