My teardrop project v1.0

  • HTML tutorial

smritte

Rank V
Launch Member

Member III

2,827
Ontario California
First Name
Scott
Last Name
SMR
Member #

8846

Ham/GMRS Callsign
KO6BI
I'm building the front ones. I'll see how they turn out. I changed my frame design and forgot to work in the front jacks. I need something narrower than the Bal jack.
 

smritte

Rank V
Launch Member

Member III

2,827
Ontario California
First Name
Scott
Last Name
SMR
Member #

8846

Ham/GMRS Callsign
KO6BI
Didn't get much done this last weekend. Had family visiting. Well that and it rained. Was able to make a run to the steel yard, got my box made for the water tank, got my external junction box mounted and added in the mounts for the tongue box. Ran out of paint and forgot to order a few items.....sigh. Oh....didn't take any pictures.
On the plus side, the frame "should" be done this weekend. I think I'm going to throw some wood on it and do the registration before I make the box. I haven't ordered the doors and windows yet. I'm guessing there's going to be a bit of lead time there.

Major items left to order (beside doors and windows), fridge and kitchen slides, aluminum for the walls and roof, misc small doors for shore power, water fill.....ect.
 
Last edited:

old_man

Rank V
Launch Member

Member III

2,827
Loveland, Colorado
First Name
Tom
Last Name
Houston
Member #

8300

Ham/GMRS Callsign
WØNUT Extra
Didn't get much done this last weekend. Had family visiting. Well that and it rained. Was able to make a run to the steel yard, got my box made for the water tank, got my external junction box mounted and added in the mounts for the tongue box. Ran out of paint and forgot to order a few items.....sigh. Oh....didn't take any pictures.
On the plus side, the frame "should" be done this weekend. I think I'm going to throw some wood on it and do the registration before I make the box. I haven't ordered the doors and windows yet. I'm guessing there's going to be a bit of lead time there.

Major items left to order (beside doors and windows), fridge and kitchen slides, aluminum for the walls and roof, misc small doors for shore power, water fill.....ect.
I figure that when I got the frame all done, I was 10% complete. Good Luck.
 

smritte

Rank V
Launch Member

Member III

2,827
Ontario California
First Name
Scott
Last Name
SMR
Member #

8846

Ham/GMRS Callsign
KO6BI
Heading out to the TDS event. I haven't been to that in 28 years. Not going to get much done structurally. Been doing small things after work. Got the main power feeds and rear tail light wiring layed out. The wiring runs through the frame. Using gland nuts and removable flanges to seal everything. Installed a wiring junction box in the front and need to install one in the rear. This will help organize my wiring and make it easier if I need to add in something later.
I'll get pictures of the layout later.
 

smritte

Rank V
Launch Member

Member III

2,827
Ontario California
First Name
Scott
Last Name
SMR
Member #

8846

Ham/GMRS Callsign
KO6BI
It's been a while since i've updated this. Had some surgery then when I was ready to start again the virus thing hit and im sitting at home. I need to order my door and windows so I can start my wall framing as well as the aluminum for the walls.

For now, I'm just doing small things without spending money.


trailer 3-24.jpg
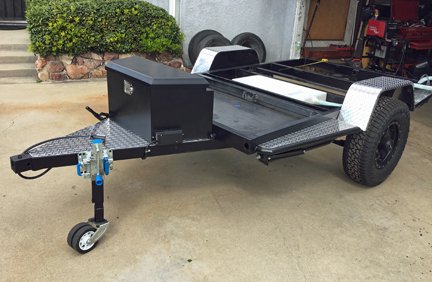
Here it is so far. All four leveling jacks on

front block.jpg
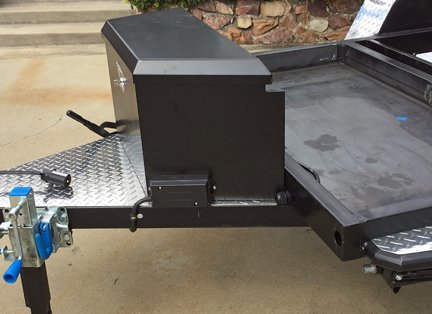
Front junction box. I have the main harness gland nut installed in the frame, will add in another once I get the framing up. The front box will be wired near the end of the project.

tank install.jpg
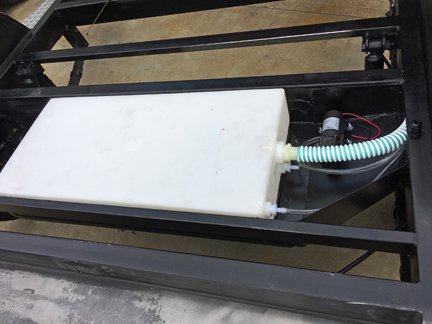
Water tank in, pump mounted hoses ran through the frame. The gland nut on the left will be inside the wall and used for the pump wiring.

rear block.jpg
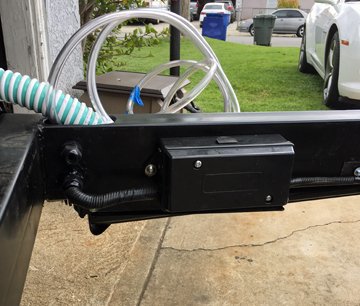
Rear junction block and hose frame exit. The junction block here is rear lights, brakes and a 12 gauge power feed for whatever may pop up later.
The blue/white hose is the tank fill and the other two are pressure and vent.

That's all for now.
 

smritte

Rank V
Launch Member

Member III

2,827
Ontario California
First Name
Scott
Last Name
SMR
Member #

8846

Ham/GMRS Callsign
KO6BI
Soooo,
The virus thing slowed my build down so between that and my surgery I figure I've lost two months build time.
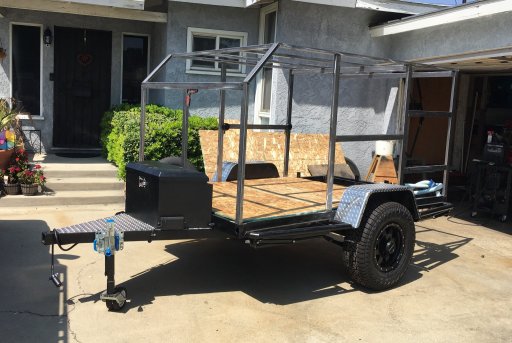
Got the basic outside frame tacked together, fridge slide made and basic floor cut and just set in. I need to get my door and windows so I can finalize my sides. I will be building the rear storage and compartment doors next.


trailer 5-1.jpg
I'm thinking of remaking the front with a radius and not a 45 degree. All I need to do is figure out how to bend square tube.

That's all for now.

Edit: just realized I left my magnets in the photo. See if you can spot all 5 in the picture. Hint : 3 different types.
 

USStrongman

Rank V

Influencer II

1,596
Lubbock, TX, USA
First Name
Bryan
Last Name
Hildebrand
Member #

20099

Excellent. I would love to have the ability to fab. What you are building makes sense. Sliders doubling as steps. Box up front for electrics and some storage. Suspension travel. Stepable fenders. Really great work. Looking forward to this progressing out.
 

RadioGuy75067

Rank V
Launch Member

Expedition Master I

1,482
Lewisville, Texas
First Name
Sean
Last Name
Compton
Member #

24954

Ham/GMRS Callsign
KI5COU
Service Branch
ARMY VET
Looking good! Very high quality build.

The best way I can think of to "bend" square tubing without a bender is to notch at specific locations, bend the tube, then weld the notches back in. Grind smooth and prep and paint.

This video can give you an idea of what I'm talking about:

 
  • Like
Reactions: USStrongman

smritte

Rank V
Launch Member

Member III

2,827
Ontario California
First Name
Scott
Last Name
SMR
Member #

8846

Ham/GMRS Callsign
KO6BI
Masking tape is your friend.

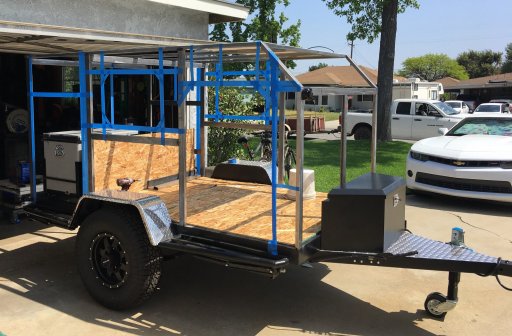
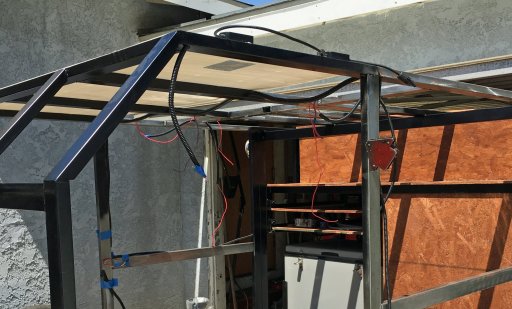
The pictures kinda poor but, this is what I spent today doing. Taped my door, window, cabinets and rear storage area openings. This way I can sit inside and look out as well as climb in and out the door. Being a visual person, using tape in this manner gives me a new perspective.

Right off the bat, the standard door size (26x36) was going to be an issue. I kept hitting my head and sometimes I caught my foot on the opening edge while climbing in and out. I changed the size to 28x38. Perfect.
The windows ended up 21x14. I have a small bucket to use as a chair. The window size is good but when I get them I need to move them up about an inch.
Passenger side, rear I have my fridge slide out and over the top of the fridge, I will be storing my folding table and camp stove. That door I'm going to make. Rear access storage figured out with door size and inside rear cabinets shelves drawn out.
After doing this I decided to move my inside rear wall back three inch's.


tape 1.jpg
Looking through the door you see the driver side window. That kind of throws the picture off.
 

smritte

Rank V
Launch Member

Member III

2,827
Ontario California
First Name
Scott
Last Name
SMR
Member #

8846

Ham/GMRS Callsign
KO6BI
Been working on rear storage brackets and shelf's.
Learned a few things.
1. I am so not a cabinet maker.
2. Plywood is not straight.
3. Metal is easier to work with.
4. needed more wood and a little more steel to finish.

With that aside, I have the rear storage/shelf area almost done (need 1 more sheet of plywood) and I will be weatherproofing the wood. The inside got an upper rear storage compartment just needing the sides done.
As for the rest of the trailer I need to do finish welding on the new rear framework (storage), paint all that, run the wiring, order the windows/door and skin it. The doors are going to be the issue. I can get the windows and complete everything but the passenger side. That's where the door will be. The company who would be making the door had shut down for two months and are dealing with back orders. They cant give me a lead time yet.

Picture time

inside shelf 1.jpg
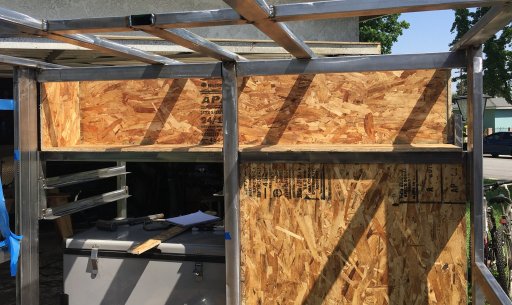
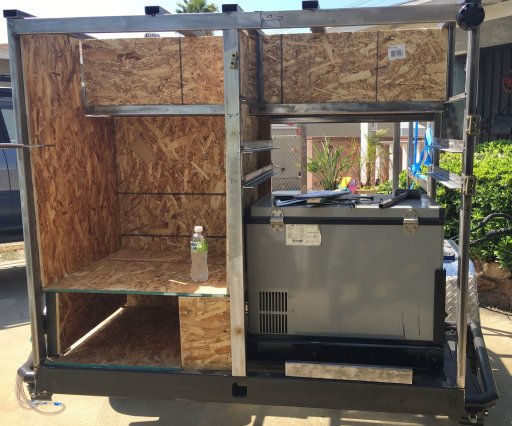
This shows the inside storage area (top of picture). 56" across, 12" high and 12" deep. This will get doors once the inside is skinned.


rear shelf 1.jpg
Here is the rear. The inside shelving comes into the top of this. On the bottom left is a small area that fits two of my storage box's perfectly. This had to be made small because my tank fill hose comes up on the left and the slider tracks come over on the right. The left area will probably get either adjustable shelving and/or some kind of slide out drawer/basket/whatever. Right side above the fridge will be three shelves. Lowest one is for my folding table, next up is where my stove will store and third...not sure. Couldn't see wasting the space.
The right side door will open upwards and the opening will be about an inch below lowest shelf. The left side will open out to the left and be almost full length.

I started another thread on venting the fridge enclosure. Looking for ideas while i'm at this stage.
 
Last edited:

smritte

Rank V
Launch Member

Member III

2,827
Ontario California
First Name
Scott
Last Name
SMR
Member #

8846

Ham/GMRS Callsign
KO6BI
Finished the storage area, dissembled it then waterproofed the wood. Windows came in today and got the doors ordered. I'm going to do the wiring and skin the driver side (no door there). On the home stretch finally. It started raining today so I called it early and didn't get any pictures. I'll assemble the storage and get some shots.
 

smritte

Rank V
Launch Member

Member III

2,827
Ontario California
First Name
Scott
Last Name
SMR
Member #

8846

Ham/GMRS Callsign
KO6BI
Started back with my job and back to work on my trailer.

Chassis is 90% wired. Only rear lights left. Have windows but should have doors in a week or two. When the doors get here is when I will be skinning the outside. Water tank is plumbed and waiting on doors before mounting the filter. I will be making an access hatch for easy filter replacement once those are installed.

Wiring1.jpg
Wiring layed out and run through the frame. I ran out of electrical tape while I was doing this. Had to hold the wires together with masking tape. Got more today and will be re-wrapping some of it

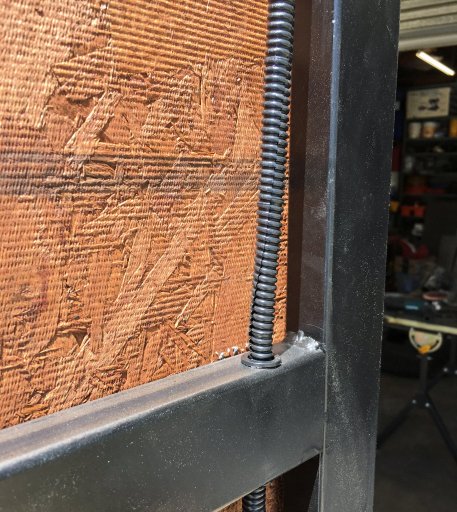
Grommet.jpg
I used plastic grommets wherever the wire passed through the tube. All of the wiring is encased in split loom. The few pieces that are not now will be when everything is final.

tire mount2.jpg
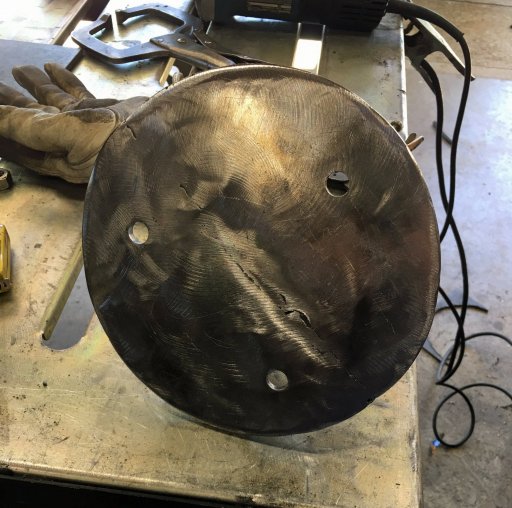
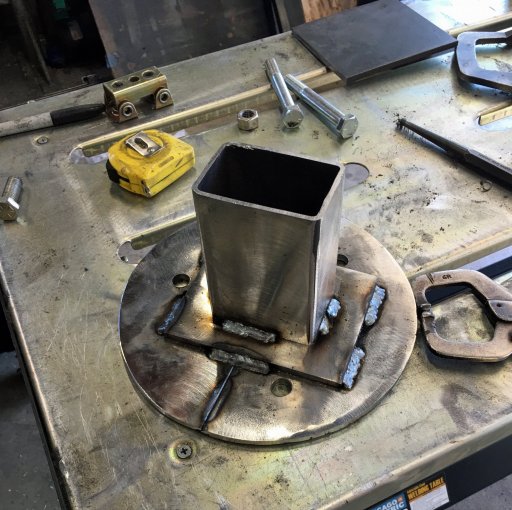
Made the spare tire mount today. I'm not too good at free handing a circle with my plasma cutter. It's close enough. When its done, the tire carrier will bolt to the side. I will be able to extend it out a little if I go to a bigger tire in the future.

Tire mount1.jpg

Back side.

That's it for now.
 

smritte

Rank V
Launch Member

Member III

2,827
Ontario California
First Name
Scott
Last Name
SMR
Member #

8846

Ham/GMRS Callsign
KO6BI
Now that I'm getting closer, here's the concept pictures i started out with. You will get an idea what I'm working towards. The XXXXXX on the sides will be painted diamond plate.

Driver side color.jpg

passenger side color.jpg

Rear COLOR.jpg
 

old_man

Rank V
Launch Member

Member III

2,827
Loveland, Colorado
First Name
Tom
Last Name
Houston
Member #

8300

Ham/GMRS Callsign
WØNUT Extra
Being a fabricator and engineer, I love your blue tape mockup. Sure helps to visualize it.
 

smritte

Rank V
Launch Member

Member III

2,827
Ontario California
First Name
Scott
Last Name
SMR
Member #

8846

Ham/GMRS Callsign
KO6BI
Being a fabricator and engineer, I love your blue tape mockup. Sure helps to visualize it.
Drawing it out doesn't cut it for me. The concept picture is almost scaled correctly and I still didn't know how it would be when it was done.
I taped the opening to what was a standard door size and I would catch my shoulder, head and tear the tape. Then once inside, I realized I didn't like the window size and placement. Got the size set and they were sold out of what I wanted. Found another size and did the tape again. My rear cabinets and doors were the same.
 
  • Like
Reactions: old_man