Member III
This has been on my project board for a number of years. In the past I ran with a home made alternator welder and always wanted to set it up with a spool gun. Having an on board welder came in quite handy multiple times. As it turned out, most vehicles we ran off road really couldn't take it. Time went on, parts and vehicles got better and I saw myself field welding fewer vehicles. As it is, my current vehicle is the only one out of my last four that doesn't have a welder. This weekend I decided to change that.
Because I'm cheap and like to do things myself, I chose not to buy one of the already made on board welders. I also didn't want to buy an expensive spool gun to convert if it wasn't going to work like I thought.
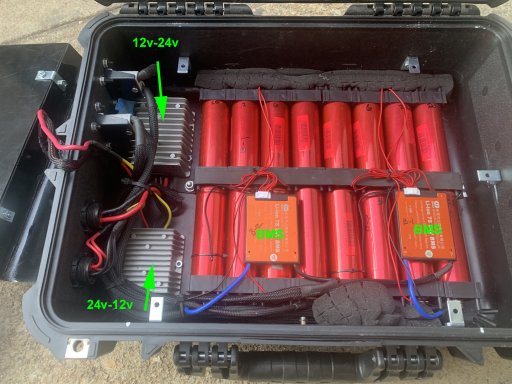
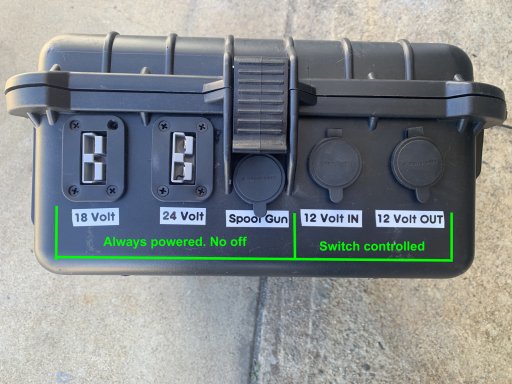
Because your welding with innershield wire, it needs 24volts. You need to series two batteries and isolate them from your vehicle. The spoolgun motor is 12volt. This will be hooked to only one of the batteries.
Like all my projects, their a work in progress. It normally takes me several tries before I either scrap it or perfect it. This one looks like it needs two things to make it right.
1. me to be a better welder.
2. a wire speed control. UPDATED 1/23 Speed controller pictures at the bottom
Here's some pic's with a few words.
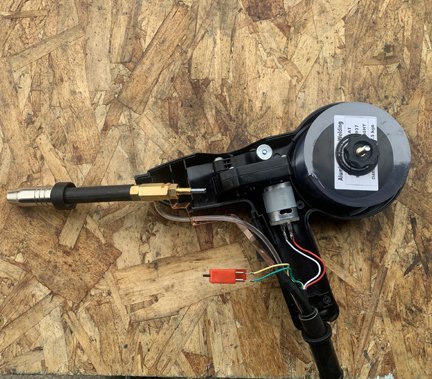
Cheap Amazon spool gun.
The way these are set up, the trigger is wired to the welder and the welder turns on the spool gun motor. Here I have exposed the switch and motor.
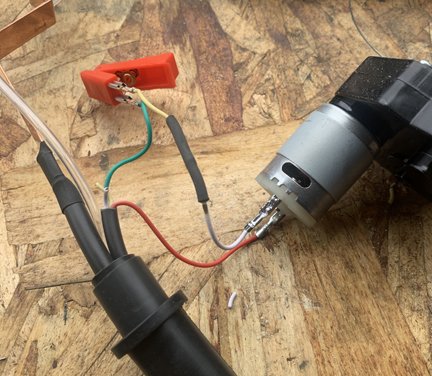
Now to connect the switch to the motor. When I pull the trigger, the spool motor will run.
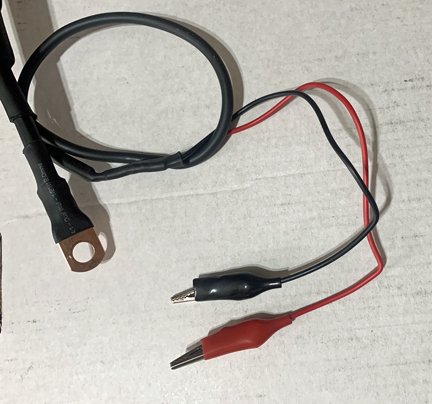
The other end of the cable had two plugs. One large one for the main power and a small one for the control. I cut off the large one and installed a single lug. The control plug was replaced by a pair of wires with small alligator clips. The spoolgun needs to have the wire feed be Negative and the metal be positive because your using flux wire. The main power lug will go to the negative post of one battery.
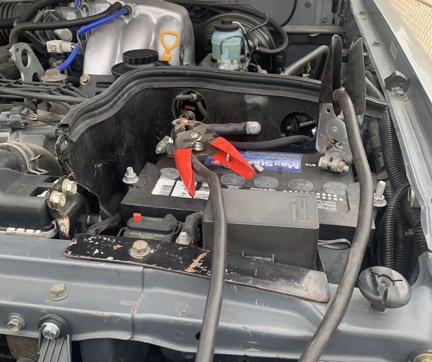
Power lug hooked to one battery, negative and the motor control hooked to both positive and negative on this battery. My red lead ran off the edge of the picture here so you cant really see it.
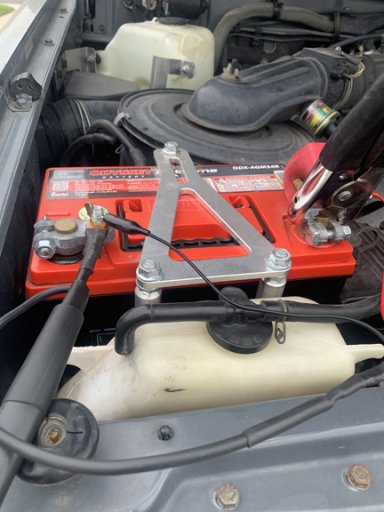
This is my other battery. I used my jumper cables to tie the negative of this battery to the positive of the other. I'm using my other jumper cable to bring positive voltage to my metal (remember, spool gun must be negative).
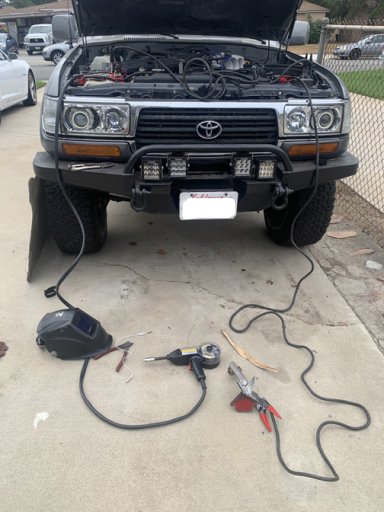
Front view (kinda hard to see everything).
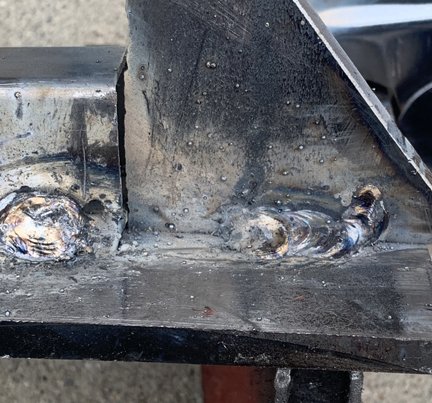
Please don't make fun of my welds. These were quick tacks because it started to drizzle on me. The upright and lower plates are 1/4 inch and the square was 1/8 inch. I overheated the 1/8 inch and had to come back over it. The quarter got good penetration. I was using very old .035 wire.
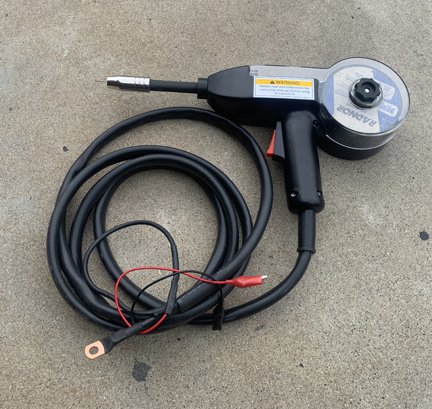
Finished (sort of) Spool gun.
Final comments. I was using some wire I had laying around for....10 years? The size was .035. I want to try .023 wire. It will flow less current and most likely will work better. I also want to add a small speed control to the motor. Dont know if it will help or not.
Overall if I needed it right now as it sits it would work very well, especially if I practiced some first. I need to figure out a small portable helmet and maybe a hard case.
With the hard case and possibly the helmet, I should still be under $200. $125 of that was the spool gun itself. Used one on eBay would save a bit.
UPDATE: I added the speed control. It works well without it but is actually better with it. As far as I can tell, none of the store bought types have a speed control. To me, the wire speed at 12 volts is too fast. I found dropping the voltage to about 10 volts works very well with the .030 wire.
Here's some pictures
Speed controller
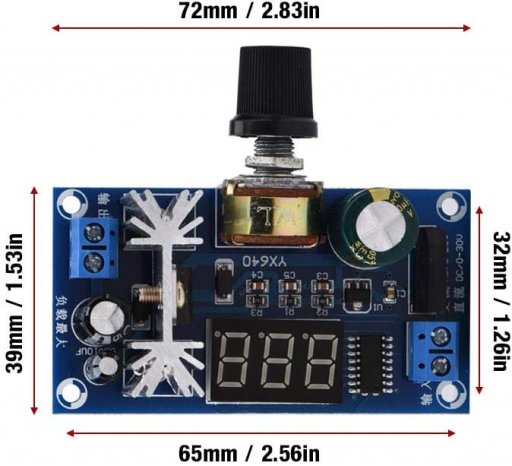
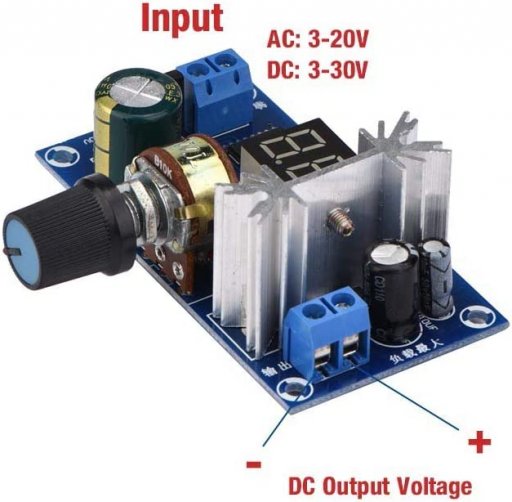
Amazon special. I wanted something smaller I could incorporate into the gun. The only way to make that happen was to build my own. Way easier just to buy it. The only bad thing about the one I chose was, it didnt come with wiring instructions. I had to go to the Amazon picture. Details for the one in the picture below is backwards. I started to let the smoke out when I hooked it up. Fortunately the controller is still good.
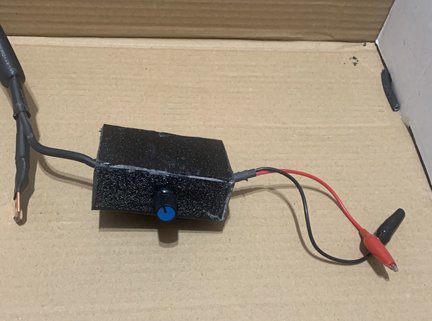
I did not get any pictures of the board wiring before I sealed it (sorry). Its basically hooked up inline . I didnt need to see the display because the speed I want is just back a little from max.
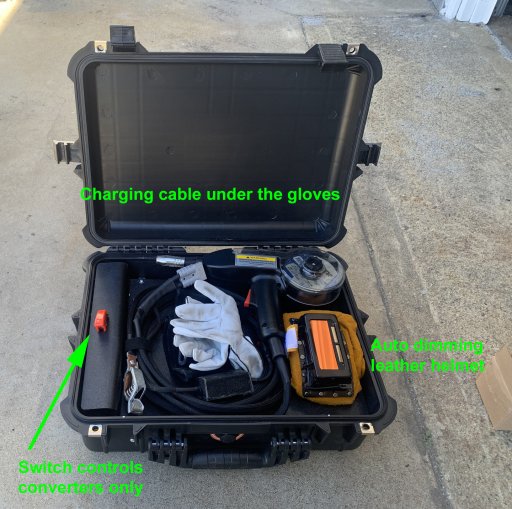
What I have left is, find a nice box for it and get a folding/compact welding hood.
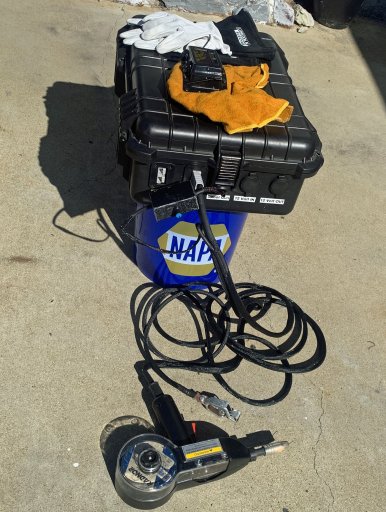
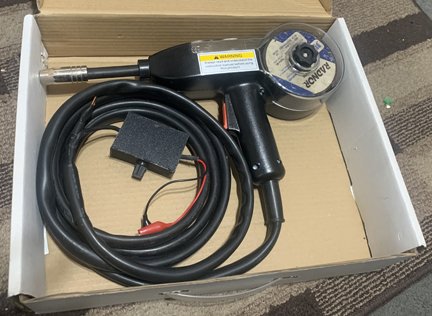
Finished project with controller
Because I'm cheap and like to do things myself, I chose not to buy one of the already made on board welders. I also didn't want to buy an expensive spool gun to convert if it wasn't going to work like I thought.
Because your welding with innershield wire, it needs 24volts. You need to series two batteries and isolate them from your vehicle. The spoolgun motor is 12volt. This will be hooked to only one of the batteries.
Like all my projects, their a work in progress. It normally takes me several tries before I either scrap it or perfect it. This one looks like it needs two things to make it right.
1. me to be a better welder.
2. a wire speed control. UPDATED 1/23 Speed controller pictures at the bottom
Here's some pic's with a few words.
Cheap Amazon spool gun.
The way these are set up, the trigger is wired to the welder and the welder turns on the spool gun motor. Here I have exposed the switch and motor.

Now to connect the switch to the motor. When I pull the trigger, the spool motor will run.

The other end of the cable had two plugs. One large one for the main power and a small one for the control. I cut off the large one and installed a single lug. The control plug was replaced by a pair of wires with small alligator clips. The spoolgun needs to have the wire feed be Negative and the metal be positive because your using flux wire. The main power lug will go to the negative post of one battery.

Power lug hooked to one battery, negative and the motor control hooked to both positive and negative on this battery. My red lead ran off the edge of the picture here so you cant really see it.

This is my other battery. I used my jumper cables to tie the negative of this battery to the positive of the other. I'm using my other jumper cable to bring positive voltage to my metal (remember, spool gun must be negative).

Front view (kinda hard to see everything).

Please don't make fun of my welds. These were quick tacks because it started to drizzle on me. The upright and lower plates are 1/4 inch and the square was 1/8 inch. I overheated the 1/8 inch and had to come back over it. The quarter got good penetration. I was using very old .035 wire.

Finished (sort of) Spool gun.

Final comments. I was using some wire I had laying around for....10 years? The size was .035. I want to try .023 wire. It will flow less current and most likely will work better. I also want to add a small speed control to the motor. Dont know if it will help or not.
Overall if I needed it right now as it sits it would work very well, especially if I practiced some first. I need to figure out a small portable helmet and maybe a hard case.
With the hard case and possibly the helmet, I should still be under $200. $125 of that was the spool gun itself. Used one on eBay would save a bit.
UPDATE: I added the speed control. It works well without it but is actually better with it. As far as I can tell, none of the store bought types have a speed control. To me, the wire speed at 12 volts is too fast. I found dropping the voltage to about 10 volts works very well with the .030 wire.
Here's some pictures
Speed controller
Amazon special. I wanted something smaller I could incorporate into the gun. The only way to make that happen was to build my own. Way easier just to buy it. The only bad thing about the one I chose was, it didnt come with wiring instructions. I had to go to the Amazon picture. Details for the one in the picture below is backwards. I started to let the smoke out when I hooked it up. Fortunately the controller is still good.
I did not get any pictures of the board wiring before I sealed it (sorry). Its basically hooked up inline . I didnt need to see the display because the speed I want is just back a little from max.
What I have left is, find a nice box for it and get a folding/compact welding hood.


Finished project with controller


Last edited:


