2003 Jeep Grand Cherokee Overland Build

  • HTML tutorial

tjZ06

Rank V
Launch Member

Advocate I

2,268
Las Vegas/Palo Alto
First Name
mynameisntallowed
Last Name
Adams
Member #

20043

The biggest problem is that the valve seats will come out and destroy the engine within a year of it is ever overheated. You can buy reman heads that have revised valve seats.
If I'm going to swap the heads I really might and well just get a whole longblock.

It was never overheated, so I'm not going to do that.

-TJ
 
  • Like
Reactions: JimBill

tjZ06

Rank V
Launch Member

Advocate I

2,268
Las Vegas/Palo Alto
First Name
mynameisntallowed
Last Name
Adams
Member #

20043

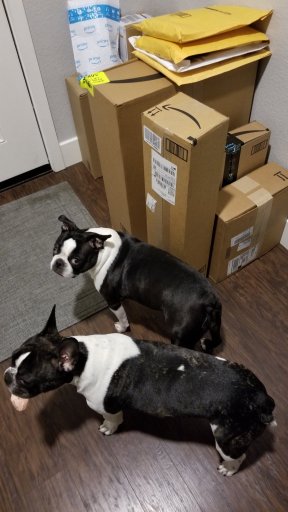
Got back home from the work week to find more parts and tools had arrived:

20200116_214339.jpg

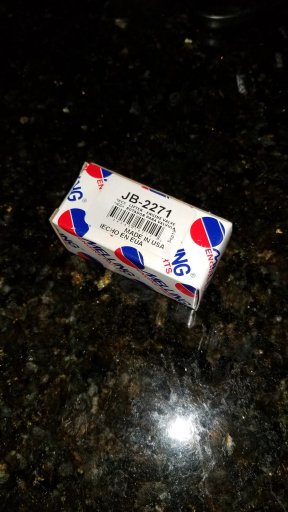
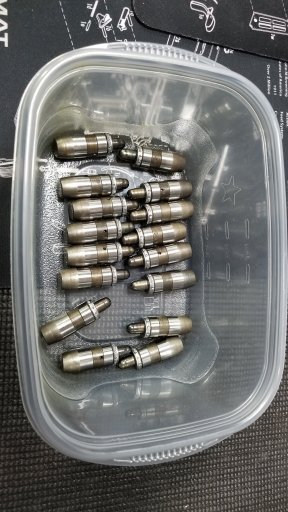
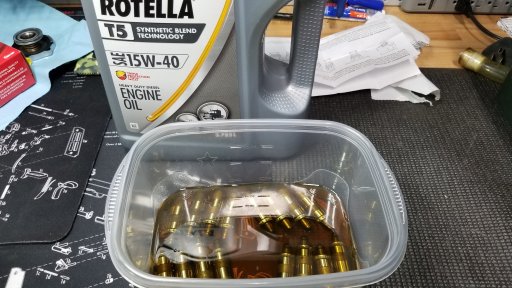
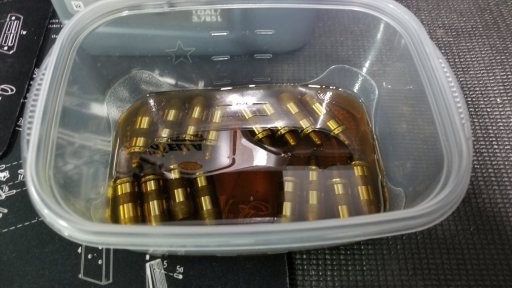
I found the box with the hydraulic lash adjusters so I could soak them in some Rotella:

20200116_220545.jpg

20200116_220727.jpg

20200116_220810.jpg

20200116_220817.jpg

-TJ
 
  • Like
Reactions: JimBill

JimBill

Rank V
Member
Investor

Advocate I

2,268
San Benito County, CA, USA
First Name
James
Last Name
Madison
Member #

18747

Got back home from the work week to find more parts and tools had arrived:

View attachment 135638


-TJ
The look on the dogs face is classic! Parts keep piling up here as well. Yesterday I had the funniest thing happen with a delivery. I bought a 7 blade Jeep Cherokee metal fan, and on delivery I was completely surprised how heavy the box was. There were 5 fans in the box! I guess a warehouse worker grabbed the bulk stock box and shipped it to me rather than pulling one fan and packaging it.
 

tjZ06

Rank V
Launch Member

Advocate I

2,268
Las Vegas/Palo Alto
First Name
mynameisntallowed
Last Name
Adams
Member #

20043

The look on the dogs face is classic! Parts keep piling up here as well. Yesterday I had the funniest thing happen with a delivery. I bought a 7 blade Jeep Cherokee metal fan, and on delivery I was completely surprised how heavy the box was. There were 5 fans in the box! I guess a warehouse worker grabbed the bulk stock box and shipped it to me rather than pulling one fan and packaging it.
Yeah... they had just finished their usual freak-out that I had gotten home. So you're going pusher e-fan plus puller mechanical?

-TJ
 

JimBill

Rank V
Member
Investor

Advocate I

2,268
San Benito County, CA, USA
First Name
James
Last Name
Madison
Member #

18747

Yeah... they had just finished their usual freak-out that I had gotten home. So you're going pusher e-fan plus puller mechanical?

-TJ
Factory puller electric and puller clutch fan. See my build thread, I'm posting my plan and parts today. It was a slow week at work.....
 

tjZ06

Rank V
Launch Member

Advocate I

2,268
Las Vegas/Palo Alto
First Name
mynameisntallowed
Last Name
Adams
Member #

20043

Work kept being a real bummer today and, well, making me do work instead of play with a Heep. I also went and helped a buddy who's shopping for his first trailer check a few out. So, in the end I only got to put a couple hours in on this project.


Let me just say, working on the passenger side under-hood of these things isn't fun. I've changed the clutch in my C5 Z06 track-side on jack stands, and working on this thing MIGHT be more annoying. If you're not familiar C5s have the motor/clutch up front but the trans and diff in the rear connected by a torque-tube, this means changing the clutch involves dropping the whole rear subframe w/suspension, dropping the entire exhaust, dropping the "tunnel plate" that has 243254252432543532 bolts holding it in, removing all the header bolts so they can be laid out to the side, removing the intake manifold or at least lifting it off the engine and scooting it forward (why in the world would you remove the intake to do a clutch... well when you lower the torque-tube/trans/diff to remove them it pulls the back of the engine down which will smash the plastic intake into the plastic/composite firewall and one or both will break) removing the torque-tube/trans-diff as an assembly (which also means taking enough interior apart to remove the shifter) but not moving it so far as to have to take the shift tube off, removing the lower half of the bell-housing (it's 2-piece), then actually doing the job you came to do: replace the clutch. Then put it all back together.


I think I might prefer that to getting the passenger side valve cover out!
;)
I went ahead and pulled the rest of the air-box, then disconnected a zillion harness clips and all the injector, coil and various sensor connectors I could. A few of the retaining tangs on the injector clips broke... which I was expecting based on my research so I have some new connectors inbound so I can either solder them in, or hopefully figure out how to slide the pins over and move them to the good housings. I removed the heater hose lines on the passenger side. Removed the AC compressor and swung it out of the way (I zip-tied it in place out of the way... everything is still connected on the AC at this point so the system is still charged). I removed the Alternator and associated wiring. I'm sure I'm forgetting other stuff, but with some swivels and whatnot I was able to get all the valve cover bolts loose and pull the covers. I set the crank at the TDC mark and knocked the balancer bolt out too, but my puller just wasn't going to work for it so I have a buddy bringing one he's used on a 4.7 HO before tomorrow.


Basically once the balancer is off I can pull the front cover and we can do the timing set. FWIW the chains don't show any unusual slop and all the guides look great... but at this point no way I'm NOT doing the t-set. I think we'll do that first, then get the front cover back on and put on the new ATI damper then deal with the lash adjusters.


How things look now:

20200117_185731.thumb.jpg.175efd0a6a4f3d94d1f68287b1e5b6d2.jpg

20200117_185725.thumb.jpg.83ee3a0c9801b7f7c3155590dae7c92d.jpg

20200117_185623.thumb.jpg.3bbba3dd75d8da420b1cc23652cf421a.jpg

20200117_185639.thumb.jpg.14f5c5dd6f61cf84352514f92ac24609.jpg


This is the passenger side head, you can see the evidence of the valve cover leak on the lower rail and side of the head. This was the "better" side but I forgot to take pics of the driver's side before I cleaned up some:

20200117_185628.thumb.jpg.eee9743c97d321afec3f932474322bcf.jpg


As soon as I loosened the crank bolt, oil started leaking... so I'd say the front seal was actually pretty shot:

20200117_185645.thumb.jpg.ecbd52b46ac956afd1e73420ccbf3c4c.jpg


And there was actually some evidence even the front cover was leaking, which I didn't think was the case:

20200117_185651.thumb.jpg.a4a9bf1cc246c6d90de4f98e14afa608.jpg


I'm not sure if it shows in this pic, but there are some crankcase vent lines that run head to head at the back of the engine bay that are also really caked with oil... they're going to be a nightmare to get to and I don't see that you can get new formed to fit pieces... so I haven't decided exactly what to do about these yet:

20200117_185702.thumb.jpg.c7fc5129a82b03756e2e592eaa488857.jpg


Pretty ATI damper stuff:

20200117_201640.thumb.jpg.9a586fab9fbae7052255e8d263f4dc3f.jpg


And that's where the fun stops tonight.

-TJ
 
  • Like
Reactions: JimBill

MuloChico

Rank III
Launch Member

Enthusiast I

874
Modesto, Ca
First Name
Alan
Last Name
Hamilton
Member #

23356

Where the front cover was leaking is where my wife's WK leaked coolant really bad when the weather cooled off.Pulled the cover and resealed = no more leak.:grinning: Pretty common from what I've heard.
 

Seanm26

Rank IV
Launch Member

Enthusiast III

1,003
Lynden, WA, USA
First Name
Sean
Last Name
Moore
Member #

21121

That spot leaks on EVERY 3.7 and 4.7 liter.

Timing chain/guide failures are super rare on these engines. In my 9 years at the Mopar shop I didn't see one set get changed. The only time I, or any one in the shop, ever did it was at the Chrysler training center. If you are going to do it, I would suggest not using anything other than OEM parts.
 
  • Like
Reactions: Graeman

Seanm26

Rank IV
Launch Member

Enthusiast III

1,003
Lynden, WA, USA
First Name
Sean
Last Name
Moore
Member #

21121

Oh, when you reinstall the front crank pulley, apply thread locker to the inner diameter and the key slot. Oil gets wicked between the crankshaft and the pulley, thrn down in to the bolt threads. Doesn't mean your crank seal was leaking.
 

tjZ06

Rank V
Launch Member

Advocate I

2,268
Las Vegas/Palo Alto
First Name
mynameisntallowed
Last Name
Adams
Member #

20043

That spot leaks on EVERY 3.7 and 4.7 liter.

Timing chain/guide failures are super rare on these engines. In my 9 years at the Mopar shop I didn't see one set get changed. The only time I, or any one in the shop, ever did it was at the Chrysler training center. If you are going to do it, I would suggest not using anything other than OEM parts.
Best I can tell, you were 110% right and I had zero reason to do the t-set... but I did anyway (the t-set was Cloyes, without going to a dealer I didn't see actual Mopar parts available). Details below...

Oh, when you reinstall the front crank pulley, apply thread locker to the inner diameter and the key slot. Oil gets wicked between the crankshaft and the pulley, thrn down in to the bolt threads. Doesn't mean your crank seal was leaking.
Great advice, thanks!

-TJ
 

tjZ06

Rank V
Launch Member

Advocate I

2,268
Las Vegas/Palo Alto
First Name
mynameisntallowed
Last Name
Adams
Member #

20043

Got some good work done. Started at a decent time this morning... for a Saturday, and quit 3 or 4 hours ago (to go help a buddy on a stereo install on his '17 RAM). So here's how it looks:

20200118_182433.thumb.jpg.b7cf3c7bfbbdf59ee6ece279a904cee4.jpg

What's that you say? It basically looks like yesterday, other than those fancy trash-bag-valve-covers? Well, looks can be deceiving. The main things I got today were:

  • Complete timing set replaced. All 3 chains. All guides. All tensioners
  • All 16 hydraulic lash adjusters replaced
  • Spark plugs changed
  • Some of the stuff that was already on before, put back on again and torqued (water pump, t-stat housing, etc.)
I really wanted to get a bit more done, but I ran into a few hold-ups...

I had a buddy helping for a bit, and he managed to crack the plastic for the connector on one fuel injector when working on the lash adjusters. Not blaming him, just saying it is what it is. I was able to source an injector locally... but after picking it up I had some second thoughts. The replacement injector cross-references to a LOT of different part numbers for all sorts of different 4.7s. But the HO has a 3.3 lbs/hr higher low-rate injector, and was only available in the GCs and I think some Dakotas/Rams. I don't think the HO was ever in Durangos, for example. But this injector I got is said to replace part numbers that include non-HO 4.7 JGCs, various Durangos, etc. To me, that's a problem since 3.3 lbs/hr is a significant lbs/hr difference, and I really don't want one hole to be 10-15% lean compared to the rest if it's actually the non-HO flow rate. So now I have to decide what I want to do about it... do I wait 'til Monday and go to a Chrysler part counter and see if I can get an OEM injector? Do I get 8 new injectors that are the correct flow rate so I know it's balanced? The injector I pulled out is a 2-hole, the later 4-holes are said to run a bit smoother and stuff so if I'm ever going to do that swap... now would be the time I guess.

Next, the actual pulley that came w/ the ATI damper is the under-drive pulley. They offer an OEM-diameter and an 25% under-drive. I wanted OEM, since this isn't a high RPM application where you need to turn the accessories (particularly the PS pump) slower to reduce heat build-up, or you're just trying to save every HP. However, it will spend lots of time idling down the trail where I want to be moving water at the OE-rate, and I also want the PS-pump producing enough pressure to turn larger-than-stock tires even at idle. I should have noticed it yesterday when I opened up the box and took the pics (in my post above)... but I didn't. It wouldn't have made a difference anyway since I doubt they would have over-nighted me the right one.

Finally, I decided not to throw the valve covers back on yet, since I have a buddy with a blast-cabinet that can get them good 'n clean and I can hit 'em with a little paint (yeah, I'm that cool). I probably should have cleaned the outside of the front-cover a bit more too... but I can get some of that tomorrow with it on the engine. I did clean the inside (especially the sealing surfaces) very well w/ parts cleaner and some scotch brite.

Oh, one nice thing: I didn't need a single one of the "specialty" tools I bought for this thing... so I can return like $400 of tools (bought 'em through Amazon so that makes it nice and easy.


-TJ
 

tjZ06

Rank V
Launch Member

Advocate I

2,268
Las Vegas/Palo Alto
First Name
mynameisntallowed
Last Name
Adams
Member #

20043

Here's some of the actual work getting done, I didn't get pics of much after a certain point since we were just getting things done, but here's some stuff...

The old front-cover gasket that actually showed lots of signs of leaking (note it's the 1-piece style, so that's what I put back in):

20200118_095929.thumb.jpg.dc72fa19d809bf132d87ae8da33a6259.jpg

20200118_095935.thumb.jpg.c1bb9804c8fb1f34f94c7a0ddde69d36.jpg

20200118_095959.thumb.jpg.4b41dc6b4f18fea4b44353f3561659e6.jpg


Old timing set, it all actually looked really good and did not need replaced at all... but hey I was there, right?

20200118_102213.thumb.jpg.46036e7e9984d4d4a12213f62eae0af8.jpg

20200118_102320.thumb.jpg.c652d24a71f5f2caadb9a924f5ae8361.jpg


Setting up the timing set on the bench ahead of install:

20200118_101603.thumb.jpg.2963ef5ae33570ba374994f7ad3fa929.jpg

20200118_101610.thumb.jpg.60be307ab7c180039dca285686e1f9cb.jpg

20200118_101611.thumb.jpg.5bdc66f154e7c8bf820b82b302d115d0.jpg

20200118_101616.thumb.jpg.0af983eda4f41efdc96870816476869c.jpg

I would explain what you're seeing, but there are YT videos that do it better... but getting it right on the bench first was key.


-TJ
 

tjZ06

Rank V
Launch Member

Advocate I

2,268
Las Vegas/Palo Alto
First Name
mynameisntallowed
Last Name
Adams
Member #

20043

Old stuff mostly out of the way:


20200118_103434.thumb.jpg.d4f34cc1a71a9e0f01efff997127816c.jpg


(yes, vice-grips on the cams... don't worry they're not on a lobe or journal)


Everything back together:


20200118_114912.thumb.jpg.1a0e57640d7dcdbea7cc0c6477d2ac81.jpg


Got a pic of each witness mark to know it was in-time (and yes, this was BEFORE I cleaned the block mating surface for the t-cover):


20200118_114926.thumb.jpg.54579aa2b86cc669c371921bb3b4493c.jpg


20200118_114920.thumb.jpg.74eb09e9fa37ed170b8261362dc67580.jpg


20200118_114917.thumb.jpg.81a68f08f4386d82438ff9e355c628d1.jpg


20200118_114915.thumb.jpg.493c4fa2f21721c9ba219199326ce3ed.jpg


20200118_114936.thumb.jpg.cc0beca3f3e2cce55ab8e5581c70d947.jpg


20200118_114931.thumb.jpg.5656554bb64da0f468c8e8f948591618.jpg

Spun it over two full revolutions and made sure the cams, crank pulley and idler all came back to their dots (the colored links will no longer necessarily line up at that point). And all was good!

I totally failed on getting a single pic during they hydraulic lash adjuster replacement, so here's a vid showing it:


1579413977968.gif
I made a little tool from a 10mm just like he did (vs. using the Chrysler thing that looked like a nightmare) and let me say, his engine bay is cleaned up and wire-tucked way more so it was actually way more of a bi... big job than he makes it seem.


The funny thing, is best I can tell every single one was good. From every vid and such I've seen of doing this job, even low-ish mileage, well-maintained 4.7s have at least one starting to fail. All of mine were great. At the same time we could tell this motor hasn't been apart before and this job hadn't been done. I guess that gives me a good feeling... but between these being fine and the t-set being great it does have me wonder a little "why the hell did I do all of that?"

I changed the plugs too. After cleaning up around the spark-plug holes and blowing them out we removed the plugs so it was easier to spin the engine over and get the cam lobes where we needed for the lash adjusters (we did this after we had already done the timing set). I got Champion Platinum plugs (OEM spec) and gaped each one to the OE 0.040 (they mostly ranged from 0.042-0.046 coming out of the box). I checked the gaps on the plugs I pulled out, which if I had to bet were the original plugs, and they ranged from 0.057-0.064. As is often the case with platinum plugs, eventually the platinum tip erodes away. It's not a sign of anything going wrong, and was really common on the LS stuff I used to do all the time. I meant to take a pic of a few plugs, they're still in the garage garbage so maybe I will tomorrow, but they were consistent and "read" just fine. Of course, to truly read a plug you need to go WOT and kill the ignition at the end of a pass... but for reading a set of plugs that had mostly idled the last few runs, I did what I could. If you're interested in my silly $0.02 on plug-reading, I wrote something up a while ago over here: Spark Plug Reading... - Dune and Dirt

Oh well, once I straighten out the issues I mentioned before at least it's all going back together at this point. So, I'm finally getting to the original job: replace the radiator, lol. I won't be doing anything on it tomorrow though, it's my BDay and I'm sleeping in, watching the Niner game and relaxin!

-TJ
 
Last edited:
  • Like
Reactions: JimBill

Disco Patrol

Rank V
Launch Member

Advocate III

1,961
Oneida, NY
First Name
David
Last Name
Cruz
Member #

10269

Service Branch
USAF Retired
Just wanted to say thanks for all of the pics. I'm a visual learner and seeing the motor torn apart helps me out. Good work so far!
 

tjZ06

Rank V
Launch Member

Advocate I

2,268
Las Vegas/Palo Alto
First Name
mynameisntallowed
Last Name
Adams
Member #

20043

Left a VM with the vendor I got the ATI from, hopefully they'll get the right pulley on the way ASAP.

Also figured out the injector situation. I'm going to return the 1 injector I got for $40 and got a full set of 8 rebuilt and balanced Denso 12582704 injectors for $80. The Densos are a 12-hole design (vs. the stock 2-hole in my '03, or the 4-hole that I got from the parts store) and are *said* to help a bit with atomization (and thereby fuel economy and idle smoothness). I kind of doubt they'll make a noticeable difference, but hey I guess it's just one more set of new parts going in "while I'm in there."
;)


-TJ
 

adventure_is_necessary

Rocky Mountain Region Local Expert Kansas
Member

Traveler III

4,007
Bonner Springs, Kansas, United States
First Name
Lucas
Last Name
Antes
Member #

7082

Ham/GMRS Callsign
KE0ZXA
Left a VM with the vendor I got the ATI from, hopefully they'll get the right pulley on the way ASAP.

Also figured out the injector situation. I'm going to return the 1 injector I got for $40 and got a full set of 8 rebuilt and balanced Denso 12582704 injectors for $80. The Densos are a 12-hole design (vs. the stock 2-hole in my '03, or the 4-hole that I got from the parts store) and are *said* to help a bit with atomization (and thereby fuel economy and idle smoothness). I kind of doubt they'll make a noticeable difference, but hey I guess it's just one more set of new parts going in "while I'm in there."
;)


-TJ
Let me know how those new injectors work. For that price, I'd be willing to give them a shot.