Wolverine RVGP
- Thread starter The Crow
- Start date


Enthusiast III
Thanks. No sorry, not on FB. This is the first place I posted.Great work! Nice to see the timeline of all of this! Do you have and social channels that this trailer build is featured on? IG? FB?
Super cool!

Educator I
- 10,890
- First Name
- Jim
- Last Name
- Bro
- Member #
-
12989
- Service Branch
- USAF DAV
So my next step was to paint the trailer. Army green of course. I also added a roof vent, side vents and some fuel cans...
What fuel can is that?
Enthusiast III
It’s made by Scepter. Same ones the Canadian military use, good quality.So my next step was to paint the trailer. Army green of course. I also added a roof vent, side vents and some fuel cans...
What fuel can is that?
Military Fuel, Water Containers & Ammunition Containers - Scepter
Scepter's commitment to excellence carries out into the battlefield - Lighter- Rugged - Safer ammunition, water & fuel containers - Scepter is trusted globally
 scepter.com
Educator I
- 10,890
- First Name
- Jim
- Last Name
- Bro
- Member #
-
12989
- Service Branch
- USAF DAV
Yep, hard to get in the US...... For a decent price at least.It’s made by Scepter. Same ones the Canadian military use, good quality.
Military Fuel, Water Containers & Ammunition Containers - Scepter
Scepter's commitment to excellence carries out into the battlefield - Lighter- Rugged - Safer ammunition, water & fuel containers - Scepter is trusted globally
Jim

Off-Road Ranger I
- 4,418
- First Name
- Shahn
- Last Name
- Brown
- Member #
-
29302
- Ham/GMRS Callsign
- GMRS - WRQD549
Off-Road Ranger I
- 4,418
- First Name
- Shahn
- Last Name
- Brown
- Member #
-
29302
- Ham/GMRS Callsign
- GMRS - WRQD549
Enthusiast III
Yes.Did you get the fuel holders also from Princess Auto?
Enthusiast III
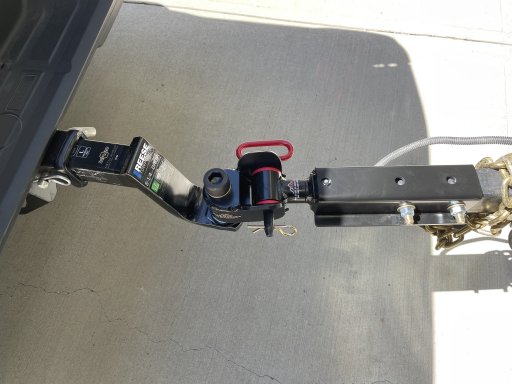
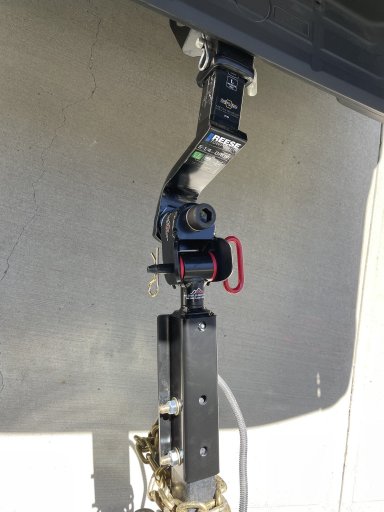
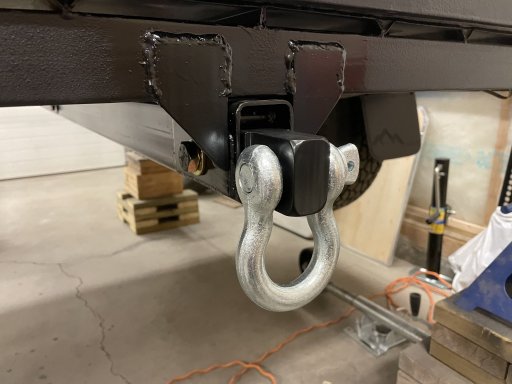
Another important part of the trailer would be to have a fully articulating hitch. If I was going to be able to travel over any rough terrain I didn't want the worry of my hitch binding or becoming damaged. Also on steep lateral inclines it helps prevent the trailer from influencing the truck, or vice versa. There are a few different ones on the market to choose from, for this I decided to go with a Max Coupler...
Attachments
-
 466.4 KB Views: 7
 -
 470 KB Views: 9
 -
 972.3 KB Views: 9
Enthusiast III
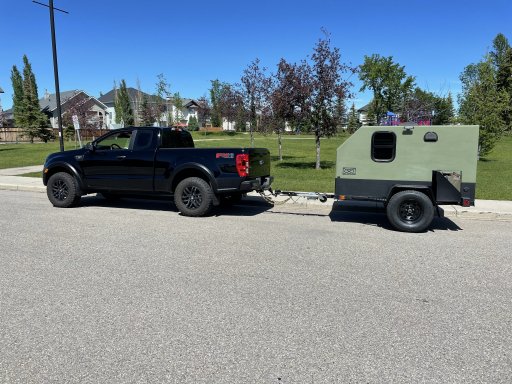
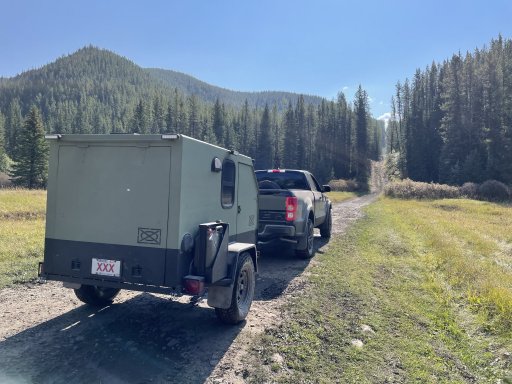
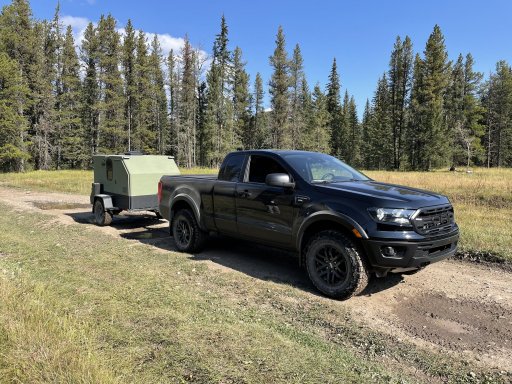
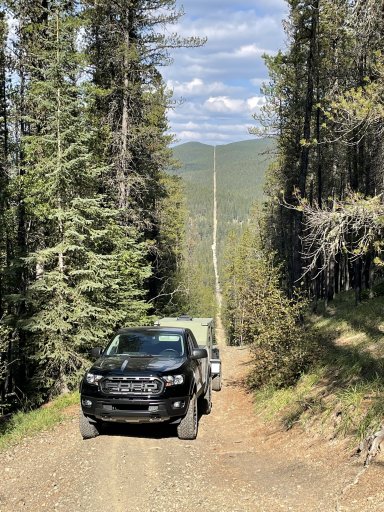
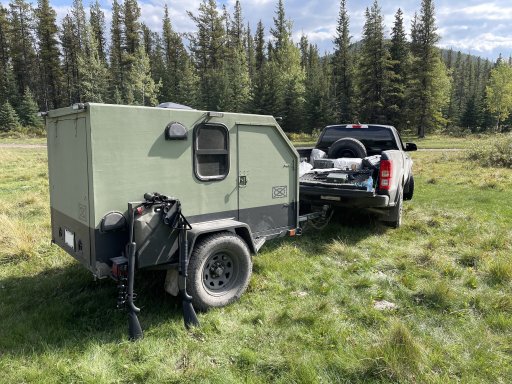
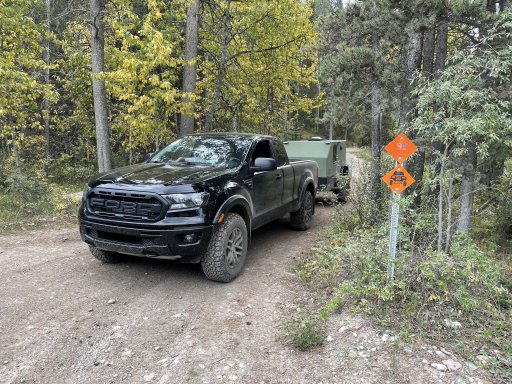
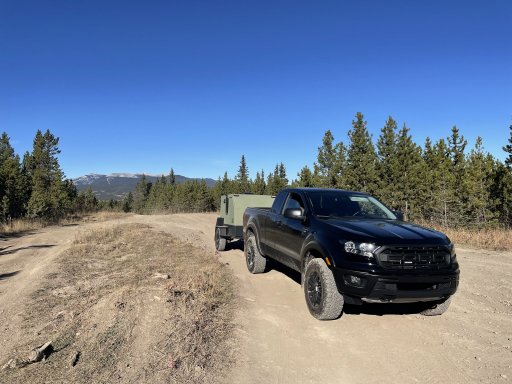
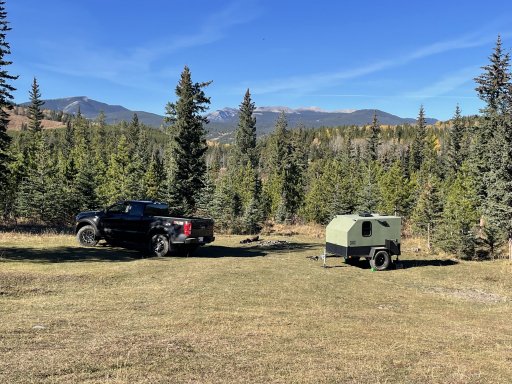
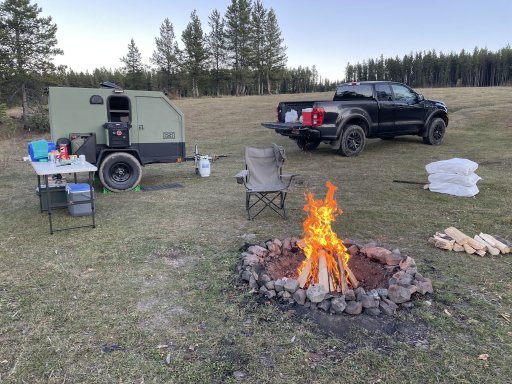
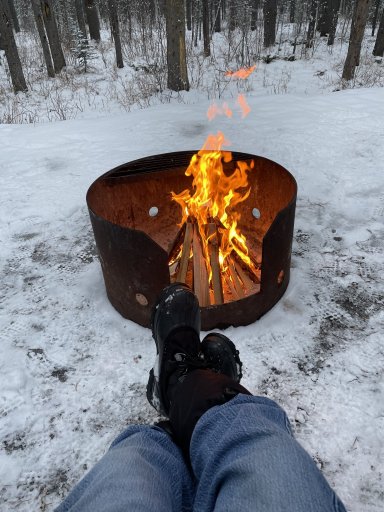
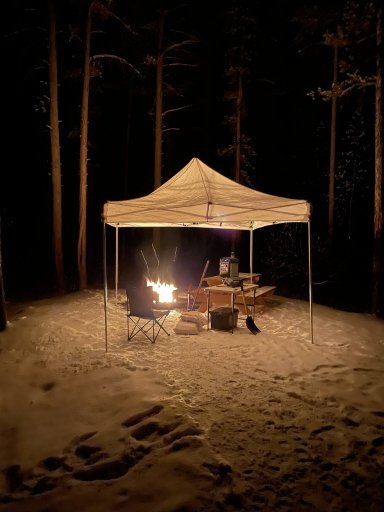
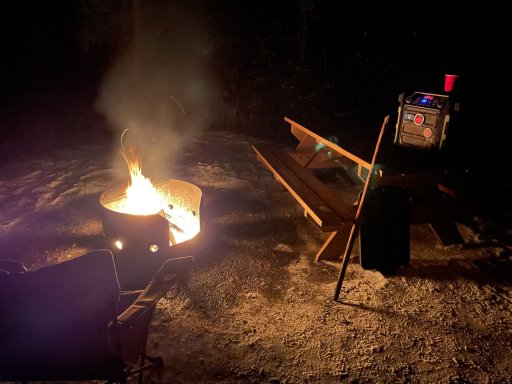
So that pretty much concluded my work on the Wolverine for the early part of 2022. The next phase of the project will be to triangulate the trailer tongue so I have a place to mount the spare tire, some batteries and a small propane tank. Hoping to start that this spring. In the mean time, here's a few pictures of some camping trips on crown land from this past summer. Cheers!...
Attachments
-
 757.9 KB Views: 8
 -
 1.2 MB Views: 9
 -
 1 MB Views: 8
 -
 1.1 MB Views: 8
 -
 1.3 MB Views: 9
 -
 675.6 KB Views: 8
 -
 901 KB Views: 9
 -
 980.9 KB Views: 9
Enthusiast III
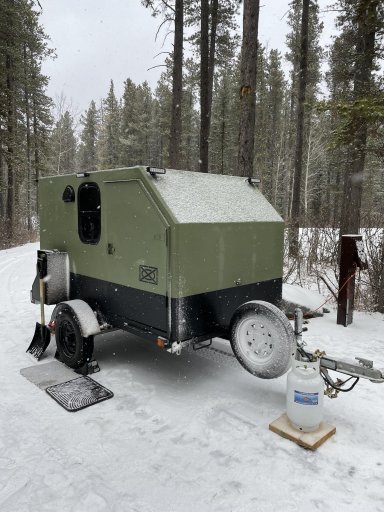
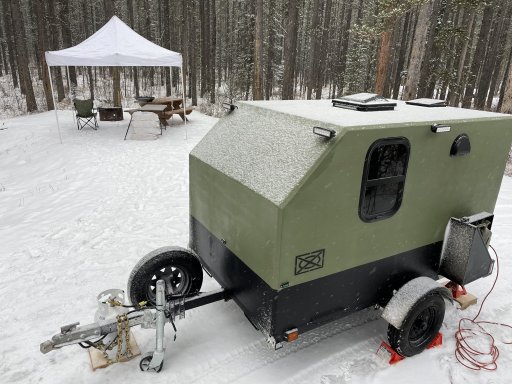
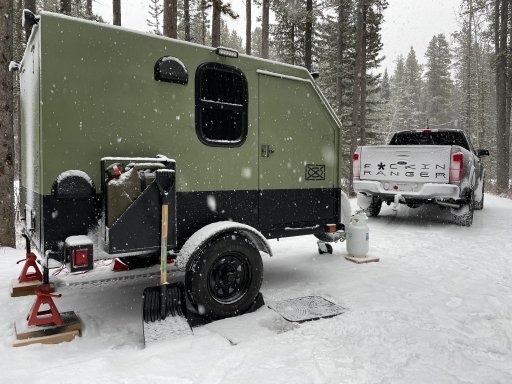
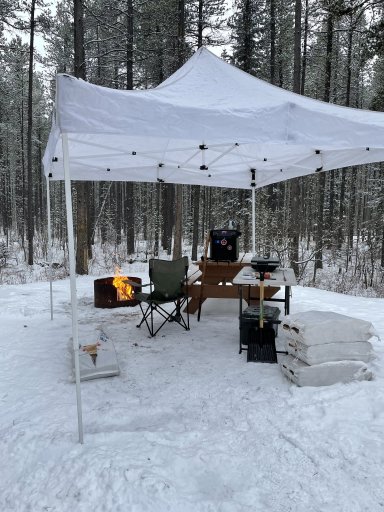
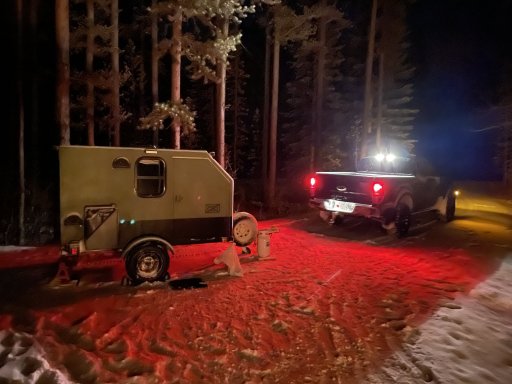
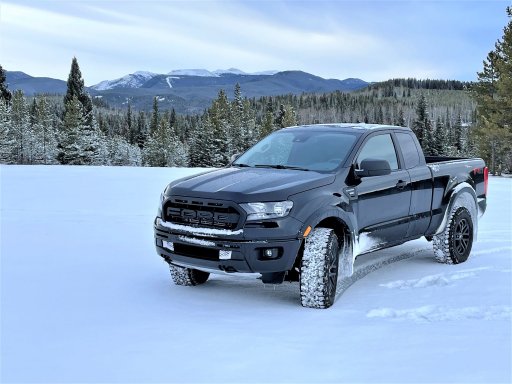
Also in case anybody's wondering, it works great in winter as well. Heating was just using a little propane Buddy heater, or can use a smal electric space heater. Works great. A few pics from the previous winter, I hadn't upgraded the suspension yet at this point...
Attachments
-
 748.7 KB Views: 8
 -
 701.5 KB Views: 9
 -
 665.8 KB Views: 10
 -
 786.5 KB Views: 11
 -
 638 KB Views: 11
 -
 403.1 KB Views: 9
 -
 491.9 KB Views: 10
 -
 478 KB Views: 9
 -
 479.2 KB Views: 9
 -
 491 KB Views: 7
Enthusiast III
looking good, i like your build. i did something similar with the bedframe, it is nice not to be directly on the floor and have some storage under the bed so that you don't have to move everything outside just to go to sleep.
how do you like your articulating hitch? i've been looking at a couple to determine what options i want to go with and wanted some real world feedback.
how do you like your articulating hitch? i've been looking at a couple to determine what options i want to go with and wanted some real world feedback.
Enthusiast III
Works great. Compared to the lock n roll it seemed simpler and I didn’t have to try and guess which of their parts I needed on the vehicle side. I could just bolt to any regular hitch mount that I already had.looking good, i like your build. i did something similar with the bedframe, it is nice not to be directly on the floor and have some storage under the bed so that you don't have to move everything outside just to go to sleep.
how do you like your articulating hitch? i've been looking at a couple to determine what options i want to go with and wanted some real world feedback.
Enthusiast III
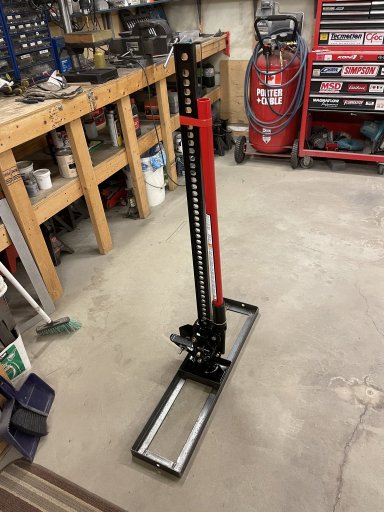
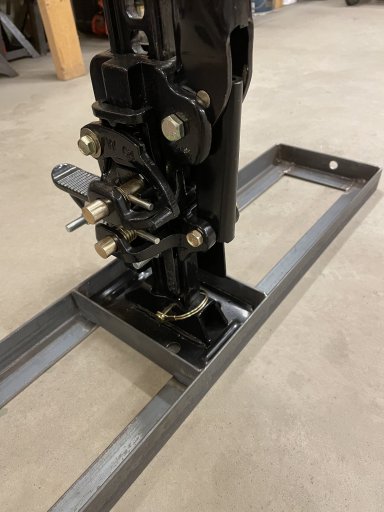
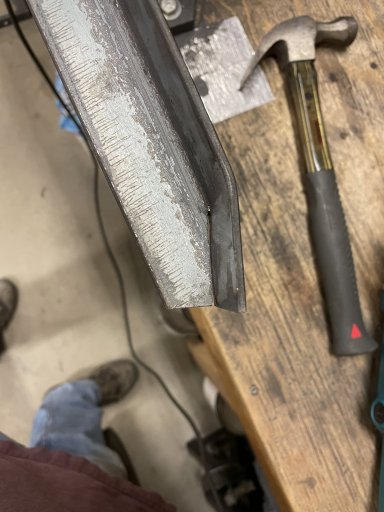
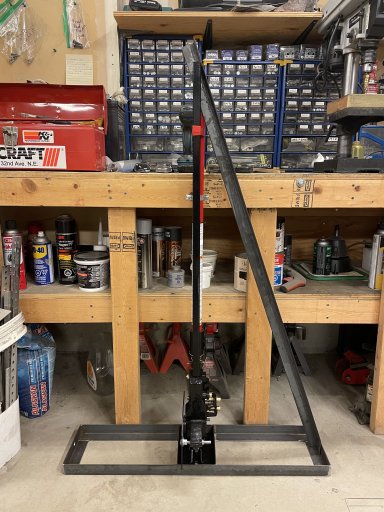
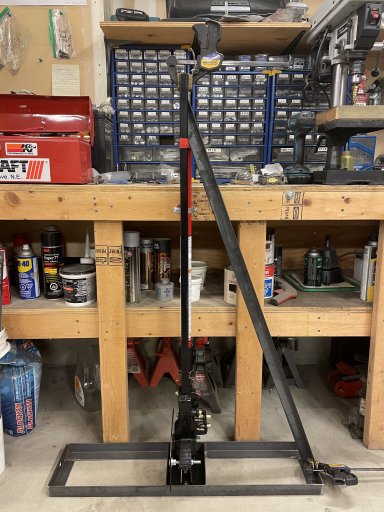
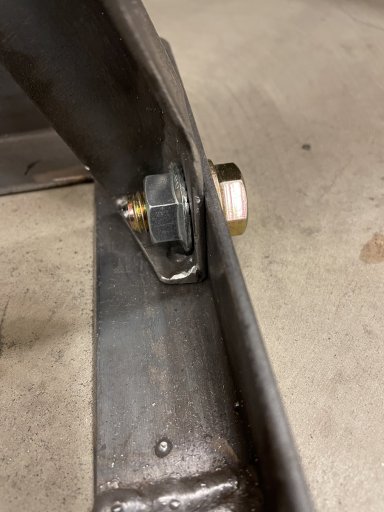
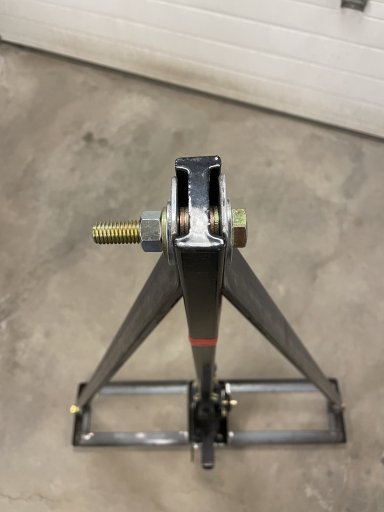
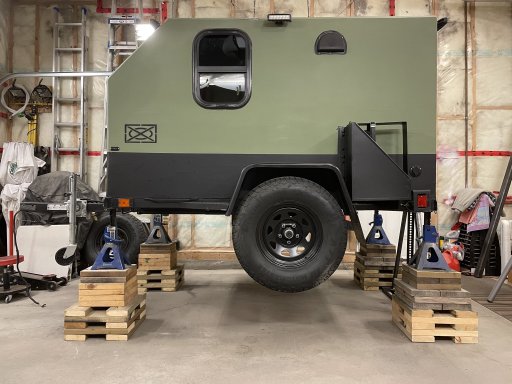
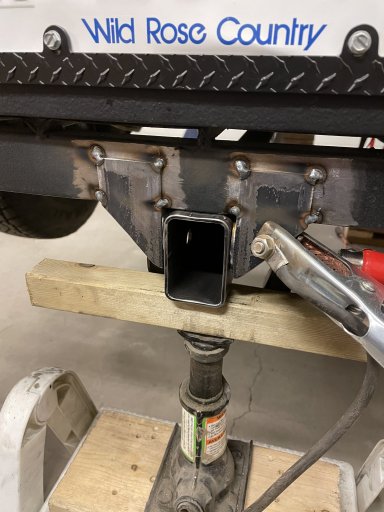
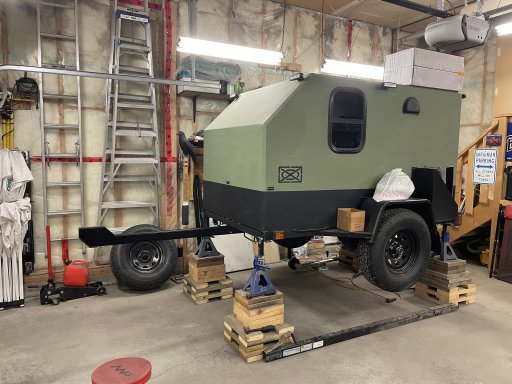
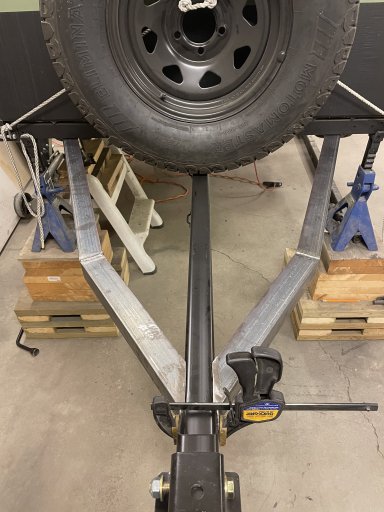
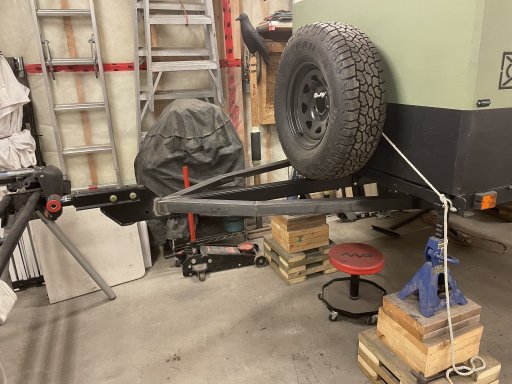
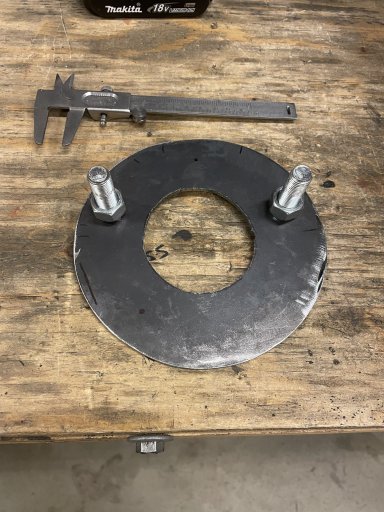
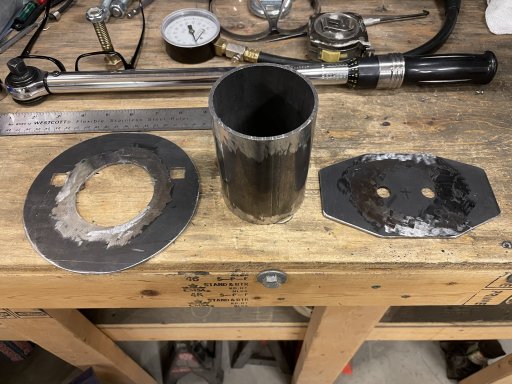
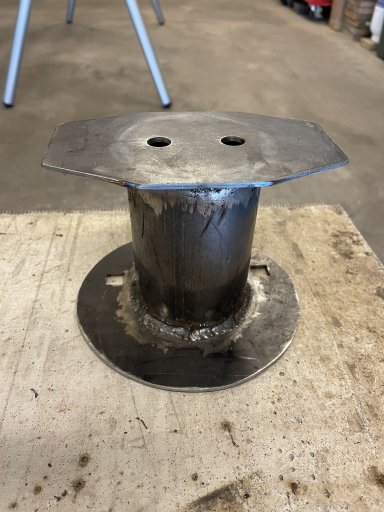
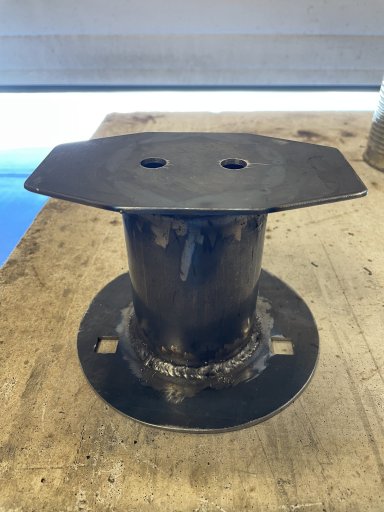
Hey there, been a while since I posted. So to get caught up, last spring I decided I wanted to triangulate the hitch. The original was a single main beam that only went half way under the frame. I wanted to run a new main beam the full length to the rear where I could add a tow shackle, as well as add a triangular frame at the front. This would allow me a place where I could mount the spare tire, a battery box to house two 6 volt batteries, and an 11 lb propane tank. In order to do all that I would need to raise the trailer up high enough to allow me to work underneath it. So my first step was to weld together a stabilizer for my Hi-lift jack. Starting with a base plate...
Attachments
-
 556.9 KB Views: 1
 -
 688.4 KB Views: 1
 -
 745.8 KB Views: 1
 -
 654.3 KB Views: 1
 -
 772.2 KB Views: 1
 -
 786.1 KB Views: 1
 -
 489.6 KB Views: 1
 -
 554.7 KB Views: 1
 -
 659.7 KB Views: 1
 -
 441.1 KB Views: 1
 -
 592.1 KB Views: 1
Enthusiast III
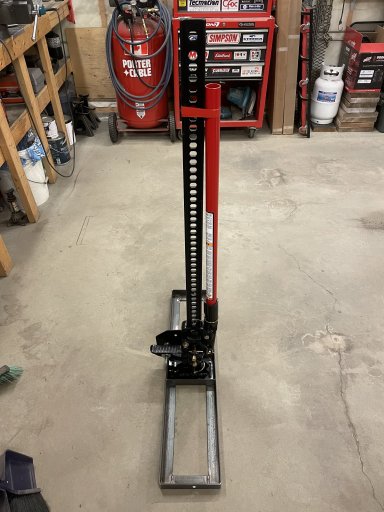
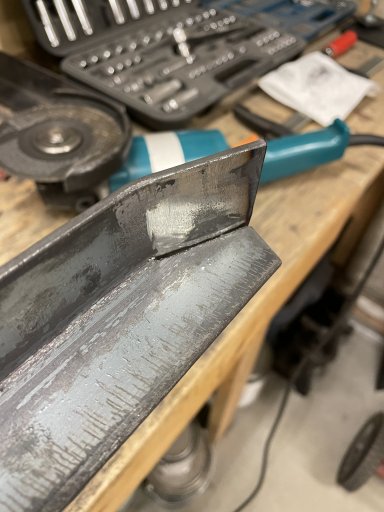
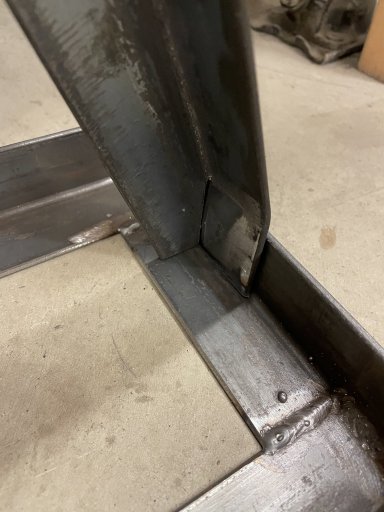
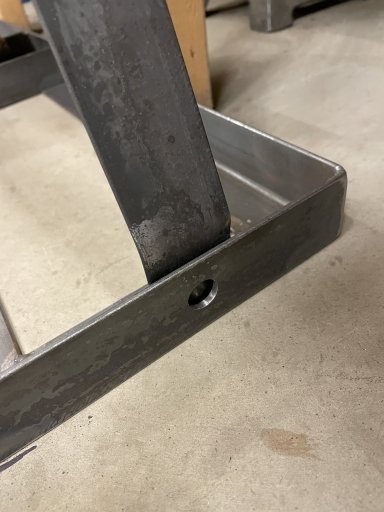
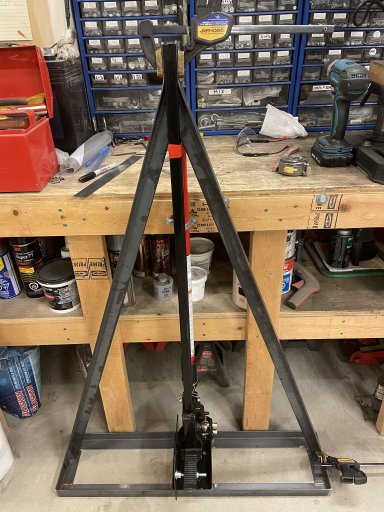
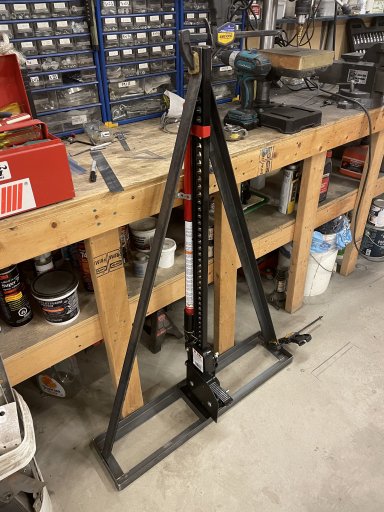
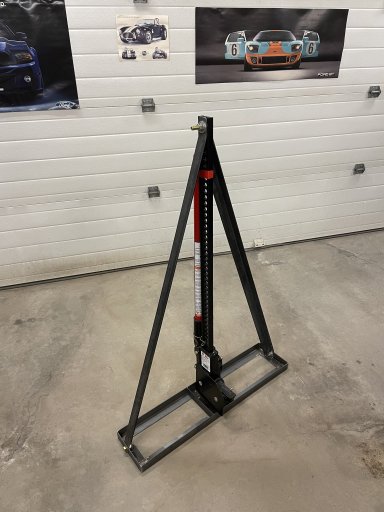
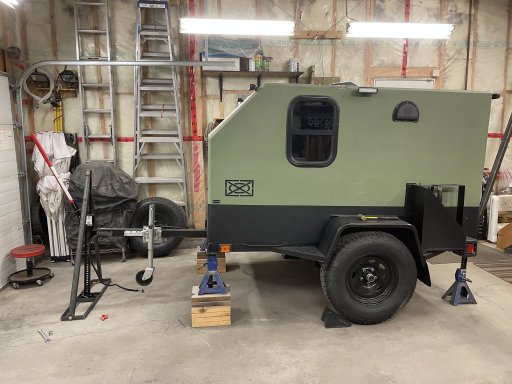
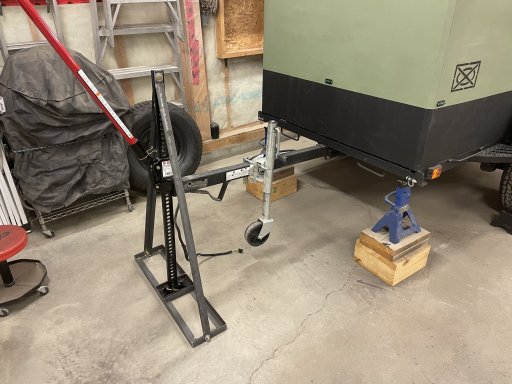
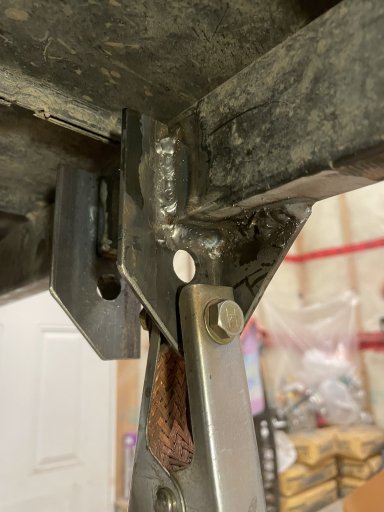
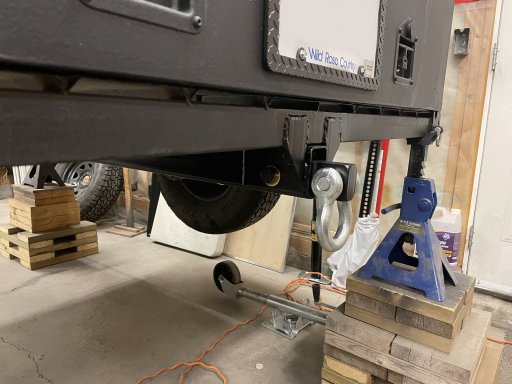
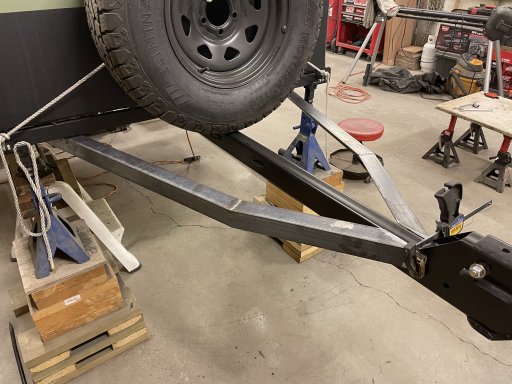
After that I added some diagonal supports. Then I could go ahead and jack the trailer up a bit at a time, front and back, to set it up onto blocks and jack stands.
Attachments
-
 460.9 KB Views: 1
 -
 493 KB Views: 1
 -
 687.2 KB Views: 0
 -
 507.7 KB Views: 0
 -
 458.9 KB Views: 0
 -
 669 KB Views: 0
 -
 674 KB Views: 0
 -
 679.8 KB Views: 0
 -
 480.8 KB Views: 0
 -
 319.6 KB Views: 0
 -
 555.3 KB Views: 1
 -
 538 KB Views: 1
 -
 566.6 KB Views: 1
 -
 529.7 KB Views: 1
Enthusiast III
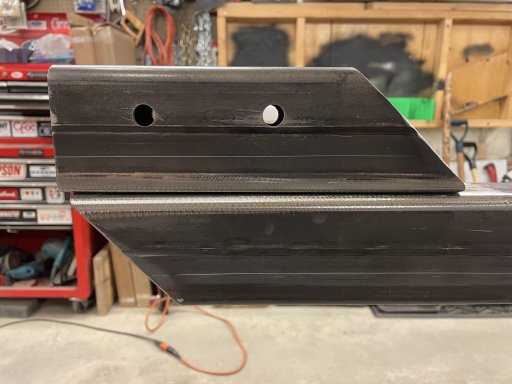
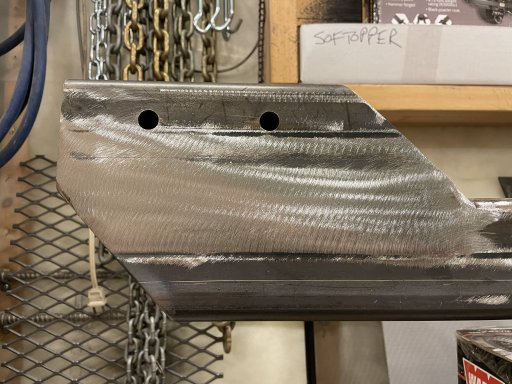
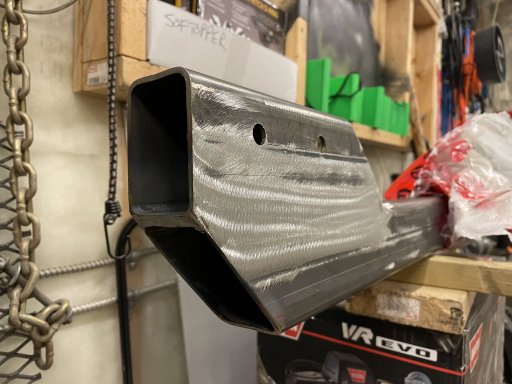
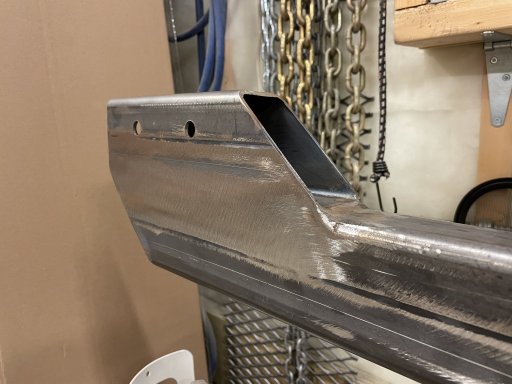
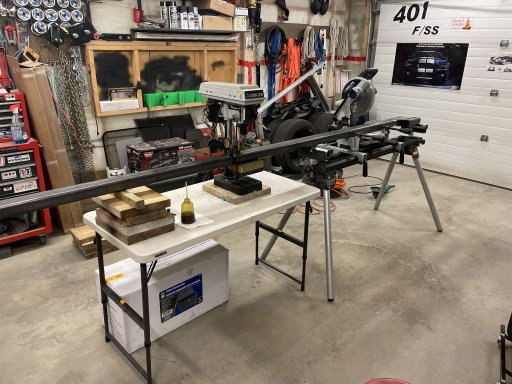
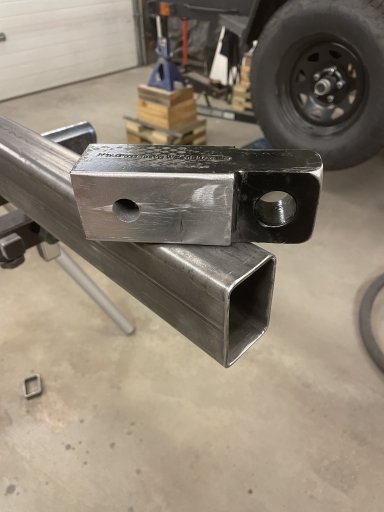
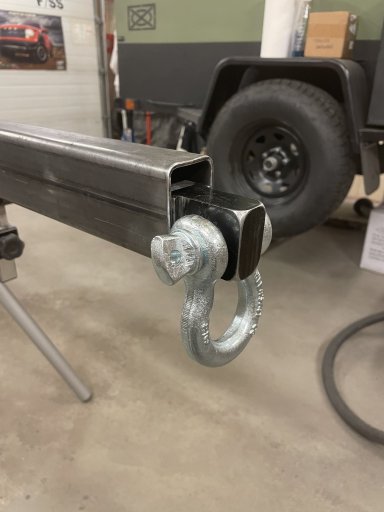
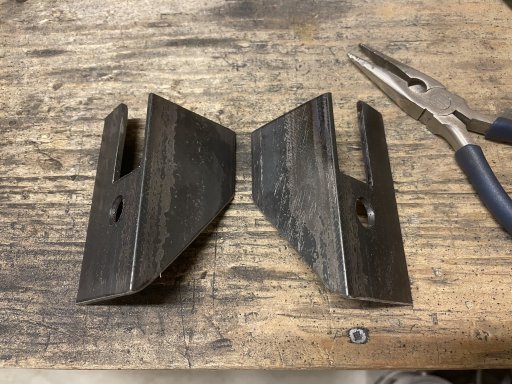
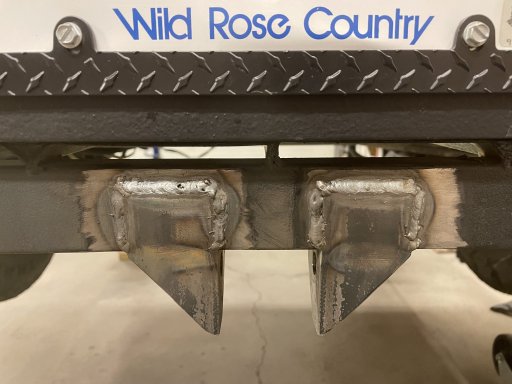
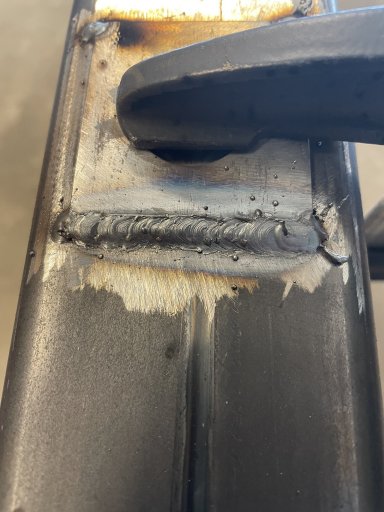
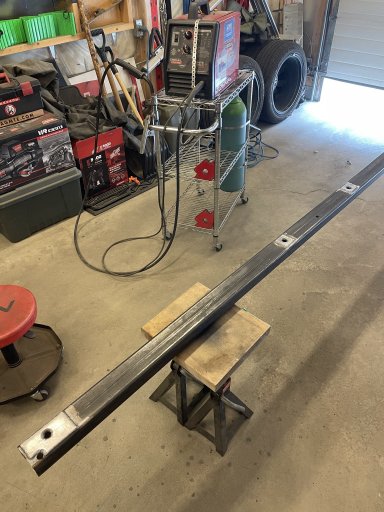
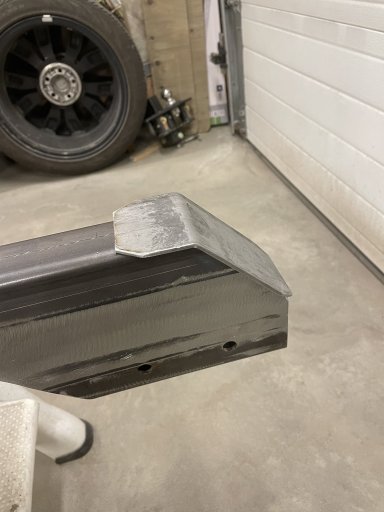
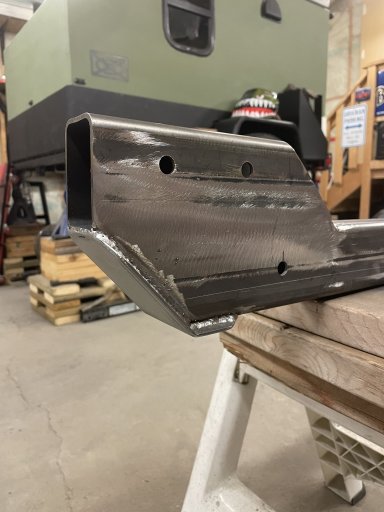
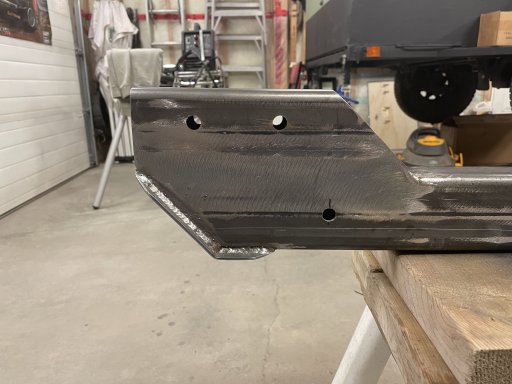
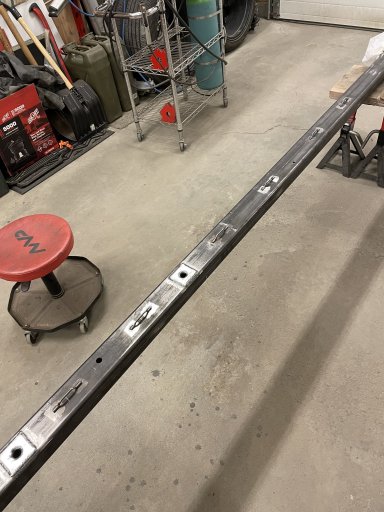
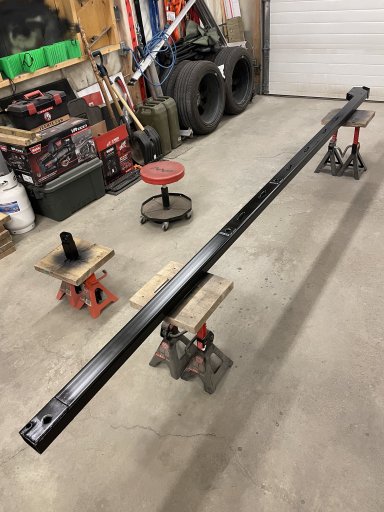
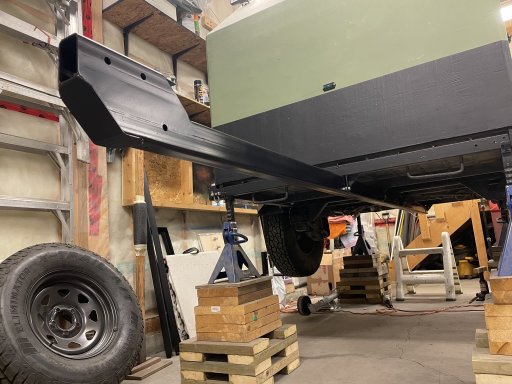
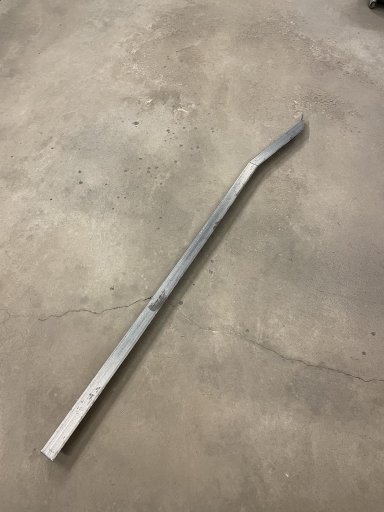
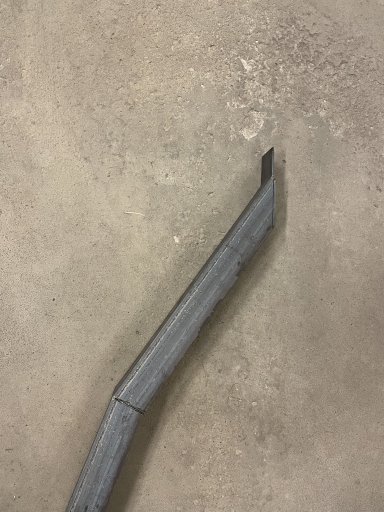
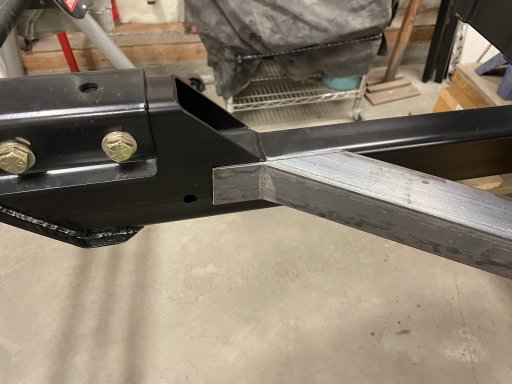
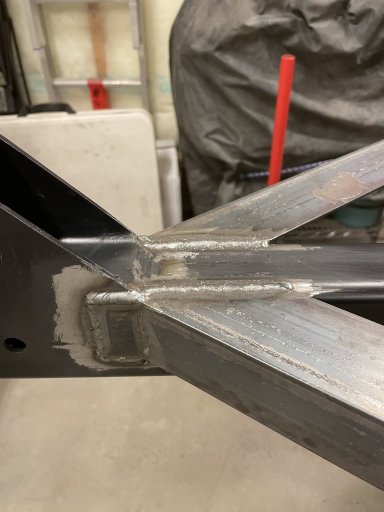
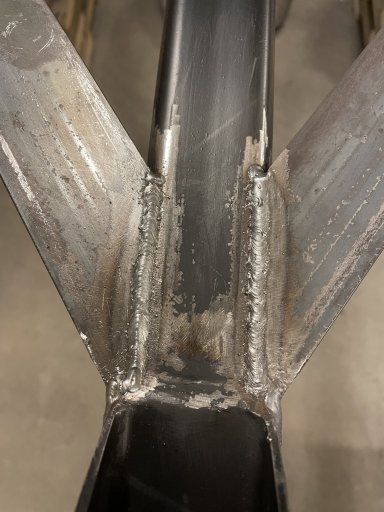
So with the trailer raised up I started work on the new main beam. I went with a 2" x 3" steel rectangle with a 1/8" thickness from Metal Supermarkets (great place to get your materials). I wanted a higher offset where the hitch bolted to on the front to give even more ground clearance at the hitch so added a section on top. Also added brackets where the main beam would bolt to the frame at the rear...
Attachments
-
 463.1 KB Views: 1
 -
 717.8 KB Views: 1
 -
 458.8 KB Views: 1
 -
 430.8 KB Views: 1
 -
 634.4 KB Views: 1
 -
 439.9 KB Views: 1
 -
 372.6 KB Views: 1
 -
 347.7 KB Views: 1
 -
 807.9 KB Views: 1
 -
 418.3 KB Views: 1
 -
 453.7 KB Views: 1
 -
 470.2 KB Views: 1
 -
 425.2 KB Views: 1
 -
 441.6 KB Views: 1
 -
 421.5 KB Views: 1
Enthusiast III
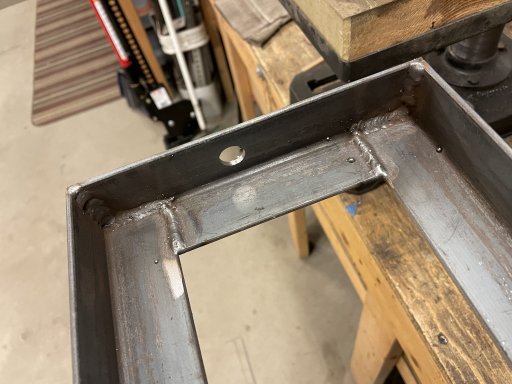
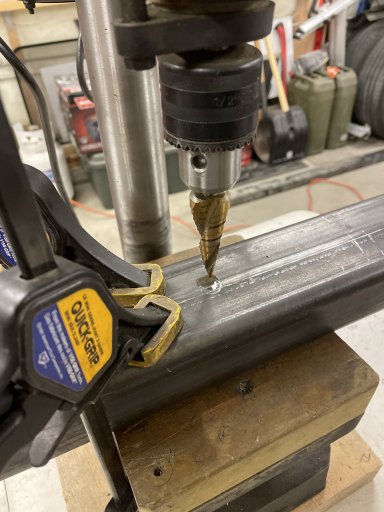
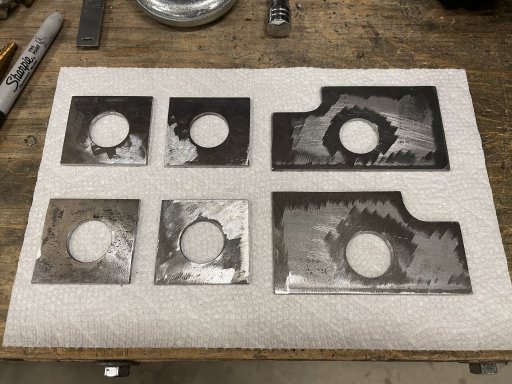
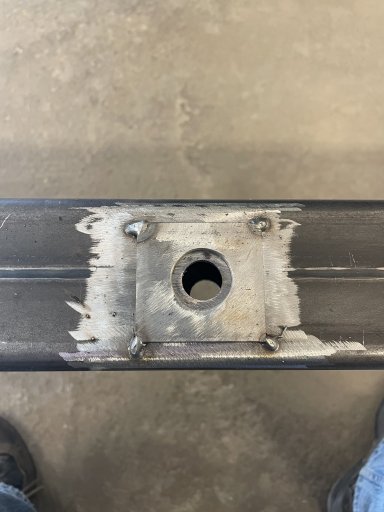
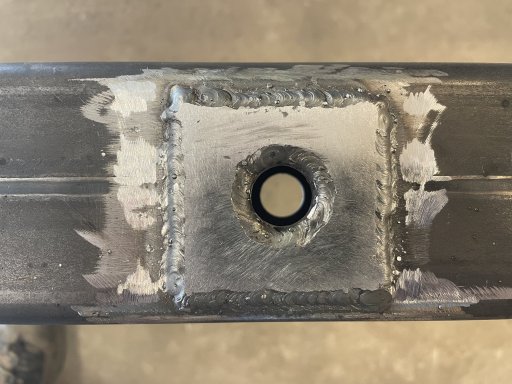
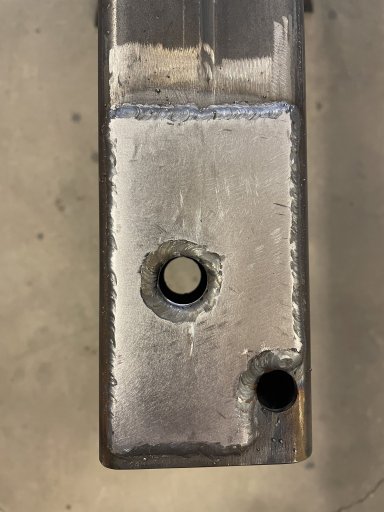
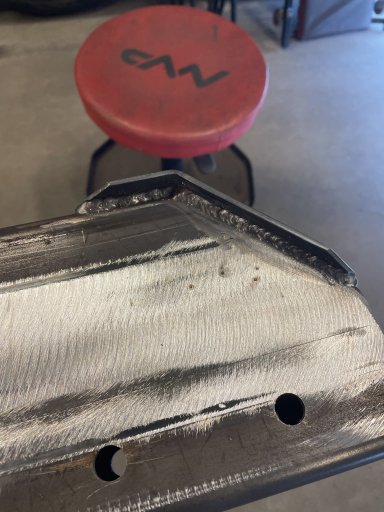
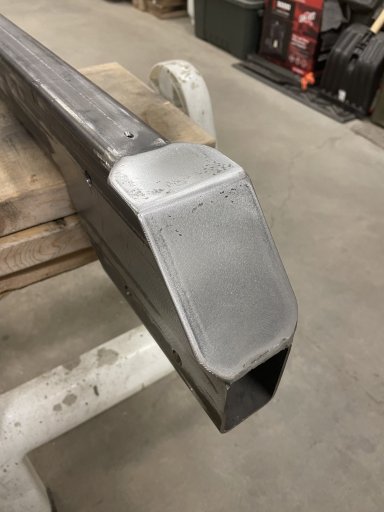
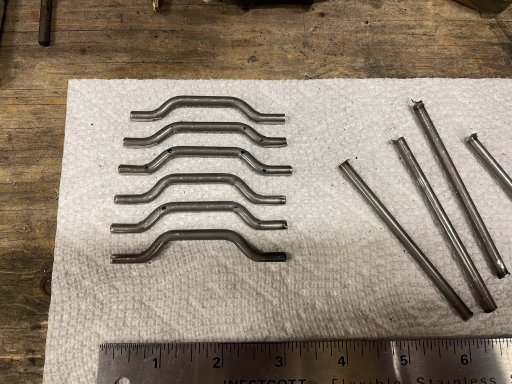
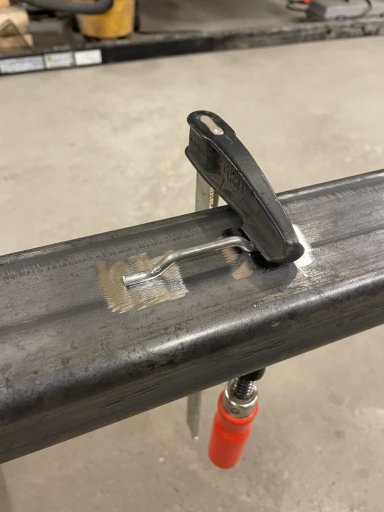
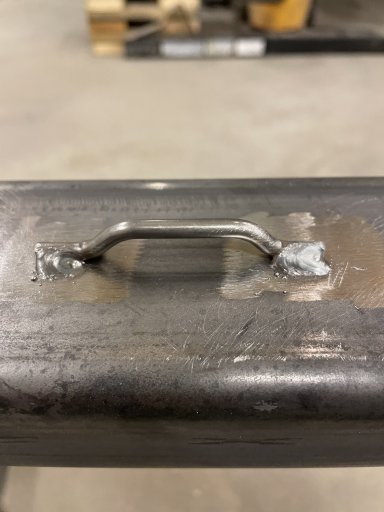
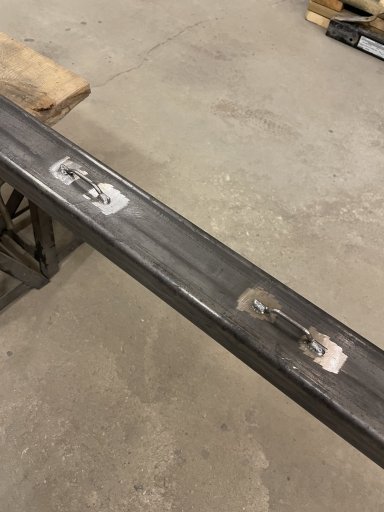
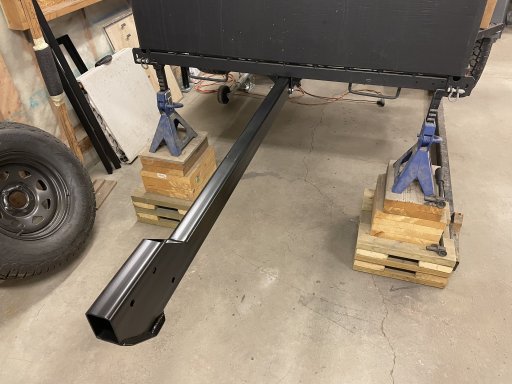
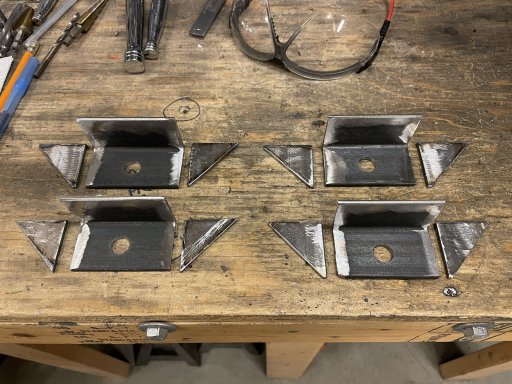
Next I drilled all the holes where the beam would bolt to the frame's existing brackets that were underneath the trailer. Also decided to add some reinforcing plates to all the hole locations for added strength. A small front skid plate and some little loops for future line attaching points welded on and I hit it with some semi-gloss black Tremclad spray paint (love that stuff)
Attachments
-
 719.6 KB Views: 1
 -
 487.3 KB Views: 1
 -
 690.9 KB Views: 1
 -
 552.9 KB Views: 1
 -
 591.8 KB Views: 1
 -
 695.5 KB Views: 1
 -
 386.5 KB Views: 1
 -
 615.1 KB Views: 1
 -
 400 KB Views: 1
 -
 421.5 KB Views: 1
 -
 463.7 KB Views: 1
 -
 758.2 KB Views: 1
 -
 419.4 KB Views: 1
 -
 419.8 KB Views: 1
 -
 453.3 KB Views: 1
 -
 642.4 KB Views: 1
 -
 651 KB Views: 1
Enthusiast III
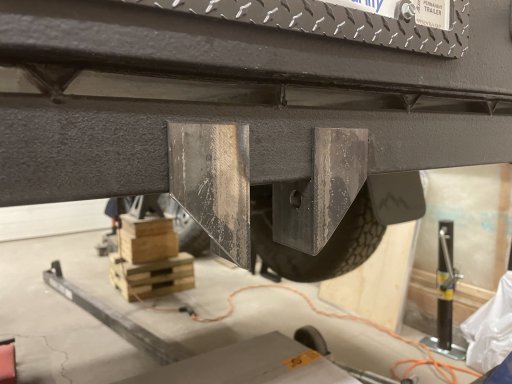
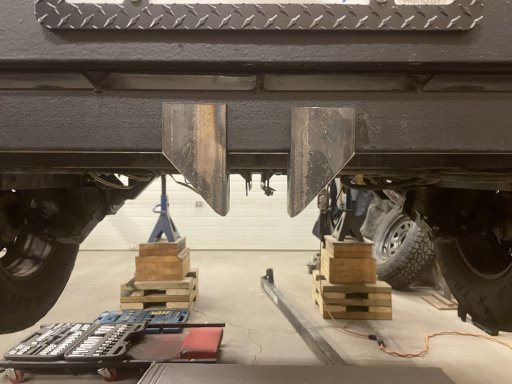
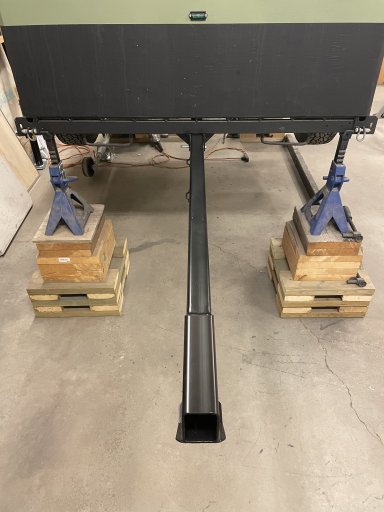
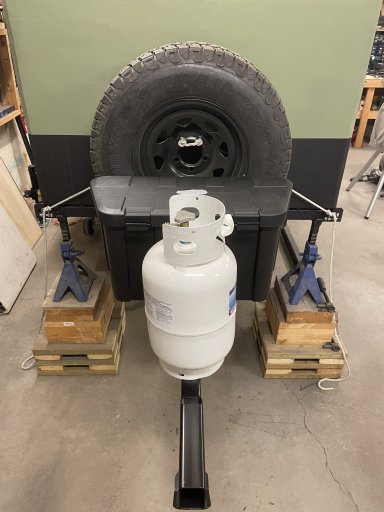
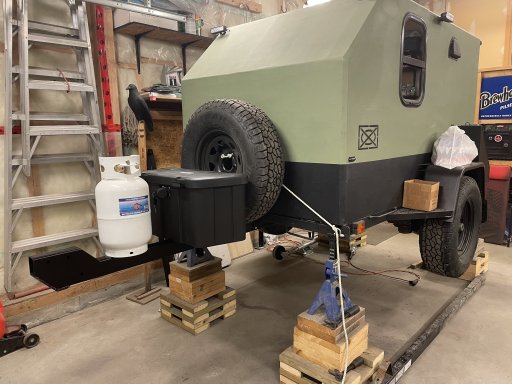
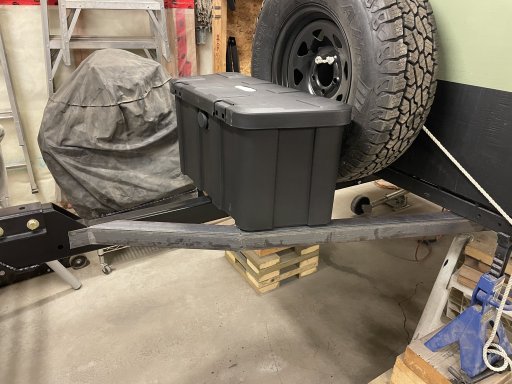
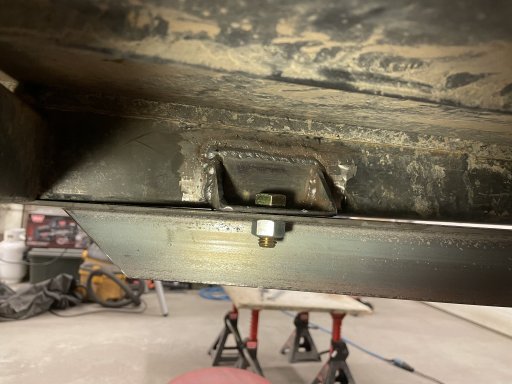
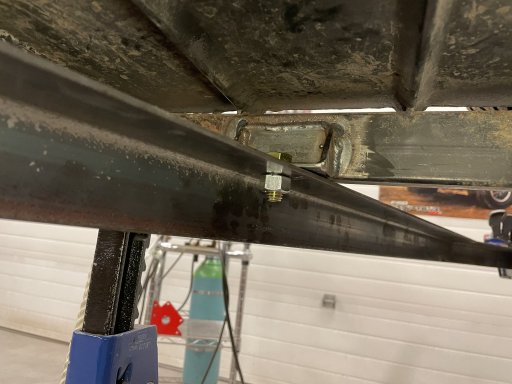
Once the paint dried I was ready to bolt it in using 1/2" grade 8 hardware underneath. That allowed me to start sizing up how I wanted to arrange the spare tire, battery box and propane tank...
Attachments
-
 555.4 KB Views: 1
 -
 478.6 KB Views: 1
 -
 535.7 KB Views: 1
 -
 564.1 KB Views: 1
 -
 409.9 KB Views: 1
 -
 460 KB Views: 1
 -
 538.6 KB Views: 1
 -
 532.8 KB Views: 1
 -
 478.8 KB Views: 1
Enthusiast III
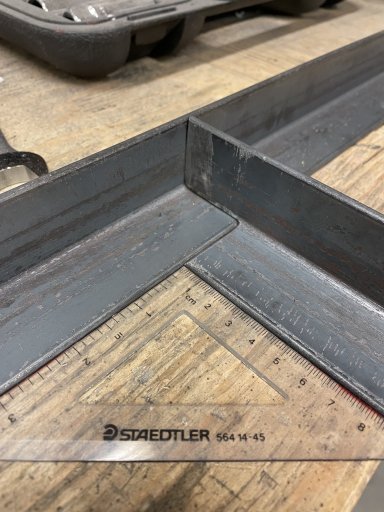
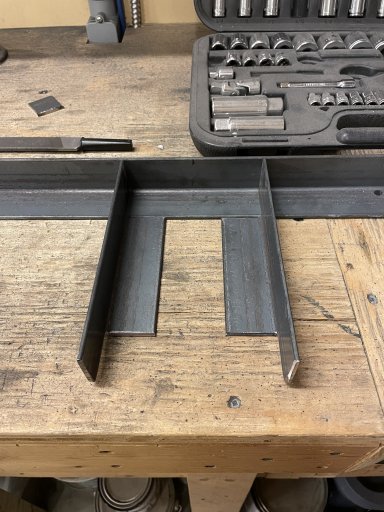
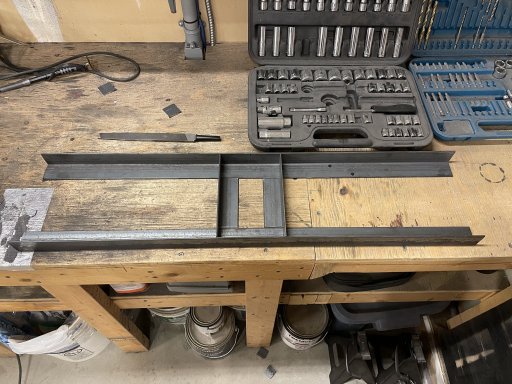
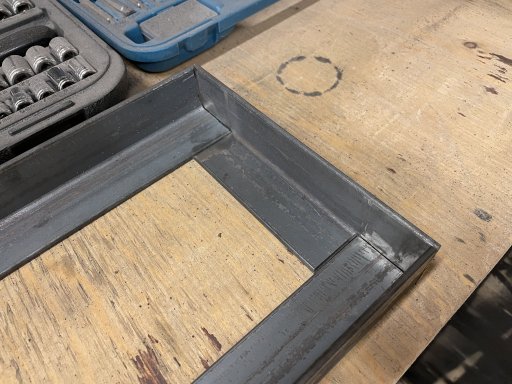
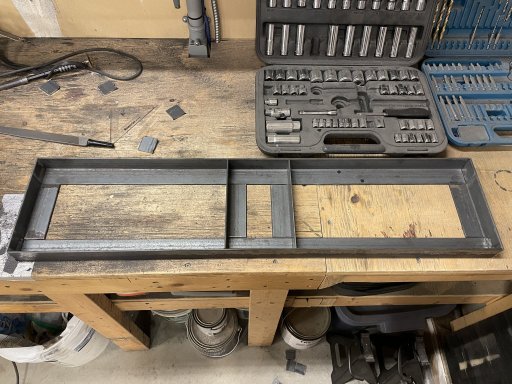
So with that I got to work on the new front frame work. To keep weight down I went with some 2" angle rather than fully boxed rectangle. Figured it should be strong enough (haven't had any issues to date). I would need to add some brackets to bolt to on the underside rather than weld it in. I wanted to be able to unbolt and drop down the entire thing from the frame in case of any future reasons.
Attachments
-
 796.2 KB Views: 1
 -
 645.3 KB Views: 1
 -
 967.6 KB Views: 1
 -
 402.3 KB Views: 1
 -
 542.6 KB Views: 1
 -
 343.9 KB Views: 1
 -
 497.2 KB Views: 1
 -
 457 KB Views: 1
 -
 548.2 KB Views: 1
 -
 624.1 KB Views: 1
 -
 411.4 KB Views: 1
 -
 590.2 KB Views: 1
 -
 562.5 KB Views: 1
 -
 574.4 KB Views: 1
Enthusiast III
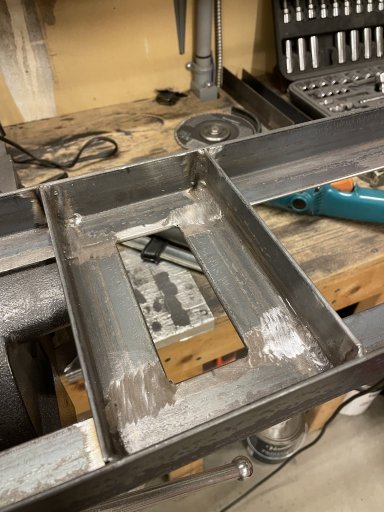
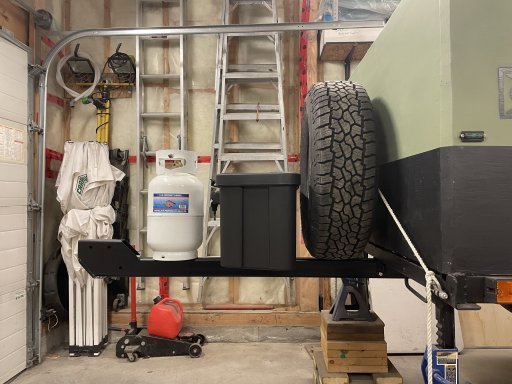
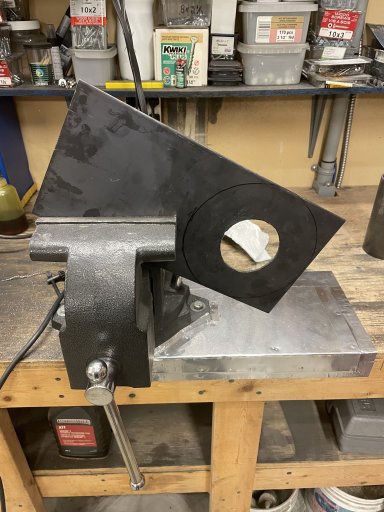
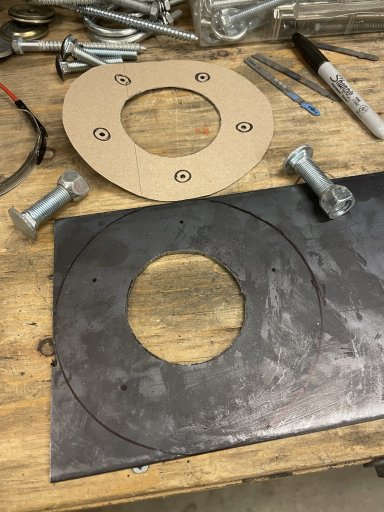
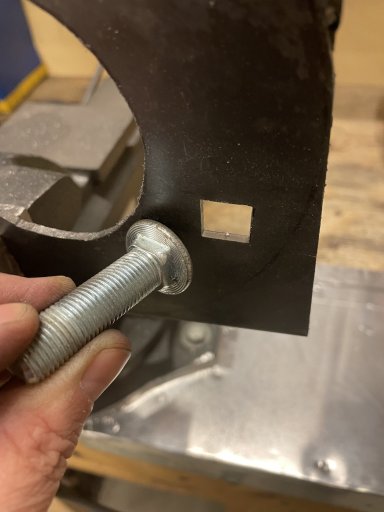
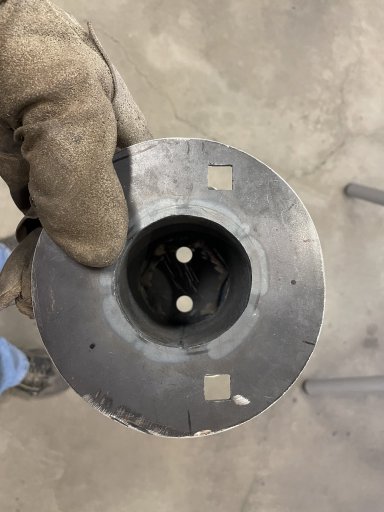
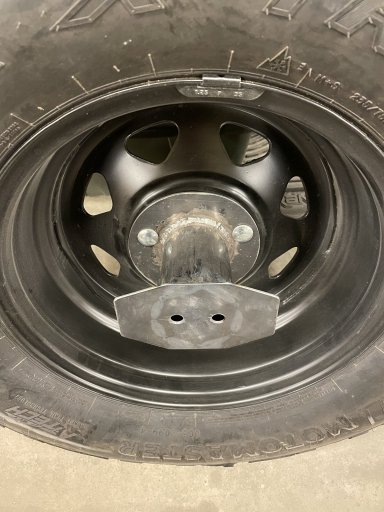
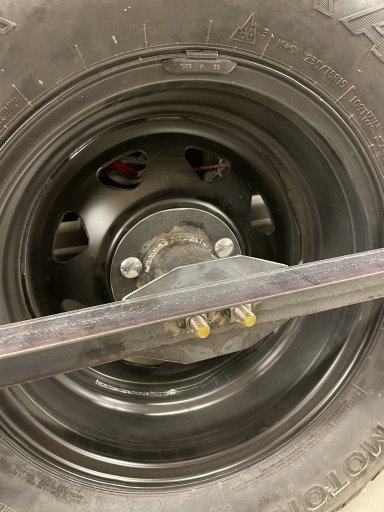
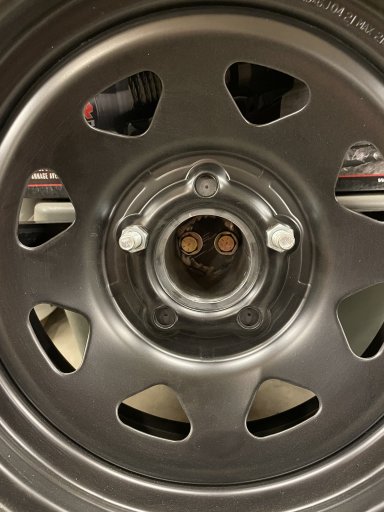
Figuring out how I wanted to mount the spare tire was a bit of a head scratcher for me. I wanted something solid in the event of a collision so I didn't have a tire come flying off and hitting me in the back of the head. So I decided on making a cradle it would bolt to. Because of the battery box location it would need to slide in from the side. To allow for that I would need to make a separate adapter to bolt it to....
Attachments
-
 573.4 KB Views: 1
 -
 679.2 KB Views: 1
 -
 338.5 KB Views: 1
 -
 723.4 KB Views: 1
 -
 625.6 KB Views: 1
 -
 591.9 KB Views: 1
 -
 482.8 KB Views: 1
 -
 495.3 KB Views: 1
 -
 636.9 KB Views: 1
 -
 542.8 KB Views: 1
 -
 524.3 KB Views: 1
 -
 505.7 KB Views: 1
