What Did You Do With Your Rig Today?

  • HTML tutorial

SLO Rob

Rank VI
Staff member
Founder 500
Member
Investor

Pathfinder III

3,614
San Luis Obispo, CA
First Name
Rob
Last Name
Petterson
Member #

0012

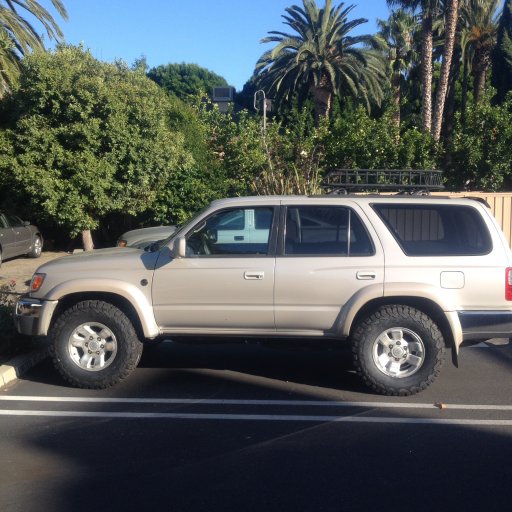
In the shop still (accident posts are a few pages back) since early June. Getting new parts along steering rack, ball joints, axles were taken off, new bearings and seals. Mechanically, good to go. Still looking for some body parts, then paint. New shopping list:

1. Tires...thinking general grabber AT2

2. Sliders

3. Coils-all four, with more weight bearing/minor lift.

4. New mapping-I'd like dedicated GPS/2way texting

Should all be a month or so and then back on the road...it's been a tough month in a rental car!
 

SLO Rob

Rank VI
Staff member
Founder 500
Member
Investor

Pathfinder III

3,614
San Luis Obispo, CA
First Name
Rob
Last Name
Petterson
Member #

0012

Replaced wheels bearings, axle seals, abs tone rings, sensors, ball joints, steering rack bushings, tie rod ends, alignment, rear wheel bearings, cleaned brake pads, adjusted brakes...lots of little things after taking that hit on the side. But all small things that matter a lot. Not as fun as spending monney on things like tires and sliders, but things that will get us back home!
 

Shane_ONeil

Rank V
Founder 500
Launch Member

Pathfinder I

1,479
Manassas, Virginia, USA
Member #

229

Courtesy of Micheal OB and this link: http://overlandbound.com/anti-glare-hood-blackout ...I went on ahead and did my own anti-glare mod for my 04 XTerra. And it worked out brilliantly thanks to the well-written How-To.


And here is the result.


I cannot convey through pictures how amazing it is to have no hardcore sunlight reflection hitting me in the face. I noticed the glare and its seriously negative effect the last several rounds of off-roading. Now its fixed. Thanks Michael.
 

Robert OB 33/48

Rank VI
Founder 500
Member

Pathfinder III

4,697
Gaanderen
First Name
Robert
Last Name
Keim
Member #

0033

Upgraded the van with a stronger solar panel and regulator. the old one will go to the trailer.
Repaired/weld some suspencion cone which hold the spring when it is extended. its a minor thing, but still, like to have that done.
 

Justin_0237

Rank V
Founder 500
Launch Member

Advocate III

1,493
Vacaville, CA, USA
First Name
Justin
Last Name
Mulrooney
Member #

0237

I installed Bilstein 5100 on all four corners! Ride is super smooth and can't wait to try them out on the trail!
 
  • Like
Reactions: deeker

MOAK

Rank V
Launch Member

Off-Road Ranger I

2,865
Wherever we park it will be home !!
First Name
Donald
Last Name
Diehl
Member #

0745

Ham/GMRS Callsign
WRPN 506
Built my own drawer system. Simple process using 1/2" top grade plywood..  Measure 2 or 3 times, then cut. The tools I used are in the photos, the builders square being very important.. I'm by no means a master carpenter, nor a cabinet maker,,, soooo this build is far from perfect, but I'm happy to report it is holding up very well, on and off road.  This winter I'm going to get some industrial grade carpeting for the top.   FYI,,, the rear is bolted down thru the rear floor utilizing existing threaded holes. The front is fastened down with turnbuckles. On the right side beneath the hinged panel is an 800 watt power inverter, on the right side is a 300 watt powered subwoofer . Flip right panel up, and full size axe is mounted to the bottom..  I built it so that when the 2nd row seats are folded down we would be able to sleep on it in an emergency.. I wished that I would have photoed the building of the drawers, but it is pretty straight forward, just keep tolerances to within an 8th".     I use candle wax on the bottom of the drawers for easier sliding. Hmmm.... today I'm doing a complete rear brake job.. New Rotors, pads and e-brake shoes.... Be good !!
 

Wolvee

ᕕ( ͡° ͜ʖ ͡° ) ︻デ═一 pew pew
Staff member
Moderator
Founder 500
Launch Member

Advocate II

2,271
Member #

0150

I woke up to broken parts, lol. I'll be taking off some factory trim pieces that were partially tore off last night when I wasn't paying attention on the trail.


I've seen these threads on other boards and they seem to be popular.. Post up anything you've done that day. It doesn't have to be in depth or even all that important.
 

Mike W

US MidWest Region Local Expert
Staff member
Member
Investor

Expedition Master III

3,833
Iowa, USA
First Name
Mike
Last Name
IowaLR4
Member #

538

I finally started on my dual battery install on my 2013 LR4. I've had the kit just sitting around for awhile.

It is about 90F and very humid today, so I mostly started on clearing space in the second battery box area for the aux batt. I will run the wire next week when the highs are 72F!

Starts out like this. With the black box on the left being a case for the transfer case module. That can be moved over to the horn bracket under the brake lines with the flex hoses. Have to move the large electrical connector, etc out of the way...


Before you know it, you have room for an aux battery... in this case I am going with an Odyssey 34-PC1500T batt for an aux and a Exide Edge FP-AGML5/49 for a better and slightly larger starter battery.


Plan is to get a fridge freezer for the second row middle (took out the seat) and ill have a hard mounted inverter in the back. The cig outlets all get wired to the aux battery. I might also figure out a solar charge setup in the future which works great with this kit because it supports reverse charging of the starter battery and aux battery at the same time, while still having the starter and aux batt isolators (independent)

 
Last edited: