What Did You Do With Your Rig Today?
- Thread starter iamout
- Start date
-
Guest, UPDATE We went through the site migration runbook and completed all steps. We will need to complete the migration next week, but will leave the forums up for the weekend. A few days after maintenance, a major upgrade revision to the forum site will occur.


AggieOE
Rank IV

Advocate II
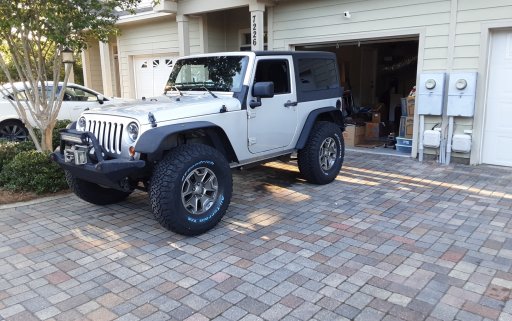
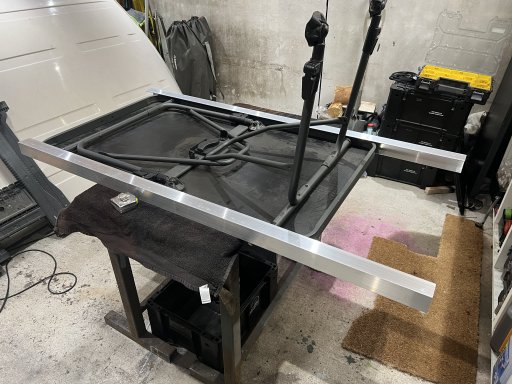
Is that a side fold out one? It looks like a good use of space!I finally had some time to get this RTT installed on the Jeep. I did the install alone and it was not easy! Can't wait to get into the wild to try it out!View attachment 255702

Off-Road Ranger I
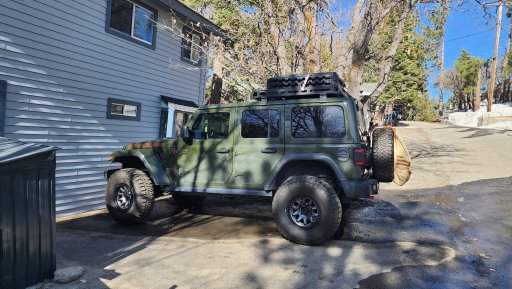
Yes, it opens to the passenger side only. I have an ARB awning that I'm going to mount on the driver side. It's the iKamper Skycamp Mini 2.0 and it'll sleep 2 adults and a dog- perfect for my application! The full-size Skycamp would be too much for a 2-door JK. With the Mini, I still have room to mount extra gas or traction boards in front of it. This is last year's model, as the 3.0 is out now, but there's not a dramatic difference in upgrades, so I figured I would take the $900 savings. I considered the Tuff Stuff Alpha 2 (which is also on sale), but in the end, I just bit the bullet and went iKamper. No one can dispute their quality.Is that a side fold out one? It looks like a good use of space!
Creator III
- 4,572
- First Name
- Rubi
- Last Name
- cajon
- Member #
-
8182
- Ham/GMRS Callsign
- KG5VLS
- Service Branch
- Navy Seabee’s
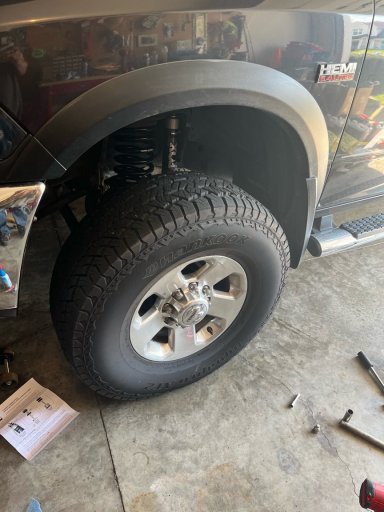
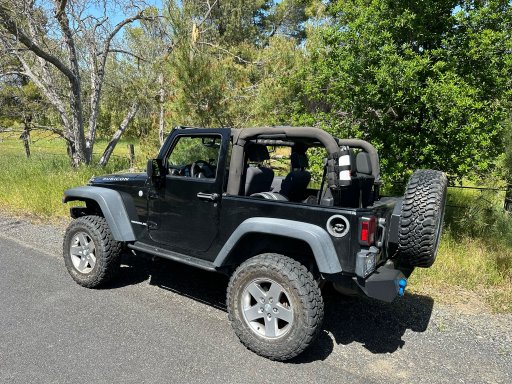
Looks great! Do you have a lift, and if so, how much? Also, what size tires were you running in the first picture?Finally put on the 37s
Creator III
- 4,572
- First Name
- Rubi
- Last Name
- cajon
- Member #
-
8182
- Ham/GMRS Callsign
- KG5VLS
- Service Branch
- Navy Seabee’s
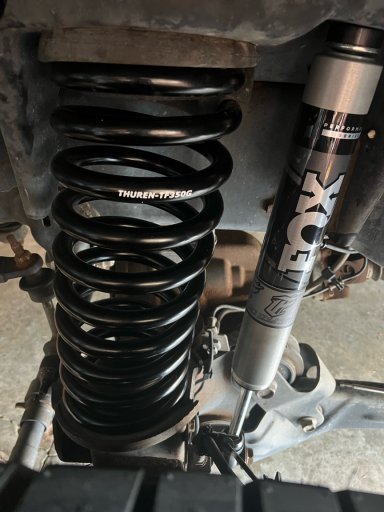
First pic was 34x10.50 bfg mud terrain. Technically it has 0 inch of lift. With that said I did put jku rubicon front springs in the front and I believe they are 19s and I have 56s in the rear now and a new set of jku rubicon 60s to install this weekend.
I did the usual spacers for the wheels and did not cut the body but hammered the seam over flat. The only rub is on the front passenger side at full lock.
I did the usual spacers for the wheels and did not cut the body but hammered the seam over flat. The only rub is on the front passenger side at full lock.
Ocean_Ranger
Rank VII

Pathfinder I
- 5,307
- First Name
- Sean
- Last Name
- Pickton
- Member #
-
30373
- Ham/GMRS Callsign
- N6SRP (GMRS WROQ518)
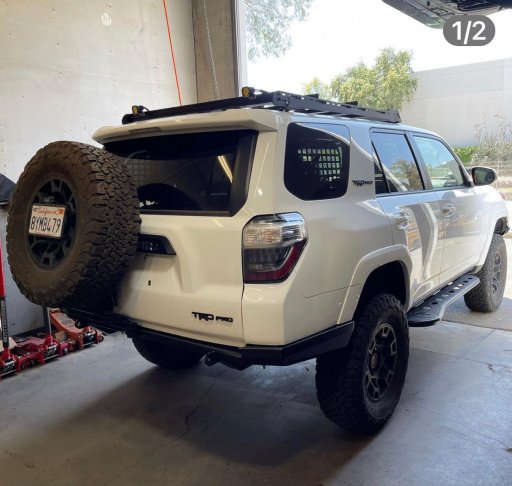
After a four month wait, the T4R finally got its new rear bumper. The departure angle has increased significantly.
Attachments
-
 297.7 KB Views: 17
AggieOE
Rank IV
Advocate II
Always good to see what's capable without going crazy high on lift. Nice work! Still looks subtle and clean.Finally put on the 37s
That looks great! Is it custom? Love the low-profile look.After a four month wait, the T4R finally got its new rear bumper. The departure angle has increased significantly.
Ocean_Ranger
Rank VII
Pathfinder I
- 5,307
- First Name
- Sean
- Last Name
- Pickton
- Member #
-
30373
- Ham/GMRS Callsign
- N6SRP (GMRS WROQ518)
The low-profile look is what pulled me in. It is not custom, Nguyen Works is the name of the company. The departure angle on my rig increased from 27 degrees to almost 40 degrees.Always good to see what's capable without going crazy high on lift. Nice work! Still looks subtle and clean.Finally put on the 37s
That looks great! Is it custom? Love the low-profile look.After a four month wait, the T4R finally got its new rear bumper. The departure angle has increased significantly.
Nothing. Went out on the motorcycle instead. Weather was too nice to pass up!
Call_me_Tom
Rank III

Enthusiast II
- 509
- First Name
- Tom
- Last Name
- K9er
- Member #
-
44277
- Service Branch
- USMC Ret
It took me and my two teenage sons to lift my RTT into place, I’ve no idea how you did it. One thing is for sure, after all of the effort of getting it mounted I’m not taking it off.I finally had some time to get this RTT installed on the Jeep. I did the install alone and it was not easy! Can't wait to get into the wild to try it out!View attachment 255702

Traveler III
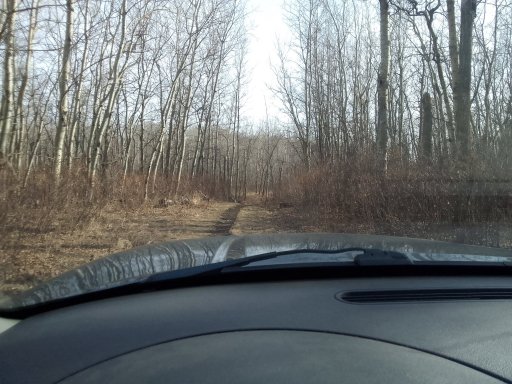
First, took the rig for a little explore yesterday of a section (160 acres) of crown land near my house, and found an epic little camp spot.
Then today, I installed the new Fire Ring cable I got for my CB radio setup. WAY better with the low profile mount, and the SWR is perfect across the board! 1.5 on channels 1 and 40 and 1 on 19. I am very stoked.
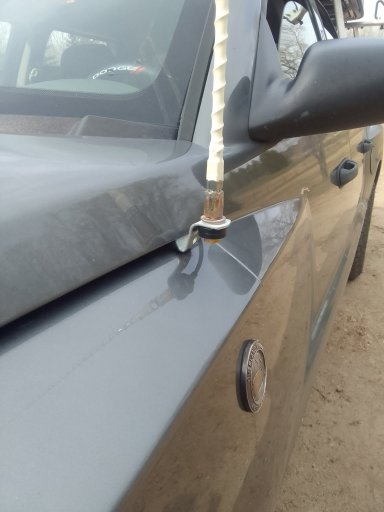
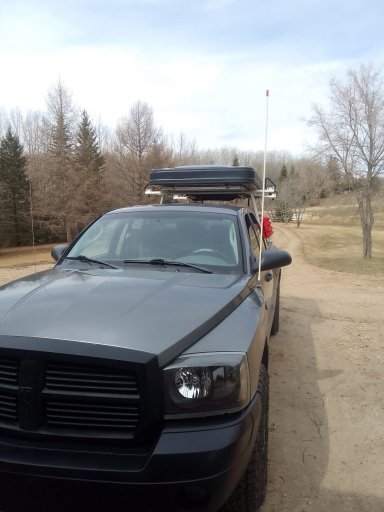
Then today, I installed the new Fire Ring cable I got for my CB radio setup. WAY better with the low profile mount, and the SWR is perfect across the board! 1.5 on channels 1 and 40 and 1 on 19. I am very stoked.

Did a little maintenance on the '66 VW in preparation for my trip to Kansas in a week. Adjusted the valves, filed and gapped the points, cleaned the contacts in the distributor cap, and adjusted the timing. Still need to change the oil and set up the sleeping platform and it should be good to go.
Distributor apart to clean and adjust points and clean contacts on cap and rotor.

Setting the timing with a test light. The timing on these engines (well with stock parts anyway) is set statically. Turn the engine until the 10 degree BTDC mark on the crank pulley lines up with the case seam, then turn the distributor until the points just open (test light illuminates), then tighten distributor clamp and test rotate a couple times to make sure the adjustment is holding.
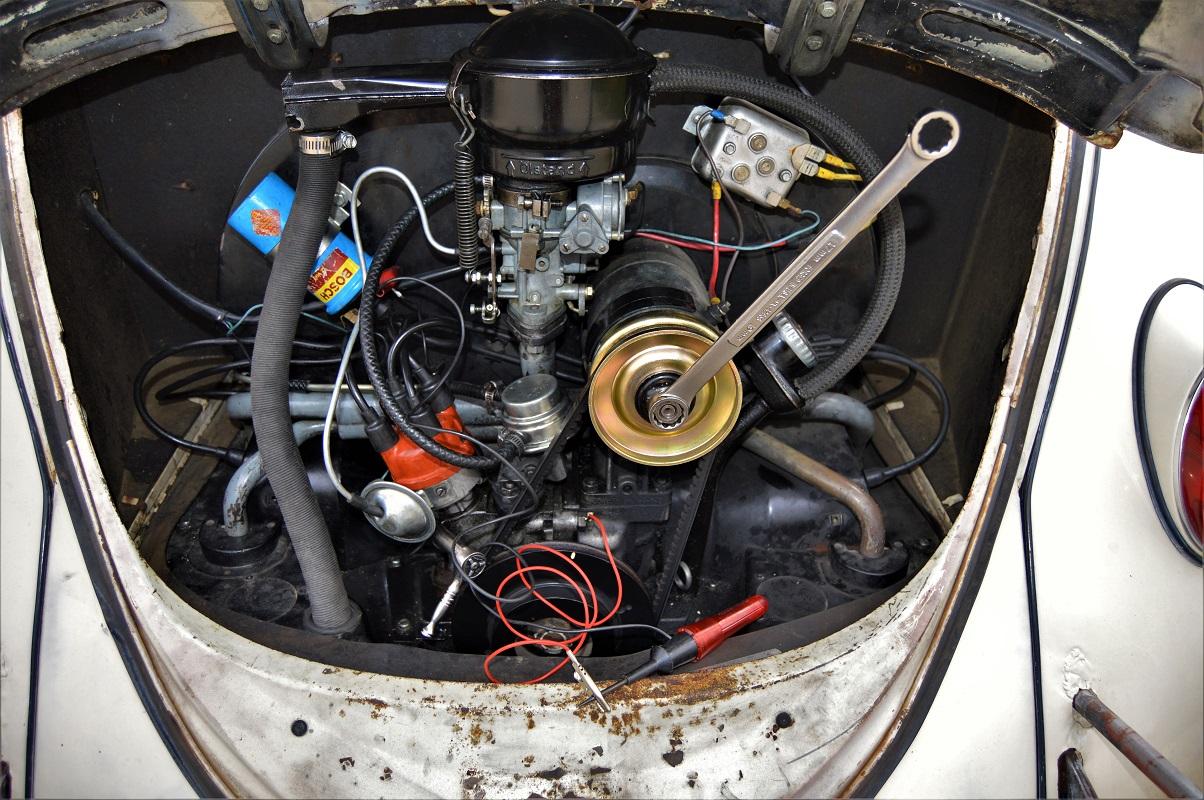
Valve cover removed. Turn each cylinder to TDC and adjust valves to .006".

Distributor apart to clean and adjust points and clean contacts on cap and rotor.
Setting the timing with a test light. The timing on these engines (well with stock parts anyway) is set statically. Turn the engine until the 10 degree BTDC mark on the crank pulley lines up with the case seam, then turn the distributor until the points just open (test light illuminates), then tighten distributor clamp and test rotate a couple times to make sure the adjustment is holding.
Valve cover removed. Turn each cylinder to TDC and adjust valves to .006".
Off-Road Ranger I
I had to use my hard top hoist that was already mounted in the garage. I let the strings and straps out as long as they could go in order to lift the tent from the garage floor, but then I found that the line would only let me raise the tent about 4 feet off the ground, so I had to rest it on my BD Workmate and reset the straps again! That was just enough to get it high enough to drive the Jeep under it. It was a project indeed!It took me and my two teenage sons to lift my RTT into place, I’ve no idea how you did it. One thing is for sure, after all of the effort of getting it mounted I’m not taking it off.
Landy-Lee83
Rank IV

Explorer I
I started making a thing for my thingy

Member III
Got my control arms adjusted, then alignment. Drives so good!
Now packed for overlanding tomorrow.
Now packed for overlanding tomorrow.
After getting my rig almost a year ago I finally took the hardtop off my JKR today for the first time - and I’m digging it! Bimini top coming in tomorrow to help provide a little sun protection.
Attachments
-
 1.1 MB Views: 9
 -
 477.3 KB Views: 9
 -
 965.4 KB Views: 9
 -
 1 MB Views: 10
 -
 1.1 MB Views: 9
Off-Road Ranger I
- 3,507
- First Name
- Mike
- Last Name
- Roots
- Member #
-
16968
- Ham/GMRS Callsign
- GMRS: WSGB862
- Service Branch
- USAF
Took the camper shell off, put the bed cover back on, and gave it a proper cleaning. Wife spent 2 hours detailing the inside and actually got the dog hair out. I spent $25 at the car wash...then came home washed it correctly.
![IMAG2627[1].jpg](/forums/data/attachments/256/256245-397879049148f277c4d21a82e88340b3.jpg)
![IMAG2624[1].jpg](/forums/data/attachments/256/256246-5efa6f7e1416d8f3221599c7e0a5ce1b.jpg)
Off-Road Ranger I
- 3,507
- First Name
- Mike
- Last Name
- Roots
- Member #
-
16968
- Ham/GMRS Callsign
- GMRS: WSGB862
- Service Branch
- USAF
Took the fog lights out. One bulb was broken and the other had water in it from a bad seal.
![IMAG2631[1].jpg](/forums/data/attachments/256/256249-47fb2e79e3b177231c9406d4d5208428.jpg)
Off-Road Ranger I
- 3,507
- First Name
- Mike
- Last Name
- Roots
- Member #
-
16968
- Ham/GMRS Callsign
- GMRS: WSGB862
- Service Branch
- USAF
Slipped off the bed of the truck and promptly took the rear camera out in the process.
![IMAG2632[1].jpg](/forums/data/attachments/256/256251-9b0366461f4279e2db2f4d112d1de3e9.jpg)
