Pathfinder II
- 913
- First Name
- William
- Last Name
- Moffat
- Member #
-
32202
I found this excellent list for emergency tools specific to the 4runner at Toyota 4Runner Tool Roll and Pack List. People are invited to crowd-share, edit and down the list so I don't think I am violating any copyright laws in sharing it:
Toyota 4Runner Tool Roll and Basic Pack List
Let’s crowdsource the ultimate 4Runner Tool Roll (and suggest some other things that you might want to carry for worst-case situations)
Theory:
Take everything here with a grain of salt. Pick the tools that best suit you, your vehicle, and the weather/situations you are likely to encounter.
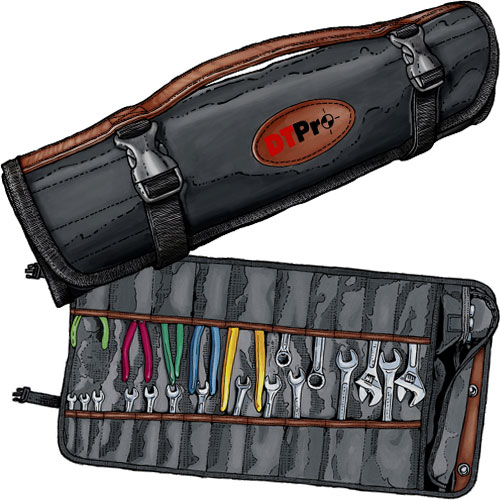
Tool roll example: (Image borrowed from Good tool roll-up pouches, where to get?)

I learned a lot of valuable lessons while building my first rig, and I want to share the order of operations that I feel best suits most weekend-warrior/overlander types.
Suggested upgrade path:
• basic recovery gear (strap, shackles, hitch pins, tools, shovel, tire patch kit, air pump)
• tires (if you can only do one thing, always do tires)
• get out and explore with others so you can get a feel for what you enjoy and what the vehicle is capable of
• build out electrical infrastructure (fuse blocks, breakers, relay mounts, etc) for accessories (comms, lights, nav, etc)
• comm gear (cb/ham/gmrs)
• sliders
• fill in missing skids or full skid replacement
• storage (roof rack, drawers, organization, etc)
• additional lights, if needed
• rear bumper
• front bumper and winch
• lift/suspension to handle increased weight
• consider running larger tires to get axles up off the ground (now that you likely also have a rear bumper or roof rack to carry a larger sized spare)
• front locker - if you get this far, you might also want to re-gear since you're likely running larger tires.
Toyota 4Runner Tool Roll and Basic Pack List
Let’s crowdsource the ultimate 4Runner Tool Roll (and suggest some other things that you might want to carry for worst-case situations)
Theory:
- Tool Roll and “In-vehicle” supplies live in the 4Runner at all times.
- The “trip kit” fits in an ammo can sized box and joins us on trips away from home for any extended amount of time.
- This list DOES NOT include camping gear. This is just vehicle/survival gear to get you out of a bad situation.
Take everything here with a grain of salt. Pick the tools that best suit you, your vehicle, and the weather/situations you are likely to encounter.
Tool roll example: (Image borrowed from Good tool roll-up pouches, where to get?)
| Tools | In-Vehicle | Recovery Kit |
| Definition: Fits in a tool roll that fits in spare tire tool area | Definition: Mounted/under seats/etc | Definition: Larger Kit designed for extended trips away from home, but separate from camping supplies. |
|
|
|
I learned a lot of valuable lessons while building my first rig, and I want to share the order of operations that I feel best suits most weekend-warrior/overlander types.
Suggested upgrade path:
• basic recovery gear (strap, shackles, hitch pins, tools, shovel, tire patch kit, air pump)
• tires (if you can only do one thing, always do tires)
• get out and explore with others so you can get a feel for what you enjoy and what the vehicle is capable of
• build out electrical infrastructure (fuse blocks, breakers, relay mounts, etc) for accessories (comms, lights, nav, etc)
• comm gear (cb/ham/gmrs)
• sliders
• fill in missing skids or full skid replacement
• storage (roof rack, drawers, organization, etc)
• additional lights, if needed
• rear bumper
• front bumper and winch
• lift/suspension to handle increased weight
• consider running larger tires to get axles up off the ground (now that you likely also have a rear bumper or roof rack to carry a larger sized spare)
• front locker - if you get this far, you might also want to re-gear since you're likely running larger tires.


