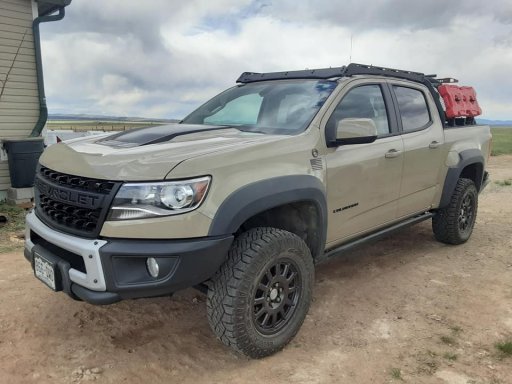
Third try - now a Bison!

  • HTML tutorial

TheBison

Rank V
Member

Trail Blazer III

2,028
Hartsel, CO
First Name
Brian
Last Name
Foltz
Member #

27816

Ham/GMRS Callsign
AA0BF / WRMI426
Service Branch
U.S. Army
Wanna sell your aev crome badge? Ill even send you another black aev decal if you want it
It got a little bent up when I removed it but I saved it and I think it could be reused. Let me take a pic and I'll PM you!
 

AppalachianGoat

Rank II

Enthusiast III

473
Dillsburg, PA, USA
First Name
Matthew
Last Name
XXXX
Service Branch
USN
I’ve been seriously thinking about the prinsu but that drilling I’ve heard is wild. I’d have to pick up a choke collar for the drill bit to not drill down too deep. Love the look of them though.

 

TheBison

Rank V
Member

Trail Blazer III

2,028
Hartsel, CO
First Name
Brian
Last Name
Foltz
Member #

27816

Ham/GMRS Callsign
AA0BF / WRMI426
Service Branch
U.S. Army
I’ve been seriously thinking about the prinsu but that drilling I’ve heard is wild. I’d have to pick up a choke collar for the drill bit to not drill down too deep. Love the look of them though.
Yep, I'm a bit intimidated by the drilling but I drill 3/4" holes for antenna mounts at work all the time without too much concern. I'll just have to be careful!
 

TheBison

Rank V
Member

Trail Blazer III

2,028
Hartsel, CO
First Name
Brian
Last Name
Foltz
Member #

27816

Ham/GMRS Callsign
AA0BF / WRMI426
Service Branch
U.S. Army
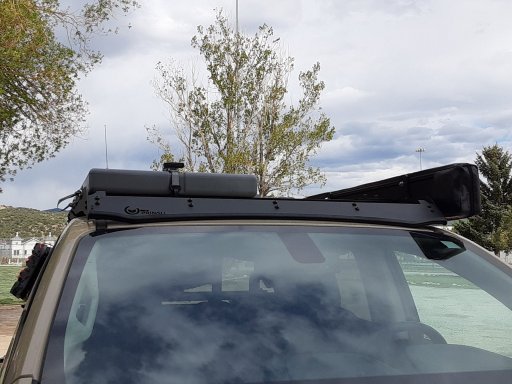
It's been a couple of busy days! We got the Prinsu rack on without too much trouble other than the drilling. As many have said, drilling into the roof channels is an absolute b*tch. I started with my decent titanium bits and partway through the first hole I had to run to the store and get cobalt bits - and I snapped a few of those too. The end product is worth it though! The final plan is to mount lights to the front of the wind deflector a la a KC M-rack (but for a fraction of the price!). We currently have a 23Zero 180 degree awning and wall set to go on the rack as well as an Ironman 13 gallon flat water tank to go on top. Pics to follow when it's all mounted up.
191064418_10158188757613434_913573907368473723_n.jpg

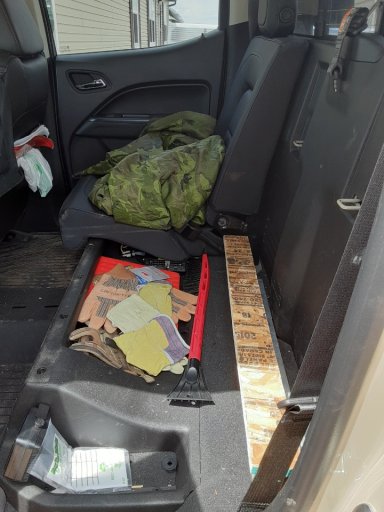
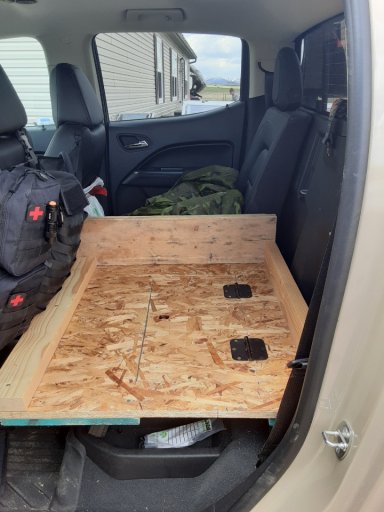
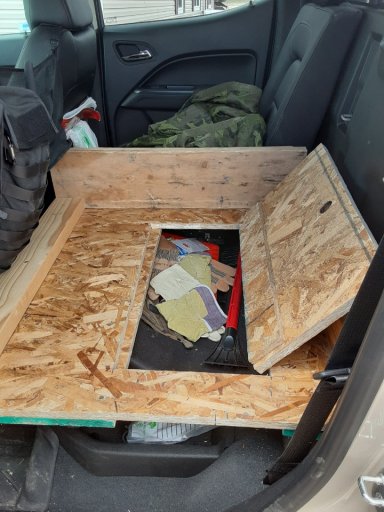
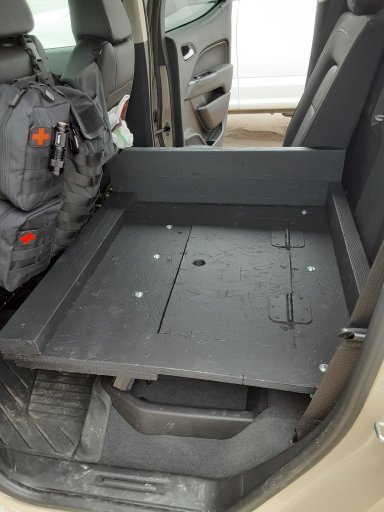
In addition to the roof rack, I'm mostly finished building a seat delete platform for the 60% side of the back seat. I really like the Goose Gear system but the price is out of my range. Using their product as a guide (and their instructions to figure out mounting options) I built our own out of some 1" OSB and lumber scraps sitting around (because with current lumber prices I'm not buying wood products unless I have to!). Everything has been test fit, and now I need to put bedliner on the platform before I do the final bolt-in. I added a divider between the platform and the rest of the rear seat to mount something soft as an armrest at the same height as the door armrest to give a backseat passenger a bit more comfort. I'll post of pics of this when it's got the finish on and it's all bolted in.
Resized_20210528_142519.jpegResized_20210528_154811.jpeg
Resized_20210528_154823.jpeg
 

dj_mccomas

Rank V
Launch Member

Member III

2,268
Louisville, KY
First Name
DJ
Last Name
McComas
Member #

4527

Nice build, the rear seat delete is nice. My father in-law just helped me build a rear seat delete for my Zr2, have my fridge on it, gained a lot of storage as well.
 
  • Like
Reactions: TheBison

AppalachianGoat

Rank II

Enthusiast III

473
Dillsburg, PA, USA
First Name
Matthew
Last Name
XXXX
Service Branch
USN
What’s your feeling on the rivnuts? I’m so close to pulling the trigger and just using my mag drill to do the holes, but I’m mulling over the idea of dropping the headliner and using nylon nuts and longer bolts instead of the rivnuts. Do you trust the rivnuts?
 

TheBison

Rank V
Member

Trail Blazer III

2,028
Hartsel, CO
First Name
Brian
Last Name
Foltz
Member #

27816

Ham/GMRS Callsign
AA0BF / WRMI426
Service Branch
U.S. Army
What’s your feeling on the rivnuts? I’m so close to pulling the trigger and just using my mag drill to do the holes, but I’m mulling over the idea of dropping the headliner and using nylon nuts and longer bolts instead of the rivnuts. Do you trust the rivnuts?
The rivnuts seem pretty solid so far. I was able to tighten the mounting hardware to them pretty tightly and didn't feel any movement, and compressing the rivnuts with the supplied "tool" was not difficult. That being said, the truck hasn't been driven since I finished the installation yesterday so the jury is still out on real-world security.
 

MazeVX

Rank VI
Launch Member

Influencer II

3,278
Gießen Germany
First Name
Mathias
Last Name
Kreicker
Member #

8002

What’s your feeling on the rivnuts? I’m so close to pulling the trigger and just using my mag drill to do the holes, but I’m mulling over the idea of dropping the headliner and using nylon nuts and longer bolts instead of the rivnuts. Do you trust the rivnuts?
So I'm working for a company that produces rivnuts and I can say that they are really really good when set correctly. The setting tool must be adjusted properly and the rivnuts must be from good quality and, ideally, have a knurling on the outside.

Unfortunately not all are made equally, but in general they are very good and actually get used more often by oem's lately.
 
  • Like
Reactions: AppalachianGoat

TheBison

Rank V
Member

Trail Blazer III

2,028
Hartsel, CO
First Name
Brian
Last Name
Foltz
Member #

27816

Ham/GMRS Callsign
AA0BF / WRMI426
Service Branch
U.S. Army
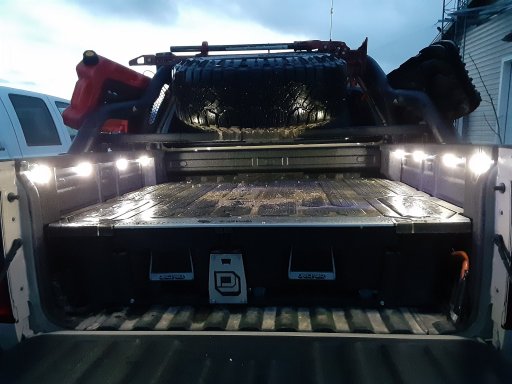
A quick side project: bed lights. Picked up a cheapo kit at Walmart that included 8 lights and a tailgate-actuated switch. I tapped power from the trailer electrical socket (I don't tow with the Bison, that's what I have my F250 for :grimacing:). Given the $30 cost, it's worked pretty well for a few months now.
20210601_204336.jpg
 

TheBison

Rank V
Member

Trail Blazer III

2,028
Hartsel, CO
First Name
Brian
Last Name
Foltz
Member #

27816

Ham/GMRS Callsign
AA0BF / WRMI426
Service Branch
U.S. Army
So I wrapped up a couple of details today. First, the seat delete has received its coat of bedliner and now it's bolted in tight:
platform.jpg

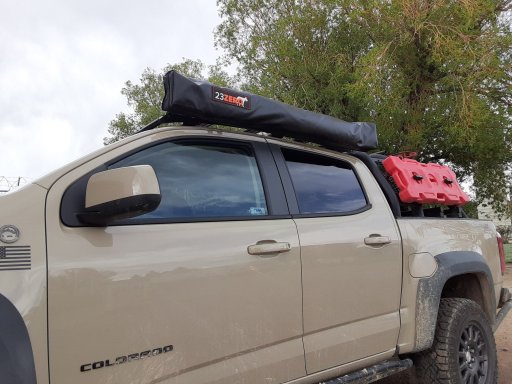
We started to add a few items to the roof rack. A 23Zero 180 degree awning (we also bought the wall kit but haven't tried it yet):
2021-06-02.jpg

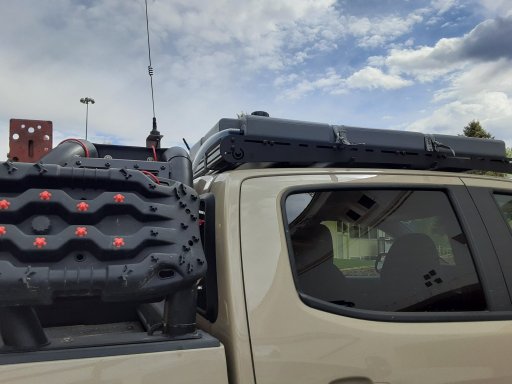
And an Ironman 4x4 50L/13 gallon flat water tank:
side.jpg
front.jpg

We haven't had the opportunity to do a "systems test" with all of the new additions, but we're headed to the Overland Bound 3rd Annual Buena Vista June Jam on Friday and that's really close to home so we're not too far away if any adjustments are needed . More scenic pics to follow!
 

TheBison

Rank V
Member

Trail Blazer III

2,028
Hartsel, CO
First Name
Brian
Last Name
Foltz
Member #

27816

Ham/GMRS Callsign
AA0BF / WRMI426
Service Branch
U.S. Army
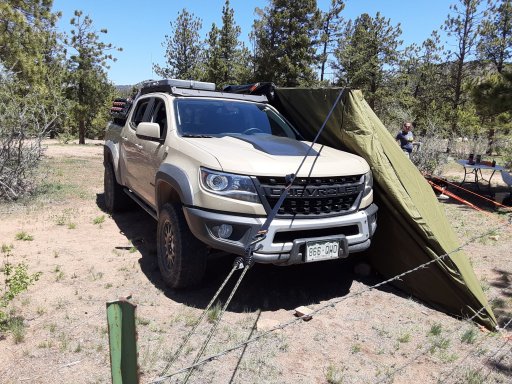
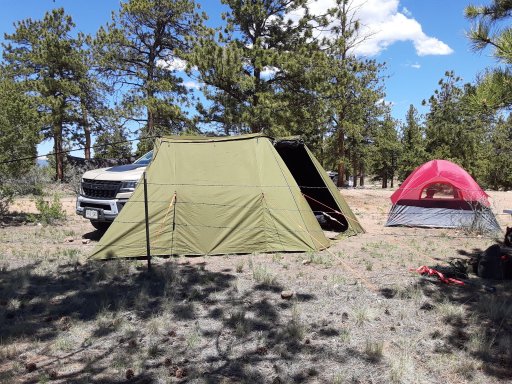
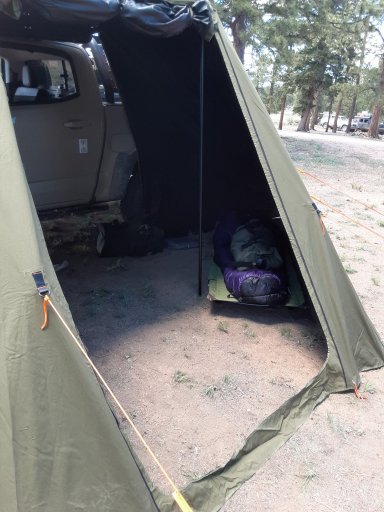
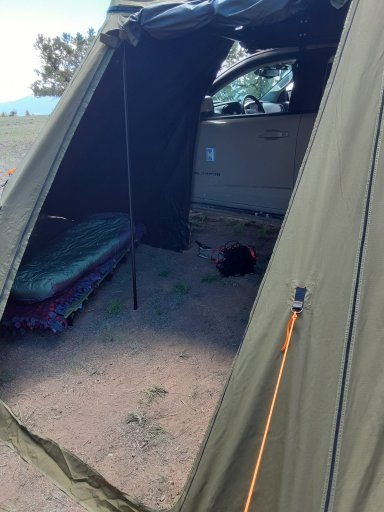
Well, happy to report that our test run went well! Sleeping under the awning with the wall kit was great (we hung a tarp to cover the gap next to the cab) and our new cots were very comfortable. We of course learned some lessons (bring an outdoor rug for inside the awning, make sure to park the rig at the correct angle to drain water from the rooftop tank, come up with some better camp organization) but we're on the right track I think.
20210604_121811.jpg
20210604_121754.jpg
20210604_130704.jpg
20210604_130715.jpg
 

SS308

Rank V
Member

Advocate I

1,864
Cheyenne, WY, USA
First Name
Randy
Last Name
Miller
Member #

29772

Ham/GMRS Callsign
KF7QFH
Service Branch
USMC
Nice looking truck! I'm a Ford man but I have always liked the Colorado. I always thought that if Chevy had put a decent suspension and a beefed up engine, it could compete with the Raptor.

What part of Colorado? I'm originally from Pueblo.
 
  • Like
Reactions: TheBison

TheBison

Rank V
Member

Trail Blazer III

2,028
Hartsel, CO
First Name
Brian
Last Name
Foltz
Member #

27816

Ham/GMRS Callsign
AA0BF / WRMI426
Service Branch
U.S. Army
Nice looking truck! I'm a Ford man but I have always liked the Colorado. I always thought that if Chevy had put a decent suspension and a beefed up engine, it could compete with the Raptor.

What part of Colorado? I'm originally from Pueblo.
Thanks! I usually like Fords myself (I've had a Bronco II :laughing:, an F150, and currently have a diesel F250 for ranch work) but I REALLY don't like the look of the new Rangers... I originally hail from Colorado Springs, but abandoned the Front Range for some solitude about 12 years ago.
 
  • Like
Reactions: SS308

TheBison

Rank V
Member

Trail Blazer III

2,028
Hartsel, CO
First Name
Brian
Last Name
Foltz
Member #

27816

Ham/GMRS Callsign
AA0BF / WRMI426
Service Branch
U.S. Army
I haven't posted since the beginning of June? WTF is up with that? Well, we've been busy... we had the OB June Jam run near Buena Vista in early June, then camping with the fam damily near Leadville over Independence Day weekend, and we did the 1st Annual Bison Stampede (just ZR2 Bisons - get it? Hah!) last weekend around Silverton and Lake City. But we've made some additions during that time!

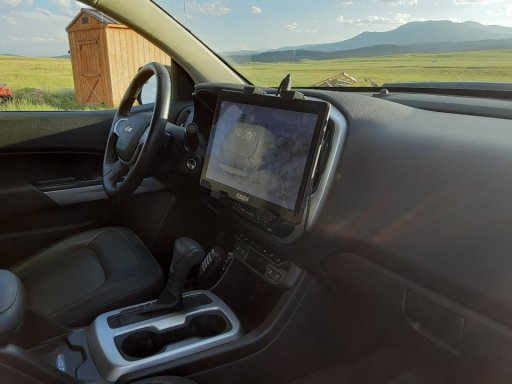
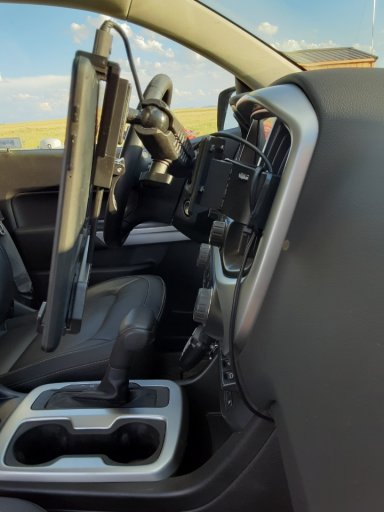
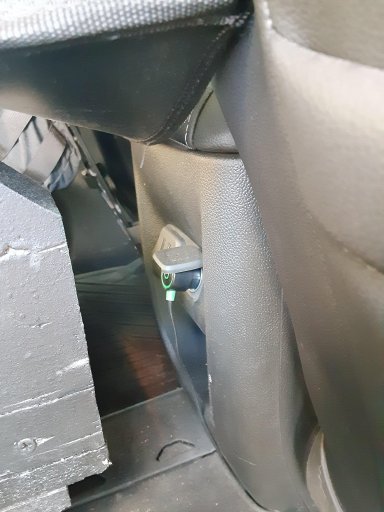
First off was putting a tablet mount for a 10" GPS-equipped off brand tablet to run Gaia etc. The vent mount is by Proclip and the arm and tablet holder I found on Amazon - basically a Ram ball knock-off. The two parts aren't actually compatible but a drill and some bolts and other hardware fixed that :grinning:. I ran the power cord into the dash panels and back to the ignition-switched outlet in the back of the center console to keep the dash area looking clean and leaving the front dash 12 VDC outlet available. FWIW, the USB outlets up front don't have enough amperage to charge a tablet...

Resized_20210806_191138.jpeg
Resized_20210806_191144.jpeg
20210806_191225.jpg

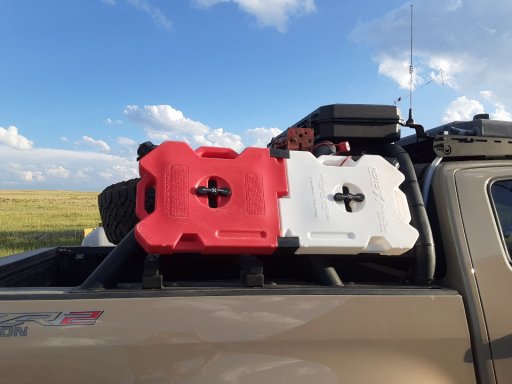
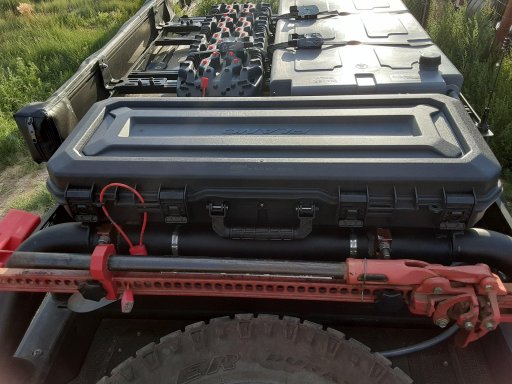
Next we moved the traction boards to the roof (just strapped 'em up there for now, but they'll get proper hardware eventually) to make room for a second set of Rotopax, this time a split gas and water combo. The 13 gallons in the roof tank is potable water but it's just from the house hose, whereas the 2 gallons in the Rotopax are drawn from our water filter for important things like cooking and coffee. And finally, in the quest for ever more storage room we decided we really didn't use the tools we have in the slimmer Decked drawer often enough to have them so reachable (except for the air compressor) so a Plano box is now mounted up on top of the bed rack to hold tools and other sundries. I relocated the ham antenna to make room for it but this was really easy and I didn't even have to move the coax to do so. All of the tools and other breakdown-related stuff will go into tool rolls and other organizational items to go in this case, freeing up all of the Decked drawers for camping cargo.

Resized_20210806_190721.jpeg
20210806_190757.jpg

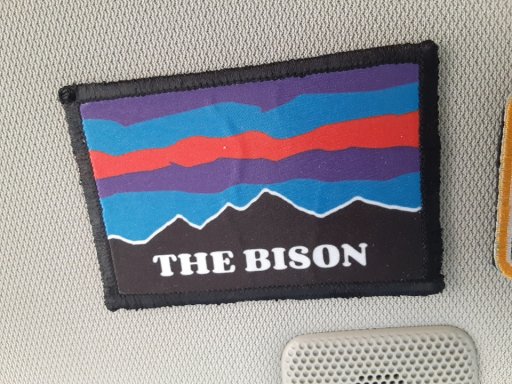
And just for fun, we had some patches made by the awesome guy over at Pull Patch. He really hooked us up when USPS lost our initial order, so we'll be using him again.

Resized_20210806_191247.jpeg
 

TheBison

Rank V
Member

Trail Blazer III

2,028
Hartsel, CO
First Name
Brian
Last Name
Foltz
Member #

27816

Ham/GMRS Callsign
AA0BF / WRMI426
Service Branch
U.S. Army
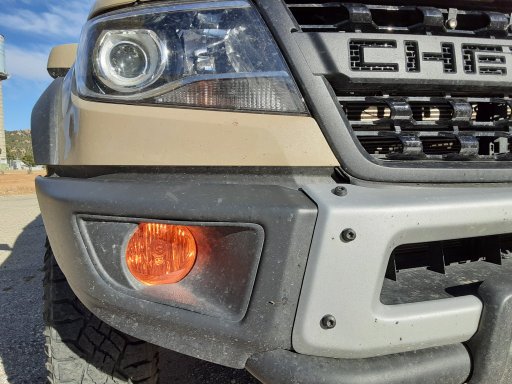
So I've been working on a few minor projects as of late. With winter darkness approaching, it's all about the lighting! First off, I was going to get the bracket from AEV and replace the fog lights with good LED units. The bracket itself is about $50 and that's not so bad, but quality lights that fit the bumper opening (5") are freakishly expensive so another route was sought. I picked up some good quality Laminex film in amber to match the front turn signals and raptor lights (not traditional fog yellow) and it was really easy to get the film on. I'll replace the halogen bulbs with Bison-specific LEDs from Diode Dynamics soon, but for now this is it.
20211011_161350.jpg

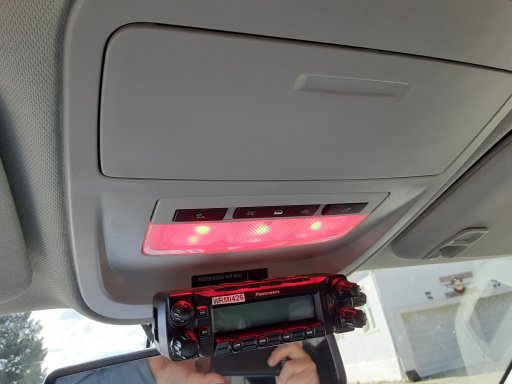
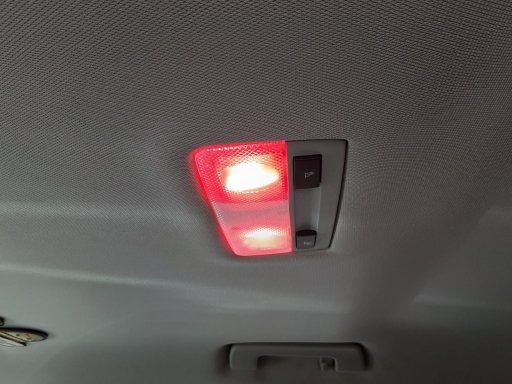
I also really liked some rigs we ran with recently that had red interior lighting to be courteous to neighbors and save our night vision. To that end, we replaced all of the interior lighting with red LEDs from Diode Dynamics. A super easy project that took maybe 10 minutes, but I really like the results.
20211011_161430.jpg
20211011_161448.jpg

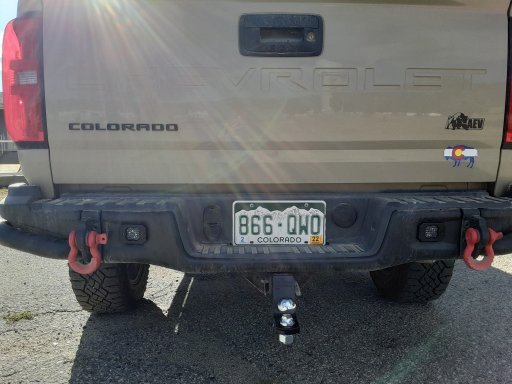
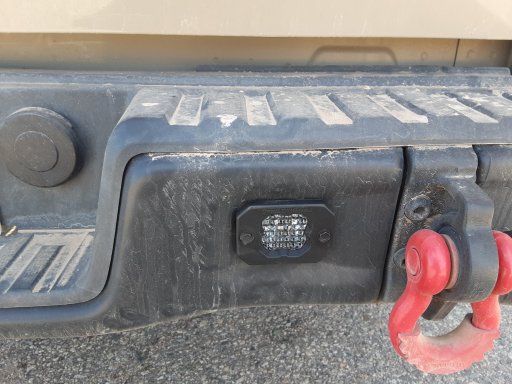
Lastly, I wanted to put backup lights in the rear bumper with AEV brackets. Again the brackets weren't too pricey and you can get LED cubes anywhere, but I visited Diode Dynamics at Overland Expo Mountain West and found that they had a really cool product that is a flush-mount cube with white as the primary LED color and a selectable color as a "backlighting" that comes on with a separate wire. Since I have lost rear visibility of my 3rd brake light because of my rack and spare tire carrier, I thought it would be cool to put these flush-mount lights in the AEV knockout holes and wire them so that the bright white LEDs came on with my backup lights and the softer red lights came on with my stop and turn signals. This was very easy to do by tapping into the trailer plug wiring harness, and the lights fit almost exactly into the provided spots in the bumper.
20211011_161407.jpg
20211011_161411.jpg

I'll put up more pictures of everything lit up at night - as soon as I have some help pressing brake pedals etc.!
 
Last edited: