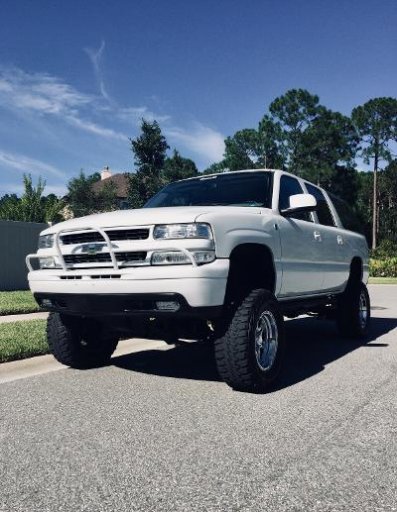
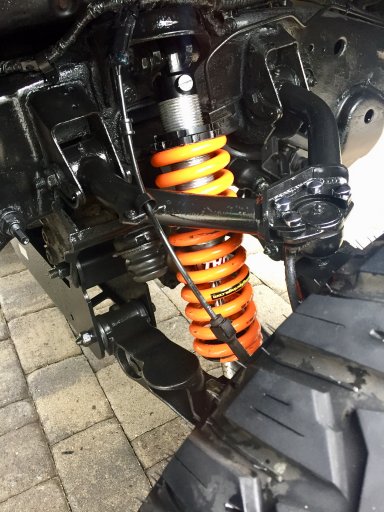
Suburban Rebellion - Go Big or Go Home - 2013 Suburban Build

  • HTML tutorial

KiloMike4

Rank IV
Launch Member

Advocate II

895
Lewisville, NC, USA
First Name
Ken
Last Name
Jackson
Member #

14219

OK, so it's time to kickoff this epic Suburban build thread. I've been putting it off for too long.
There needs to be more love out there for Fullsize Overland rigs; so let's get the party started.
But first a little perspective is in order...

The Truck: She's a sweet little 2013 Suburban 1500 LTZ - 4wd, with all the bells and whistles that has been my highway queen for work for the past umpteen thousand miles without any complaints (at least until the past year which is part of the story). My last driver was a 2008 4Runner that I drove the wheels off until trading it in for the Suburban. I had an ulterior motive at the time which was several driving trips with the family (+ dogs) so I was looking for the space. Well the Suburban really delivered as the ultimate highway queen and I fell in love immediately.

Fast forward September, 2018, and I've spent the last year planning my next offroad explorer which would be a 2018 4Runner. Oh, the hours I spent watching videos and reading reviews and forum posts to plan out the build. I had the 4Runner build nailed down. I even talked to several local shops to lineup the work. Then came the fateful day I drove the Suburban into to Toyota dealership to talk with the salesman I've dealt with in the past to have him start looking for the exact options I was looking to buy in the next month. Well that didn't go unnoticed...


To keep it short, let's just say engine light at 137k miles - oil pressure range... in the shop... %#%^$@&&&@@... new engine with 100,000 mile warranty. Well, let's think twice about that trade-in for a 4Runner.

And that's where she started whispering sweet nothings in my ear...
"If you look under my hood, you'd see the second battery tray the factory graciously installed for you."
"You forgot about the factory locker they put in my rear differential."
"If you push that button on the door, I'll blow cold snowflakes on your backside all day long."
"You know I have 8 cylinders and if you push that Tow/Haul button on the shifter, I'll actually move like I should."
... on and on and on...

And so here we go. We go big or we go home!
The 2013 Suburban LTZ build has started and we're on a roll.
Here's the baseline:
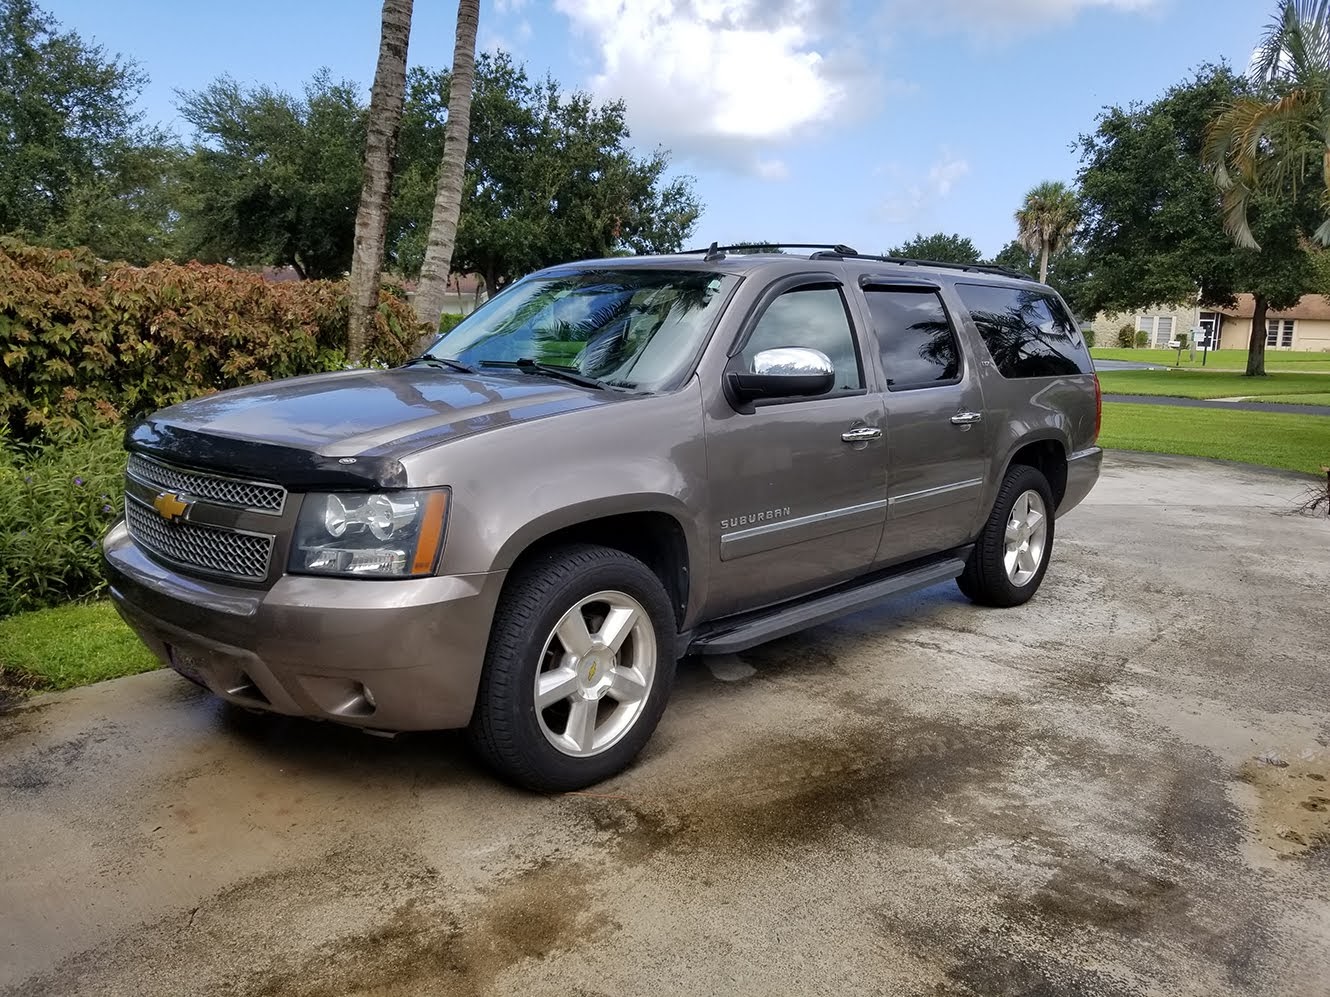
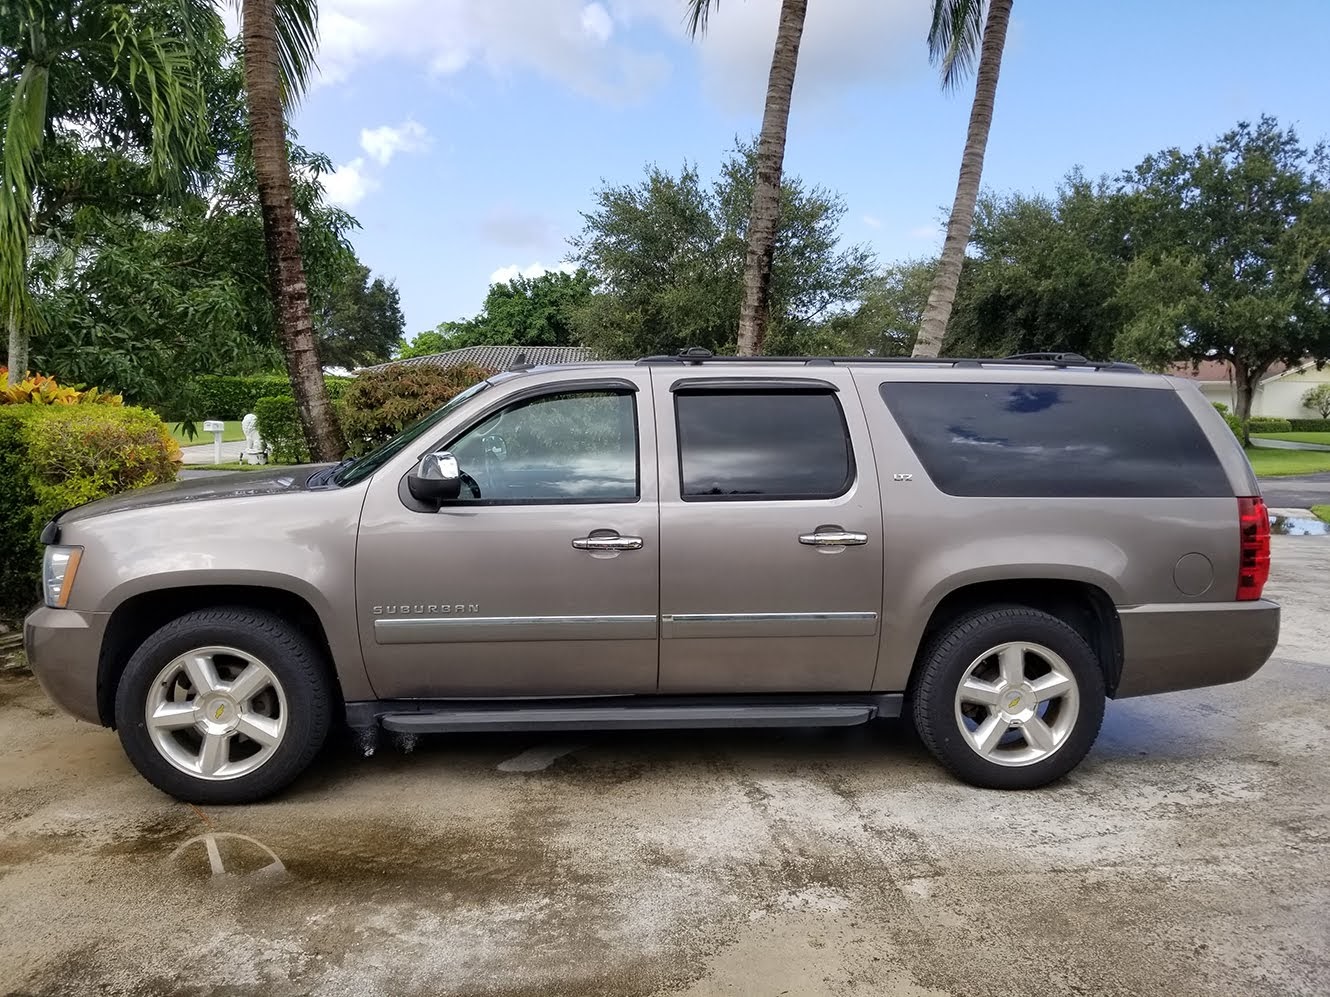

If you need some motivation to read this thread, here it is...


So first up is Tires, Wheels, and a Lift...
More soon to follow.

Edit 12/10/2018:
General Roadmap -
1. Capable A/T tires, new wheels and a small lift (~3")... done
2. Dual Battery setup - add new accessories (lights, air compressor, etc.) off house battery ... done
3. Front Bumper with integrated winch and recovery points. Improved wheel clearance and approach angles... done
4. Rock sliders to replace the factory plastic sidestep.
5. Rear bumper with improved wheel clearance, departure angle, integrated swing out spare holder, etc. (this one's going to be tough)
6. Roof rack sufficient for potential RTT in the future.
7. Rear drawer storage system with sleeping platform.
8. Coms - Ham radio, GMRS, CB...
.
.
.
We'll see where it goes from there.
Current build:
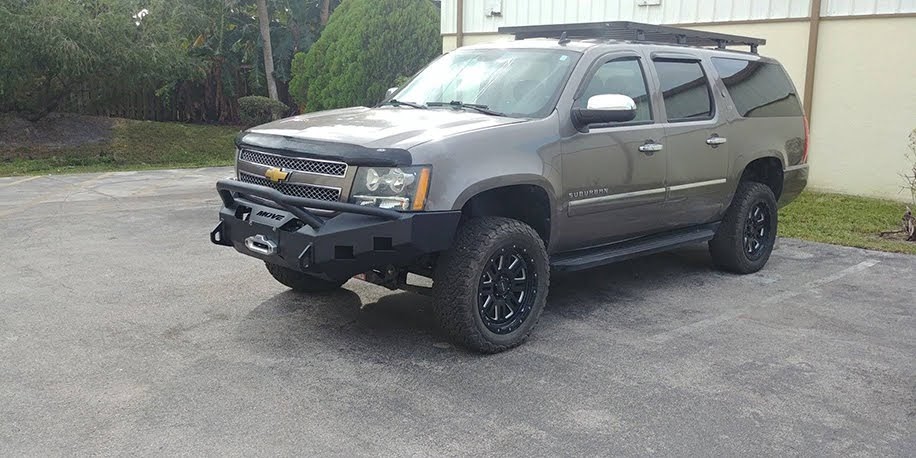
 
Last edited:

KiloMike4

Rank IV
Launch Member

Advocate II

895
Lewisville, NC, USA
First Name
Ken
Last Name
Jackson
Member #

14219

What are your plans? I would look into AFM delete if you want that new motor to last longer than the last one.
The plans in general are to modify the Suburban into a capable, comfortable overland rig. I have the time now to travel and explore and there isn't pavement leading to everywhere I'd like to go. At the same time, I realize that 95%+ of my time will be highway miles. That was a big factor in the decision to stay with the Suburban. So I don't want to sacrifice much of that highway comfort in the process. I'll edit my OP to add a roadmap and keep it updated with the progress. I have a little catching up to do for the work over the past couple of months.

That's real good advice on the AFM delete. I absolutely hate the AFM system GM designed. When I put the crate motor in I had to make that hard decision and it wasn't easy. I ended up going with a fully stock rebuild with a 100,000 mile warranty including full labor coverage. I have a real good mechanic that keeps her running and have already had to use some warranty $ on the initial install. I'd love to have more power but the 5.3 has enough to get me where I want to go while keeping the mileage at an acceptable level. The ability to get any stock service / repair work done on the engine across the country - just about anywhere - was a big factor in my decision.
 

Phildirt

Rank IV
Launch Member

Advocate II

The plans in general are to modify the Suburban into a capable, comfortable overland rig. I have the time now to travel and explore and there isn't pavement leading to everywhere I'd like to go. At the same time, I realize that 95%+ of my time will be highway miles. That was a big factor in the decision to stay with the Suburban. So I don't want to sacrifice much of that highway comfort in the process. I'll edit my OP to add a roadmap and keep it updated with the progress. I have a little catching up to do for the work over the past couple of months.

That's real good advice on the AFM delete. I absolutely hate the AFM system GM designed. When I put the crate motor in I had to make that hard decision and it wasn't easy. I ended up going with a fully stock rebuild with a 100,000 mile warranty including full labor coverage. I have a real good mechanic that keeps her running and have already had to use some warranty $ on the initial install. I'd love to have more power but the 5.3 has enough to get me where I want to go while keeping the mileage at an acceptable level. The ability to get any stock service / repair work done on the engine across the country - just about anywhere - was a big factor in my decision.
Since you'd need a new cam and lifters with the AFM delete you could address some of the power issues there. Long tube headers and less restrictive cats/muffler would bump you up a little more. I'd worry more about lifter failure than the ease of stock maintenance on a new motor.

If you are looking for mild offroad capability I'd look at the 33" tire range - something like Nitto Trail or Ridge Grapplers. Both have good highway manners and a little bite offroad. Also I am assuming you have either 3.42 or 3.72 gears - they will handle 33s just fine. They may fit with a level and some trimming depending on wheels. Personally I'd run stock wheels and keep the air presssure monitor capability. Plus those stock wheels are hub centric and you know they will balance well.

Shouldn't need much in the way of a roof rack unless you are taking the kitchen sink - I removed mine on my Burb because it was just added weight and wind resistance. I like sleeping on the ground so that was also a factor.

Once you start tinkering with it you'll find that they aren't as rare for overland applications as you'd suspect and I wouldn't trade my 05 for a jeep if you paid me to :) I did a coilover conversion in the front and upgraded to Bilstein 5100s in the rear - a must do if you haven't already.

Good luck with the build and I look forward to seeing your progress. I'm not super active in this forum but dip in from time to time.
 

KiloMike4

Rank IV
Launch Member

Advocate II

895
Lewisville, NC, USA
First Name
Ken
Last Name
Jackson
Member #

14219

1. Lift, Tires and Wheels

Skyjacker 3.5 inch Suspension Lift

BFG All -Terrain T/A KO2 285/55-20

Pro Comp Series 61 Cognito Wheels (20x9.5)


So the lift kit selection presented the first monkey wrench in one word – Autoride. This severely limited my lift kit options down to only a couple. You are basically forced to keep the stock shocks that are part of the system unless you go through major headaches. I tried to research removing the system and a few have been successful. But when they got to the part about sending off the BCM for reprogramming to avoid Christmas lights on your dashboard, I cried uncle. Skyjacker makes a 3.5 inch lift that works with the Autoride by using an extension on the stock shocks. There were a couple of 6 inch options but I didn’t want to go that high in this truck. I’ve been hearing it from my wife for years every time she has to climb up into my GMC 2500HD with a 6 inch lift and 37 inch tires – not going down that road again.

Measurements at the fender well before and after the lift put it right at 4 inches of lift all the way around.


For tires, I wanted to go a little bit bigger than stock but not have to bring out the hammers and saws to stop the rubbing. The BFG KM3’s looked appealing and would probably be a better pick for offroad – especially in the southeast. But I wanted a more all-around tire so starting with the KO2’s seemed a no-brainer. The 285/55-20 gave me a little bit wider track and a 32.4” diameter just a little above the stock 275/55-20. Well I did get some occasional rubbing at the steering limits. A couple zip ties on the fender liner and a razor blade took care of the worst and the new bumper should solve the rest. I’ll probably go up to 35” tires at some point but not until I’m ready to do the gears.

Wheels? Well, I liked the way the Pro Comp Series 61 Cognito’s looked and they came in a 20x9.5 with the right bolt pattern. Seemed like winning all around. We’ll see how they hold up.

Overall I’m really pleased with the outcome. The highway ride still has that magical land yacht feel. They performed well on my first trip to Overland Expo Mudfest East 2018. And most importantly got me out of the camping mudfest field when it was time to go home. The wife even gave her seal of approval for the ride and the looks!
 
Last edited:
  • Like
Reactions: JCWages and MazeVX

Phildirt

Rank IV
Launch Member

Advocate II

1. Lift, Tires and Wheels

Skyjacker 3.5 inch Suspension Lift

BFG All -Terrain T/A KO2 285/55-20

Pro Comp Series 61 Cognito Wheels (20x9.5)


So the lift kit selection presented the first monkey wrench in one word – Autoride. This severely limited my lift kit options down to only a couple. You are basically forced to keep the stock shocks that are part of the system unless you go through major headaches. I tried to research removing the system and a few have been successful. But when they got to the part about sending off the BCM for reprogramming to avoid Christmas lights on your dashboard, I cried uncle. Skyjacker makes a 3.5 inch lift that works with the Autoride by using an extension on the stock shocks. There were a couple of 6 inch options but I didn’t want to go that high in this truck. I’ve been hearing it from my wife for years every time she has to climb up into my GMC 2500HD with a 6 inch lift and 37 inch tires – not going down that road again.

Measurements at the fender well before and after the lift put it right at 4 inches of lift all the way around.


For tires, I wanted to go a little bit bigger than stock but not have to bring out the hammers and saws to stop the rubbing. The BFG KM3’s looked appealing and would probably be a better pick for offroad – especially in the southeast. But I wanted a more all-around tire so starting with the KO2’s seemed a no-brainer. The 285/55-20 gave me a little bit wider track and a 32.4” diameter just a little above the stock 275/55-20. Well I did get some occasional rubbing at the steering limits. A couple zip ties on the fender liner and a razor blade took care of the worst and the new bumper should solve the rest. I’ll probably go up to 35” tires at some point but not until I’m ready to do the gears.

Wheels? Well, I liked the way the Pro Comp Series 61 Cognito’s looked and they came in a 20x9.5 with the right bolt pattern. Seemed like winning all around. We’ll see how they hold up.

Overall I’m really pleased with the outcome. The highway ride still has that magical land yacht feel. They performed well on my first trip to Overland Expo Mudfest East 2018. And most importantly got me out of the camping mudfest field when it was time to go home. The wife even gave her seal of approval for the ride and the looks!
Looks good! I deleted the autoride by putting resistors at each shock and the pump. Tricks the pcm into thinking it's aired up. How much did that lift drop the front diff?

I'm running around 9" of lift on my Burb and it's getting 35s this spring. Here's an older pic, I've changed a few things. Burb 3.jpg
 

KiloMike4

Rank IV
Launch Member

Advocate II

895
Lewisville, NC, USA
First Name
Ken
Last Name
Jackson
Member #

14219

Looks good! I deleted the autoride by putting resistors at each shock and the pump. Tricks the pcm into thinking it's aired up. How much did that lift drop the front diff?

I'm running around 9" of lift on my Burb and it's getting 35s this spring. Here's an older pic, I've changed a few things. View attachment 78094
Thanks, that's a good trick with the resistor. I'll have to remember that for the future. I believe the diff drop was about 1 inch.

View attachment 78095 Here’s my front setup. Sorry to jack your thread just not a lot of Burb guys here lol.
No problem, I love seeing good stuff from others especially about land yachts. That's a good setup; I don't think my wife would let me get away with a 9" lift.
 
  • Like
Reactions: Phildirt

KiloMike4

Rank IV
Launch Member

Advocate II

895
Lewisville, NC, USA
First Name
Ken
Last Name
Jackson
Member #

14219

2. Dual Battery Setup

So I spent a long time looking at options for the dual battery setup before settling on the hardware I picked. Some of the things that went into consideration were:

-Override switch for the House battery as a backup to ‘jump start’ a drained main battery

-Separate House electrical system for added accessories to not drain the main battery

- Override switch for the House battery to support the start battery / alternator for high current demand winching (the one accessory planned to connect directly to the main battery

-Ability for House battery to handle long term current drain w/o charging ie refrigerator, inverter, lights, etc.

-Ability to incorporate a solar charging system in the future future


Battery Selection – I went with an AGM battery from Batteries Plus (made by NorthStar). It comes with a 60 month replacement warranty and will handle both high current starting and tolerate deep cycle discharges. It has a 69 AH capacity in the stock Group 48 size.


GM was nice enough to leave the driver front battery tray in place when they moved the Main battery back to the passenger firewall location for later year Suburbans. So all I needed was an $8 hold-down from the Chevy dealer and a bolt.

Here’s the stock second battery tray. Thanks GM!


So let’s get everything else together:

10 ft x 2 (Black and Red) 1/0 Welding Cable

Blue Sea ML ACR (Magnetic Latch Automatic Charging Relay)

200 A ANL Fuse Holder / Fuse

Battery Terminals

Shrink Tubing

Copper 1/0 terminal connectors

Hydraulic Crimping Tool (I highly recommend you use this or get pre-made cables)

Battery Hold down

Misc tools


The Blue Sea ML ACR was selected for several reasons. It has a high 500 A capacity rating on the relay. It automatically senses charging voltages on either circuit and closes the relay to connect the batteries after the charging voltage is sensed for 30 seconds. This delay gives the alternator a chance to bring back up the start battery without overloading it with a discharged house batteries. It has a low voltage sensor that will keep the batteries isolated with certain low voltage conditions. It has a manual override lever directly on top of the relay to either lock out the relay or force it to engage. It also has a remote switch that can be mounted in the cab to perform the same override functions.


1/0 Welding cable was used to connect the two battery’s positive terminals with the fuse and relay placed in line. The 200 A ANL Fuse for the new House battery was mounted on the fender wall next to the main fuse block. This keeps it close to the House battery that it’s protecting. It also is convenient for future power connections on the House circuit.


The House battery ground was connected to the stock grounding point for the second battery on the engine block.


Selecting a good spot for the ML ACR was a bit more difficult. I finally settled on the fender wall next to the Main battery. It gets some protection there but still offers easy access to the override lever.

***IMPORTANT NOTE: You can see below that when the new cable is routed to the firewall, it gets real close to the hing location when closed. I had to zip tie the cabling down tight near the battery tray to keep it from being hit by the hinge mechanism.


The positive 1/0 cable is connected to the Main Battery directly at the fuse terminal mounted on the positive battery terminal.


Here’s the finished Relay and cabling next to the Main battery.


KiloMike4

Rank IV
Launch Member

Advocate II

895
Lewisville, NC, USA
First Name
Ken
Last Name
Jackson
Member #

14219

Well she came back from the fabricator last night so time for an update.

1. Bumper and winch

OK, so the aftermarket bumper selection for a 2013 Suburban is slim to non-existent. I had a good idea what I wanted and that included a winch mount. There aren’t many options and you can count them on less than one hand. So that left me looking at a fabricated option. I stumbled on Move Bumpers and they really struck a note with the options that they had available. The only problem was that I would have to weld it together myself after they shipped me the pre-cut pieces. I could probably weld it together but I don’t think it would stay together long with my skills. Maybe I can work on those welding skills some day; but a front winch bumper is probably not the place to start.

So I went off in search of a local fabricator that could put all the pieces together. That was an adventure in itself. Long story short, I finally found the right man. A local small fab shop, CSA Services, was the right place. Mike had done some Move bumpers and was eager to tackle the project. He’s done quite a bit of offroad custom work and understood what I was looking for in the job.

Time to order the bumper. I went with the Move Bumpers Classic 2.5” Prerunner bumper.

https://www.movebumpers.com/products/classic-25-prerunner

I added the options for two 3” light cutouts on each side along with the off road upgrade that brings the center section and frame mounts up to ¼” steel and adds a winch mount. The order was placed and within two weeks the wife was calling me to tell me it was on the front doorstep. The center bumper piece came pre-cut and bent in ¼” steel. The remaining pre-cut pieces came packed in a single box wrapped in plastic and secured with foam. So now I had to get on the fabricator’s list to get it assembled and mounted. Between a busy economy, the start of hunting season and a trip to NC, we finally got her into the shop last Wednesday to start the build.

Mike was great to work with and excited to start the build. By Wed night he texted me a picture of the mock-up in progress. Oh boy, are we on the right track and I like where this is going!


I talked with Mike about the winch mount that night. He was concerned about getting a winch fitted before we finished the bumper to make sure we didn’t need to modify anything before we finished it. I had been putting off picking the winch between a few options hoping to see some enlightenment to help with the decision. Now I had to make a decision. After hours of research and reading reviews, specs, videos…. Ad nauseum, I decided to go for the Warn Zeon 10S. I went in Thursday morning and measured the space available in the mock-up and it was going to be a super tight fit. I went ahead and made the trip to pick one up and bring it back to the shop.


Saying the fit was tight, is probably an understatement and some tweaks were definitely in order. After a couple hours of looking at options, we decided to rotate the mount and bolt the winch to the front of the bumper. This forced us to move the fairlead cutout down in order to line up with the 10S location. We clocked around the clutch arm so it would be more easily accessible on the top of the winch through the access holes in the bumper. In the end, I think we ended up with a really good build. After all the final welds, the bumper was primed and finished with Raptor bed liner. I’m really pleased with the finished bumper and it really hits all the points that I wanted.


Next up will be wiring up the winch and spooling up the winch rope. I need to pick some lights for the cutouts and planning to go with amber led fogs in both a wide pattern and spot pattern – more to follow. Oh, I have to hang some shackles on those mounts, what color? Decisions… decisions…

(Those following along and looking at the pictures will see I’m skipping something. Yes, that’s a Front Runner rack on the roof in the bumper pictures. I finished the install the day before she went into the shop for the bumper and haven’t had a chance to do the write-up yet. I’ll do it next to catch things up…)
 

Doug B

Rank II
Launch Member

Contributor III

327
Visalia, CA
First Name
Doug
Last Name
Burch
Member #

16189

Very nice! I’m getting ready to start building my 2011 Suburban 2500. I may have to look into the same bumper.
 
  • Like
Reactions: Rusty burbin

DrRobert

Rank III
Launch Member

Enthusiast III

646
Bristow, VA
Member #

11858

OK, so it's time to kickoff this epic Suburban build thread. I've been putting it off for too long.
There needs to be more love out there for Fullsize Overland rigs; so let's get the party started.
But first a little perspective is in order...

The Truck: She's a sweet little 2013 Suburban 1500 LTZ - 4wd, with all the bells and whistles that has been my highway queen for work for the past umpteen thousand miles without any complaints (at least until the past year which is part of the story). My last driver was a 2008 4Runner that I drove the wheels off until trading it in for the Suburban. I had an ulterior motive at the time which was several driving trips with the family (+ dogs) so I was looking for the space. Well the Suburban really delivered as the ultimate highway queen and I fell in love immediately.

Fast forward September, 2018, and I've spent the last year planning my next offroad explorer which would be a 2018 4Runner. Oh, the hours I spent watching videos and reading reviews and forum posts to plan out the build. I had the 4Runner build nailed down. I even talked to several local shops to lineup the work. Then came the fateful day I drove the Suburban into to Toyota dealership to talk with the salesman I've dealt with in the past to have him start looking for the exact options I was looking to buy in the next month. Well that didn't go unnoticed...


To keep it short, let's just say engine light at 137k miles - oil pressure range... in the shop... %#%^$@&&&@@... new engine with 100,000 mile warranty. Well, let's think twice about that trade-in for a 4Runner.

And that's where she started whispering sweet nothings in my ear...
"If you look under my hood, you'd see the second battery tray the factory graciously installed for you."
"You forgot about the factory locker they put in my rear differential."
"If you push that button on the door, I'll blow cold snowflakes on your backside all day long."
"You know I have 8 cylinders and if you push that Tow/Haul button on the shifter, I'll actually move like I should."
... on and on and on...

And so here we go. We go big or we go home!
The 2013 Suburban LTZ build has started and we're on a roll.
Here's the baseline:


If you need some motivation to read this thread, here it is...


So first up is Tires, Wheels, and a Lift...
More soon to follow.

Edit 12/10/2018:
General Roadmap -
1. Capable A/T tires, new wheels and a small lift (~3")... done
2. Dual Battery setup - add new accessories (lights, air compressor, etc.) off house battery ... done
3. Front Bumper with integrated winch and recovery points. Improved wheel clearance and approach angles... done
4. Rock sliders to replace the factory plastic sidestep.
5. Rear bumper with improved wheel clearance, departure angle, integrated swing out spare holder, etc. (this one's going to be tough)
6. Roof rack sufficient for potential RTT in the future.
7. Rear drawer storage system with sleeping platform.
8. Coms - Ham radio, GMRS, CB...
.
.
.
We'll see where it goes from there.
Current build:

Nice looking rig. You can't beat that size. I've got a 2012 Suburban LTZ and have slowly but surely been adding capability. I've been wondering about the lift because I'd like a little more ground clearance and that suggests both a lift and bigger wheels. What did you do about that?
 

DrRobert

Rank III
Launch Member

Enthusiast III

646
Bristow, VA
Member #

11858

Nice looking rig. You can't beat that size. I've got a 2012 Suburban LTZ and have slowly but surely been adding capability. I've been wondering about the lift because I'd like a little more ground clearance and that suggests both a lift and bigger wheels. What did you do about that?
Whoops - I saw the other posts on the lift and tires. No need to respond. Thanks!
 

Doug B

Rank II
Launch Member

Contributor III

327
Visalia, CA
First Name
Doug
Last Name
Burch
Member #

16189

(Those following along and looking at the pictures will see I’m skipping something. Yes, that’s a Front Runner rack on the roof in the bumper pictures. I finished the install the day before she went into the shop for the bumper and haven’t had a chance to do the write-up yet. I’ll do it next to catch things up…)
Is your rack the grab on style? In know they don’t have one that is specific for Suburbans. Just haven’t had a chance to call them yet.
 

KiloMike4

Rank IV
Launch Member

Advocate II

895
Lewisville, NC, USA
First Name
Ken
Last Name
Jackson
Member #

14219

Is your rack the grab on style? In know they don’t have one that is specific for Suburbans. Just haven’t had a chance to call them yet.
It's actually their :

TRUCK CANOPY OR TRAILER SLIMLINE II RACK KIT / TALL / 1255MM(W) X 2368MM(L) - BY FRONT RUNNER
https://www.frontrunneroutfitters.com/en/us/roof-racks/canopy-cap-trailer-racks/truck-canopy-or-trailer-slimline-ii-rack-kits-by-front-runner.html#315=1424&316=1437&317=1432&328=1472


I had to adapt it to the Suburban. In short, I removed the factory rails and was able to re-use 4 (out of 6) holes on each side and had to drill two more holes and install rivnuts to mount the frontrunner rails. (Note: the frontrunner rivnut bolts fit the factory nuts mounted in the roof). The rack then mounts on 8 feet (note it's the tall feet) to the new rails.

I'm extremely impressed with the strength of the rack and the install. I don't hear any wind noise and very happy with the finished rack. They have one the same length that's a few inches wider that would also fit but I thought the narrower look on the roof was better. I got lucky in that it was barely wide enough to re-use most of the factory bolt holes in the roof.

I called them a couple of times with the questions on the Suburban. They were very helpful but didn't have any experience to share with mounting one of their racks on it. They said that they just don't see them in their shop.

I'll try to get some pictures up of the install with better explanation soon.
 
  • Like
Reactions: Doug B and Kao pii

Doug B

Rank II
Launch Member

Contributor III

327
Visalia, CA
First Name
Doug
Last Name
Burch
Member #

16189

It's actually their :

TRUCK CANOPY OR TRAILER SLIMLINE II RACK KIT / TALL / 1255MM(W) X 2368MM(L) - BY FRONT RUNNER
https://www.frontrunneroutfitters.com/en/us/roof-racks/canopy-cap-trailer-racks/truck-canopy-or-trailer-slimline-ii-rack-kits-by-front-runner.html#315=1424&316=1437&317=1432&328=1472


I had to adapt it to the Suburban. In short, I removed the factory rails and was able to re-use 4 (out of 6) holes on each side and had to drill two more holes and install rivnuts to mount the frontrunner rails. (Note: the frontrunner rivnut bolts fit the factory nuts mounted in the roof). The rack then mounts on 8 feet (note it's the tall feet) to the new rails.

I'm extremely impressed with the strength of the rack and the install. I don't hear any wind noise and very happy with the finished rack. They have one the same length that's a few inches wider that would also fit but I thought the narrower look on the roof was better. I got lucky in that it was barely wide enough to re-use most of the factory bolt holes in the roof.

I called them a couple of times with the questions on the Suburban. They were very helpful but didn't have any experience to share with mounting one of their racks on it. They said that they just don't see them in their shop.

I'll try to get some pictures up of the install with better explanation soon.
Thanks for the info!
 

portbigcity

Rank 0

Traveler I

Kilomike, great write up. I have been thinking about putting a rig together and I will have an opportunity in the near future to buy my dads older suburban in this model range. Being in louisiana, I do not have many opportunities to truly overland but I am a hunter and travel all over for that. I would need it to be an road warrior most of the time but will need clearance and some mud capabilities for some of the places I go. I have been wanting a dedicated truck to do that in and I have always loved my suburbans. I am sure I will hit you up with questions as I get closer to the build. Thank you for the thread.