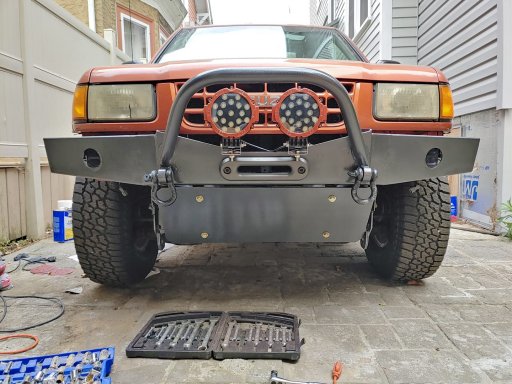
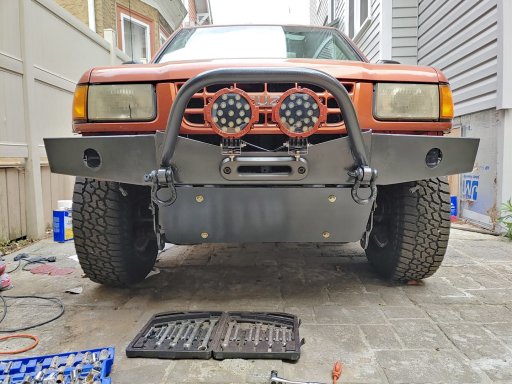
Question wiring lights to Rough Country switch controller

  • HTML tutorial

utherjorge

Rank V
Launch Member

Enthusiast III

1,416
Warren, PA
First Name
Dave
Last Name
Becker
Member #

17438

Good morning!

So, I have one of the Rough Country switch controllers, and although it's been in for a while (and gets power), only yesterday did I begin to hook it up. I attempted to wire two Nilight 51w floods to it.

The switch panel has a fuse and relay already as a part of the line, so I did not wire either of those into the two lights. However, wiring them in...must have been user operator error. No light. Not even a flicker to the lights.

I did hear clicking, so I am assuming that I blew the fuse. I will be taking it all apart to make sure that everything works before attempting again.

My question is: how to you wire the lights typically? I wired the two together with the negs all together, power all together, and to the panel. Is that the proper way to do it?
 
  • Like
Reactions: 1 person

Boort

Rank V
Launch Member

Member III

2,779
Colorado
Member #

9314

Good morning!

So, I have one of the Rough Country switch controllers, and although it's been in for a while (and gets power), only yesterday did I begin to hook it up. I attempted to wire two Nilight 51w floods to it.

The switch panel has a fuse and relay already as a part of the line, so I did not wire either of those into the two lights. However, wiring them in...must have been user operator error. No light. Not even a flicker to the lights.

I did hear clicking, so I am assuming that I blew the fuse. I will be taking it all apart to make sure that everything works before attempting again.

My question is: how to you wire the lights typically? I wired the two together with the negs all together, power all together, and to the panel. Is that the proper way to do it?
@utherjorge

If you throw the switch and hear a click than the rough country switch controller is doing it's job. The click is the relay flipping. Which means that you have power to the Switch controller, the in cab switch, the control wiring between the controller - switch, and control side of the specified relay. I was not able to find a set of instructions for the RC switch controllers online so I'm going to base this update off of similar sPOD and DIY Relay setups.

Please provide more information about what you did when you said " wired the two together with the negs all together, power all together".
When using a relay controller, Each device is usually wired to it's own +/- port on the relay controller

Check the following:
  1. Check fuse, if blown disconnect and check everything on the circuit with the blown fuse for a ground short! Your 51watt lights should be drawing 4.25 Amps, from what I see online the fuses in the RC setup are 30amp so if they blew something bad happened in that circuit.
  2. Do you have the lights connected to the CORRECT relay connections? (IE: if using switch 1 is the device connected to Relay 1?)
  3. Hook up a test light to the terminals for Switch 1 and Switch1 GRND, Does it turn on/off with the switch?
    (A test light is simply an Incandescent 12v bulb, in a socket with 2 wires see This test setup is safe here but don't use on your car's computerized circuits).
  4. Are the lights connected in the proper polarity?
    Unlike Incandescent/halogen bulbs the power can only be applied 1 way with LEDS, so you need the Positive lead hooked to + on the relay and negative hooked to Ground .
  5. Is your switch controller properly grounded directly to the battery?
    You should not use Chassis ground for the controller box.
  6. Do the lights work w/o the switch controller? Try tapping their +/- leads directly to to the battery and see if they light.
  7. At least some of the RC switch controllers have an integrated Low-Voltage Cut-Off to protect the battery. If your controller has this feature check the voltage of your battery to ensure it is above the cut-off threshold.
    Usually 11.2v-11.5v (This is unlikely the problem given you are hearing the relay click so I believe the battery is above the threshold but just something to confirm.)
Be sure to check out @Michael's videos on building and wiring a relay box. Your setup should be simpler as you just need to wire to the RC controller but the fundamentals and troubleshooting are the same:


Regards,
Boort
 
  • Like
Reactions: MarioT'sCJResto

utherjorge

Rank V
Launch Member

Enthusiast III

1,416
Warren, PA
First Name
Dave
Last Name
Becker
Member #

17438

I did hear that click, a couple of times, so I agree...I think it's "working" as intended.

Your first question might be the whole problem. I would assume that when you wire lights, I want them to run off of one switch, not one switch per light. I'll put a picture below of what they look like. So, I put all black together (two lights, neg from switch controller) and and all red together (ditto). If that's wrong, I literally don't know how to wire it up.

@utherjorge

Check the following:
  1. Check fuse, if blown disconnect and check everything on the circuit with the blown fuse for a ground short! Your 51watt lights should be drawing 4.25 Amps, from what I see online the fuses in the RC setup are 30amp so if they blew something bad happened in that circuit. AGREED. YET TO DO AS I FIRST ESTABLISH IF I'M A DUMB NOOB OR NOT
  2. Do you have the lights connected to the CORRECT relay connections? (IE: if using switch 1 is the device connected to Relay 1?) YES SIR
  3. Hook up a test light to the terminals for Switch 1 and Switch1 GRND, Does it turn on/off with the switch? NOT YET, BUT WILL DO WHEN I DISSASSEMBLE TO MAKE SURE I DON'T HAVE SOME OTHER FAULT
    (A test light is simply an Incandescent 12v bulb, in a socket with 2 wires see This test setup is safe here but don't use on your car's computerized circuits).
  4. Are the lights connected in the proper polarity?
    Unlike Incandescent/halogen bulbs the power can only be applied 1 way with LEDS, so you need the Positive lead hooked to + on the relay and negative hooked to Ground .YES SIR
  5. Is your switch controller properly grounded directly to the battery?
    You should not use Chassis ground for the controller box. YES SIR I actually had an automotive wiring guy work with me as he could use a real (and real large) crimper for wiring new wires to ground and what not.
  6. Do the lights work w/o the switch controller? Try tapping their +/- leads directly to to the battery and see if they light. AS ABOVE. WILL DO UPON DISSASSEMBLY
  7. At least some of the RC switch controllers have an integrated Low-Voltage Cut-Off to protect the battery. If your controller has this feature check the voltage of your battery to ensure it is above the cut-off threshold. WILL DO AS ABOVE...BUT KINDA A LAST STEP: I do have a Deka that's not charging great as the vehicle hasn't been run enough to properly charge it regularly
    Usually 11.2v-11.5v (This is unlikely the problem given you are hearing the relay click so I believe the battery is above the threshold but just something to confirm.)
Pic of setup:

frontwiring.jpg
 

Attachments

  • Like
Reactions: RoarinRow

utherjorge

Rank V
Launch Member

Enthusiast III

1,416
Warren, PA
First Name
Dave
Last Name
Becker
Member #

17438

I'm actually both a) out of town right now and b) waiting for the rig to get legal at the shop, with a fresh inspection.

I have gotten no further with this since the original post, and cannot post pics but will be able to do so in a couple of days.

I simply ran straight wires from the lights to the Rough Country controller box: wired both lights with solder and shrink wrap to the two wires to the controller. Reds all together and black all together, separately, of course.
 

utherjorge

Rank V
Launch Member

Enthusiast III

1,416
Warren, PA
First Name
Dave
Last Name
Becker
Member #

17438

I'm sorry that I didn't come back to reply. I solved the problem.

I tested the lights as is, and had a bit of a flicker. I didn't trust my connectors (soldering, shrink wrapping) so I cut it all, and then tested each light to make sure they worked. They did. This time, I got a good crimper, and crimped instead of soldered and then shrinkwrapped on top anyway.

Wired them together and tested. They still worked. Wired it to the controller, which had power...no joy.

Long story short, the furthest left switch on a 5-switch controller is not number 1. It's number 6. Assuming that the numbering is correct and properly ordered...the switches go from 6 to 2....with 1 being there, but non functional. All works as it should.
 
  • Like
Reactions: Boort