After the last trip I realized I desperately needed something to hold my phone and tablet for mapping. Ordered the T.P.A.M. from ExE and expect it to be shipped soon, I went ahead and got the 4.8 amp blue sea fast charger usb port preinstalled by ExE.
Qbaums 2017 Taco Bomb Adventure Build
- Thread starter quadabaum
- Start date
-
Guest, UPDATE We went through the site migration runbook and completed all steps. We will need to complete the migration next week, but will leave the forums up for the weekend. A few days after maintenance, a major upgrade revision to the forum site will occur.
I just finished installing the ExE T.P.A.M in my 2017 Tacoma TRDOR so I figured I would do a write up since there are not that many out there for this mod. I missed some of the pictures but I tried to get the impartant ones (aka wiring taps, etc). Excuse the poor lighting, I started mid afternoon but it took much longer than expected and I had to run to the auto store to get taps because I dropped the ones that ExE supplied and couldnt retrieve them.
1. Check the packaging, UPS beat my box up pretty good but ExE made sure everything inside was wrapped in foam and well taken care of. A+ on the packaging, + a free sticker :bananadance:
2. Begin the install. You start by pulling firmly on the radio bezel, it feels like youre going to break something but it comes off with pressure. You will be installing and pulling the bezel off several times so you will get used to it.
3. Undo the 4 10mm bolts holding the radio in. You can leave the radio hanging but I chose to unplug it because I wanted to get it out of the way and make it easier to connect the wiring.

4. Pull the A/C bezel off. This is an extra step but this made it easier for me to connect the wire taps and its easier to see what youre doing, I also took the time to check my wire taps with a voltmeter to make sure all was well. The trick to removing the A/C bezel if on the left side (close to the steering wheel) you will have to unclip a small section of the lower dash panel for the steering wheel. Youll have to pry it beck a little to get the A/C panel from behind it, it has a small U that ties the two together.

5. Find your 12V accessory plug and disconnect it. Pull the plug up towards the A/C panel area so you can see the wiring. Use the supplied t-taps to tie the red (positive) and purple (positive) wire and the black (negative) and white/black (negative) striped wire together. Try not the drop the taps, they are hard to dig out (ask me how I know).

6. Run the T.P.A.M. harness up the upward left hand corner of the radio and push the radio back into place. Start by installing the Lower 10mm radio bolts first. Then pull your supplied T.P.A.M. mounts and install them with the upper 10mm radio mount bolts. The shorter mount goes on the left/drive side and the longer mount goes on the right/passenger side.
7. Grab the radio bezel you removed and your T.P.A.M. and tape or clamp the T.P.A.M. to it. Be sure to slide the T.P.A.M. as far left/driver as it will go and get the rear side flush with the radio bezel. You will want to clamp/tape it to this spot then use a punch (+ screw driver in my case) to mark the 2nd and 6th mounting holes. You will then use a 1/4" bit ( I used a step bit) to drill the holes out.


8. Reinstall the radio bezel and look into your newly drilled holes (perv :rofl:) and check that you can see the mounting bracket, You will want to line the mounting bracket up with the holes so that you can use 2 of the longer supplied screws to mount the T.P.A.M.. Check the fit by mounting the T.P.A.M. to the bezel and bolting 2 of the longer screws to the mounts. Once you have the brackets adjusted remove the bezel and repeat step 7 to mark the remaining 4 mounting holes.


9. Be sure to make clearance for the wiring as well in the back of the bezel towards the left/driver side. Once you are done drilling mount 1 of the longer screws into the 1st (driver) mounting point. Then install the remaining shorter screws, nuts, and washers in the other 3 holes. Now reinstall the bezel with the T.P.A.M. mounted (plug your wiring connectors into the usb port before pressing the bezel into place) and install your last 2 longer screws to the mounting brackets and you are complete.

1. Check the packaging, UPS beat my box up pretty good but ExE made sure everything inside was wrapped in foam and well taken care of. A+ on the packaging, + a free sticker :bananadance:
2. Begin the install. You start by pulling firmly on the radio bezel, it feels like youre going to break something but it comes off with pressure. You will be installing and pulling the bezel off several times so you will get used to it.
3. Undo the 4 10mm bolts holding the radio in. You can leave the radio hanging but I chose to unplug it because I wanted to get it out of the way and make it easier to connect the wiring.
4. Pull the A/C bezel off. This is an extra step but this made it easier for me to connect the wire taps and its easier to see what youre doing, I also took the time to check my wire taps with a voltmeter to make sure all was well. The trick to removing the A/C bezel if on the left side (close to the steering wheel) you will have to unclip a small section of the lower dash panel for the steering wheel. Youll have to pry it beck a little to get the A/C panel from behind it, it has a small U that ties the two together.
5. Find your 12V accessory plug and disconnect it. Pull the plug up towards the A/C panel area so you can see the wiring. Use the supplied t-taps to tie the red (positive) and purple (positive) wire and the black (negative) and white/black (negative) striped wire together. Try not the drop the taps, they are hard to dig out (ask me how I know).
6. Run the T.P.A.M. harness up the upward left hand corner of the radio and push the radio back into place. Start by installing the Lower 10mm radio bolts first. Then pull your supplied T.P.A.M. mounts and install them with the upper 10mm radio mount bolts. The shorter mount goes on the left/drive side and the longer mount goes on the right/passenger side.
7. Grab the radio bezel you removed and your T.P.A.M. and tape or clamp the T.P.A.M. to it. Be sure to slide the T.P.A.M. as far left/driver as it will go and get the rear side flush with the radio bezel. You will want to clamp/tape it to this spot then use a punch (+ screw driver in my case) to mark the 2nd and 6th mounting holes. You will then use a 1/4" bit ( I used a step bit) to drill the holes out.
8. Reinstall the radio bezel and look into your newly drilled holes (perv :rofl:) and check that you can see the mounting bracket, You will want to line the mounting bracket up with the holes so that you can use 2 of the longer supplied screws to mount the T.P.A.M.. Check the fit by mounting the T.P.A.M. to the bezel and bolting 2 of the longer screws to the mounts. Once you have the brackets adjusted remove the bezel and repeat step 7 to mark the remaining 4 mounting holes.
9. Be sure to make clearance for the wiring as well in the back of the bezel towards the left/driver side. Once you are done drilling mount 1 of the longer screws into the 1st (driver) mounting point. Then install the remaining shorter screws, nuts, and washers in the other 3 holes. Now reinstall the bezel with the T.P.A.M. mounted (plug your wiring connectors into the usb port before pressing the bezel into place) and install your last 2 longer screws to the mounting brackets and you are complete.
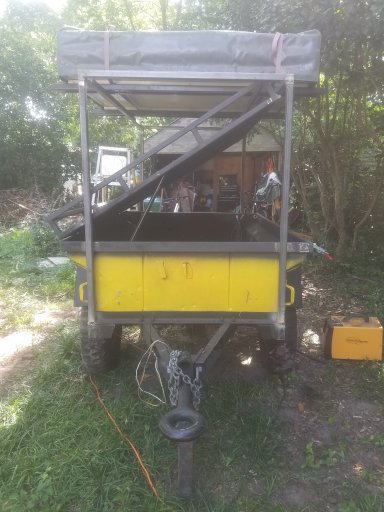
Did a little work to my M416 trailer in preparation for our Labor day trip to the outer banks. I fabbed the 1 1/4" rack to the trailer, it is tied to the frame so the lid can be used without disturbing the tent or awning. I have a 270 awning that will be on the trailer that is not pictured.
Attachments
-
1.9 MB Views: 53
Picked up a Dometic 962 toilet at Academy Sports and Outdoors today, they had it on clearance for $35. I wanted the 972 but figured for the price I would take the slight downgrade to the older model.
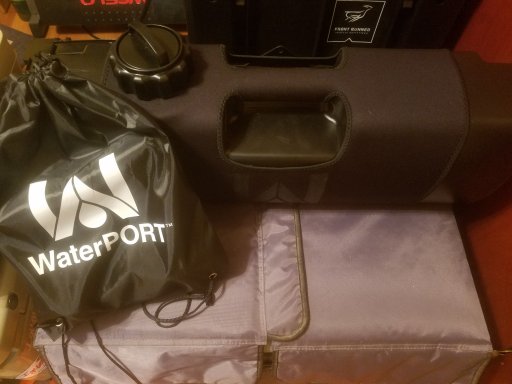
My Waterport Daytank got delivered today. I ordered the kit from Costco since it was a significant savings, comes with the pump cap and lock for only $170+ shipping. I am excited to have this on my rig for fresh water and shower duty. Will post up more and maybe a review after our outerbanks trip this labor day.
Attachments
-
3.1 MB Views: 59
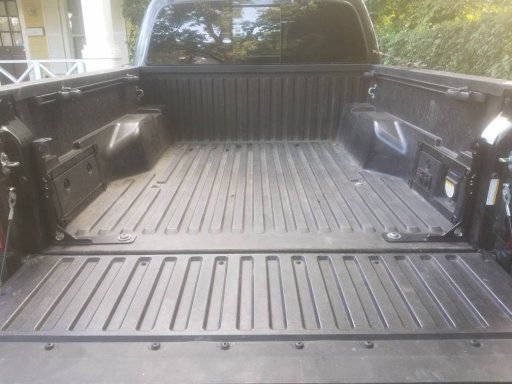
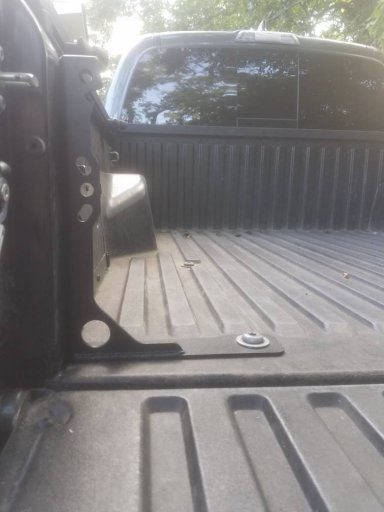
Got my At the Helm bed stiffeners installed. I didnt do a write because there is already a useful video and the instructions are sufficient. Its a straight forward, fast, and easy mod. Most excited about the bottle opener and extra tie down points. I did ratchet strap the bed tighter during install to make sure everything was squared up.


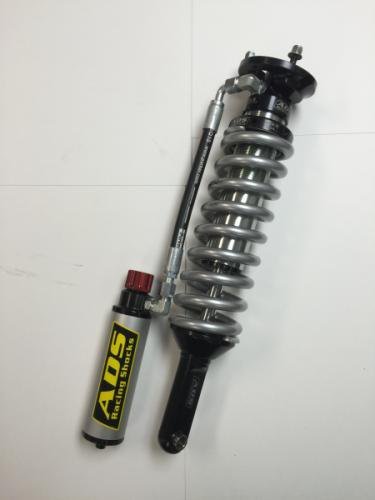
Well, had a dream that I ordered ADS suspension from Marie at Headstrong so I took it as a sign to stop shopping around and make it happen. She was super helpful through the entire process and I would definitely recommend her services. Plus her price is super reasonable, with free shipping, and a total package deal. Hopefully the is the last suspension kit I ever buy for this truck.[https://www]
I opted for 700# coils given I am a 3rd genDCSB V6 4x4 and I plan to add an AGMbattery and armor down the road. Also optedfor Headstrongs Stage 3 kit, extended lengthwith the compression adjusters, and SPC arms. I wanted to be in the $3,000 range but figured if I only want to buy once cry oncethen I need to do it now, plus the wife said she was cool with it given all the overtime Iworked this year and she wants me to only have to buy 1 lift kit for this truck, I love thatwoman. [https://www]
Also, dont judge my dream, I started my first day of my 3rd shift round last night and gotcalled in early for a 12hr shift so I didnt get any sleep. [https://www]
Current thought process is to set the preload low and shoot for 1.5" to 2" after everything settles. Also looking into the ECGS bushing and may do it during the suspension install.

Trip report for our trip to the South Core Islands of Cape Lookout National Seashore. https://www.overlandbound.com/forums/threads/qbaum-adventures-cape-lookout-national-seashore-labor-day-weekend-2018.18954/
Option Shipping ($) Lodging ($) Gas ($) Miles (HWY) Hours (HWY) Total Cost ($)*
A $ 1,100.00 $ - $ 604.00 3,624 55 $1,704.00
B $ - $ 230.00 $ 792.00 4,744 72 $1,022.00
C $ - $ 230.00 $ 755.00 4,529 68 $985.00
D $ 750.00 $ - $ 604.00 3,624 55 $ 1,354.00
*Total cost only includes cost of hwy driving, lodging, and shipping. Does not include camping in various destinations, gas while on trails, etc.
Option A
Nov 15-18 Home to Auburn to drop off dogs then head to Montrose, CO.
Nov 18-20 Rimrocker trail to Moab
Nov 20-22 Explore Moab trails and town
Nov 22-24 Lockhart Basin trail, valley of the gods
Nov 24-26 Visit 4 corners national monument on the way home
Pros Less HWY miles and HRS, smooth transition from trail to trail and get to see main attractions and no lodging costs.
Cons Pay for shipping charges
Option B
Nov 15-18 Home to Auburn to drop off dogs then head to Belgrade, MT
Nov 18-20 Belgrade, MT to Moab to explore trails
Nov 20-22 4 corners monument, valley of the gods, and lockhart basin trail
Nov 22-24 Rimrocker trail to Montrose, CO
Nov 24-26 Return home
Pros Get to see MT and the GFC HQ. No shipping charges.
Cons 1,120 more miles HWY, 17 more HRS hwy.
Option C
Nov 15-18 Home to Auburn to drop off dogs then head to Belgrade, MT
Nov 18-20 Belgrade, MT to Moab to explore trails
Nov 20-22 Explore trails in Moab
Nov 22-24 Rimrocker trail to Montrose, CO
Nov 24-26 Return home
Pros Get to see MT and the GFC HQ. No shipping charges. More time in Moab.
Cons 905 more miles HWY, 13 more HRS hwy. Miss Valley of the Gods and 4 corners monument.
Option D (Same as option A but with freight shipping )
Nov 15-18 Home to Auburn to drop off dogs then head to Montrose, CO.
Nov 18-20 Rimrocker trail to Moab
Nov 20-22 Explore Moab trails and town
Nov 22-24 Lockhart Basin trail, valley of the gods
Nov 24-26 Visit 4 corners national monument on the way home
Pros Less HWY miles and HRS, smooth transition from trail to trail and get to see main attractions and no lodging costs.
Cons Pay for shipping charges and have to install GFC myself
S
SubeeBen
Guest
How did that fuse panel work for you looking at the same one for my jku ?I learned a lot throughout this mod. I built my electrical system, now have 12.6v in the bed of the truck to run the dometic and charge stuff.


Sent from my SM-G930V using Tapatalk
It is working well so far, I have ran my fridge on several trips without any issues. I am adding the second set of wires soon which will run my interior lighting on my camper. Blue sea systems is quality gear for sure.How did that fuse panel work for you looking at the same one for my jku ?
S
SubeeBen
Guest
Awesome thanks for the feedbackIt is working well so far, I have ran my fridge on several trips without any issues. I am adding the second set of wires soon which will run my interior lighting on my camper. Blue sea systems is quality gear for sure.

World Traveler III
I see your MGM Taco and raise you a silver one. :)
I got this 2018 Off Road DCSB about 1.5 weeks ago with the plan to moderately outfit it for overlanding with my son. It’s also my DD so I don’t want to go too nuts just yet. I just picked up a used KB Voodoo tonneau cover rack that will go over my Diamondback cover for my RTT. Your build looks good, I’d love to see a photo of your drill-less antenna mount you have. Thanks!View attachment 49343
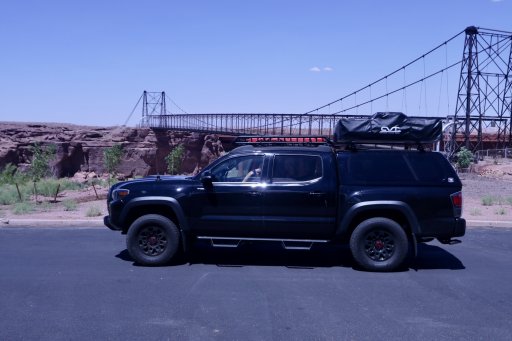
At first I put it on the hood on the left side now it’s on the return of the rear swing arm..
Update on my 265/65/R16 Falken Wildpeak AT3W
Just had my 1st rotation (5,000 miles on tires, 20,000 miles on truck), tires are at 11/32nds tread and fairly even all the way across the tread. I have been running 32psi front/30psi rear, I stepped it up to 34psi front/32psi rear to see if I can get the tread closer to even but I may be unrealistic since its soooo close already. I will see how these pressures ride and adjust again at the next 5,000 miles.
Just had my 1st rotation (5,000 miles on tires, 20,000 miles on truck), tires are at 11/32nds tread and fairly even all the way across the tread. I have been running 32psi front/30psi rear, I stepped it up to 34psi front/32psi rear to see if I can get the tread closer to even but I may be unrealistic since its soooo close already. I will see how these pressures ride and adjust again at the next 5,000 miles.
At my 20k service my dealer said I was due for a recall so they ordered the parts. I went back in today, about a week since my 20k service, and they performed the repair for the a/c blower recall. I wasnt having any issues with my A/C but it is nice to get ahead of the issue.
I also bought a hi-lift for self recovery on our big trip in November and a SOG Power Access Multi Tool as my EDC. I am not into knives and stuff but I saw this multi tool and how you can buy different components to change out the gear as needed which really intrigued me.
I also bought a hi-lift for self recovery on our big trip in November and a SOG Power Access Multi Tool as my EDC. I am not into knives and stuff but I saw this multi tool and how you can buy different components to change out the gear as needed which really intrigued me.

Steward II
- 10,598
- First Name
- Dave
- Last Name
- Addington
- Member #
-
10123
- Ham/GMRS Callsign
- KN6BKH
They look great. I’m interested in hearing how the install goes and the ride vs stockSuspension is now complete thanks to HeadStrong Off-Road, ADS Racing Suspension and Brown Santa. Parts delivered ahead of schedule.


Totally awesome shocks you're gonna install. Ride will be way better than stock. Great trucks just need better valved shocks and heavier springs for wheeling. I purchased most of my suspension parts from Headstrong, great company. Are you going to install yourself?
I will be installing myself with help from a friend next weekend. Hoping to get it all knocked out, seems pretty straight forward but I have been watching videos and reading threads on installs. I will be changing out my needle bearing and both diff fluids at the same time as well.Totally awesome shocks you're gonna install. Ride will be way better than stock. Great trucks just need better valved shocks and heavier springs for wheeling. I purchased most of my suspension parts from Headstrong, great company. Are you going to install yourself?


