Project 'Yeller' Trailer Build

  • HTML tutorial

KonzaLander

Rank VI
Member

Traveler II

3,402
Junction City, Kansas, USA
Member #

15814

Ham/GMRS Callsign
KE0EBF
Isn't that how it goes? You have a beautiful weekend ahead that would be perfect for working on your trailer project, but your honey-do list is 3 pages long and relatives are in town...

I needed to finish prepping the 'box body' so I could take the whole thing apart and get ready for sand blasting. One of the last things to do was to install 4 used SouthCo locking latches for the side doors along with some generic handles. I repeated this same installation on both sides.
1627918321190.png

I removed the 'box body' from the trailer for the last time (let's hope!) and finished welding the rack and attached the receiver hitch reinforcement rings at each end of the backbone.

I then pulled the trailer frame out of the shop to media blast it. I really don't like blasting, but it is the best way to remove paint, rust and scale and end up with a consistent finish.

1627918419794.png

Remember how busy the weekend was? I ran out of daylight when trying to finish blasting the frame.

1627918485641.png
 
  • Like
Reactions: Shahn and PCO6

KonzaLander

Rank VI
Member

Traveler II

3,402
Junction City, Kansas, USA
Member #

15814

Ham/GMRS Callsign
KE0EBF
I pondered for awhile on how to remove the weld seam from the 2.5" backbone tubing. My first few tries were using tools I already had. I tried to use a reciprocating saw with a cutting blade on it with no success as well as a hammer and chisel. Then I tried to use a hand file and while the hand file was working (slowly) it was way more effort than I cared to do. Seeing this as an opportunity to buy a new tool I started looking at mini belt (finger) sanders but ultimately settled on a file that attaches to the reciprocating saw.
1628536249591.png

I drilled an 11/16" hitch pin hole at both ends of the trailer and both ends of the trailer will accept 2" hitch accessories.
1628536466337.png

Utilized the 100's winch to hold the trailer in the upright position while I blasted the under side.
Before:
1628536836019.png

After:
1628536928138.png

Finally. The yellow is disappearing from Yeller! Here it is with one splotchy coat of DTM Chassis Black on the frame.
1628537354322.png

I now have two coats of paint on the frame and am debating if a 3rd coat is really necessary. It already has a consistent finish and smooth color throughout.

I have just about finished stripping the paint from the 'box body' using any method available. While I am not sure how old the trailer frame is (I suspect its from the 60's) I do know that it has had at least 5 paint jobs (red oxide primer followed by: Cat yellow, white, blue, red, yellow). These layers of paint have been a pain to remove. It is so humid here in Kansas I can hardly use the blaster since the two water traps I have don't seem to catch all of the moisture in the air line and it clumps the blast media. Might be time to build a drier... Angle grinder with flap wheel and stripper wheel has worked great though!
 
  • Like
Reactions: Kozysnack and Shahn

KonzaLander

Rank VI
Member

Traveler II

3,402
Junction City, Kansas, USA
Member #

15814

Ham/GMRS Callsign
KE0EBF
It took most of the week, but I was able to get the 'box body' components stripped and primed (yay... the yellow is GONE!!!!). The components where moved outside so I could get them ready to spray with Raptor liner. I am sure the folks from the neighboring county that drive my road think I am crazy.

1629123092400.png

I bought my first Raptor liner kit from TCP Global a decade ago for doing the bed of the [still incomplete] MJ project. The results were fantastic so I decided to use Raptor Liner from TCP Global again. I chose the tintable version of the Raptor liner for Yeller and went with "Charcoal Metallic" as the color. Mixing the Raptor liner is quick and easy: Fill the bottle of liner with the provided hardener to the next ridge in the bottle then dump in one bottle of the color tint and shake it like a shake weight!

Initially I followed the Raptor instructions and set my airline pressure to 60 psi (40-60psi is recommended). From my past experience I knew the higher the pressure the finer the texture. I wasn't thrilled with the rough texture of the Raptor liner being sprayed at 60 psi.

1629123143431.png

On the second coat I ran the line pressure to 85 psi, since I seem to remember spraying the MJ bed around 90psi. The texture was much finer and did a nice job smoothing out that rough first coat.

1629123196226.png

After the Raptor cured for 1 day, I taped off the fender and coated it in Chassis Black paint. You can also see the final texture of the Raptor liner.

1629123301338.png

Components moved inside and awaiting final assembly...

1629123332659.png

... but first, I need to cut the floor for the center part of the trailer. I am going to use a PVC panel for the inner floor. I've never used this material before, but being water and mold proof is a huge bonus based on where it will be installed.
 

KonzaLander

Rank VI
Member

Traveler II

3,402
Junction City, Kansas, USA
Member #

15814

Ham/GMRS Callsign
KE0EBF
I was hoping to get the trailer done in time for a trip over Labor Day weekend, but it just wasn't going to happen so I took a couple of weeks off and I am now back working on it.

I started to reassemble the 'box body'. Between each steel panel on the 'box body' I am running a strip of 3/4" Butyl tape to try and keep some of the elements at bay. My least favorite part of the trailer is the back panel. It was clearly beat by an orangutan in it's previous life. Luckily, most of the wavy panel will be covered by the rear door gasket.
1631716174047.png

I am also starting to focus on the trailer's electrical system. I prefer easy to use and multiuse components when it comes to my overland projects. The trailer will have a 7 Pin connector and have a 20amp power provided by the vehicles second battery. Since there are no good spots to mount rocker switches in this trailer, I am going to use an Auxbeam switch kit and panel mount the thin switch pad inside the side door.

In the above picture you can see I already have new taillights. I modified these LED "Jeep" style taillights to have the tag light on its own circuit. Both lights have a tag light for some reason and I intend to switch the tag light as low output area lighting. The reverse lights will be powered by the tow vehicle and by a switch for more camp light options. A diode will prevent the tow vehicle reverse lights from illuminating when the trailer reverse lights are manually switched on. While this trailer is small enough it doesn't require amber clearance lights, I am adding two on each side at the bottom of the 'box body' at the front a rear. These clearance lights will illuminate with the taillights, but they will also have the ability to be manually switched on with diodes preventing the taillights from illuminating. I suspect these clearance lights will be my 'go-to' camp light.

I know most folks would rather bolt on a couple of small high lumen LED bars for area lighting. I have learned I dislike a lot of light at camp and prefer to let my night vision do it's thing. In the event I need additional light around the trailer, 4 Nilight "rock lights" at each corner of the rack should provide enough illumination. The trailer will have interior cargo light since it is pretty dark on the inside that will turn on whenever one of the 4 doors are opened.

1631890016382.png
 
Last edited:

KonzaLander

Rank VI
Member

Traveler II

3,402
Junction City, Kansas, USA
Member #

15814

Ham/GMRS Callsign
KE0EBF
The handles and locking latches are installed along with some adhesive backed weather stripping.

1632167680245.png

I then started working on getting the 4 doors mounted on the trailer. I lined the doors with butyl tape and then clamped them in place. I progressively tightened the clamps to evenly spread the butyl seal under the door. Once the door made contact with the 'box body' I drilled and bolted the doors in with #8 machine screws and locknuts.

1632167704531.png

I then secured the floor to the frame with galvanized carriage bolts/split lock washers and nuts. Once I get some miles on the trailer and know the floor will work out I will apply seam sealer.

1632167736037.png

I buttoned up the leaf springs and set the trailer weight on the axle in anticipation to finally do a test pull behind my Land Cruiser. I hear two loud pops when the trailer settled on the ground and noticed the shackle was laying against the frame. When I calculated the shackle angle months ago, I did not expect the springs to flatten out so much and collapse the shackle under the weight of the trailer. Ugh, now I have to move the rear shackle hanger back 2.5 inches :disappointed: 
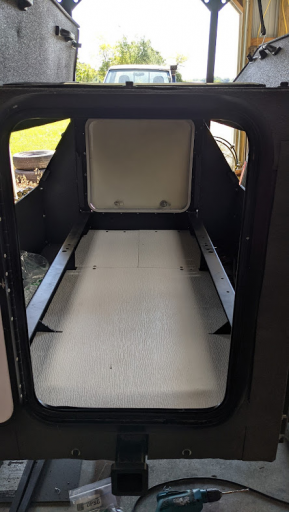
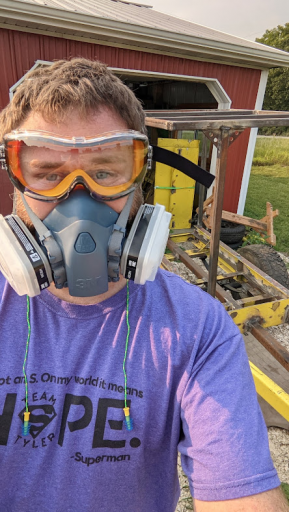
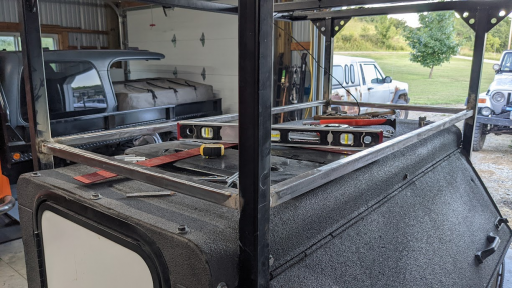
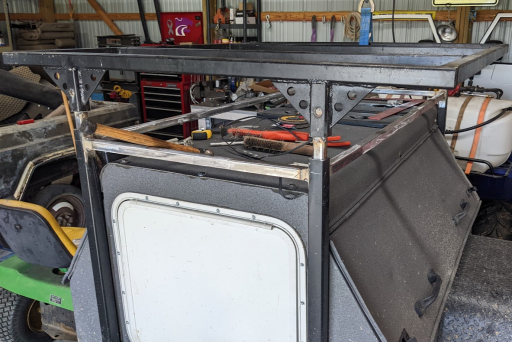
Ah, the life of DIY.
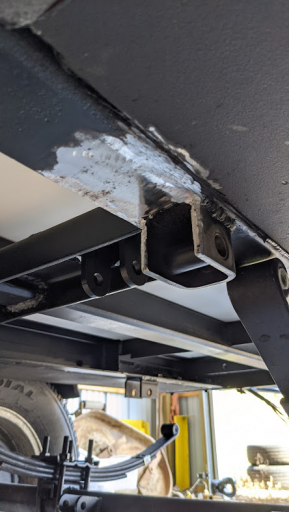
1632167760569.png
 

KonzaLander

Rank VI
Member

Traveler II

3,402
Junction City, Kansas, USA
Member #

15814

Ham/GMRS Callsign
KE0EBF
Yesterday I finally made "real" progress on the trailer.

I was able to get new shackle hangers welded on and painted. Then I installed the shocks, tightened down the suspension, torqued the lug nuts and filled the tires with air. With an empty load the leaf spring shackles are sitting just past 90° towards the rear of the trailer; perfect.

First test pull was a success.
1632318461739.png
1632318612049.png

It is still far from done. The to-do list continues to grow:
  • Wire trailer and cargo/rack lights
  • Figure out how to install safety chain (properly)
  • Get new tires
  • Figure out how/where to mount a spare tire
  • Trim U-bolts
  • Install bump stops
  • Apply seal sealer to unsealed joints
  • Move RTT and awning from Cruiser to trailer
  • Start planning a water system
 

KonzaLander

Rank VI
Member

Traveler II

3,402
Junction City, Kansas, USA
Member #

15814

Ham/GMRS Callsign
KE0EBF
Starting to build the wire harness for Yeller. I am not sure what the best way to go about building a custom wire harness is, but I am slowly getting it done. Sure am glad I have a wire diagram cheat sheet so I don't forget something :flushed:
1632512254165.png

And a bit of trailer farkle. I made a vanity plate. In Kansas, trailers under 2,000lbs are not required to be registered/tagged.
1632512915079.png
 
  • Like
Reactions: PCO6 and Shahn

KonzaLander

Rank VI
Member

Traveler II

3,402
Junction City, Kansas, USA
Member #

15814

Ham/GMRS Callsign
KE0EBF
A little progress.

New shoes! I decided to get Goodyear Trailrunner AT's in a 235/75R15 for Yeller. The spare tire mount is temporary until I can come up with a better solution. If anybody has any ideas, let me know!
1632969724873.png

When I went to hitch up the trailer again I discovered my electrical plug was about 4" too short to reach the new 7 blade plug on my Land Cruiser. I built an extension to fix that blunder. Now to clean it up.
1632970938965.png

The trailer electrical system is now fully operational. I opted to use an Auxbeam switch assembly for power distribution. The switch panel has an extension cable that will allow it be used in the RTT, stuck to the outside of the trailer or secured inside the trailer. This will be great for those late night nature calls!
1632971825106.png

Cargo:
1632972068146.png

Rack:
1632972195081.png

Amber clearance:
1632972254500.png

Backup:
1632972331767.png

The mysterious Rock Lights:
1632972386146.png

Running lights. She is ready to roll down the highway!
1632972510486.png
 

KonzaLander

Rank VI
Member

Traveler II

3,402
Junction City, Kansas, USA
Member #

15814

Ham/GMRS Callsign
KE0EBF
In preparation for a weekend trial run with Yeller, I wanted to transfer the RTT from my Land Cruiser to the trailer. I usually request help from a local buddy when I need to remove or install the RTT on the Cruiser, however he was tied up 4 counties over in corn harvest... so I improvised.
1633098077186.png
1633098127289.png
1633098211148.png

RTT installed. I'll probably move the 270 awning over to the trailer someday, but I have really grown to like it mounted to the cruiser! My wife would probably disagree that I need two awnings...
1633098722229.png

I have been pondering what to do with the spare tire and I might have come up with a reasonable solution. I will build a spare tire carrier, similar to what you would find on the back of a Jeep CJ7. It would mount the tire in front of the front door and attach to the vertical rack supports. I don't foresee the front door being used much and a tire that swings away would still allow access if necessary. This is the only solution I have come up with that keeps the tire in front of the axle, preserves the ability to 90° jackknife and keeps the weight somewhat low.
 

KonzaLander

Rank VI
Member

Traveler II

3,402
Junction City, Kansas, USA
Member #

15814

Ham/GMRS Callsign
KE0EBF
The inaugural weekend run with the trailer was a success.

1633362372486.png
1633362513503.png
1633362547466.png

It pulled great on the interstate and down rough rutted roads. I was pleasantly surprised to see that it (almost) tracks perfectly behind the cruiser in tight turns. There was some "bounce" in the trailer on occasion, but I suspect once it actually gets loaded up for a trip the extra weight will makes the springs work.

Two 'issues' presented themselves on the trip.
  • Squeaky suspension sounds like a mid 90's Chevrolet truck. Since the bushings are new, I suspect it is due to a lack of lubrication. I am considering moving to a grease type "wet" spring bolt to make sure grease is in the bushing since it seemed to 'wipe off' when I installed the spring bolts.
  • Unsecured RTT straps flap in a wind and make an annoying 'tap-tap' sound. A couple of those reusable gear-ties should fix that problem.
 
Last edited:

KonzaLander

Rank VI
Member

Traveler II

3,402
Junction City, Kansas, USA
Member #

15814

Ham/GMRS Callsign
KE0EBF
I have started planning a water system for the trailer and think I have settled on a design. Check out my super high tech diagram below:

1634075198344.png

I will generally fill with potable water from a municipal supply or well supply. If I use a non potable water supply, the water will be pre filtered outside of the trailer to remove large sediment or dirt. Once water is in the tank, I will chlorinate it with bleach for storage. To use the water it will be filtered via 3 stages to remove gunk in the water and the chlorination. If anybody had recommendations to improve the water system, let me know!
 

PCO6

Rank V
Launch Member

Member III

2,268
Newmarket, Ontario
First Name
Stew
Last Name
Beatty
Member #

12534

There ain't much yeller left in Project Yeller! You could always paint the doors yellow. What about the Turbines? :fearscream:

I have a similar water system with and on demand Eccotemp heater included. I opted for a portable 20 liter plastic Sceptor jerry can tank though. I put it on the tongue so it's easy to take off, clean, store for the winter etc. and go for water on foot when I need to. Maybe you can find one in yellow! lol
 
Last edited:
  • Like
Reactions: KonzaLander

Billiebob

Rank V
Launch Member

Member III

2,835
earth
First Name
Bill
Last Name
William
Member #

18893

Glad you upgraded the axle, and the trailer looks pretty light but the narrow frame creates a lot of leverage from the spring to the hub...
Be diligent monitoring the axle.
 
  • Like
Reactions: KonzaLander

KonzaLander

Rank VI
Member

Traveler II

3,402
Junction City, Kansas, USA
Member #

15814

Ham/GMRS Callsign
KE0EBF
There ain't much yeller left in Project Yeller! You could always paint the doors yellow. What about the Turbines? :fearscream:
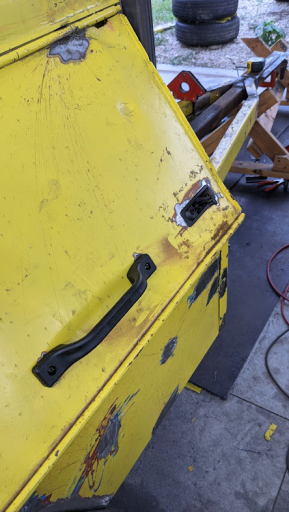
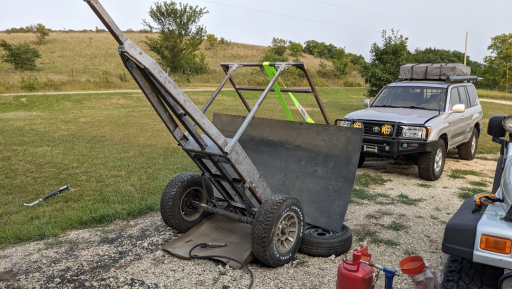
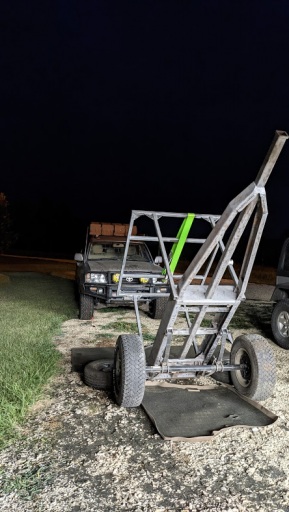
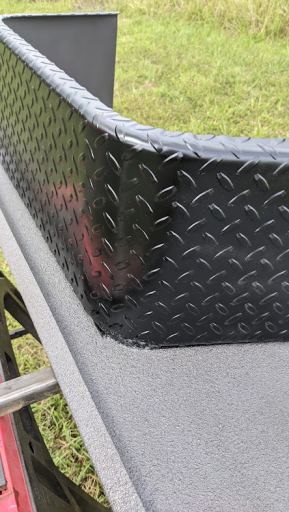
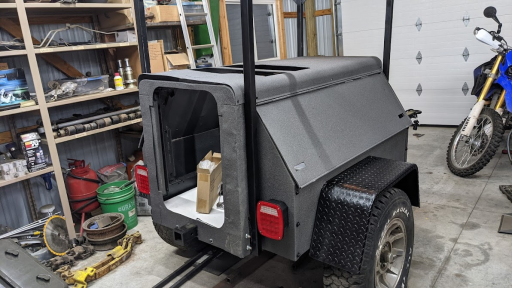
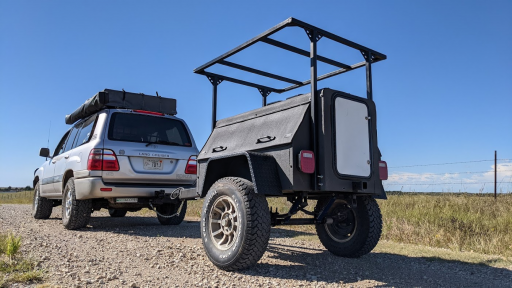
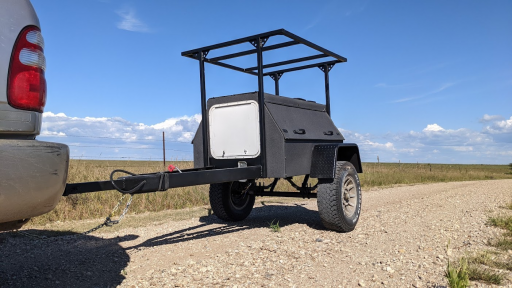
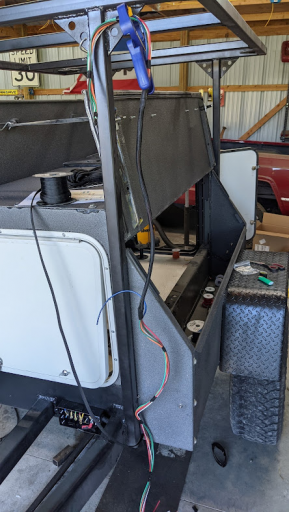
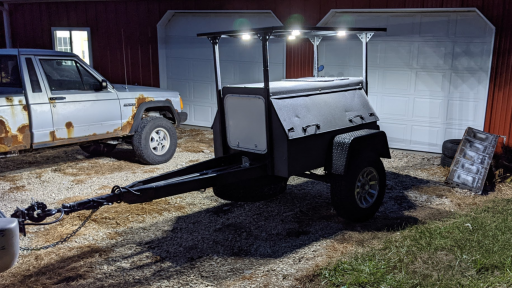
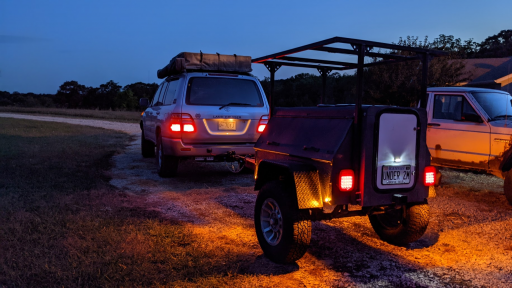
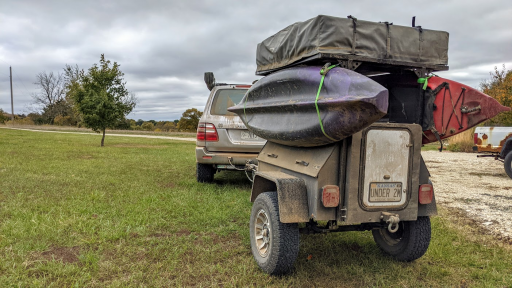
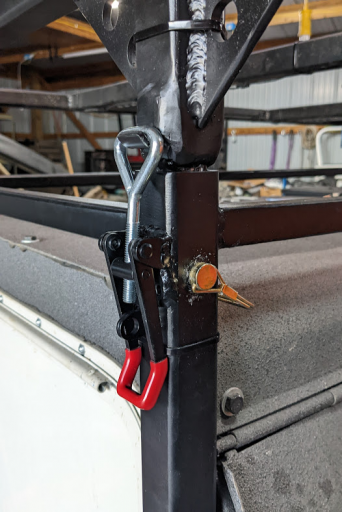
If you squint, there is still some yellow over spray on the safety chains that I reused. It is such a relief that the yellow is gone!

Glad you upgraded the axle, and the trailer looks pretty light but the narrow frame creates a lot of leverage from the spring to the hub...
Be diligent monitoring the axle.
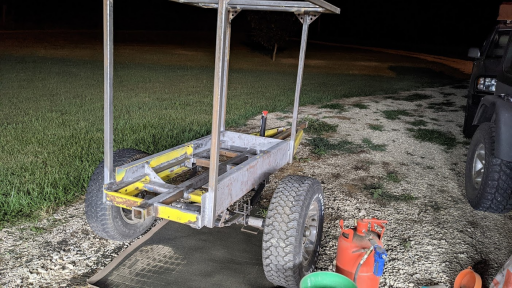
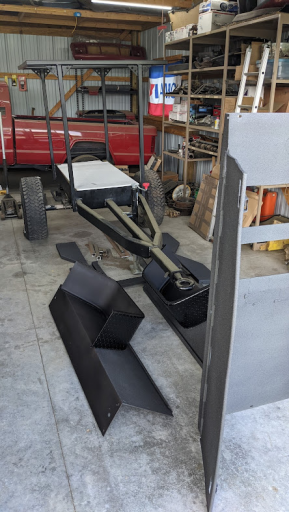
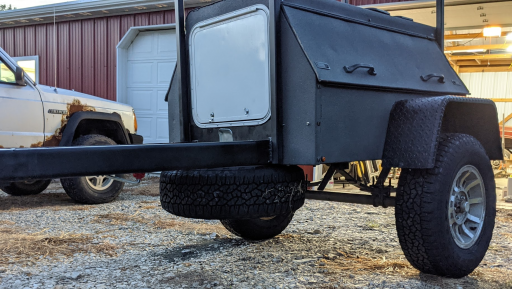
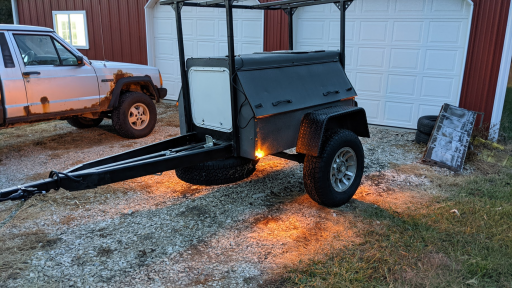
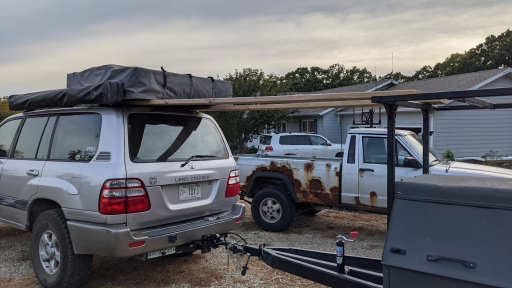
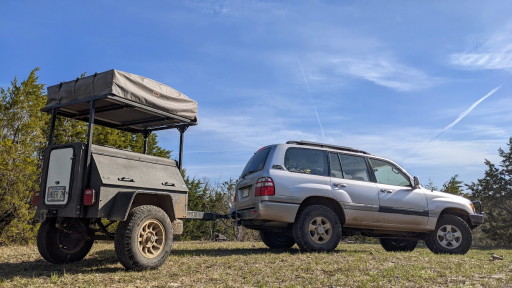
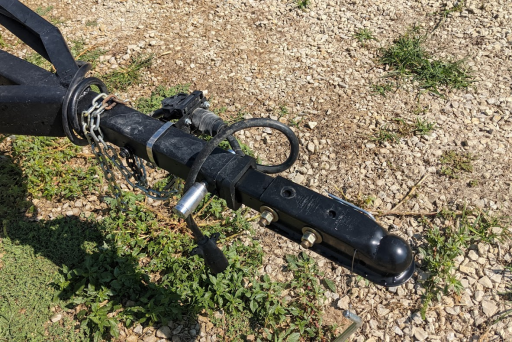
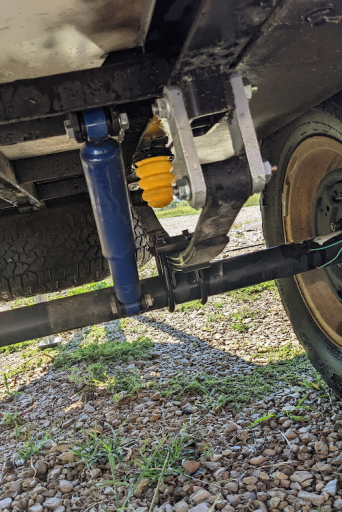
You are absolutely right. The narrow frame and narrow suspension isn't ideal. I suspect the higher capacity leaf springs will help keep the trailer stabile with the extra leverage created from the spring to hub distance on the axle. My only fear is that the extra leverage could bend the axle, so I am keeping a close eye on it.
 

KonzaLander

Rank VI
Member

Traveler II

3,402
Junction City, Kansas, USA
Member #

15814

Ham/GMRS Callsign
KE0EBF
I am still scratching my head on the best place for the water tank, so the water system is still currently just a box of parts in the garage.

In the meantime I removed the leaf spring and shackle bolts and coated them in sticky grease. I also adjusted my torque technique on the suspension bolts. I tried tightening them to snug then backing off a 1/4 turn on the lock nut. The suspension responded well to this and the trailer is riding much smoother on rough roads and that old chevy leaf spring squeak sound is gone.

Hauling a couple of kayaks was one of my design goals for the trailer and I finally got to try it out.

1635175599753.png

The kayaks fit perfect in the space. The top of the hull sat flush to the vertical supports of the rack and the sides of the hull just fit between the rack and the doors. While the straps held the kayaks firmly on rough roads and at 75mph on the interstate, I need to figure out a more elegant solution to secure the kayak and to get them onto the trailer.

I have now put about 600 local miles on the trailer.
 

KonzaLander

Rank VI
Member

Traveler II

3,402
Junction City, Kansas, USA
Member #

15814

Ham/GMRS Callsign
KE0EBF
I now have around 2,500 miles on the trailer.

At the start of 2022 I added bearing buddies to the hubs in hopes that the positive pressure would help keep water out of the bearings. The trailer likes to follow the Land Cruiser when it goes swimming, so every little bit should help. The bearing buddies are NOT a replacement for pulling and repacking the bearings.

1660155962641.png

On a trip to the Mark Twain National Forest after the MOORE Expo I finally got to pull the trailer down roads that were actually rough. You can see a bit of that in this video:

I quickly learned the trailer is too top heavy. During the build I mentioned some concern about the stability of the trailer due to its height and the narrow leaf spring configuration. While the height is great for hauling the kayaks, it is not necessary the rest of the time. I am going to remove 11" of rack height and weld a square pipe to the rack that will nest into the lower main structure of the rack.

To get started I added supports to the main structure of the rack.
1660157056213.png

Then I cut the top section of the rack off.
1660157268142.png

Now I need to construct the nesting tubes. I have a few ideas in mind to tackle this, but I am not sure what will be the most most effective.
 
  • Like
Reactions: Nathan_96ee81

KonzaLander

Rank VI
Member

Traveler II

3,402
Junction City, Kansas, USA
Member #

15814

Ham/GMRS Callsign
KE0EBF
I settled on 1" tube with alignment shims for the nesting poles. Here it is tacked together for a trial fit.
1662474091502.png

A 3/8" pin and 1300lb latches hold it all together.
1662474663245.png

The pintle is kind of noisy when city driving so I built a 2" ball adapter for the trailer. This will be useful this fall when I take a trip with my wife that will involve several urban centers.
1662474138677.png

I installed bump stops and greaseable shackle bolts. Greaseable shackle bolts will make keeping the leaf spring bushings lubed a simple task.
1662474164704.png

With the tent on and the rack lowered, the trailer is more proportional than it was with the rack way up high. It also passes the "shake" test in the driveway :laughing:
1662474191397.png

The next steps are to (finally) finish up the brake wiring, repaint some of the components that are chipping and tackle efficient interior storage security.