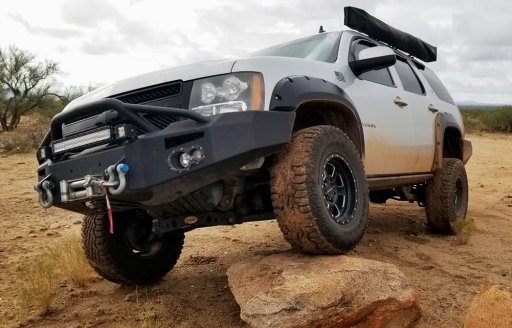
My 2011 Tahoe LT. build, a work in progress.

  • HTML tutorial

Charles M

Rank V
Launch Member

Member III

2,771
Wickenburg, AZ, USA
First Name
Charles
Last Name
M
Member #

17640

Ham/GMRS Callsign
K1CJM
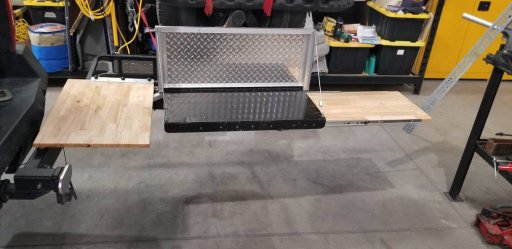
Finished the extra table on the left side today.

20191024_133840.jpeg

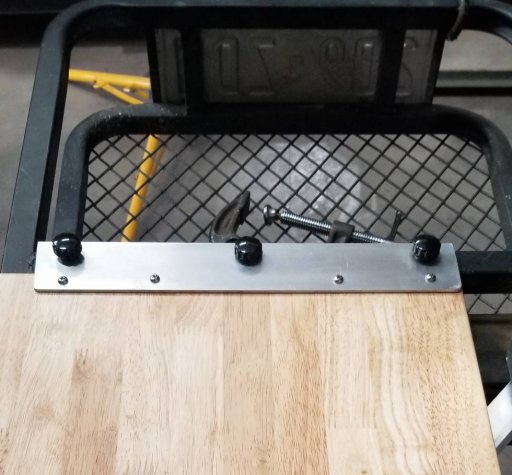
These are the three thumb screws that hold it in place.
20191024_160741.jpeg

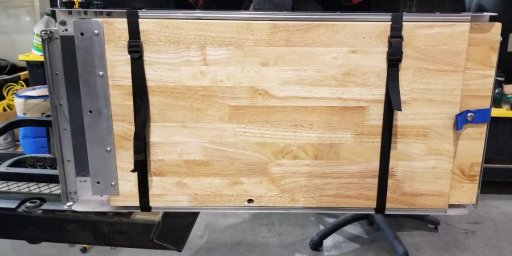
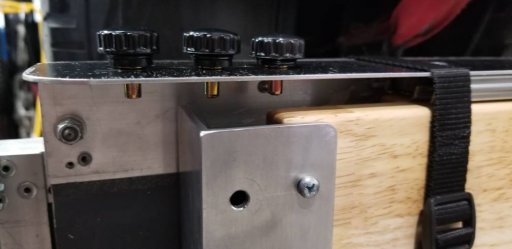
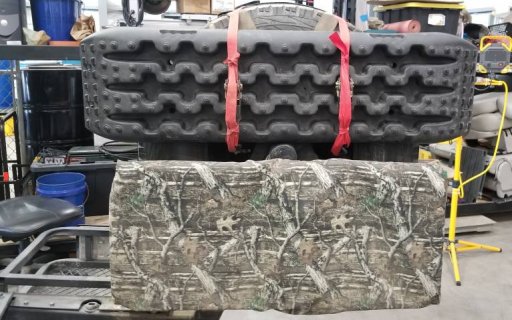
It stores with the slide out table when traveling. and the camo dust cover covers both of them. When the thumb screws are not being used they screw into the top left corner of the slide out table so they won't get lost.

20191024_160706.jpeg
 
Last edited:
  • Like
Reactions: RoarinRow

Charles M

Rank V
Launch Member

Member III

2,771
Wickenburg, AZ, USA
First Name
Charles
Last Name
M
Member #

17640

Ham/GMRS Callsign
K1CJM
Rub it in Charles! lol Looking good! You've got skills!
Thank you...

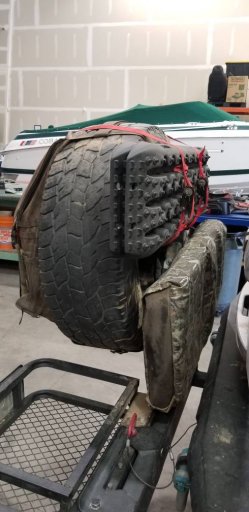
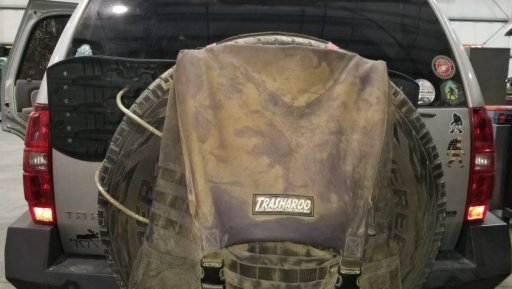
So I also decided to take my trax off the roof and mount them on the spare tire. But you have to mount them to the left side so they wont interfere with opening the hatch.

Starting to fill that empty space up between the tire and tailgate...

20191022_150149.jpeg


20191024_162839.jpeg

20191024_163557.jpeg

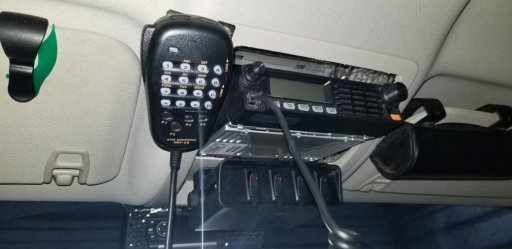
Last modification today was installing a new switch box under the Ham radio.

20191024_162301.jpeg
 
Last edited:
  • Like
Reactions: RoarinRow

RoarinRow

Rank V
Launch Member

Member III

2,771
Elk Grove, CA, USA
First Name
Rolando
Last Name
Nispiros
Member #

17011

Ham/GMRS Callsign
KN6JJS
Thank you...

So I also decided to take my trax off the roof and mount them on the spare tire. But you have to mount them to the left side so they wont interfere with opening the hatch. Last modification today was installing a new switch box under the Ham radio.View attachment 123612View attachment 123613View attachment 123614View attachment 123615
Ohh nice placement on the recovery tracks. I have mine on the roof rack. I'd be a pain if I had to use them and get them off the roof.
 

Charles M

Rank V
Launch Member

Member III

2,771
Wickenburg, AZ, USA
First Name
Charles
Last Name
M
Member #

17640

Ham/GMRS Callsign
K1CJM
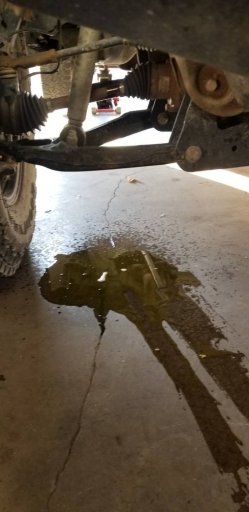
I am getting ready to head to Arizona for a month and I took the rig in to rotate and balance the tires and to replace the spare with a new tire that matches my other ones. When they jacked it up the Rancho RS7000 struts decided to blow a seal. I guess it is better for it to blow now instead of on a trail or in the middle of nowhere. I will be replacing it with a set of custom King coil overs. Finding someone to do an alignment before Sunday most likely will be impossible.

20191030_170013.jpeg
 
Last edited:
  • Sad
Reactions: RoarinRow

RoarinRow

Rank V
Launch Member

Member III

2,771
Elk Grove, CA, USA
First Name
Rolando
Last Name
Nispiros
Member #

17011

Ham/GMRS Callsign
KN6JJS
I am getting ready to head to Arizona for a month and I took the rig in to rotate and balance the tires and to replace the spare with a new tire that matches my other ones. When they jacked it up the Rancho RS7000 struts decided to blow a seal. I guess it is better for it to blow now instead of on a trail or in the middle of nowhere. I think I will be replacing it with a set of Fox 2.0 But finding someone to do an alignment before Sunday most likely will be impossible.

View attachment 124807
Ah man, hope you get it fixed before your trip.
 
  • Like
Reactions: Charles M

Charles M

Rank V
Launch Member

Member III

2,771
Wickenburg, AZ, USA
First Name
Charles
Last Name
M
Member #

17640

Ham/GMRS Callsign
K1CJM
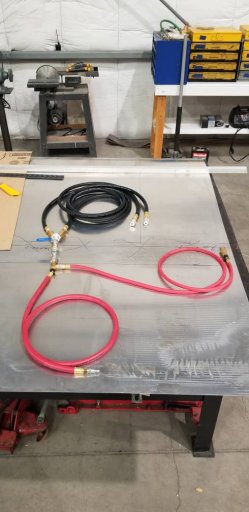
More work today, setting up my air up/down system. Everything is spread out before installation. The red hoses will hook to my CO2 air tank in the back of the Tahoe and route under the carpet one coming out by the refrigerator one beside the back seat on the left side. They will be the connection points for airing up both tires on the right or left side at once. The black hoses are connected to two tires and dumped or filled when connected to the air tank. With this system I will be able to air up or let out air from two tires at a time.
20191205_124225.jpeg

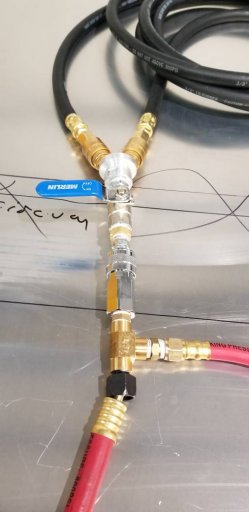
With this valve set up when it is disconnected from the red hose the air can be dumped out really fast from both tires at once. Open the valve and air will flow out close it and the gauge (not installed yet) will read air pressure on both tires. There is an outlet in this manifold for an air gauge that will be added soon. When Airing up you connect the manifold to the red air line on either side and open the valve. The tank has an adjustable regulator set at 50 psi so I will be able to open the valve and take a break while the system does all the work. Then hook it to the other side and repeat. Later if I get lazier I can add two more air lines and do all four at once.
20191205_124235.jpeg

These are the best lock on air chucks I have found to date they are very positive they lock to more than one side. But they do cost a lot more.
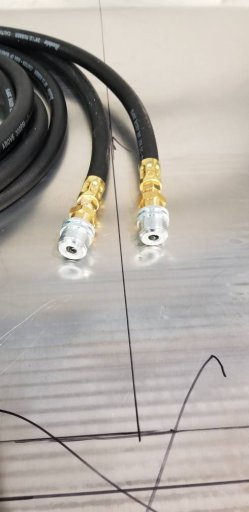
20191205_124238.jpeg

Here is what the outlet looks like beside the left rear seat.
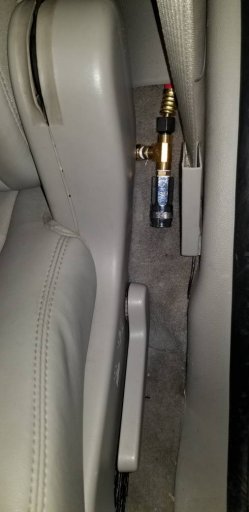
20191205_130417.jpeg

This little square storage area is where the two black hoses go when not in use. If your Tahoe storage area does not, look this big it is because you have not sawed the original box out of there yet... What are you waiting for the storage behind there is huge. Even with the hoses in place there is a lot of room. (Room for 2 more hoses) In this photo you can see I fasten a lot of stuff under the lift up shelf in the back so there is no wasted space here. If you are looking for a good place to store snow chains just get a small blue storage bag form Cabellas and stick some rubber gloves in a side pocket to keep your hands dry when putting them on or taking them off. This bag holds chains for a set of 35x12.5x17 tires.
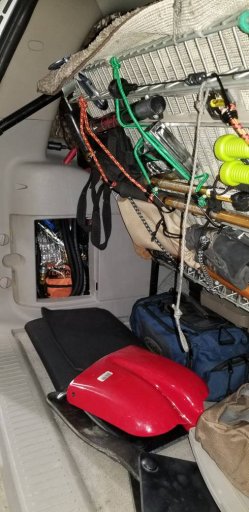
20191205_130845.jpeg

This is the tank hook up without the regulator installed. I also installed two power outlets back here a twin USB and standard power port my refrigerator is plugged into this switched circuit to the secondary battery.
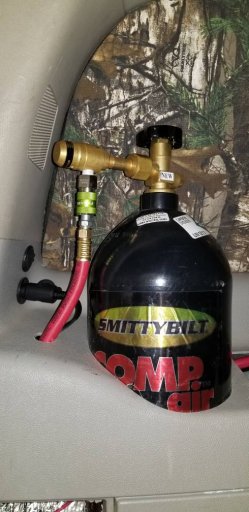
20191205_130050.jpeg

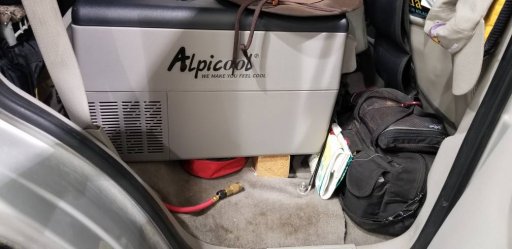
This is where you connect the black hose to fill the tires on the right side of the truck. It tucks back out of the way behind the refrigerator when not in use. The two black bags are medical trauma/first aid kits the red bag below the refrigerator are my jumper cables. These items are located here for fast easy access. No sense in having this stuff if you can't find it in a hurry.
20191205_124558.jpeg
 
Last edited:
  • Like
Reactions: RoarinRow

Danny Boy

Rank IV
Launch Member

Enthusiast III

1,213
Huntington Beach, California, United States
First Name
Danny
Last Name
Romeyn
Member #

19576

Ham/GMRS Callsign
KI5HKQ
Very nice. Let us know how well it works. I’m currently using the portable ARB compressor system. Airs up fast but need to do each tire separate as of now. Thinking about doing a split hose as well to at least do two tires at once. Deflate all 4 done at same time.
 

Charles M

Rank V
Launch Member

Member III

2,771
Wickenburg, AZ, USA
First Name
Charles
Last Name
M
Member #

17640

Ham/GMRS Callsign
K1CJM
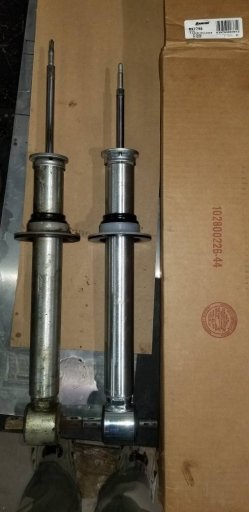
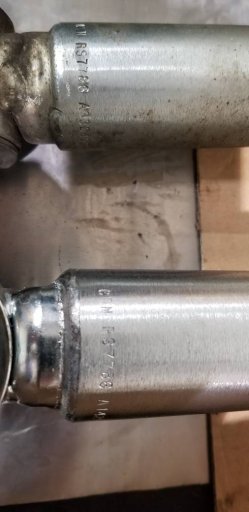
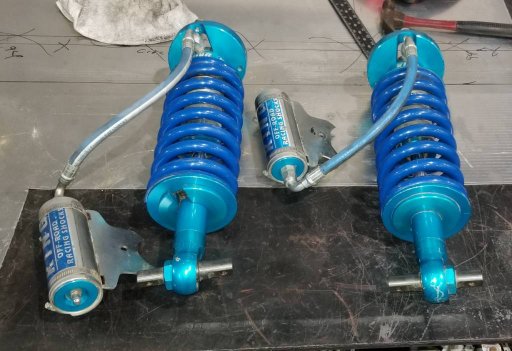
So I finally replaced my shock today after 4000 miles... lol I guess you could say I was putting it off... After pulling the spring I noticed the new shock is 1.78 inches longer this seems like it could be a big deal... But after talking with the Rancho tech guy we came to the conclusion internally the shock came apart due to impropper installation by Folbeck 4x4 in Reno. Those guys screwed up my rig and never stand behind their work... The $15,000 of work they did for me a couple years ago is still haunting me...

20191206_121603.jpeg

The shocks do have the same part number... So after talking with the tech guy I went ahead and installed it and everything looks like it is happy again...

20191206_122012.jpeg
 
Last edited:
  • Wow
Reactions: RoarinRow

Charles M

Rank V
Launch Member

Member III

2,771
Wickenburg, AZ, USA
First Name
Charles
Last Name
M
Member #

17640

Ham/GMRS Callsign
K1CJM
Very nice. Let us know how well it works. I’m currently using the portable ARB compressor system. Airs up fast but need to do each tire separate as of now. Thinking about doing a split hose as well to at least do two tires at once. Deflate all 4 done at same time.
I did a timed air down and air up with this system. This is the time it took to do two tires so total time for all four tires will simply be double the time.

Tires 35x12.5x17
Start air pressure was 55 PSI Lowered to 20 PSI Air down time 4.5 minutes

Air pressure 20 PSI filled to 55 PSI Fill time 2 minutes

Conclusion
Air down time for all four tires would be about 10 minutes.
Air up time would be about 5 minutes. I can conect the air hose and not have to mess with an ARB deflator or hold an air chuck to the tire anymore or worry about damaging my tire valves.

If I add another set of hoses so all four tires are hooked up at once those times should be.
Air down time only 4.5 minutes
Air up times 2 minutes.

Is it worth it???

How often do you go out to play in the snow, sand, mud, mountains and decided to not air down because I didn't feel like spending 5 minutes per tire to air down twenty minutes total.... Then take another 25 minutes to fill them up with my old electric air pump. After getting my CO2 tank it cut my fill up time in half to about 12 minutes...

How many times did you not air down because it is raining or too cold out or you had to stand in the mud? Well with this system you will still get wet or cold during the 1 minute hook up time then get back inside to finish.
 

Charles M

Rank V
Launch Member

Member III

2,771
Wickenburg, AZ, USA
First Name
Charles
Last Name
M
Member #

17640

Ham/GMRS Callsign
K1CJM
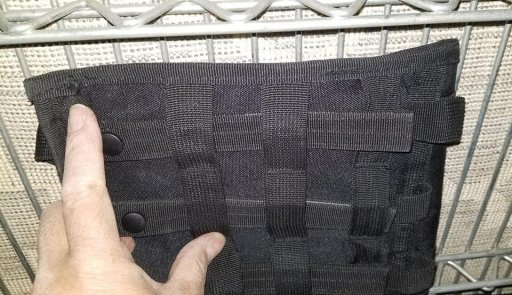
This is a great addition to storage space under a steel shelf system.
Anything with the Molle system straps can easily be attached to them since the spacing is the same.
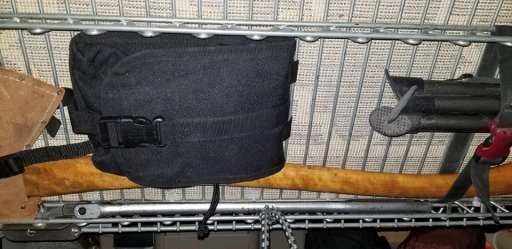
molle 2.jpg

With these pouches you can put all sorts of small items in them. This one holds a staple gun and extra staples in it. You could also hold a first aid kit here too.
molle1.jpg

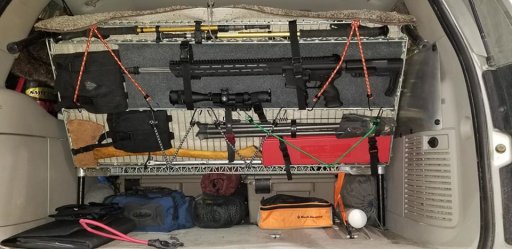
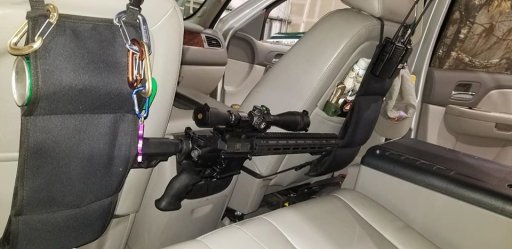
If you add in the right carpet they also can be used to store a rifle and Velcro items can be attached to the carpet too.

rifle rack.jpg

When you are out hunting you can use a SUV rifle rack for a rifle or shotgun but, when not hanging a rifle or shotgun it each slot will hold 2 bottles of water or you can hang extra radios, carabiners oil spray cans and what ever else you can think of.

Rack.jpg
 

RoarinRow

Rank V
Launch Member

Member III

2,771
Elk Grove, CA, USA
First Name
Rolando
Last Name
Nispiros
Member #

17011

Ham/GMRS Callsign
KN6JJS
This is a great addition to storage space under a steel shelf system.
Anything with the Molle system straps can easily be attached to them since the spacing is the same.
View attachment 131685

With these pouches you can put all sorts of small items in them. This one holds a staple gun and extra staples in it. You could also hold a first aid kit here too.
View attachment 131686

If you add in the right carpet they also can be used to store a rifle and Velcro items can be attached to the carpet too.

View attachment 131688

When you are out hunting you can use a SUV rifle rack for a rifle or shotgun but, when not hanging a rifle or shotgun it each slot will hold 2 bottles of water or you can hang extra radios, carabiners oil spray cans and what ever else you can think of.

View attachment 131691
You're ready for a zombie outbreak! :)
 
  • Like
Reactions: Charles M

Charles M

Rank V
Launch Member

Member III

2,771
Wickenburg, AZ, USA
First Name
Charles
Last Name
M
Member #

17640

Ham/GMRS Callsign
K1CJM
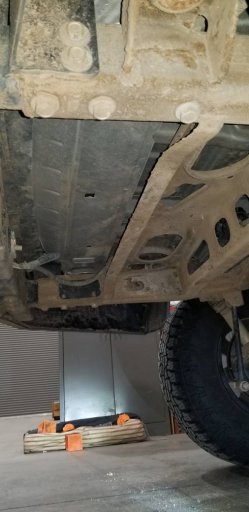
I am thinking this space could be used better... First I need to chop out the wimpy cross member used for the spare tire. Then reinforce the frame and put a heavy cross member in the back. Then build an extra 20 gallon fuel tank to put in there or maybe hidden storage accessible through the floor or maybe both... 20191216_140131.jpeg
 
Last edited:
  • Like
Reactions: eagle_A40

Danny Boy

Rank IV
Launch Member

Enthusiast III

1,213
Huntington Beach, California, United States
First Name
Danny
Last Name
Romeyn
Member #

19576

Ham/GMRS Callsign
KI5HKQ
I am thinking this space could be used better... First I need to chop out the wimpy cross member that was used for the spate tire. Then reinforce the frame and put a heavy crossmember in the back. Then build an extra 20 gallon fuel tank to put in there or maybe hidden storage accessible through the floor or maybe both... View attachment 131718
Ya I was thinking of some ideas for that area as well. I may install a 30lb propane tank there with a skid plate protector and bring hose to the side of vehicle with a door for easy refill and hose connector. I measured and the tank would fit perfect. That is my 3rd project on my list. Right now I’m doing storage unit in back with my new dometic. Then solar install and then it will be propane location.
 
  • Like
Reactions: Charles M