Little Girl the 2007 Toyota FJ Cruiser

  • HTML tutorial

theBROFESSOR

Rank VI
Launch Member

Influencer II

4,226
Conway, Arkansas
Member #

8306

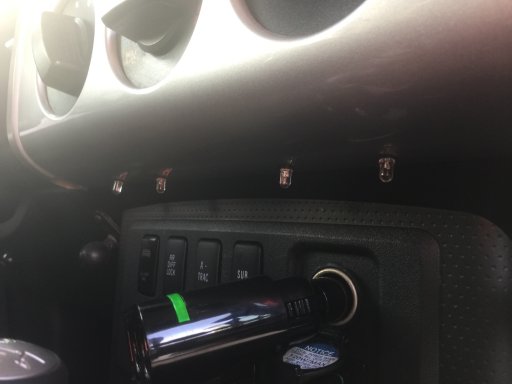
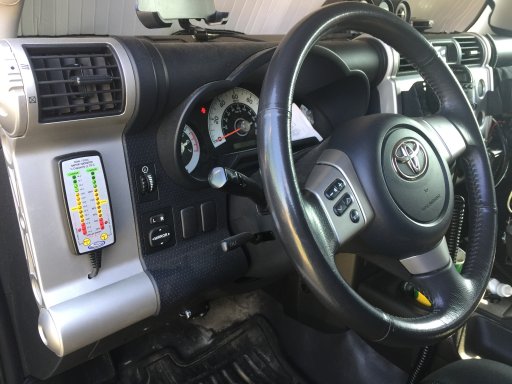
Since we do a lot of night riding, we are in the vehicle when it is dark. The push switches are illuminated when they are pushed but when they are not, it is too dark to see which one is which. A buddy of mine gave me some LED lights for motorcycles. I wired them in to come on when the key is on. Gives me just enough light to see the switches but not too much to get in my eyes to blind me driving. Worked out perfect.
IMG_7872.JPG
 

Attachments

  • Like
Reactions: HappyOurOverlanding

theBROFESSOR

Rank VI
Launch Member

Influencer II

4,226
Conway, Arkansas
Member #

8306

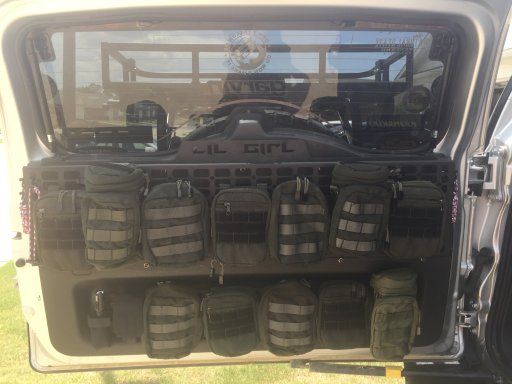
With the purchase of my OrangeBoxx PSD and lower molle rack I needed some molle packs. A good friend of mine from Arkansas that I met through Overland Bound, @Jube, who is one of the best men I have come to know, said he had some packs that he wasn't using that he would give me. Man did he?! Enough to fill up my whole PSD system. I've got tons of room now that was just wasted space and now I have room for all of the small stuff that I ever thought I could carry.
IMG_7874.JPG
 

Attachments

theBROFESSOR

Rank VI
Launch Member

Influencer II

4,226
Conway, Arkansas
Member #

8306

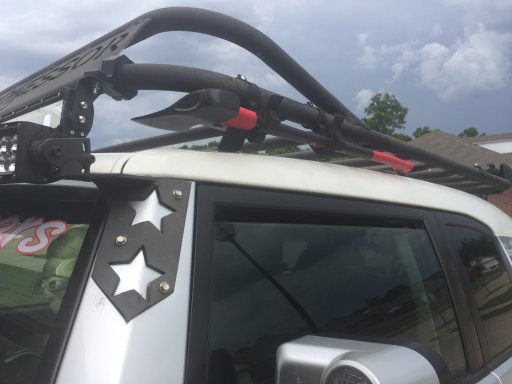
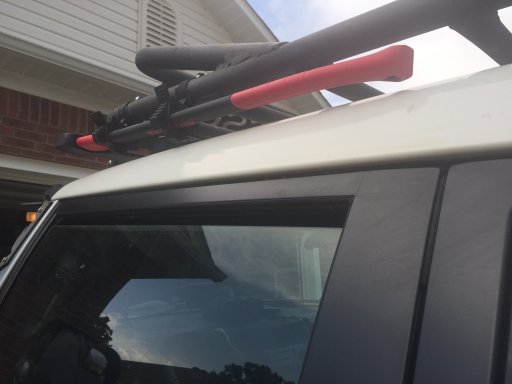
Since I received my new roof rack I finally got around to remounting my axe. I separated the axe and shovel in order to get them out of the way a little. I really enjoy having the sides of the roof rack so I can throw the pelican cases on top without having anything in the way. So I reinstalled this underneath the rack.
IMG_7888.JPG IMG_7889.JPG
 

HappyOurOverlanding

Rank VI
Launch Member

Member III

3,402
Verdi Nevada
Member #

9206

Ham/GMRS Callsign
KI7RAM
  • Like
Reactions: theBROFESSOR

theBROFESSOR

Rank VI
Launch Member

Influencer II

4,226
Conway, Arkansas
Member #

8306

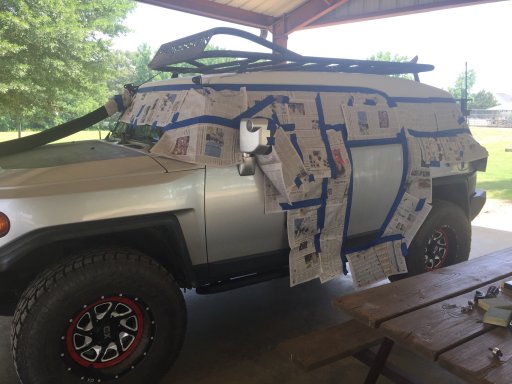
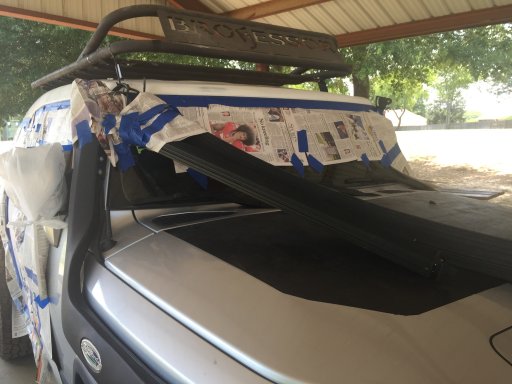
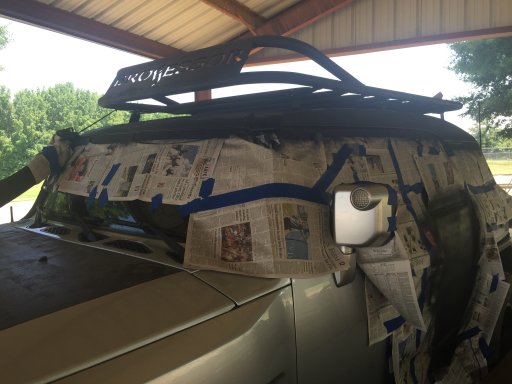
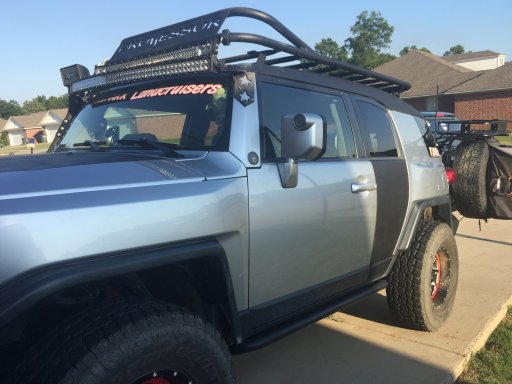
One of the biggest projects I have taken on to date. I have been wanting to do this for a while and I have been kicking myself for not doing it when I had the OEM roof rack off. It would have made this so much easier. I also picked one of the windiest days of the year which ended up causing me to scrub my hood with mineral spirits to get the spray off, but in all its done. It took me all day and about killed me because of the heat, but I knew with the heat the paint would stick so much better.
Before

IMG_7903.JPG IMG_7904.JPG IMG_7905.JPG IMG_7906.JPG IMG_7907.JPG
A little sanding with a sponge sander (love these. Makes it so easy) and then taping up of the whole car.
IMG_7908.JPG IMG_7909.JPG IMG_7909.JPG IMG_7910.JPG IMG_7911.JPG IMG_7912.JPG IMG_7913.JPG IMG_7914.JPG IMG_7916.JPG
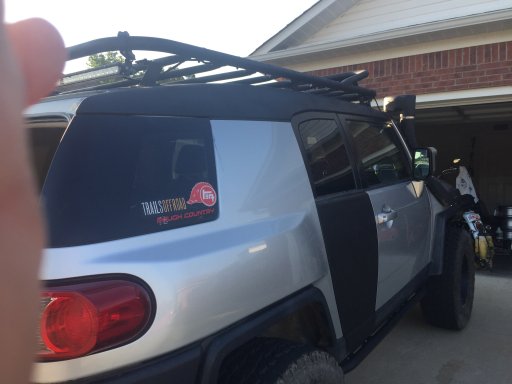
And the outcome. Dare to be different lol
IMG_7924.JPG IMG_7925.JPG IMG_7926.JPG IMG_7927.JPG
Love it. She is a happy Little Girl! haha

BROfessor Out
 

Kdj

Rank 0

Contributor I

60
Naptown
Brofessor, really,really nice build. Love fact that your not just buying stuff, but building it yourself if whats available doesn't fit your style or budget. My be one day my 07 will look as cool. But i do have to say you one too many light bars above the windshield IMHO. Keep it up, and follow your path.
 
  • Like
Reactions: theBROFESSOR

theBROFESSOR

Rank VI
Launch Member

Influencer II

4,226
Conway, Arkansas
Member #

8306

What mount are you using for your light bar?
If you’re talking about the one on the roof rack, It’s a Nilight LED light bar mounting kit. Very well made.

Nilight NI-KIT01 LED Light Bar Mounting Bracket Kit LED Off-Road Light Horizontal Bar Tube Clamp Roof Roll Cage Holder ,2 years Warranty
The one below that just above the windshield was homemade.


Sent from my iPhone using OB Talk
 

theBROFESSOR

Rank VI
Launch Member

Influencer II

4,226
Conway, Arkansas
Member #

8306

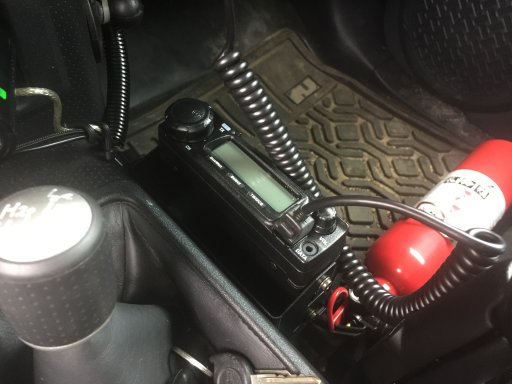
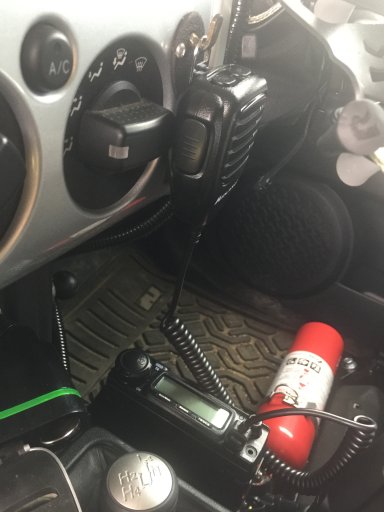
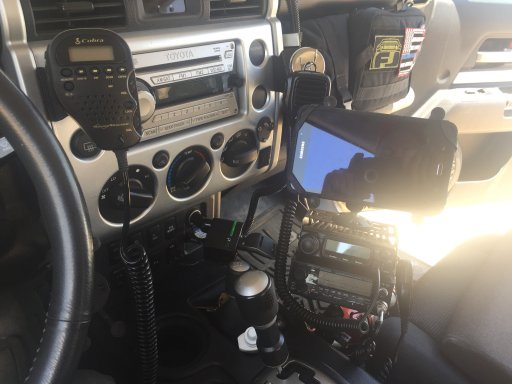
How my radios were mounted were not cutting it for me. So I pulled out all the stops, all of the RAM mounts and attachments...fabricated some brackets and whalla! I love it. The wife is a little crowded now on her side, but with the seat scooted up to help brace everything in, it is perfect and does not rattle at all.
IMG_8021.JPG
The bottom radio is the HAM radio which is mounted (because it is so heavy) to a RAM mount which goes directly underneath it - permanent mount to the console. There are side brackets that connect it to the GMRS radio on top of it. Then I took a RAM mount and screwed it into the GMRS radio mount. On top where the RAM mount is for the tablet I took a RAM 3 ball and then came off of that to the GMRS radio on top. So both radios are mounted top and bottom and then to each other. Kind of complicated to explain and took me about 3 weeks to get in my head and about 9 hours to install but it works amazing for what I want.

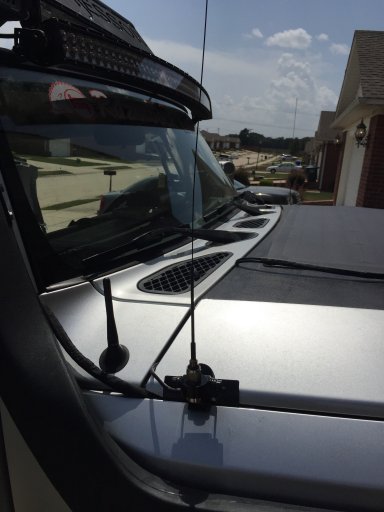
Ordered these cool little whip antennas when Ebay was having a 20% off sale but didn't realize they were coming from Thailand so had to wait about 3 weeks for them. But they are nice and do a great job.
IMG_8123.JPG
The brackets are also from Ebay. Ran the wires underneath and through the side of the door. Hid all the wires nice and neat and we are all set up.
 

Attachments

  • Like
Reactions: HappyOurOverlanding

theBROFESSOR

Rank VI
Launch Member

Influencer II

4,226
Conway, Arkansas
Member #

8306

Finally was able to get my solar charger in. It was a pretty good deal I thought on Ebay for the complete setup to keep my second battery charged up.

Lensun 80W Solar Kit

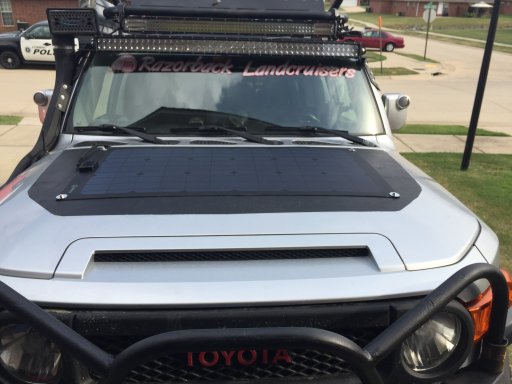
It came with the charging station, wires and solar panel. I installed the solar panel on the hood. Having to get some aftermarket windshield washer nozzles and move them to the cowl panels was a chore but not too bad. The original hoses reached. Just had to drill a couple holes to run the hoses. I may move them again. They are a little close to get much coverage on the windows. But anyways...I digress.

Double sided sticky tape and 4 self tapping screws outfitted with fender washers hold the panel in place. Fits perfectly and really blends in well with the blacked out hood.

IMG_8106.JPG
Gonna have to paint those silver screws black. Thats gonna bug the heck out of me. lol

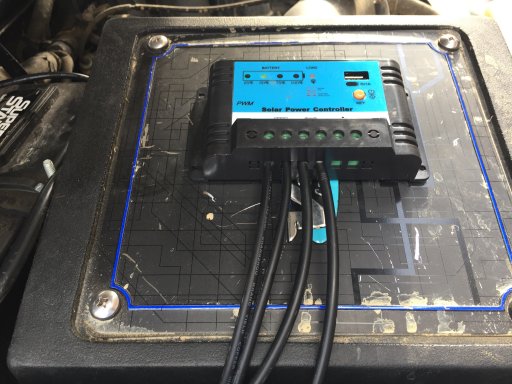
Ran the wires back under the hood and mounted the control box on top of the Volant cold air intake via double sided tape. Perfect spot.
IMG_8104.JPG
Very easy setup to install. 2 wires from the solar panel into the box. 2 wires from the box to the 2nd battery and done. Has a 3rd place to integrate but did not utilize at this time. Also has a USB port that I probably won't ever use.

After sitting around most of the day the next day, the charger took the 2nd battery from 50% to around 80%. Works like a charm.
 

Attachments

theBROFESSOR

Rank VI
Launch Member

Influencer II

4,226
Conway, Arkansas
Member #

8306

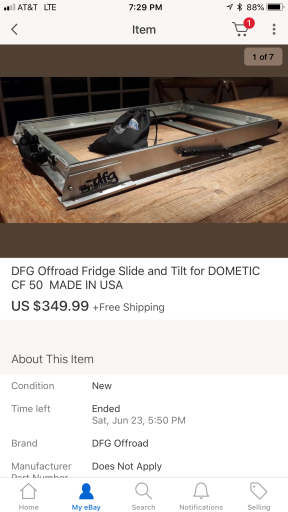
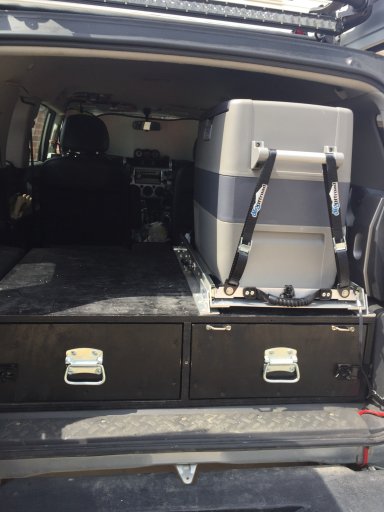
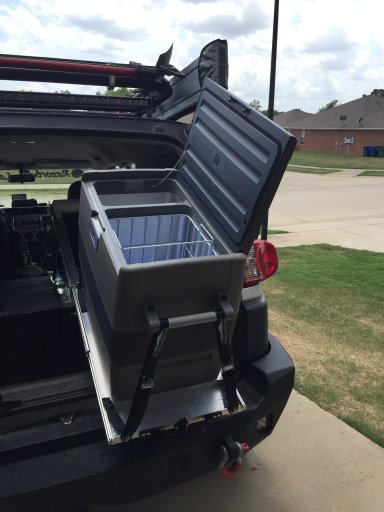
Decided on a fridge and slide a few weeks back. Found a japanese knockoff of a Dometic for less than $400 50L. Decided to give it a try since it was about 1/2 price of the others. Looks really nice. Then ordered me a fridge slide for it. It's a little long for it but it fits really nice.
IMG_8107.PNG
Works really well and I'm very happy with it. Gonna be so nice not to have to worry about ice all the stinkin time. And with the solar charger and 2nd battery to power it I should have no worries
IMG_8101.JPG IMG_8121.JPG
 

Attachments

  • Like
Reactions: HappyOurOverlanding

theBROFESSOR

Rank VI
Launch Member

Influencer II

4,226
Conway, Arkansas
Member #

8306

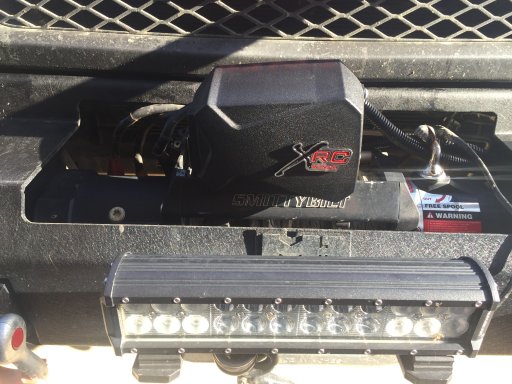
Wife noticed after a weekend trip a month or so ago that the plastic piece on my Smittybilt winch was broken. I contacted Smittybilt and asked them if I could purchase another piece to cover up the wiring on the winch. They were so kind as to send me another one free of charge. Amazing. Got it replaced in a few minutes this week.
IMG_8034.JPG
 

Attachments

  • Like
Reactions: HappyOurOverlanding

ibemarcus

Rank III
Launch Member

Advocate II

722
Tuscaloosa,AL
Member #

12150

Not really part of a “build” per se but dang what you spend on windshield wipers these days! Unbelievable. They have one job. Wipe water. Lol. Everyone said Bosch are the best so I thought I’d give them a try.
That thing is awesome!!!!! Look forward to seeing it in action !


Sent from my iPhone using OB Talk
 

theBROFESSOR

Rank VI
Launch Member

Influencer II

4,226
Conway, Arkansas
Member #

8306

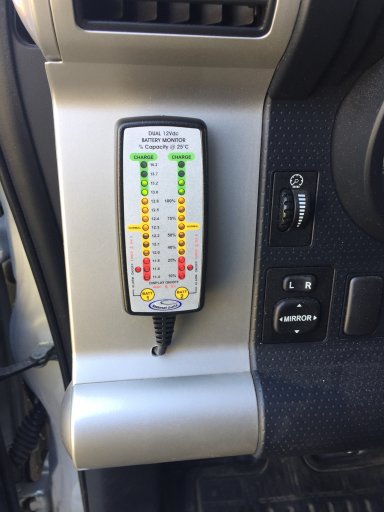
After I installed my dual battery setup I wanted a way to monitor the charge of both batteries, especially since the majority of the charge for the 2nd battery would be coming from the solar panel. I wanted to make sure it was doing it's job. So I purchased and installed the National Luna battery monitor. Easy, simple and exactly what I wanted.
IMG_8147.JPG IMG_8148.JPG
 
  • Like
Reactions: HappyOurOverlanding