
Enthusiast II
So I’ve had this idea for a couple of weeks and thought of a few different ways of approaching it. I decided to make a hitch mounted skid plate to protect the receiver, but I also wanted a recovery point capable of accepting a shackle. I didn’t see anyone making one, so off to the drawing board.
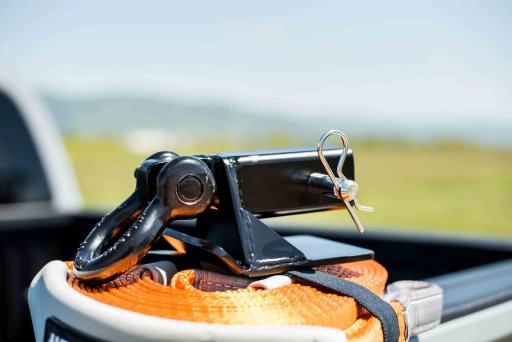
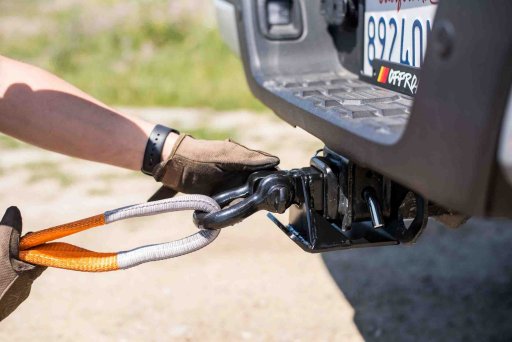
I took out my Tacoma out a few months ago with a couple of friends out to Hollister OHV in the Central Coastal(ish) of California. The day went by great, and the completely stock 19 Off Road handled some pretty serious trails. However, I did manage to scrape my hitch a couple of times. Nevertheless, to say it plainly, I was VERY impressed.
While looking at off road parts as anyone does after a new vehicle purchase, I saw there were hitch mounted skids and hitch mounted recovery points for sale, but not both. Knowing I was scraping my own hitch, and seeing lots of vehicles always scraping theirs, I decided to move forward into fixing the problem.
I took some measurements and fired up Solidworks. I sketched out the tubing and plate profiles, and put it all into an assembly. A couple hours later, I had a decent model to work with.
I also took into account the measurement for the pin, overall width of the receiver, and distance between the plate to mount trailer safety chains.
Its all designed around 1/4 plate Cold Rolled Steel (CRS), minus the gussets are 3/16 CRS.
I had some 1/4 plate laying around the shop and some 2x2 .250 wall square tube. I also ordered some 1 x 1.5 CRS bar stock as well. Once I got the materials all together, safety classes on, ear buds in, & Metallica playing nice and loud, I started cutting away.
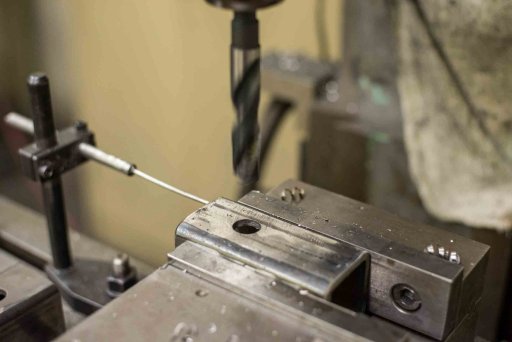
I fixtured up the square tubing in the vice, used the edge finder and piloted a hole. The pin size for the tacoma is a 5/8”, so i drilled around .030 over.
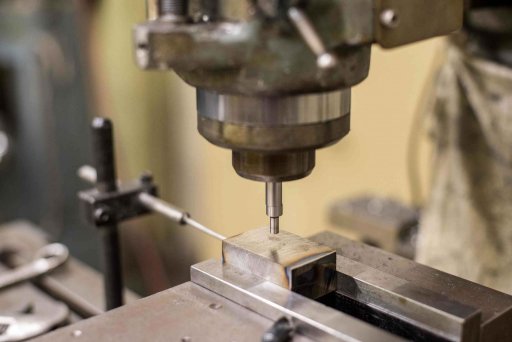
For the recovery point, I used the bar stock. Fixturing it as well, locating edges, pilot holes, then drilling .899(ish) to leave clearance for the .875 diameter shackle.
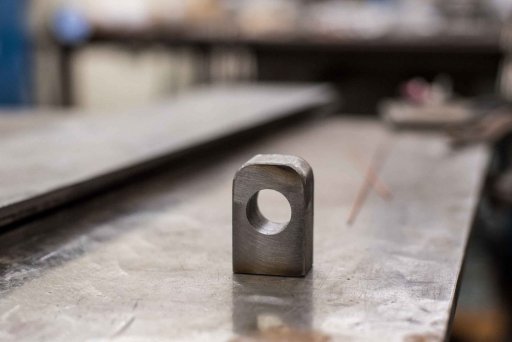
I chamfered the edges with the belt sander and gave it a nice radius, as shown. After a little bit of time for cooling, I put a good size bevel on the edge to give myself a few passes when welding.
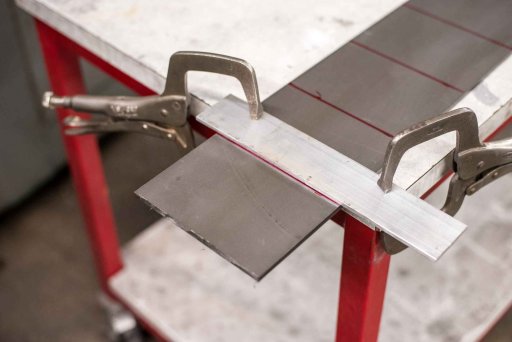
Next, I tackled cutting the skid plate to size. I laid out the dimensions and clamped a piece of extruded aluminum next to the drawn line. It helps act as a nice guide while using the cutoff (death) wheel.
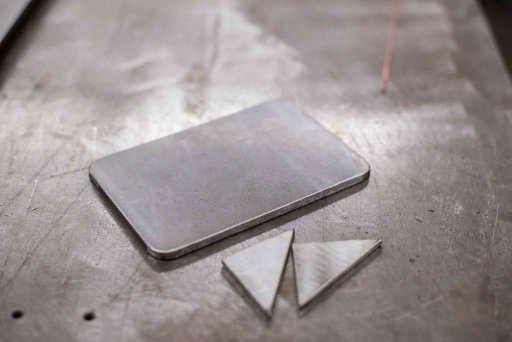
Next came cutting the 3/16” gussets to size.
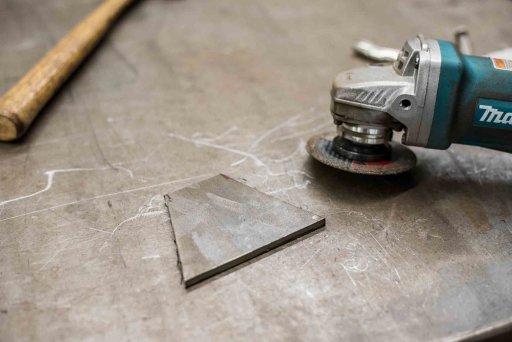
Similarly, I cut the profile of the end cap with the angle grinder as well.
I didn’t feel like setting up the press brake with the heavy radius tools. Instead, I cut about 3/4 of the way through the 1/4” skid, making it easy to bend up the edge. A few passes with the TIG and it was just as good in my book.
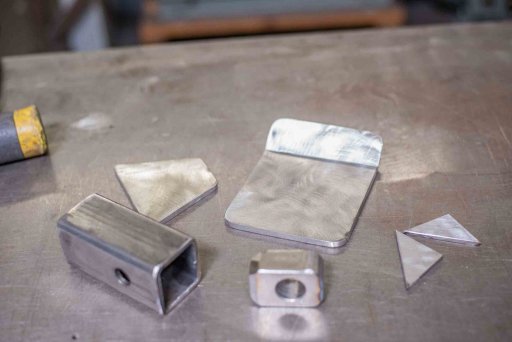
Here are all the pieces for a single weldment all laid out, prior to welding of course.
Order of operations required some planning, making sure I could fit my torch and electrode into the nooks and crannies of this fine contraption.
I first beveled the edges of the square tube then fitted it up to the end cap.
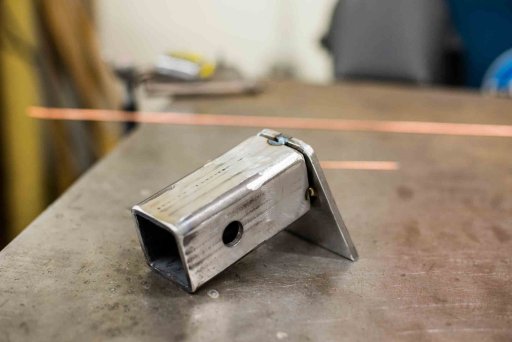
First tacked, then fully welded in 3 passes.
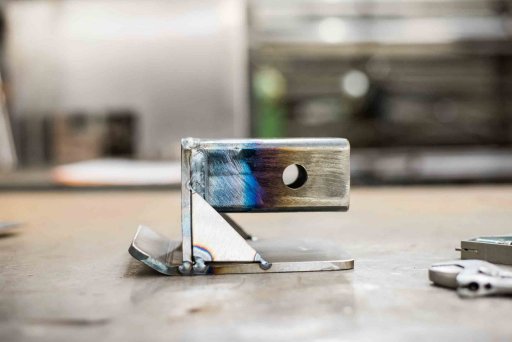
Next I tacked the end cap onto the skid plate. Checking for squareness and motivating it with a mallet. Once square, I tacked up the gussets, to help keep it square during welding.
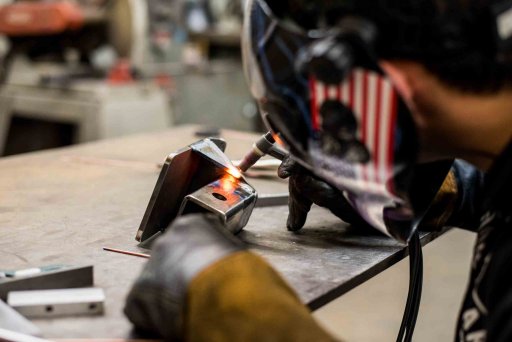
I welded up the gussets to the skid and end cap. This would prevent the end cap from pulling forward when being welded to the skid plate.
Next, I turned up the CFM a lil bit, a little more electrode stick out than usual, and welded up the end cap to the skid.
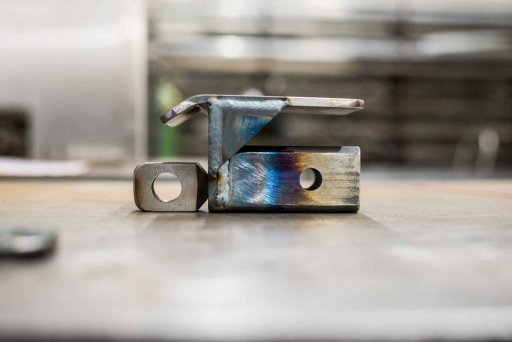
After, I flipped over the weldment to use the table as a means of aligning the square tube and machined recovery point mount. Once aligned, I tacked the top and bottom, checked squareness, then welded a single pass. Next I tacked the sides, being that the top and bottom was welded once, it is less likely to wander. There is fair amount of beveling involved. To speed up the process, I’m making up a fixture for the mill to accomplish the bevel, rather than the belt sander.
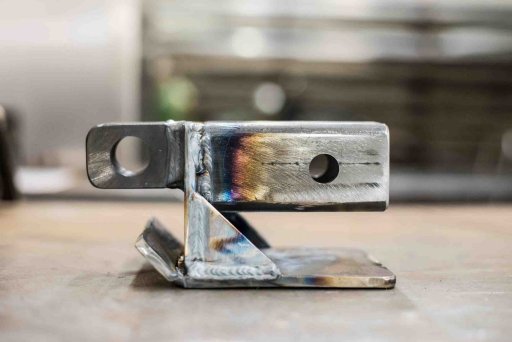
3 passes later, I had a finished product
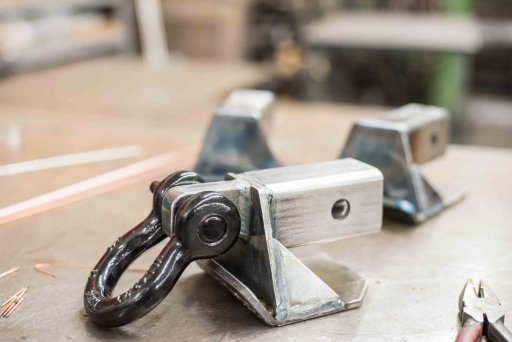
Heres a pic with the 3/4” shackle from Rhino.
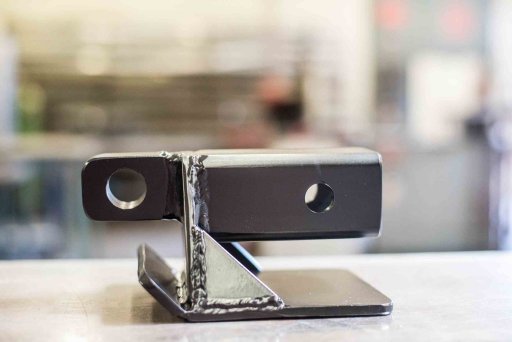
Couple coats of black paint later
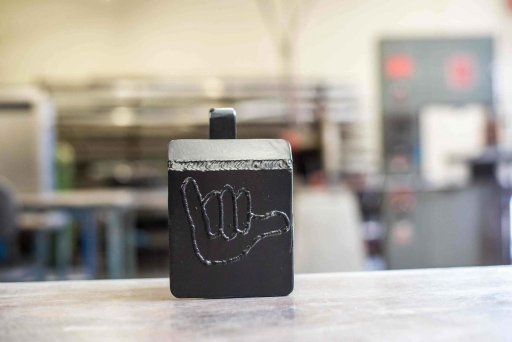
Rad Bro! well see how long before this gets scraped off.
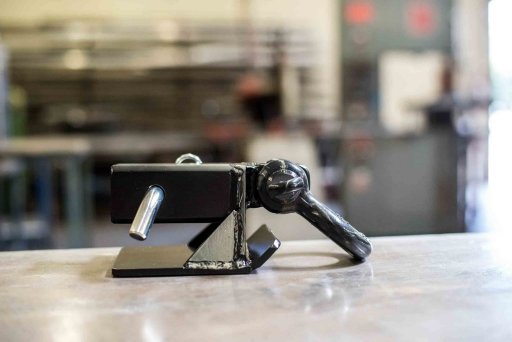
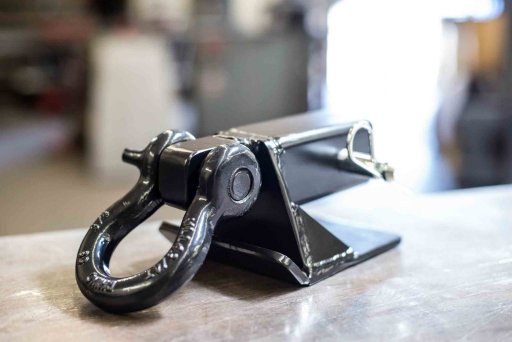
With the shackle and hitch pin
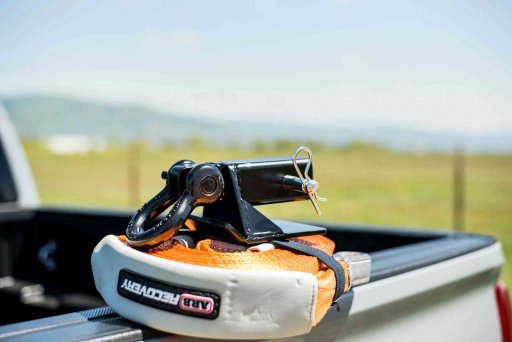
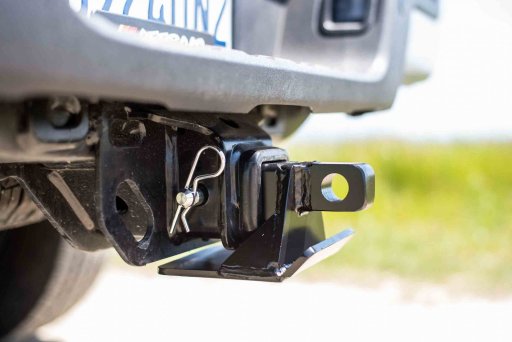
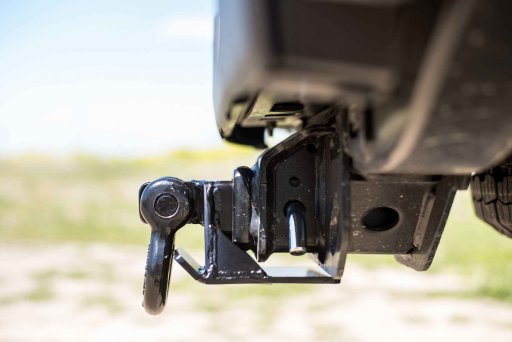
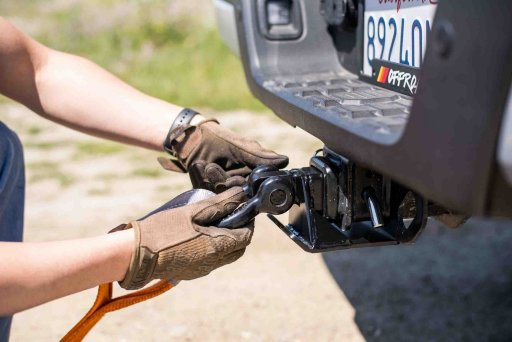
Took it outside to get a few shots of it. Fits great.
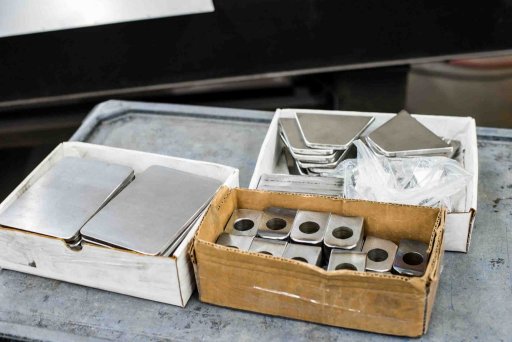
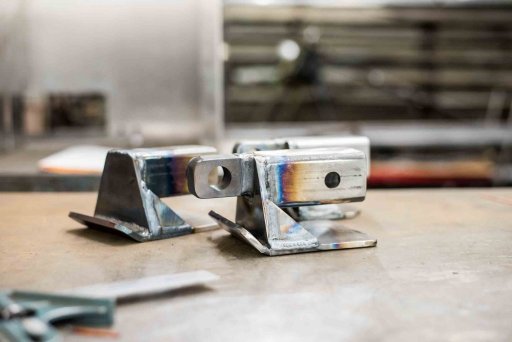
I got so much positive feedback through a single reddit post, even selling a couple to other 3rd gen taco owners, like any sane person, I went out and bought enough material for 20 more to put up on my site. I only have a few left to finish until im out of material.
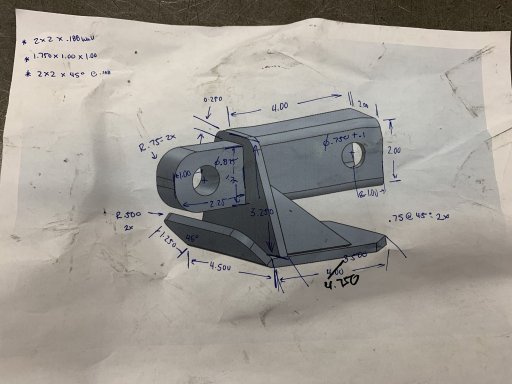
Check the dimensions on the drawing below to see if it will fit for your application if you’re interetsted. So far it fits 2016+ Tacomas, 3rd Gen 4Runners. And I’m like 90% sure they fit Colorados and 5th Gen 4Runners as well.
goldcountryfab.com
But for those who want a little more info for how to do it yourself, here is a poorly dimensioned drawing for your reference.
Cost
~ $30 material (based on bulk buy from local supplier)
~ $10 shackle
~4 hours start to finish for one.
The longer time is mainly to let the material cool after cutting and welding.
Tips for DIY
Happy fabricating! Feel free to ask any questions you have to build your own.


I took out my Tacoma out a few months ago with a couple of friends out to Hollister OHV in the Central Coastal(ish) of California. The day went by great, and the completely stock 19 Off Road handled some pretty serious trails. However, I did manage to scrape my hitch a couple of times. Nevertheless, to say it plainly, I was VERY impressed.
While looking at off road parts as anyone does after a new vehicle purchase, I saw there were hitch mounted skids and hitch mounted recovery points for sale, but not both. Knowing I was scraping my own hitch, and seeing lots of vehicles always scraping theirs, I decided to move forward into fixing the problem.
I took some measurements and fired up Solidworks. I sketched out the tubing and plate profiles, and put it all into an assembly. A couple hours later, I had a decent model to work with.
I also took into account the measurement for the pin, overall width of the receiver, and distance between the plate to mount trailer safety chains.
Its all designed around 1/4 plate Cold Rolled Steel (CRS), minus the gussets are 3/16 CRS.
I had some 1/4 plate laying around the shop and some 2x2 .250 wall square tube. I also ordered some 1 x 1.5 CRS bar stock as well. Once I got the materials all together, safety classes on, ear buds in, & Metallica playing nice and loud, I started cutting away.

I fixtured up the square tubing in the vice, used the edge finder and piloted a hole. The pin size for the tacoma is a 5/8”, so i drilled around .030 over.

For the recovery point, I used the bar stock. Fixturing it as well, locating edges, pilot holes, then drilling .899(ish) to leave clearance for the .875 diameter shackle.

I chamfered the edges with the belt sander and gave it a nice radius, as shown. After a little bit of time for cooling, I put a good size bevel on the edge to give myself a few passes when welding.

Next, I tackled cutting the skid plate to size. I laid out the dimensions and clamped a piece of extruded aluminum next to the drawn line. It helps act as a nice guide while using the cutoff (death) wheel.

Next came cutting the 3/16” gussets to size.

Similarly, I cut the profile of the end cap with the angle grinder as well.
I didn’t feel like setting up the press brake with the heavy radius tools. Instead, I cut about 3/4 of the way through the 1/4” skid, making it easy to bend up the edge. A few passes with the TIG and it was just as good in my book.

Here are all the pieces for a single weldment all laid out, prior to welding of course.
Order of operations required some planning, making sure I could fit my torch and electrode into the nooks and crannies of this fine contraption.
I first beveled the edges of the square tube then fitted it up to the end cap.

First tacked, then fully welded in 3 passes.

Next I tacked the end cap onto the skid plate. Checking for squareness and motivating it with a mallet. Once square, I tacked up the gussets, to help keep it square during welding.

I welded up the gussets to the skid and end cap. This would prevent the end cap from pulling forward when being welded to the skid plate.
Next, I turned up the CFM a lil bit, a little more electrode stick out than usual, and welded up the end cap to the skid.

After, I flipped over the weldment to use the table as a means of aligning the square tube and machined recovery point mount. Once aligned, I tacked the top and bottom, checked squareness, then welded a single pass. Next I tacked the sides, being that the top and bottom was welded once, it is less likely to wander. There is fair amount of beveling involved. To speed up the process, I’m making up a fixture for the mill to accomplish the bevel, rather than the belt sander.

3 passes later, I had a finished product

Heres a pic with the 3/4” shackle from Rhino.

Couple coats of black paint later

Rad Bro! well see how long before this gets scraped off.


With the shackle and hitch pin


Took it outside to get a few shots of it. Fits great.


I got so much positive feedback through a single reddit post, even selling a couple to other 3rd gen taco owners, like any sane person, I went out and bought enough material for 20 more to put up on my site. I only have a few left to finish until im out of material.
Check the dimensions on the drawing below to see if it will fit for your application if you’re interetsted. So far it fits 2016+ Tacomas, 3rd Gen 4Runners. And I’m like 90% sure they fit Colorados and 5th Gen 4Runners as well.
goldcountryfab.com
But for those who want a little more info for how to do it yourself, here is a poorly dimensioned drawing for your reference.

Cost
~ $30 material (based on bulk buy from local supplier)
~ $10 shackle
~4 hours start to finish for one.
The longer time is mainly to let the material cool after cutting and welding.
Tips for DIY
- Local metal suppliers usually have a throw away bin, which is A LOT cheaper than your general contractor or hardware store.
- I recommend Cold Rolled. Usually stores like lowes or home depot usually carries hot rolled, material properties make it softer. Ask your supplier for cold rolled
- Use LOTS of oil when drilling.
- Make sure to use a sturdy vice
- Be generous with pilot holes if using a drill press or
- scrap material for guides are great for straight cuts
- bevels for welding. I ended up purchasing an end mill that lets me chamfer the edges easily.
- tack weld together to test fit on vehicle, then break tacks as needed for access for full welding
- For bends of thicker metal, cut through partially, bend by hand, then weld it back up
Happy fabricating! Feel free to ask any questions you have to build your own.


