#2 – Attaching Wood Panels to 80/20 Cabinets
When building furniture, in most cases there needs to be some covers for open sides/tops etc. And of course, this being 80/20 there is about a gazillion ways to do this. I'll show a few I've used in my build and go into the advantages and disadvantes here.
1. Side panels
First of all, this is a question about design. Do you want to hide the 80/20 or do you want it to be either an element of your design or functionality? If hiding is the goal, then this actually becomes a lot easier.
The easiest way is to cut a panel to the size you want to cover, add some t-nuts into the extrusion channels it will cover, drill holes into the wood in the right places and bolt the panel on. The advantages of this are that it is very cost efficient and easy to do and looks as good as you can make the wood look on the outside. You can even use some brackets on the inside and use wood screws so that there are no screw heads showing from the outside.
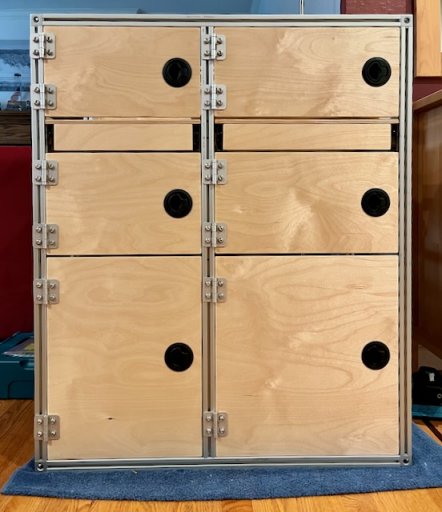
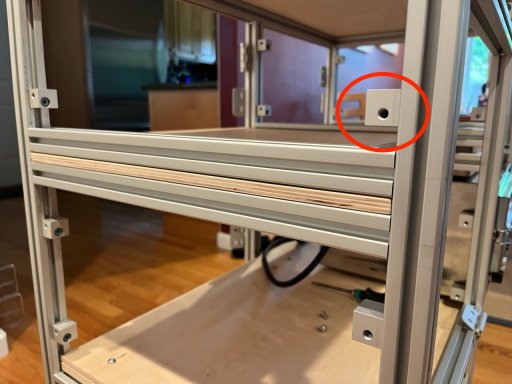
There are also some 80/20 components that help with this type of mount, e.g. the panel mounts you can see in the first picture of the post before this one. The little blocks that are bolted to the aluminum frame provide a recessed mount as well as a flush mount option. They provide (in my case) a M6 thread on either side. In case of on-top-of-extrusion mounting, I find these to be total overkill and would always go with plain t-nuts in the channel since it's a lot cheaper.
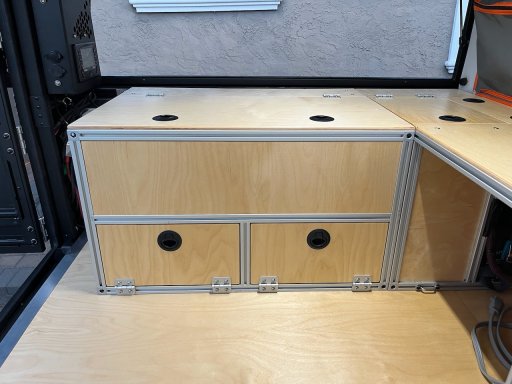
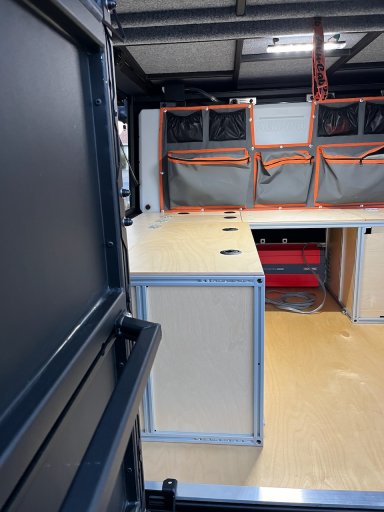
If you want a recessed look like we have here:
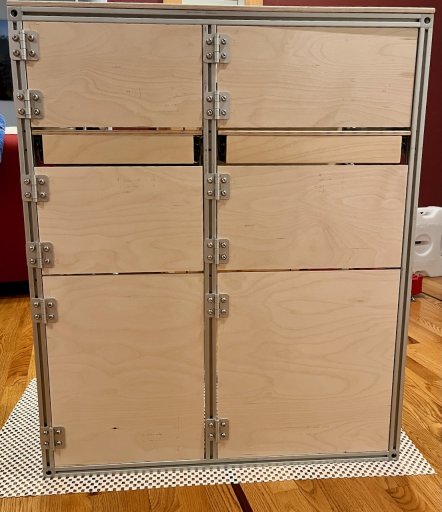
or flush with the extrusion like this:
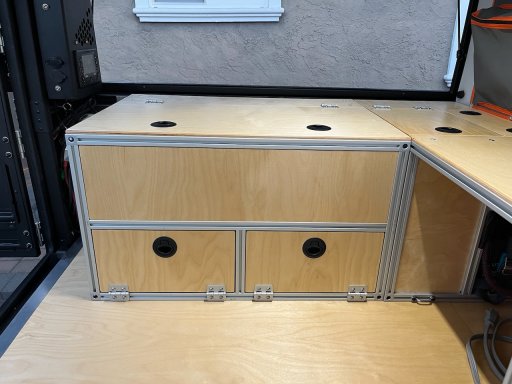
Both can be achieved by mounting the panels into the t-slot.
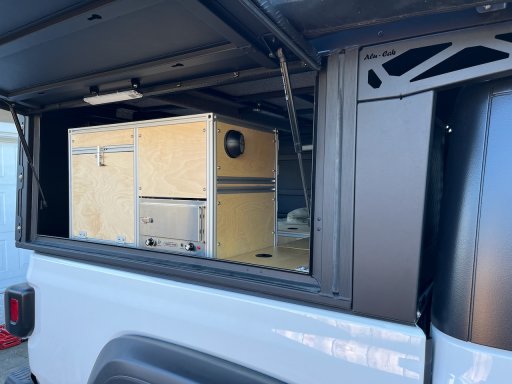
In the first picture, the 6mm plywood side panels are sitting inside the t-slot. There is no additional mounting holding them anywhere, since they can't move anyways once the furniture piece is completely put together.
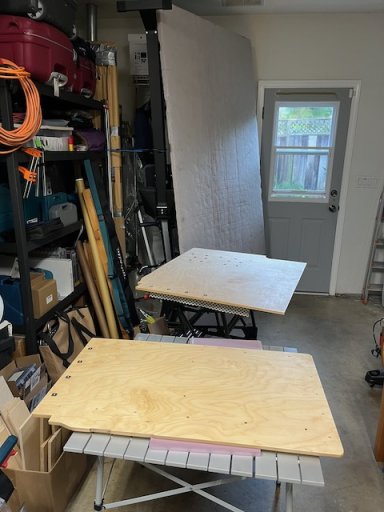
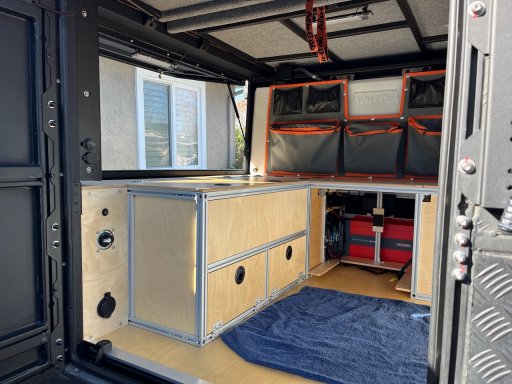
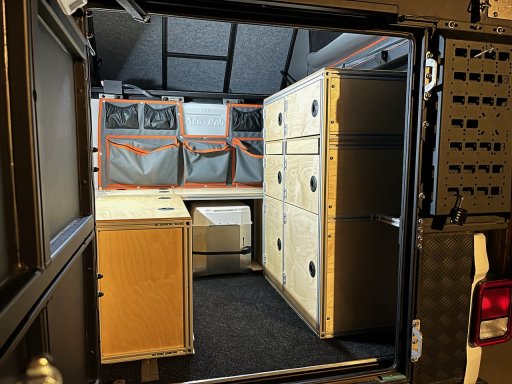
Same is true for the panel above the two small doors in the bench module. Although that we wanted to be mounted flush with the outside extrusion, it got a little bit more complicated. We had a perfectly sized piece of 12mm Baltic Birch plywood and didn't want to waste that. The idea was to glue some 6mm plywood pieces to the back and use these pieces to slot into the extrusion. Ah, but now you have to account for material thickness ...
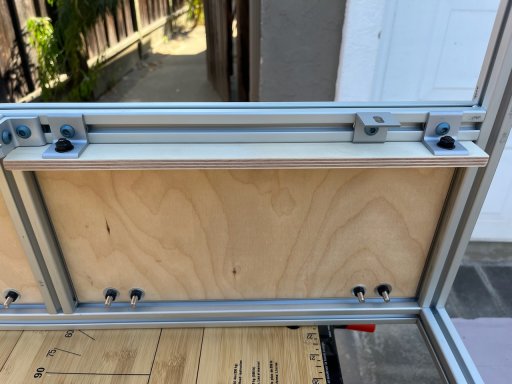
So, out came the router and a surface bit. We trimmed off about 4mm or so of the thickness in some areas, then attached the 6mm strips that ultimately hold the part in the channel:
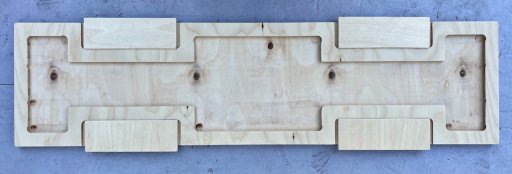
And since this was 12mm plywood, way too heavy to act as a simple panel, we removed about 8mmm from the inside area, removing about 30% of the total weight of this panel. We could have used 9mm plywood and glued the 6mm straight to it and it would have looked good enough, but again, we had the material and the time, so the above is what we did.
This is it mounted:
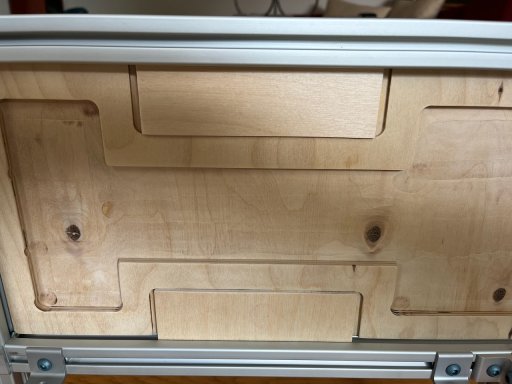
It's sits perfectly flush with the extrusion on the outside:
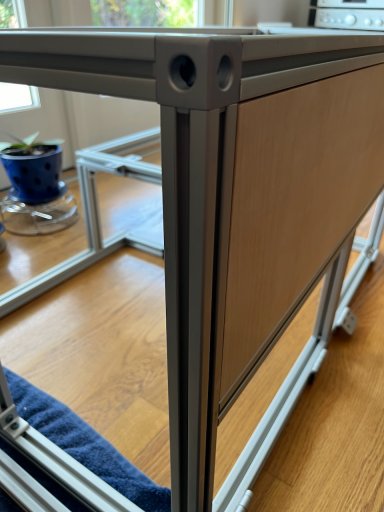
It takes a little bit of effort, but in the end looks pretty good.
Now, the biggest downside of this mounting style is that you can't remove the panel without disassembling the furniture. We need to attach some stuff to some of these panels in the utility module and since we can't take them out without disassembling the whole thing, this isn't happening right now. It'll wait until the time when we do a full on disassemble, correct mistakes, apply thread locker, reassemble run.
I do NOT recommend the method we used above putting the panels into the t-slot.
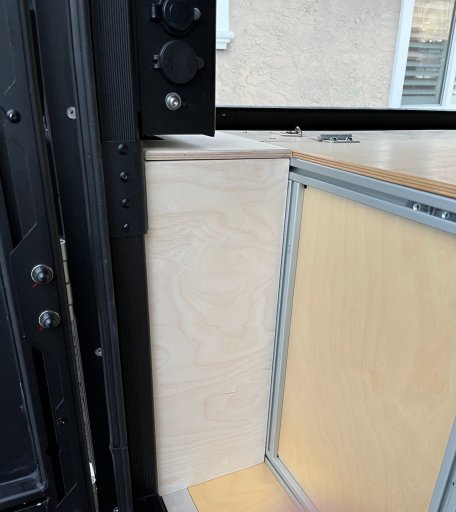
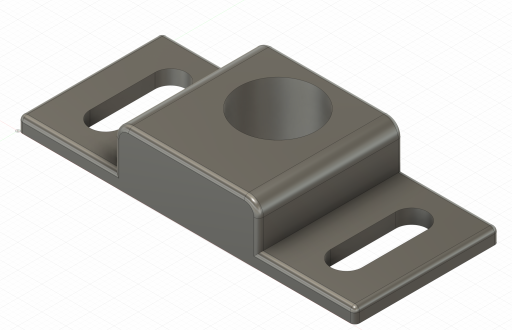
Then again, there are the little mounting blocks I mentioned above, they can also be used to mount panels in a recessed way, all that needs to be done is to trim the panel thickness to around 4 to 4.5mm and use the mounting blocks in the recessed position (the one visible in the previous post). We will do this above this access door:
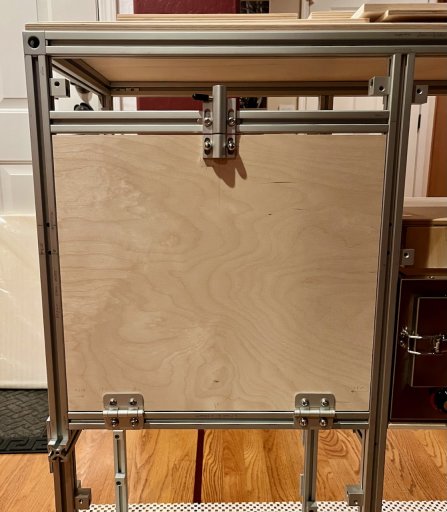
The panel above the door needs to sit flush, so that it is behind the latch. And we aren't going to make the same mistake as before and put it into the t-slot. So, we just cut away a bit of material from the surface of the cover panel and mount it to the blocks. We are okay with bolt heads visible on the outside, so it'll be easy and I can probably show the result in a few days when we get to this part of the furniture piece.
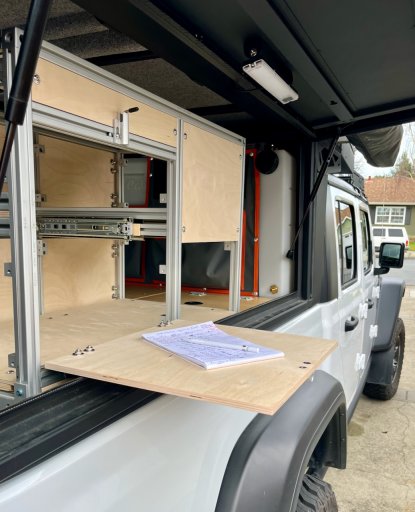
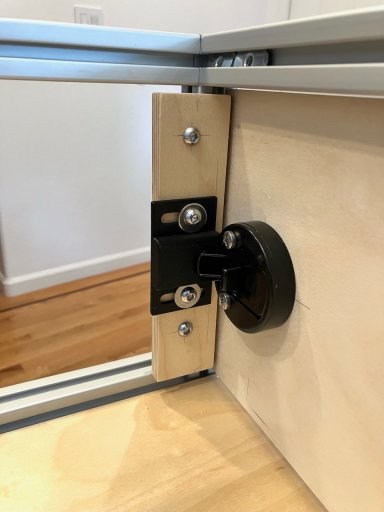
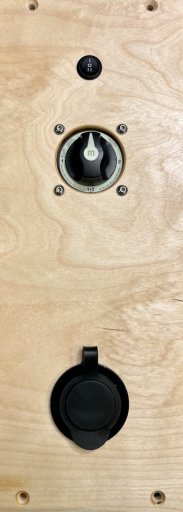
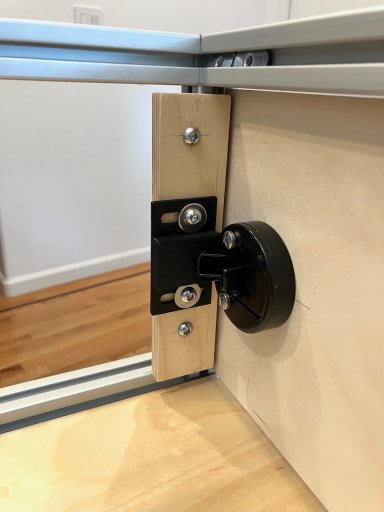
The door uses this type of latch because the rear of that panel needs to be perfectly flush to act as a table when opened and with this latch we could use countersunk screws on the rear and nuts on the outside. Again, something to show in more detail at a later stage.
There are some more ways of mounting side panels, one option we might convert our existing furniture to is use the slot only at the bottom and use S-shaped mounting brackets with bolts on the sides/top. Then it could be removed without disassembling the furniture piece.
Ping me if you want any part numbers or links to the products used, I don't have them all handy right now but can look them up easily enough.
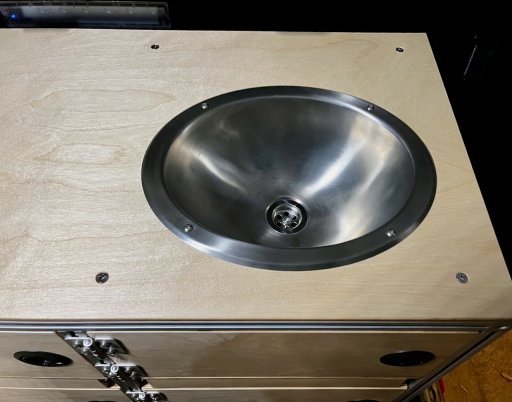
The top of our galley will use an "on-top-of-extrusion" style mounting, with countersunk bolts going to 90 degree mounting brackets underneath (not into the t-slot since we wanted a bit more wood material on the outside edge.
So, this wraps up the side/top panel mounting we have used. There are more ways, but since we haven't used them, I'm not going into this.
My recommendations:
Next installment: attaching doors and the components used.
When building furniture, in most cases there needs to be some covers for open sides/tops etc. And of course, this being 80/20 there is about a gazillion ways to do this. I'll show a few I've used in my build and go into the advantages and disadvantes here.
1. Side panels
First of all, this is a question about design. Do you want to hide the 80/20 or do you want it to be either an element of your design or functionality? If hiding is the goal, then this actually becomes a lot easier.
The easiest way is to cut a panel to the size you want to cover, add some t-nuts into the extrusion channels it will cover, drill holes into the wood in the right places and bolt the panel on. The advantages of this are that it is very cost efficient and easy to do and looks as good as you can make the wood look on the outside. You can even use some brackets on the inside and use wood screws so that there are no screw heads showing from the outside.
There are also some 80/20 components that help with this type of mount, e.g. the panel mounts you can see in the first picture of the post before this one. The little blocks that are bolted to the aluminum frame provide a recessed mount as well as a flush mount option. They provide (in my case) a M6 thread on either side. In case of on-top-of-extrusion mounting, I find these to be total overkill and would always go with plain t-nuts in the channel since it's a lot cheaper.
If you want a recessed look like we have here:

or flush with the extrusion like this:

Both can be achieved by mounting the panels into the t-slot.
In the first picture, the 6mm plywood side panels are sitting inside the t-slot. There is no additional mounting holding them anywhere, since they can't move anyways once the furniture piece is completely put together.
Same is true for the panel above the two small doors in the bench module. Although that we wanted to be mounted flush with the outside extrusion, it got a little bit more complicated. We had a perfectly sized piece of 12mm Baltic Birch plywood and didn't want to waste that. The idea was to glue some 6mm plywood pieces to the back and use these pieces to slot into the extrusion. Ah, but now you have to account for material thickness ...
So, out came the router and a surface bit. We trimmed off about 4mm or so of the thickness in some areas, then attached the 6mm strips that ultimately hold the part in the channel:

And since this was 12mm plywood, way too heavy to act as a simple panel, we removed about 8mmm from the inside area, removing about 30% of the total weight of this panel. We could have used 9mm plywood and glued the 6mm straight to it and it would have looked good enough, but again, we had the material and the time, so the above is what we did.
This is it mounted:

It's sits perfectly flush with the extrusion on the outside:

It takes a little bit of effort, but in the end looks pretty good.
Now, the biggest downside of this mounting style is that you can't remove the panel without disassembling the furniture. We need to attach some stuff to some of these panels in the utility module and since we can't take them out without disassembling the whole thing, this isn't happening right now. It'll wait until the time when we do a full on disassemble, correct mistakes, apply thread locker, reassemble run.
I do NOT recommend the method we used above putting the panels into the t-slot.
Then again, there are the little mounting blocks I mentioned above, they can also be used to mount panels in a recessed way, all that needs to be done is to trim the panel thickness to around 4 to 4.5mm and use the mounting blocks in the recessed position (the one visible in the previous post). We will do this above this access door:

The panel above the door needs to sit flush, so that it is behind the latch. And we aren't going to make the same mistake as before and put it into the t-slot. So, we just cut away a bit of material from the surface of the cover panel and mount it to the blocks. We are okay with bolt heads visible on the outside, so it'll be easy and I can probably show the result in a few days when we get to this part of the furniture piece.
The door uses this type of latch because the rear of that panel needs to be perfectly flush to act as a table when opened and with this latch we could use countersunk screws on the rear and nuts on the outside. Again, something to show in more detail at a later stage.
There are some more ways of mounting side panels, one option we might convert our existing furniture to is use the slot only at the bottom and use S-shaped mounting brackets with bolts on the sides/top. Then it could be removed without disassembling the furniture piece.
Ping me if you want any part numbers or links to the products used, I don't have them all handy right now but can look them up easily enough.
The top of our galley will use an "on-top-of-extrusion" style mounting, with countersunk bolts going to 90 degree mounting brackets underneath (not into the t-slot since we wanted a bit more wood material on the outside edge.
So, this wraps up the side/top panel mounting we have used. There are more ways, but since we haven't used them, I'm not going into this.
My recommendations:
- If money is a consideration, put the panels on top of the extrusion and mount them with t-nuts in the slots and a bolt through the panel. Cheap, easy, removable.
- If you want to annoy yourself down the line, put the panels into the t-slot and fight them at a later stage.
- If you want a nice, flush look, use the mounting blocks and bemoan the money spent.
Next installment: attaching doors and the components used.
Last edited:


