Goal: simple day to day life, small(ish), offroad capable – a Jeep Gladiator build

  • HTML tutorial

cug

Rank II

Enthusiast III

473
San Jose, CA, USA
First Name
Guido
Last Name
GNE
We've been camping with our vehicles for a few years and we made basically every mistake in the book. We underestimated our desire for quick and easy setup, we overestimated our willingness to compromise for either less cost or higher comfort, we bought stuff we didn't need and still have a whole bunch of things we will never need.

So, this time, we hope to get it closer to what we consider "right" for us. This is a very personal opinion, it deviates significantly from many other builds on the same platform, and is taking us forever to finish. I started a build thread on the Gladiator forum nine months ago, when we decided we needed to change something.

The build thread here will be a recap of the most important things we learned along the way (so far), it won't be as detailed as the very detailed one on the other forum, I will summarize a lot of things, but maybe somebody here can learn a little piece here and there from our own experiences.

It will take a while for me to write these, but most of the work has been done over the mentioned last nine months and we are in the final phase of finishing our build to use from this year on.

So, I hope you'll enjoy this and maybe get some information from it.

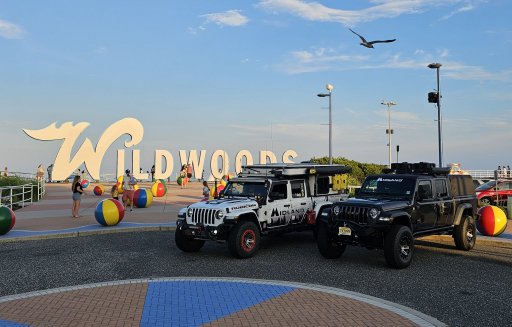
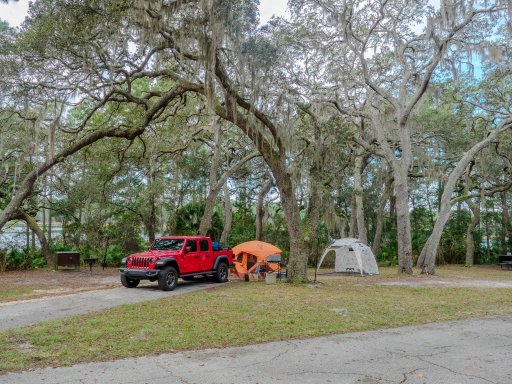
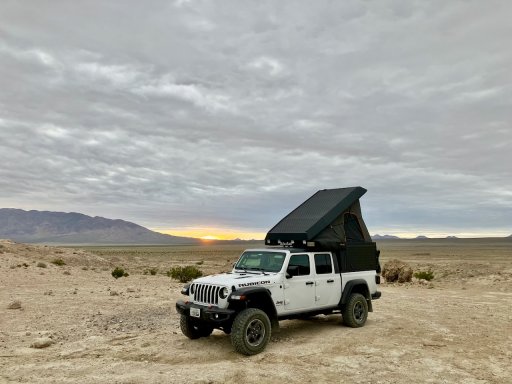
Here's a teaser of the current state of the rig this thread is about:
IMG_5956.jpeg
 
Last edited:

cug

Rank II

Enthusiast III

473
San Jose, CA, USA
First Name
Guido
Last Name
GNE
How we started

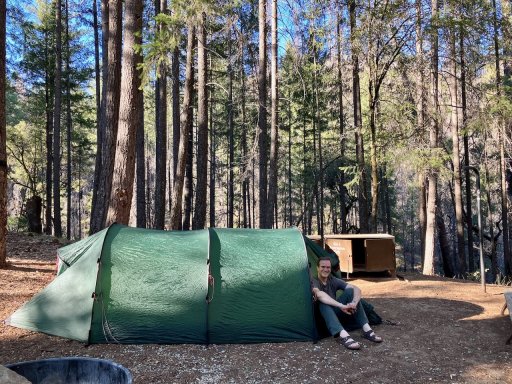
We started with just basic car camping. A standard car, a tent, mattresses and sleeping bags. We still have all this camping gear since we also take it on hikes and motorcycle trips.

IMG_4898.jpeg

I think, this is actually one of the best ways of finding out, whether you can deal with the whole overlanding thing. If you don't like basic camping, there is a very good chance you won't like overlanding either, because it comes with a lot of the same limitations and annoyances. Like not having a shower every day, having to deal with limited amount of gear and comfort, living with critters and even potentially the dangers of larger animals (bears and cougars in our case), and annoying other campers ...

Some of these can be less or more annoying and some of them can be handled by the right gear, but starting simple and cheap will give a very good indication about what you like and what you don't like. We should have taken this into much more consideration in our journey of overlanding rigs. But no, we made probably every stupid mistake possible.
 
  • Like
Reactions: El-Dracho

cug

Rank II

Enthusiast III

473
San Jose, CA, USA
First Name
Guido
Last Name
GNE
The first "rig"

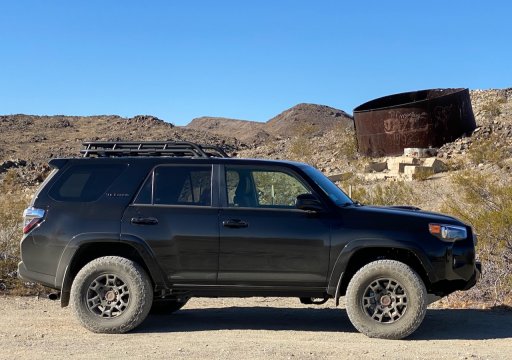
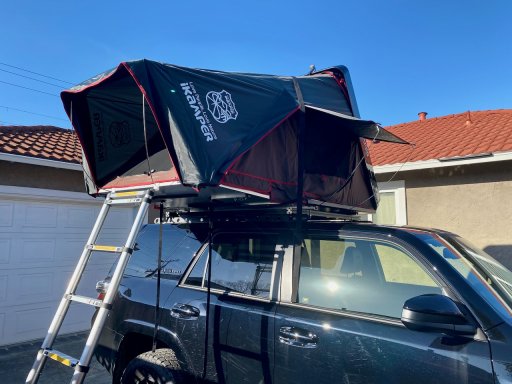
Since we loved camping in general and at some point, when it was time to switch one of vehicles, we got a Toyota 4Runner and started building it out with more overlanding gear, including a rooftop tent.

IMG_3955.jpeg

IMG_4129.jpeg

IMG_4267.jpeg

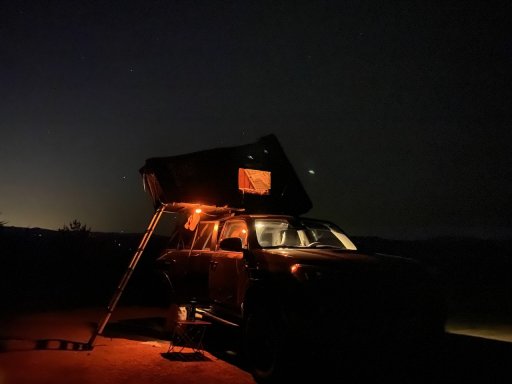
It was a good setup, but had more flaws than a swiss cheese has holes ... the tent was decent, but the mattress was utterly horrible. We ended up using Thermarest MondoKing mattresses, but still, the tent was overall suboptimal. It took long to set up and was then tight and condensation wasn't great either. Granted, we used this mostly in cold conditions, but overall, we just didn't like the "everything is around the car, then you get up into the tent, and you always forget something in the car" kind of thing.

Still, it got us into driving more off the beaten path and staying in cool places.

Since we are always traveling alone, meaning one vehicle and two people, we thought higher suspension, a winch, and other stuff would be a great idea. Turned out we never needed any of that. Could have done 99% of our trips with the stock 4Runner.

But, we were missing amenities ... a kitchesn/cooking setup, organized storage, etc.

And this is where our most expensive learning experience happened: we got a camper trailer.
 

cug

Rank II

Enthusiast III

473
San Jose, CA, USA
First Name
Guido
Last Name
GNE
The "trailer rig"

To deal with our desire for some more amenities, our unwillingness to dedicate a truck to "just" overlanding (or car camping anyways), we decided to switch to this:

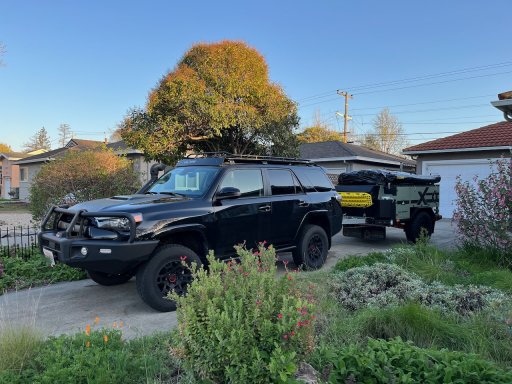
IMG_5232.jpeg

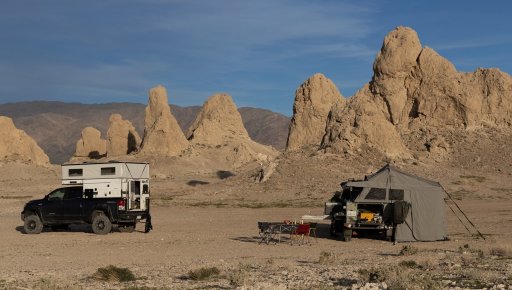
Went to some incredible places with it and had a lot of fun, but also an insane amount of frustration.

20230327-180604-01.jpeg

IMG_5240.jpeg

The problem with the Patriot X1 was that we just weren't compatible.

It takes forever to set up and pack away the tent once there is wind going. And somehow, there was always wind when and where we were camping. If you check out all the great videos of this camper, there isn't a single one where someone shows how to set up or pack away the thing in real wind, in rain, or just in general inclement weather conditions.

Oh, yeah, we could set it up (properly, no shortcuts, with tent pegs in hard ground etc.) in about 15 minutes if everything went well. One day it took as 45 minutes to pack away since wind started overnight and we faced 30mph wind with 50mph gusts. Try to handle all that canvas in that weather. It wasn't great. The awning was another thing – very big and beautiful when you have space and time to set it up, but we never did because in real life it was pretty much always a pain the rear.

The other problem we had was that we like to switch camp spots pretty much every day. The fuss of setting it up in the evening and packing away in the morning, adding up to about an hour per day was just too much. Even the extraordinary comfort with this camper couldn't bring us to keeping it. If we had used it differently, e.g. going some place, setting up and staying for a few days, then moving on to the next location, that would have been fine and we would have loved to keep the comfort – the bed in this things is extremely comfortable, I slept better on that mattress than at home.

So, again, we didn't consider what was important to us. We sold the camper. And shortly after that, we sold the 4Runner as well. A car I personally always disliked, but that's a different story.
 

cug

Rank II

Enthusiast III

473
San Jose, CA, USA
First Name
Guido
Last Name
GNE
Now, after having made all these mistakes and having learned from them, we started with a list of priorities:
  • One Minute Sleep Ready: After arriving at camp having a bed ready to jump in must be achievable in under a minute (preferably way under a minute, but of course plus any work the actual site needs for either clearing stuff or leveling the truck). Same for packing away the basics.
  • 30 second awning: Setting up an awning should be quick and simple, basically "instant", so that we'd use it more.
  • Ability to be out of the elements when the weather is not great for being outside. We don't need a full living space inside, this isn't our house or home, but it's great to be able to avoid rain, mosquitos, etc. if needed.
  • Fewer tires to air down and fill up.
  • Off-road capabilities at least as good as our 4Runner which had a 2" lift, decent tires, and excellent suspension.
Looking hard at the requirements above and since we were relatively flexible on the rest, including the cost, since the 4Runner and Patriot X1 were sold for decent prices, we ended up deciding on:
  • Jeep Gladiator with
  • an AluCab Canopy Camper installed.
We were looking at other slide-in camper options, but none really appealed to us, so we went with the option above.

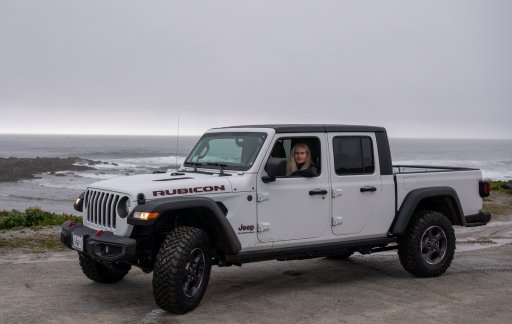
Here's the new start, in still OEM form:

20230407-172256-01.jpg
 

cug

Rank II

Enthusiast III

473
San Jose, CA, USA
First Name
Guido
Last Name
GNE
We started with small modifications, here are some including reviews I wrote at the time.

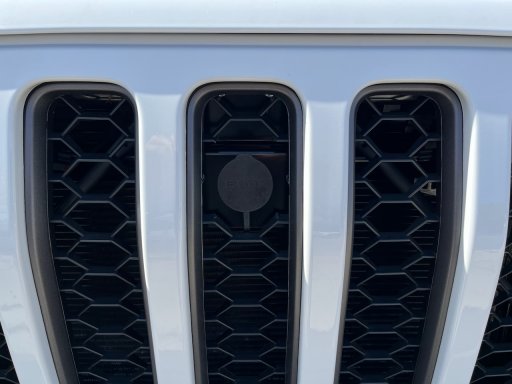
The Bolt Hood Lock

Installation

It's surprisingly simple to install.

  1. You "prime" the lock with your vehicle's key, this is a five second job, but can't be undone once set.
  2. Remove the plastic holders of the front grill at the top. Pull grill forward enough to have access.
  3. Rivet the lock into place with the rivets that came in the kit. You need a heavy duty rivet tool, I bought one on Amazon since I didn't have one yet, and it did work, although it had it's difficulties with the 1/4 rivets.
  4. Cut out the grill to fit.
  5. Re-attach with the new, included, plastic fasteners.
  6. Done.
It looks stock, it works with the vehicle key, it doesn't seem to be easily defeated (although I could be wrong there), so it SHOULD keep curious fingers away. The metal part is heavy duty, appears to be very high quality, the parts are well made and fit perfectly, comes with a rubber protector. There isn't really much else to say about it, other than it just works.

This was a simple, very nice, and easy modification, that I can highly recommend.

Rating: 5/5 – would definitely install again

IMG_5256.jpeg
 
  • Like
Reactions: El-Dracho

cug

Rank II

Enthusiast III

473
San Jose, CA, USA
First Name
Guido
Last Name
GNE
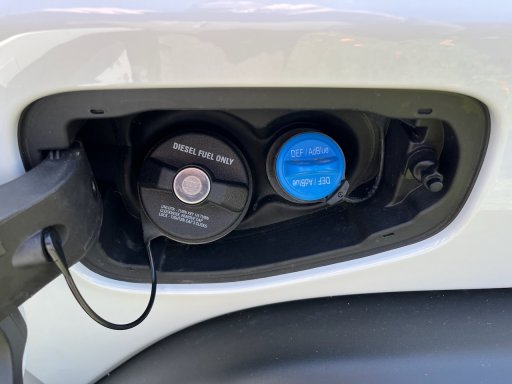
Mopar Locking Diesel Fuel Cap

Reason to install

This has been bugging us on our 4Runner as well and while I fully understand that thieves will just drill the tank, I don't care about "professional" gas or diesel thieves. I care about a-holes dropping stuff in the tank because for some reason, and possibly in their twisted minds, don't like us or our vehicle.

So, this is to keep less determined people away from things that shouldn't be in easy access anyways. Not a safety measure, an anti-idiot measure.

Quality

The fuel cap itself feels cheap and very plasticy, it rattles a bit and is fully plastic, the lock cylinder feels pretty solid, I guess it's the same used for the doors, just repurposed for this cap.

Installation

Installation time is mainly used for keying the lock cylinder to the vehicle's key, Quadratec has a good video on how to do that in a pretty much fool-proof way. It's still a "one way installation", so if the lock cylinder is inserted into the gas cap and not keyed correctly, you're done, you have just wasted more than $100. I don't get why they don't included a small slot in the cap where the "cylinder retainer" could be released when the cap is open, but it is what it is.

Since I have re-keyed many such cylinders before (mostly on BMW motorcycle luggage), I was well aware of the process, so it was a simple job of just sorting through the parts, arranging them on a paper towel, installing the springs, lock plates, and plastic retainer, then inserting the cylinder into the cap and installing that on the car. Multiple stages of testing and making sure I'm not locking myself out inbetween, but otherwise quick and simple.

In Use

The lock is a bit fiddly since the key is so bulky. You have to insert the key, hold the cap in place so it doesn't turn, turn the key to unlock, then turn the cap with the key in the cap. As said, fiddly, but perfectly doable. Would have been nicer to have the outer door included in the central locking, but hey, we get what we pay for (or ask for, if enough people complained about this, Jeep would include it, but people seem to be ambivalent about this in the US – not so much in Europe, never seen a vehicle with non-locking cap there).

Overall

Quick and easy, should have been included from stock, should be able to remove key when unlocked to make it less fiddly.

Rating: 3.5/5 – would install again, but could be better

IMG_5257.jpeg
 

cug

Rank II

Enthusiast III

473
San Jose, CA, USA
First Name
Guido
Last Name
GNE
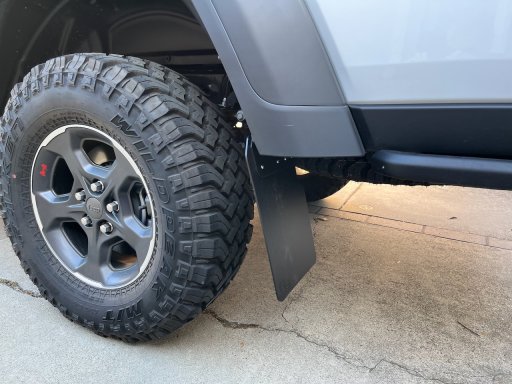
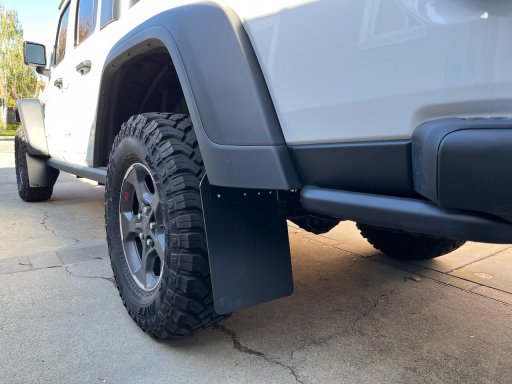
RokBlokz Mud Flaps

Reasoning

This Gladiator will be for travel. Traveling on unpaved roads, gravel roads, dirt, some tracks, etc. We want to camp away from the Subarus and Kias and whatnot, so traveling away from paved roads will always be a goal, we don't do rock crawling, therefore the size doesn't bother me too much for that. We wanted detachable just in case and these were basically the only ones that fit the bill.

We decided on normal width, but long.

Initial Quality Impression Before Installation

Bad. Relatively cheap, straight plastic, nothing molded, nothing to go better with the lines of the vehicle, nothing to make them fit the installation areas better. The fasteners are non-metric, metric do fit, but not great. Why can't accessory manufacturers not switch over just like the vehicle manufacturers did? It's beyond stupid and leaves a bad aftertaste.

Comes as multiple pieces of plastic, some marked for position, others not, and multiple bags of screws and nuts. Again, cheap, inconsiderate, but not unheard of.

Installation

Relatively simple, but their video is only half helpful. There are brackets included in the kit that weren't explained in the manufacturers video I watched, figured it out by myself. Otherwise relatively easy and painless. Passenger side front was a bit harder to get to the OEM plastic trim holder to cut off, but again, not too bad.

The rear is more complex than the front, the flaps need to be assembled in multiple layers with the included hardware, I would have preferred if this was actually properly formed plastic and better attachment points.

The metal hardware in the rear attaches easily, the included and unexplaned small bracket is to stiffen the rear mount, it fits well, and makes sense once you see it. Multiple sizes of fasteners for the small bracket as well, worked with my metric kit, but I doubt it's metric hardware (again, hmpf).

The rear can be moved in/out a bit to adjust for wheel spacing, so setting it up just right was eyeballed and turned out okay.

The cut out on the front flaps for the Rubicon rock rail is tight, might want to scrape some material off to prevent rubbing if you're concerned about it rubbing off the powdercoating and then having rusting rails. I don't mind too much, since these will likely get nicks and scrapes anyways.

Looks

Leaves a lot to be desired, but if they do the job, in can live with it. Just from the looks department and the initial feel of the plastic parts, rating would be a 1 or 1.5/5 or so.

In Use

Since it finally stopped raining in California, at least for the time being, we have not had a chance to test them, but they look like they'd protect the body of the vehicle as well as following cars reasonably well with the stock 33" tires on the Gladiator. Larger tires might need wider flaps though.

The quick detach will probably work for a while and then muck up solid to be removed with pliers only. It's okay, I've added some thumbscrews on my list of "consumables" to add to the kit, don't have them yet, but will find some.

Overall

They are priced stupidly high for what they are and do, but okay, blame me for spending the money.

Should have gone with Weathertech and just replaced them if they ever broke due to not having quick detach.

Rating: 2.5/5 so far, not convinced by plastic quality, fit, price, mounting instructions, or looks; I might update my rating later on, but as of now, it stands.

IMG_5266.jpeg

IMG_5267.jpeg
 
  • Like
Reactions: El-Dracho

cug

Rank II

Enthusiast III

473
San Jose, CA, USA
First Name
Guido
Last Name
GNE
Hot Head Roofliner

Reasoning

I'm really sensitive to noise and the Gladiator with mud terrain tires and diesel engine is certainly not a quiet ride once you get past 40 or 50 mph. Also, putting the hand up when the roof is in direct sunlight showed some serious heat radiation coming down to our heads, so something had to be done about both of these.

The research into this was quick and dirty, I settled fairly quickly on the Hot Heads product and ordered this a day after bringing the Jeep home.

Initial Quality Impression

Pretty good. They stink, though. When new they have a rather offending smell to them, it really goes well along with the "new car smell" that now creates something close to cow dung smell in the car when it is sitting for a bit. I know this will go away over time, right now, it takes some time getting used to whenever we get in the car.

Other than that the roofliner comes with everything I wanted or needed, even some blue painters tape to mark the position of the sticky tape on the visible side to know where to press down. A very thoughtfully compiled package.

We got ours with the Sound Assassion strips and the small rear side panels. In black of course, to go with the rest of the interior trim and not the saddle leather seat trim.

The package even comes with a hard cardboard piece to distribute pressure and a small roller to appy the Sound Assassin butyl strips.

That's how it's done and the RokBlokz folks REALLY should take a closer look at matching the quality of the parts, the instructions, and the completeness of the package.

Installation

We took the long way, removing the front roof panels as well as the complete rear from the car to be able sand the parts properly without completely covering the whole insight with plastic dust. It worked rather well this way, applying everything was as simple as laying out the Sound Assassin (SA)stips on the roof parts, cutting them to size in preparation, then sanding the roof interior, cleaning it with Acetone, sticking on the SA strips, rolling them down, then sticking on the actual roofliner pieces and pressing the tape on properly. Much easier when the panels are off the car.

One note: I accidentally touched a black plastic trim with the Acetone soaked rag and of course it ruined the black color. It's in rear, upper, passenger side corner, not too bad, so I'll be able to ignore. Might have been a good idea to but a big warning marker in the instruction, especially since they recommend using Acetone. I was aware of the potential, just not aware enough to avoid clumsiness. My mistake.

Putting the roof back on was also not hard. I did all this with my wife, she's 5'7" and slender, but was able to handle her part of the rear roof reasonably well. Might still be a good idea to have a buddy help with this if your partner is smaller or not a rock climber (my wife is a hobby rock climber).

Removing and re-installing the roof was also easy. Nice touch on this.

In Use

We did not measure the decibel levels before installing the roofliner, but for my ears, it seems to be about 30% less noise (I used to have a sound and light company back in the day, out of school, so have a little bit of a feel for this). My guess is that the 4 to 6dB(A) that can be found on their website as well as in various reviews is pretty much spot on. Also, less echo-y. Think room without to room with large carpet. Similar effect.

Conclusion

I'm happy to have done that, it's relatively expensive at around $500, but for me it was well worth it. There is very little heat "bleading" through the roof line now, and that is in California sun. Not yet really warm, but there is a MASSIVE difference to before. The decreased noise level and slightly less hollow sound is a nice bonus.

Might actually take a look behind the door trim and see whether we can use up the rest of the Sound Assassin strips there to damping the rather cheesy door closing sound.

Rating: 4.5/5 – half point taken off for the relatively hefty price

No photo taken of this one, there are enough out there and there will be more from this car when I get to more interior work.
 

Ethan N

Local Expert, East Region USA
Member

Expedition Master III

10,785
Ocean County, NJ, USA
First Name
Ethan
Last Name
Newago
Member #

30968

Service Branch
US Army
This is a great progression post. I'm still a ground tent sleeper, and might always be but thanks for showing all these rigs and trailer. Nice JT! Can't wait to see more.

2023.jpg
 

cug

Rank II

Enthusiast III

473
San Jose, CA, USA
First Name
Guido
Last Name
GNE
These are nice rigs there! We looked at the Project M as well, but wanted a tight door and side openings. So we ended up with the Canopy Camper.
 

cug

Rank II

Enthusiast III

473
San Jose, CA, USA
First Name
Guido
Last Name
GNE
The next big topic we tackled was the electrical and cooking system. These two are very related in our setup and drove a lot of the decisions we made.

And since we learned from mistakes before, let's start with the requirements:
  • Induction cooking – we want to be able to not care too much about wind or the dangers of an open flame. This drives decisions for battery capacity, charging power, inverter size, etc.
  • Run a fridge, a fan for our toilet, lights, the water system and assorted other small things.
  • Be able to use all available power sources (even though we might not hook up all of them): shore power, solar, alternator.
  • Have as few individual components as possible (which excluded Victron unfortunately).
Of course, the induction cooking part drove most of the technical necessities. There are some interesting observations we made on our journey to a cooking system that seems to work for us:

Propane bottles are heavy. An 11lbs bottle full with propane weighs about 20 to 23lbs. That's actually more than the second battery I need for induction cooking. Then I need all these hoses, regulators etc. So, there isn't much in terms of weight savings over a fully electrical setup.

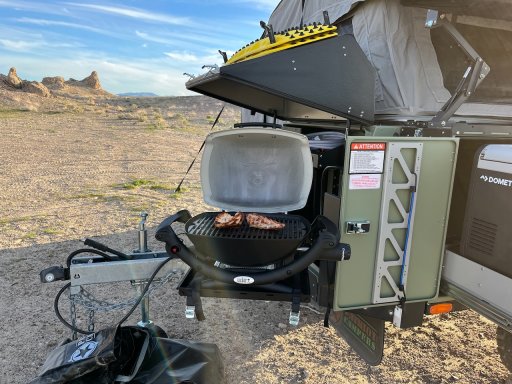
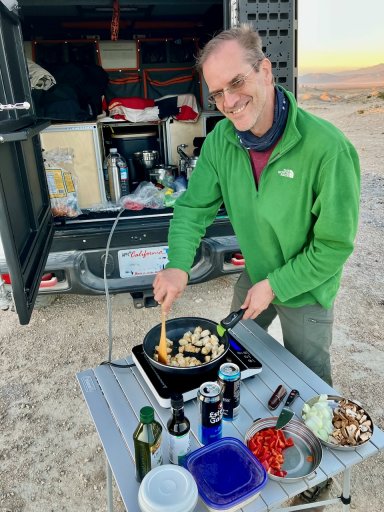
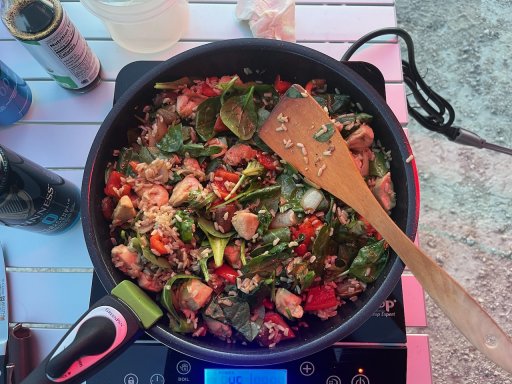
I know that this is my very personal opinion, but I believe that cooking with propane while camping completely and utterly sucks. Let me explain. When cooking with an open flame a strong wind can make it annoying to nearly impossible to regulate the temperature. We used a pretty high quality setup with our Patriot camper and I hated every single time a slight breeze started. Nearly every single propane camping stove sucks. We own(ed) three different ones: a Martin, a Coleman, and a Jetboil Genesis. We hate every single one of them. The one we still have is the Jetboil, and even on that insanely expensive stove, one of the burners can't simmer after maybe 20 uses. The price to quality is just badbadbad. We then used a MSR Windburner for coffee or tea during the day. That was great, but it required a second type of fuel. The one thing we loved regarding propane cooking was the Weber grill. So, we had to find a way to integrate a small oven into our system without having to carry propane.

Given all that, our cooking system now consists of:
  • A 1800W induction plate.
  • An electric kettle.
  • A 12V travel oven.
  • Induction ready pots and pans, an induction ready mocca pot, and we are planning on a small milk frother to go with the mocca pot.
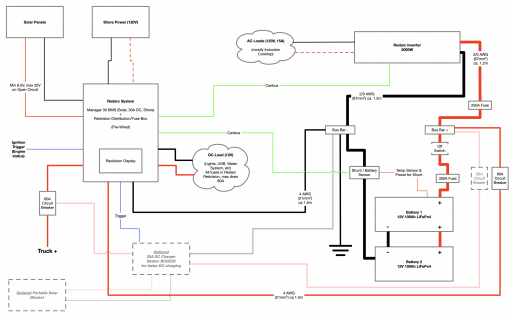
The journey to get the electrical system to the point to suppot these things (not all at once of course, but some can easily be combined) took us again a while to sort out. Here's a component list:
  • GP-Factor full Redarc System with Manager 30 and Redvision including Redvision display
  • A secondary Redarc charger to get us a) a secondary solar input for a mobile solar blanket and b) 25A more DCDC charging for a full 55A.
  • 2x 100Ah Renogy self heating batteries with BMS
  • Redarc 2000W inverter
  • Some assorted odds and ends.
Here's the plan:

Screenshot 2023-07-09 at 10.20.56.png

This has been tested, and is now mostly installed. Some improvements are still upcoming, but it's close to done.
 

cug

Rank II

Enthusiast III

473
San Jose, CA, USA
First Name
Guido
Last Name
GNE
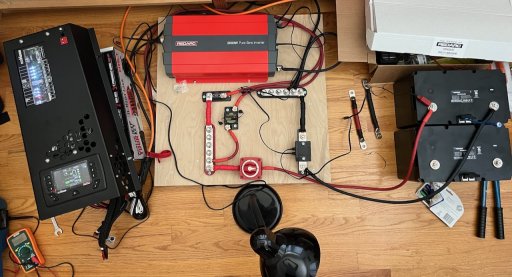
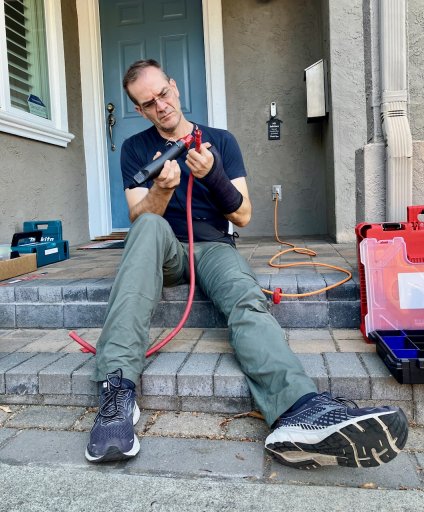
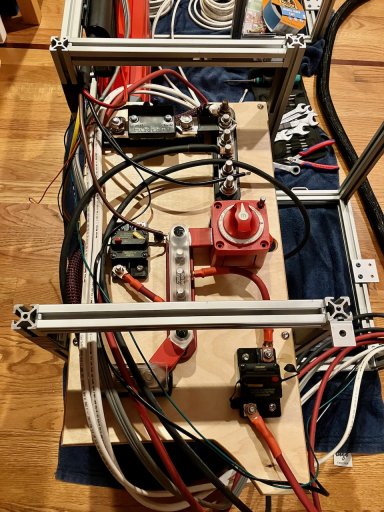
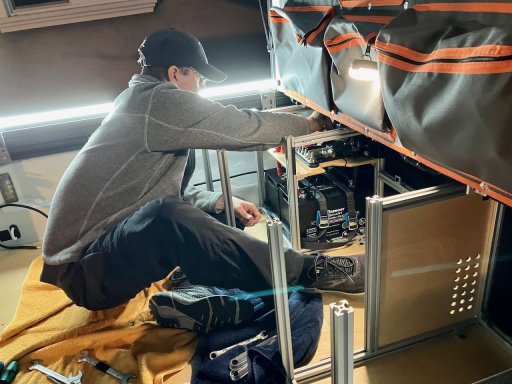
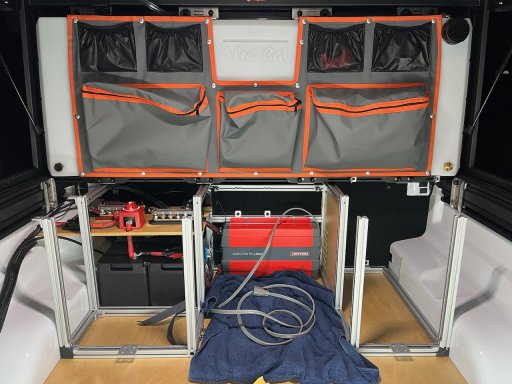
Here are some impressions of the install:

Testing:

IMG_5583.jpeg

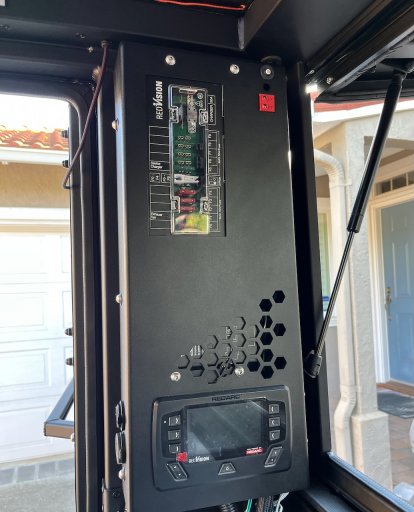
The GP-Factor system installed in the camper

IMG_5642.jpeg

Me building cables:

IMG_5861 (1).jpeg

Testing cable lengths, routing, etc, in our "utility furniture module":

IMG_5908.jpeg

Installing it in the truck:

IMG_5911.jpeg

Installed:

IMG_5980.jpeg

And hidden away:

IMG_5991.jpeg
 
  • Like
Reactions: gonzoy5

cug

Rank II

Enthusiast III

473
San Jose, CA, USA
First Name
Guido
Last Name
GNE
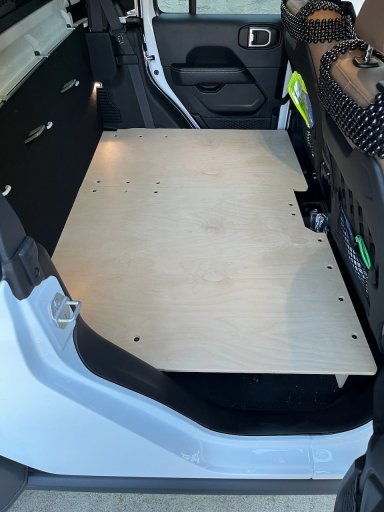
Rear Seat Delete

This was one of the things we knew we needed to get the storage space required for the type of travel we love. We love to be mostly independent, we love to be outside/outdoors, but we also like our creature comforts.

It was also the first driver to build our own furniture. The rear seat delete from Goose Gear is laughably expensive. It's utterly ridiculous. I might have considered their furniture, even though that is also very expensive for the lack of complexity it has. The drawers, maybe since drawers are complex to build, but the rest is too expensive in my very personal opinion. Yes, this is my personal opinion, but I'm making that determination based on my own build now, not out of the blue, never having build something like this.

We built the rear seat delete ourselves, in a reasonable amount of time, granted more than needed, since there was "product development" involved, aka we haven't done something like this before.

For the price of the Goose Gear rear seat delete for the Gladiator we bought all the materials (with lots to spare), all the high quality power tools we needed (Makita track saw, Bosch miter saw, Makita jig saw and router, and a bunch of other stuff). The we invested the time to build it properly and create templates in case we ever need to build it again.

We decided, that access doors in the platform make no sense for us, since we'll always have stuff covering them, therefore, it's slightly simpler than the Goose Gear platform, but adding two access doors would have been relatively simple and added only about 50 bucks in high quality latches.

Here's the process:

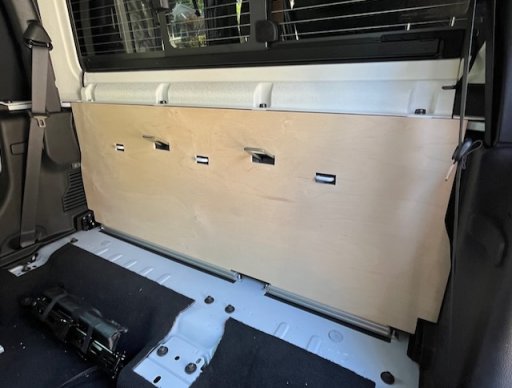
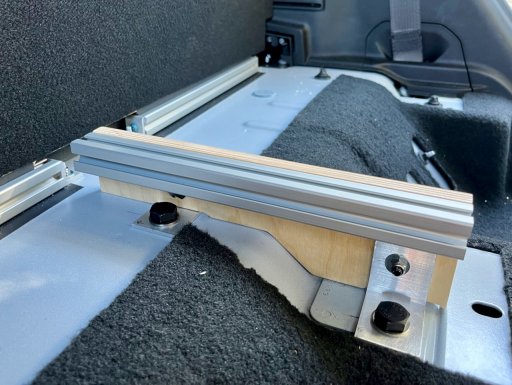
First, rip out the seats and rear plastics, then build a wall cover, you can see the lower mounting in 80/20 extrusion:

IMG_5721.jpeg

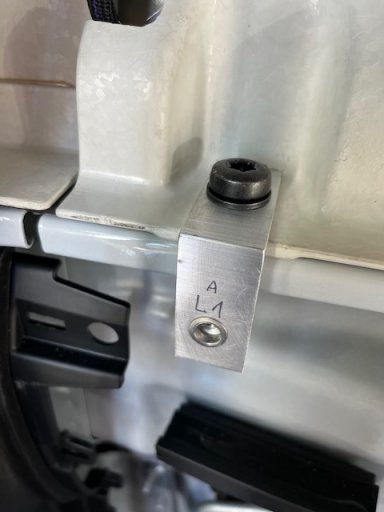
Upper mounting for the rear wall:

IMG_5722.jpeg

We cut them so that the wall mounts flat, of course.

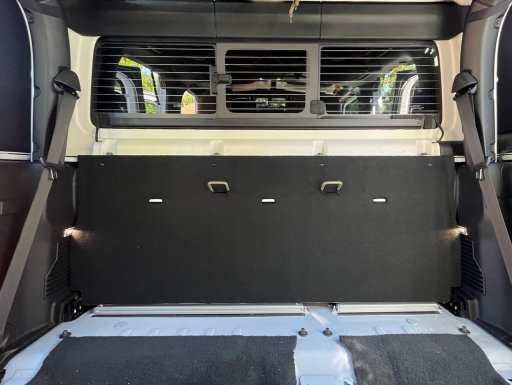
Result:

IMG_5735.jpeg

We've put noise dampening on the metal rear wall and thinsulate on the rear of the wood panel. Works great.

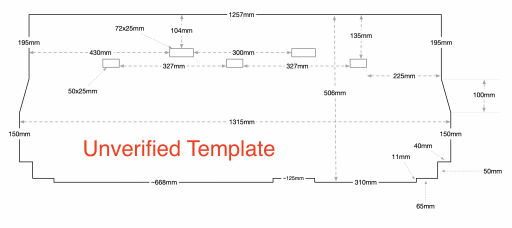
In case you're interested in building your own, here's a template, but MEASURE BEFORE YOU CUT!!!!!! This is for a 2023 Jeep Gladiator Rubicon.

Screenshot 2023-08-28 at 20.24.22.png
 

cug

Rank II

Enthusiast III

473
San Jose, CA, USA
First Name
Guido
Last Name
GNE
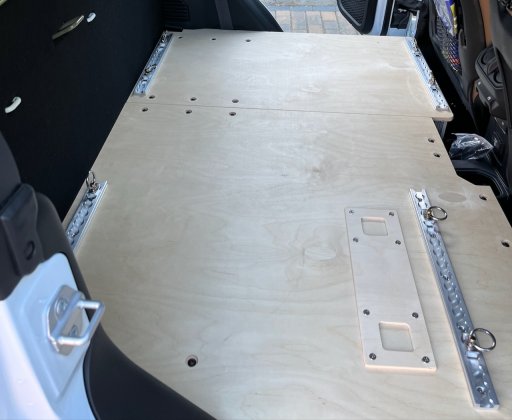
Now, onto the actual platform.

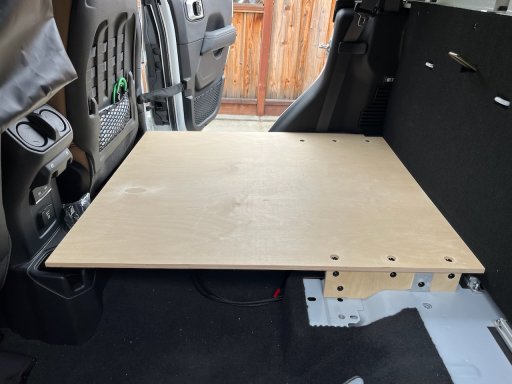
Rear mounts, we put them to a certain height so we get useful space underneath, accessible from the side:

IMG_5736.jpeg

Wood platform on:

IMG_5739.jpeg

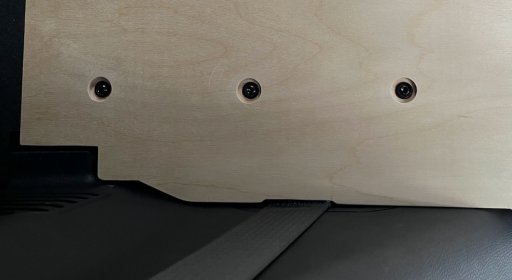
Optimized side cutout:

IMG_5741.jpeg

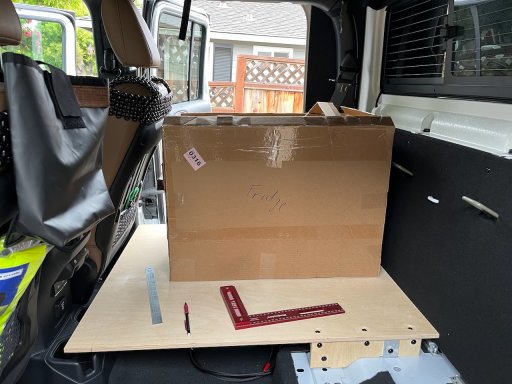
Testing with a mockup of our fridge:

IMG_5742.jpeg

We could have actually gone about an inch or so higher with the platform, we were a bit too careful witih the fridge height with open lid. But it works.

Building a "fridge retainer":

IMG_5763.jpeg

Raw platform:

IMG_5787.jpeg

And with all the attachment hardware and fridge retainer installed:

IMG_5836.jpeg

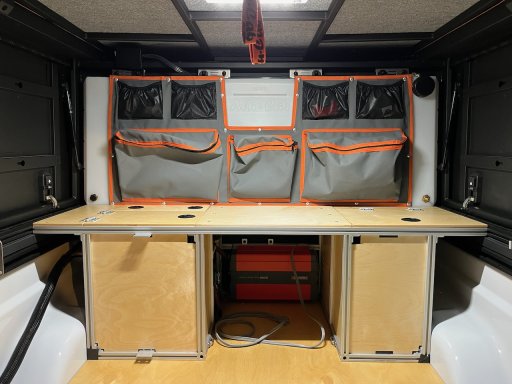
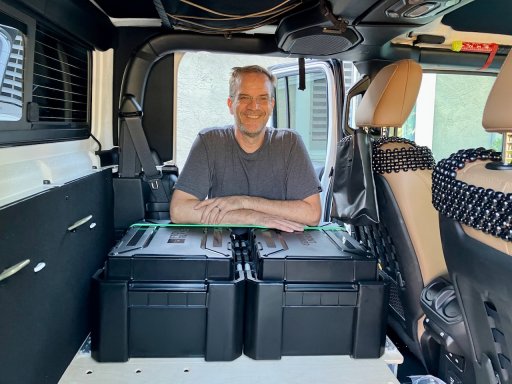
Happy camper:

IMG_5780.jpeg

We have since added automotive carpet and are constantly optimzing the rear storage solution to be easier to access and use, the maximum we can carry there is:
  • Four of the Frontrunner Wolfpack Pro cases with high lids (differently stacked than shown in the photo above, that's just our day to day config)
  • One Zarges K470 case (20.5 x 12.6 x 8.7 Inches)
  • Our winter jackets (on top of the Zarges box)
  • Two daypack sized backpacks (~30L each)
  • Snacks and drinks for the day
  • Our Dometic CFX55IM fridge
  • Some light items, e.g. hats and a sweater or blanket, in a net "attic"
  • A ton of less often used items underneath the platform, mainly recovery gear, tools, hiking gear, emergency stuff, etc. There is enough space to cram in a camping table and two Maxtrax Extreme boards as well, but then it gets hard to access.
Overall, we are super happy with this solution, we can take either side out to add either the double or the single seat back in, and it gives us the much needed storage space for longer trips.

I don't have a digital template for the platform, maybe one day I'll create one.
 
  • Like
Reactions: El-Dracho

gonzoy5

Rank V
Launch Member

Builder I

1,730
Miami, Fl
First Name
Eric
Last Name
Gonzalez
Member #

3748

We've been camping with our vehicles for a few years and we made basically every mistake in the book. We underestimated our desire for quick and easy setup, we overestimated our willingness to compromise for either less cost or higher comfort, we bought stuff we didn't need and still have a whole bunch of things we will never need.

So, this time, we hope to get it closer to what we consider "right" for us. This is a very personal opinion, it deviates significantly from many other builds on the same platform, and is taking us forever to finish. I started a build thread on the Gladiator forum nine months ago, when we decided we needed to change something.

The build thread here will be a recap of the most important things we learned along the way (so far), it won't be as detailed as the very detailed one on the other forum, I will summarize a lot of things, but maybe somebody here can learn a little piece here and there from our own experiences.

It will take a while for me to write these, but most of the work has been done over the mentioned last nine months and we are in the final phase of finishing our build to use from this year on.

So, I hope you'll enjoy this and maybe get some information from it.

Here's a teaser of the current state of the rig this thread is about:

View attachment 273291
Replying here, but great progress you’ve been describing. We’ve been down a similar path. Same vehicle in a JTR actually! I love identifying a need and really thinking through a goal to make a decision. We’re more basecamp style so slightly longer setup times are ok, but still want it relatively low effort so we’ve gone the Gazelle route. Our goal was that my wife and I can handle any section (sleep, kitchen, misc..) independently in about 10 minutes each so we can shut down a full unloaded camp in about 30-40 minutes, which was a huge progress from our 2 hour pack up days as beginners! At the end of our trips everything gets cleaned and back in its “box” (Plano trunk, waterproof bag, etc) and ready for a quick load up next time it’s time to adventure.

Keep sharing info and looking forward to your suspension details!
 

Attachments

cug

Rank II

Enthusiast III

473
San Jose, CA, USA
First Name
Guido
Last Name
GNE
Hey! Thanks for the kind words. I like the simplicity of your setup! The posts you see here are the results of about half a year of working on the truck on and off. There are a bunch more to write, then it's caught up to the current stage of the build out. The big missing part is the functional galley.

Yeah, our goals were a bit crazy. We wanted to be able to have the camp sleep ready in two Minutes and packed away in not much more time. We've spent too much time setting up and breaking down camp as is. Doing this is a chore, not the fun part of our travels, so we put down our wishlist, which in it's shortest form boiled down to:
  1. Setup and packing away of basic camp in two minutes or less.
  2. Never have to deal with propane again.
  3. No towing.
All the rest were downstream from these three.

The nice thing with the current setup is that both of us can do this alone in a pinch. My wife would not have been able to pack up the Patriot X1. It was a lot of work for two people! They have much easier to use use campers, and we would still be using a trailer if we hadn't chosen the wrong one in the beginning. But I'm also glad that I'm not pulling a trailer anymore. We are coming through too many trails where turning around is impossible in long stretches and backing a trailer up/down a difficult trail is not something I EVER want to do again.
 
  • Like
Reactions: gonzoy5

cug

Rank II

Enthusiast III

473
San Jose, CA, USA
First Name
Guido
Last Name
GNE
Roof Rack

We use Maxtrax recovery boards for their intended purpose, as well as leveling aids when the ground is uneven. I hate driving up on a rock or such and really prefer a more solid platform. The main issue for us has been where to store them during travel. On our previous trips we had them either just thrown in the rear where there was no furniture or under the storage platform where the rear seats used to be. That doesn't work long term for us since a) we now have furniture (more about that in a future post) and b) we need the space under the storage platform for other things.

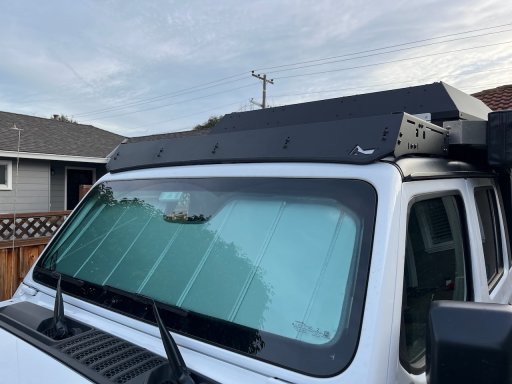
On a different truck, we have them on a roof rack in front of the camper overhang and that has turned out okay. We wanted to do the same on the Jeep and, at the same time, also wanted a wind deflector that would direct air up and hopefully a bit better over the camper to improve fuel mileage on long trips.

The only rack I found that is made to fit the Gladator with the Canopy Camper is from Trailrax and we went with that – at some point, when we have more testing in, I'll write a review for it, but we only installed it today, so I can only give an installation overview.

The rack, assembled and just losely laying on the Jeep for a first impression:

IMG_6147.jpeg

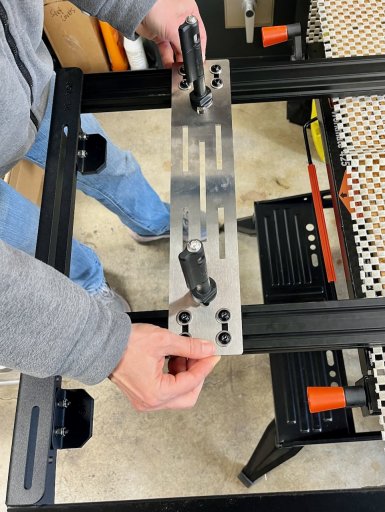
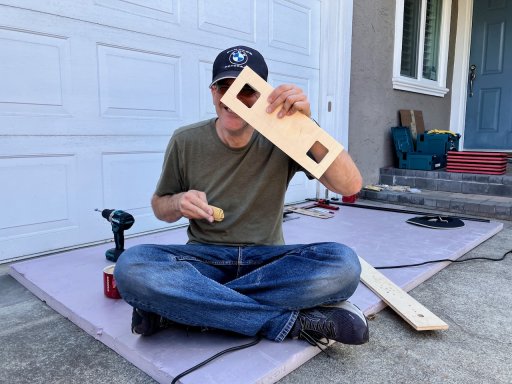
We designed some brackets in a 2D drawing application, exported the file to SVG, and then had the brackets cut in stainless steel by an online service (OSH):

IMG_6156.jpeg

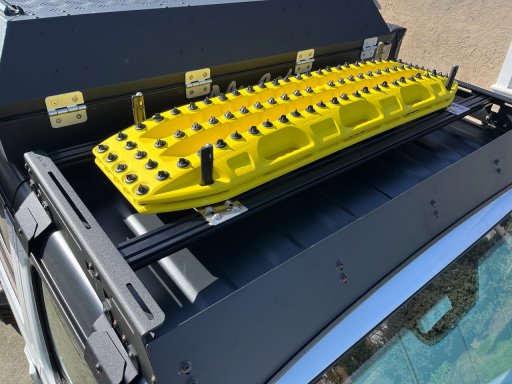
It fits great with the Maxtrax, is much lighter than the solution from Trailrax as well as less than half the price:

IMG_6171.jpeg

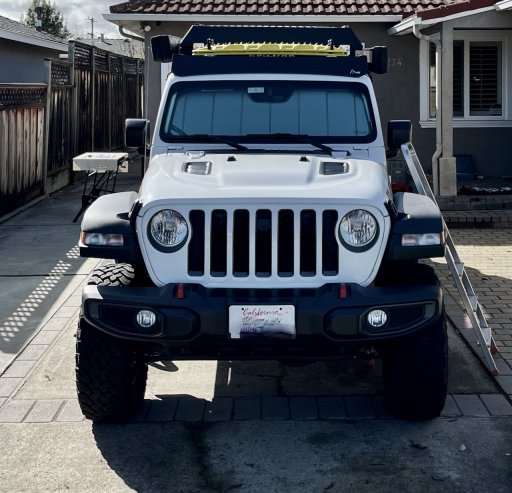
Front view, fully mounted:
IMG_6169.jpeg

We'll need another pair of boards, then I can check this off the to-do list.