f[z]j80 build discussion
- Thread starter Tahoe
- Start date
-
- Tags
- fj80 fzj80 mods
-
Guest, UPDATE We went through the site migration runbook and completed all steps. We will need to complete the migration next week, but will leave the forums up for the weekend. A few days after maintenance, a major upgrade revision to the forum site will occur.

Off-Road Ranger I

Off-Road Ranger I

Off-Road Ranger I
Waiting on $$Check your diff fluid to make sure it's up, and pump some grease into the knuckle to be sure if you're not going to get on it sometime soon.
Sent from my iPhone using OB Talk

Off-Road Ranger I
I hear that... cha ching. Not too crazy if you're just doing the gaskets and not the birfs, but if you're in there and the joints are making noise, or clicking, it would be worth it to do all at once.
First, I would take it to a car wash (pay and spray) and get down on the ground in front of it with the engine degreaser on and hose that dude down.
If you can take someone along, have them turn the wheel so you can get the front and back of both sides.
Then you've got it clean, you'll know what you're working with, that's pretty messy, but I've seen worse. It's a messy job.
ThanksI hear that... cha ching. Not too crazy if you're just doing the gaskets and not the birfs, but if you're in there and the joints are making noise, or clicking, it would be worth it to do all at once.
First, I would take it to a car wash (pay and spray) and get down on the ground in front of it with the engine degreaser on and hose that dude down.
If you can take someone along, have them turn the wheel so you can get the front and back of both sides.
Then you've got it clean, you'll know what you're working with, that's pretty messy, but I've seen worse. It's a messy job.
Sent from my iPhone using OB Talk

Enthusiast III

Off-Road Ranger I
Really the most unique tool you need is the large socket for the spindle nut.
Can't remember if it's 54 or 56 mm... ?
I can check if you need me to.
It's good to have it in your took kit anyway.
Can't remember if it's 54 or 56 mm... ?
I can check if you need me to.
It's good to have it in your took kit anyway.
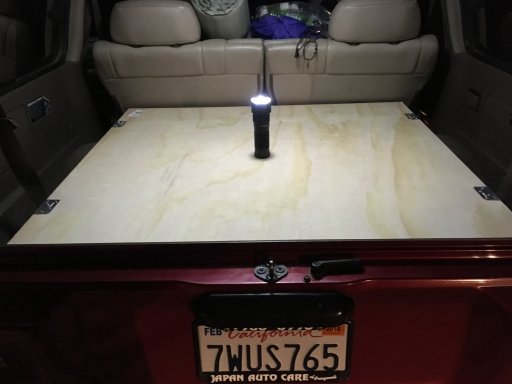
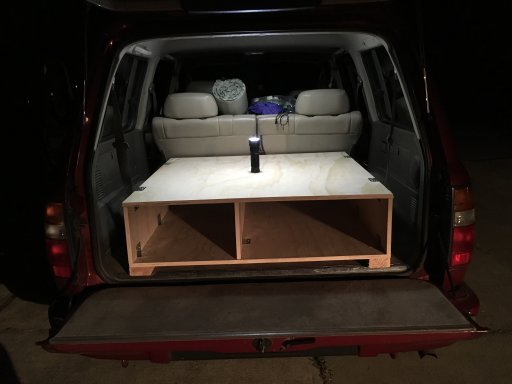
The only wood we used was 2x4 whatever and just basic Pine 0.61" thick plywood.
The plywood at lumberjack was only $23 each for 4'x8' pieces, not bad.
The dimensions we used were:
1. top/bottom pieces were 41"x44" of the plywood
2. feet were just 41" of 2x4
3. The walls are 10"x41"
We used angle brackets (24 of them) with 3 screws each (3/4" screws) which were just perfect.
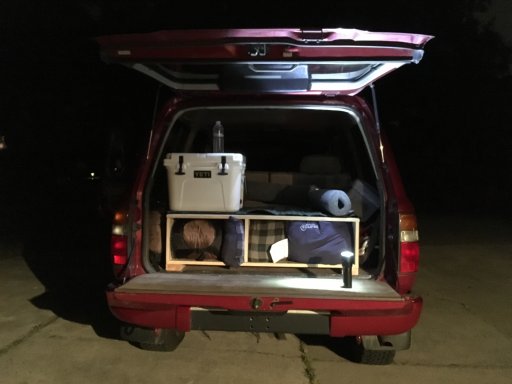
It slides in between the wheel wells just perfectly with little to no room for lateral movement.
The point of the legs really was so that I could have a place to put my table when I get it back from @MilkTeacoma

Off-Road Ranger I
I will, just haven't gotten around to it. I have L shaped brackets that have a single bolt hole for mounting to the wheel well and then a loop on the other side that I can use to strap it down hard. I think this should be sufficient to stop it from going anywhere.Do you anchor it down to the car?


