Big Tuna Presents: Pegasus Rising

  • HTML tutorial

adventure_is_necessary

Rocky Mountain Region Local Expert Kansas
Member

Traveler III

4,007
Bonner Springs, Kansas, United States
First Name
Lucas
Last Name
Antes
Member #

7082

Ham/GMRS Callsign
KE0ZXA
Well, I finally got the IRO A-Arm I bought LAST FREAKIN' YEAR installed. I managed to also install the flex joint upgrade on it, so the A-Arm is completely rebuildable, and rubber bushing free! On a side note, trying to remove the old A-Arm ball joint with a box end wrench and brute strength, I managed to pop my back (which has been out for the last week). Sometimes you fix the Jeep, sometimes the Jeep fixes you! :tearsofjoy:


The old A-Arm bushings and ball joint were completely trashed. The bushings were wallowed out to the point that it had actually developed slop when braking or accelerating. The entire axle would not only shift, but also cause the entire rear end to slightly walk all over the road. I stopped driving the Jeep for a while, I waited for the weather to cool down enough to work on. I took on the task of adding a cooling fan to my Joying android headunit. Being an older model, it is based on the Rockchip PX5 CPU, which is notorious for overheating issues. A simple mod that can be done mostly in the shade of the garage! The saving grace is Joying's custom main board design, which has a decent cooling solution built in, just needs some air on it, especially in our summer.


Overall, the Jeep is driving much better with the new A-Arm in place. Now that the entire suspension has been effectively replaced, all clunks and noise has been eliminated. First time in a long time.

Now I can focus on what is wrong with the A/C again...
Before I sold my WJ, I was having the same symptoms you mention of the rear end slop. Ball joint was toast and the bushings on the A arm we're dry rotted and barely doing anything. Unfortunately I could not salvage the original A arm and replace the bushings like I originally planned and bought bushings for. Ended up getting an OEM replacement A arm and ball joint. Had to get out the cut wheel and hack off one end of the arm to get it to spin to hit the ball joint bolts with an impact. Talk about a PITA! Glad you got it sorted out! Makes all the difference and is more confident in turns and braking. Kinda scary bombing down the highway fully loaded and braking causes the shimmy or walking effect.
 

JimBill

Rank V
Member
Investor

Advocate I

2,268
San Benito County, CA, USA
First Name
James
Last Name
Madison
Member #

18747

I'll add to the WJ cooling drama.

I have a 03 WJ and converted the hydraulic fan setup to the dual fan 99 setup, and eventually running the ebay special 2 row radiator as well. I experienced all the install fun you did.
To not be long winded here is my present result:
-Using factory 5 blade and clutch fan as primary. It moves plenty of air, the issue is the fan clutch activation temps. If only we had heavy duty and severe duty fan clutch options like everyone else. Only the standard duty is offered. I bent the end of the spring in such a way to lengthen the overall spring, this forces clutch engagement to happen sooner by activating the valve sooner. Works like a champ. The Ford system works more due to the fan clutch activating sooner and moving air sooner, rather than more CFM.
- The electric fan is now secondary. When it is on it moves just enough air to be blowing cooler air on the fan clutch, messing with the signal. My needle would bounce all over when I ran this in auto and as the primary cooling, and I would see 210 often and under load fight to not climb higher. I have a switch with auto/on/off. I have run all summer with it off, and now it sits just for backup if the fan clutch fails (again).
-Agreed- the 99 transmission cooler is completely inadequate. The only time this summer I got freaked out on temp rise was waiting for a TJ to get unstuck on the rocks in front of me on a very very steep incline. I was holding it in gear just a little too much and the high load spiked the temp fast and high. I backed it out to flat, spun up a little RPM and mechanical fan flow, and cooled it down to normal. It held for the rest of the climb. I completely blame this heat spike on the transmission cooler.
-I blew it. When I first did the cooling mod I reused the hydraulic fan cooler for the transmission. It is much larger than the 99 trans cooler. I did not like using so much soft line so when I spotted a fairly clean 99 system at the pick and pull, I grabbed it and the hard lines. No leaks, no worries, nice and tight and clean factory looking setup, but went backwards in trans cooling capacity. I will be going back to the bigger cooler at some point.
 

BigTuna117

Rank V
Launch Member

Member II

2,306
Springfield, OR, USA
First Name
Michael
Last Name
Bouman
Member #

1813

@JimBill, not long winded at all! It's all great information I think. If someone reads our builds and experiences and ends up learning something, then that's all I can ask for.
 

BigTuna117

Rank V
Launch Member

Member II

2,306
Springfield, OR, USA
First Name
Michael
Last Name
Bouman
Member #

1813

Well, my final days in the Arizona sun are upon me. In a number of weeks, I'll be moving to the cooler climates of Oregon, and that means I need to get off of my butt and get a few small issues fixed with the Jeep. Overall, she is running very healthy and should make the trip just fine.

-(Biggest Issue) Re-seal my Spyder headlight assemblies. Though these have served me well, the Arizona sun has definitely pounded the plastic pretty well. I do plan to replace these sooner or later, but for now I need to re- seal two of the ball connectors onto the assemblies on both sides.

-Rebuild the joints on my trackbar- I purchased the flex joint upgrade kit from IRO, and the larger bolt upgrade for the lower joint from Kevin's Offroad. The upper joint is just being a booger to remove, and I have to completely drop the bumpstop on that side to complete the extraction.

-Fine tune fan Kick-On temp- increase temperature about 10-15 degrees.

-Retire front lightbar- the position is not ideal if I get the opportunity to install a winch bumper eventually. Bar will be re-sealed and used elsewhere. I may eventually install a roof mounted lightbar, and re-use the circuit.

-Tighten clamps on all coolant hoses. Trust me, if you go to silicon hoses, such as HPS, don't use a screwdriver or bit driver to tighten your hose clamps. Ratchet those suckers down as far as they'll go without the clamp breaking!


I'm also working on bringing my old hitch mounted tire carrier back into service. I was never terribly happy with my wiring harness on it, so I'm working on a more professional looking (clean) solution. I also discovered that Trimax makes a style of hitch clamp I may incorporate into it to get rid of much of the noise that plagues the design.


Another project I'm pulling out of storage to finish (because it would be too awkward to properly pack) is a Grille I had freshly bought, de-chromed, and had Cerakoted in the Charcoal Grey color I prefer. Alot of people go for mesh inserts to freshen the look, but I have another idea...
 
  • Like
Reactions: WJ - Firefly

BigTuna117

Rank V
Launch Member

Member II

2,306
Springfield, OR, USA
First Name
Michael
Last Name
Bouman
Member #

1813

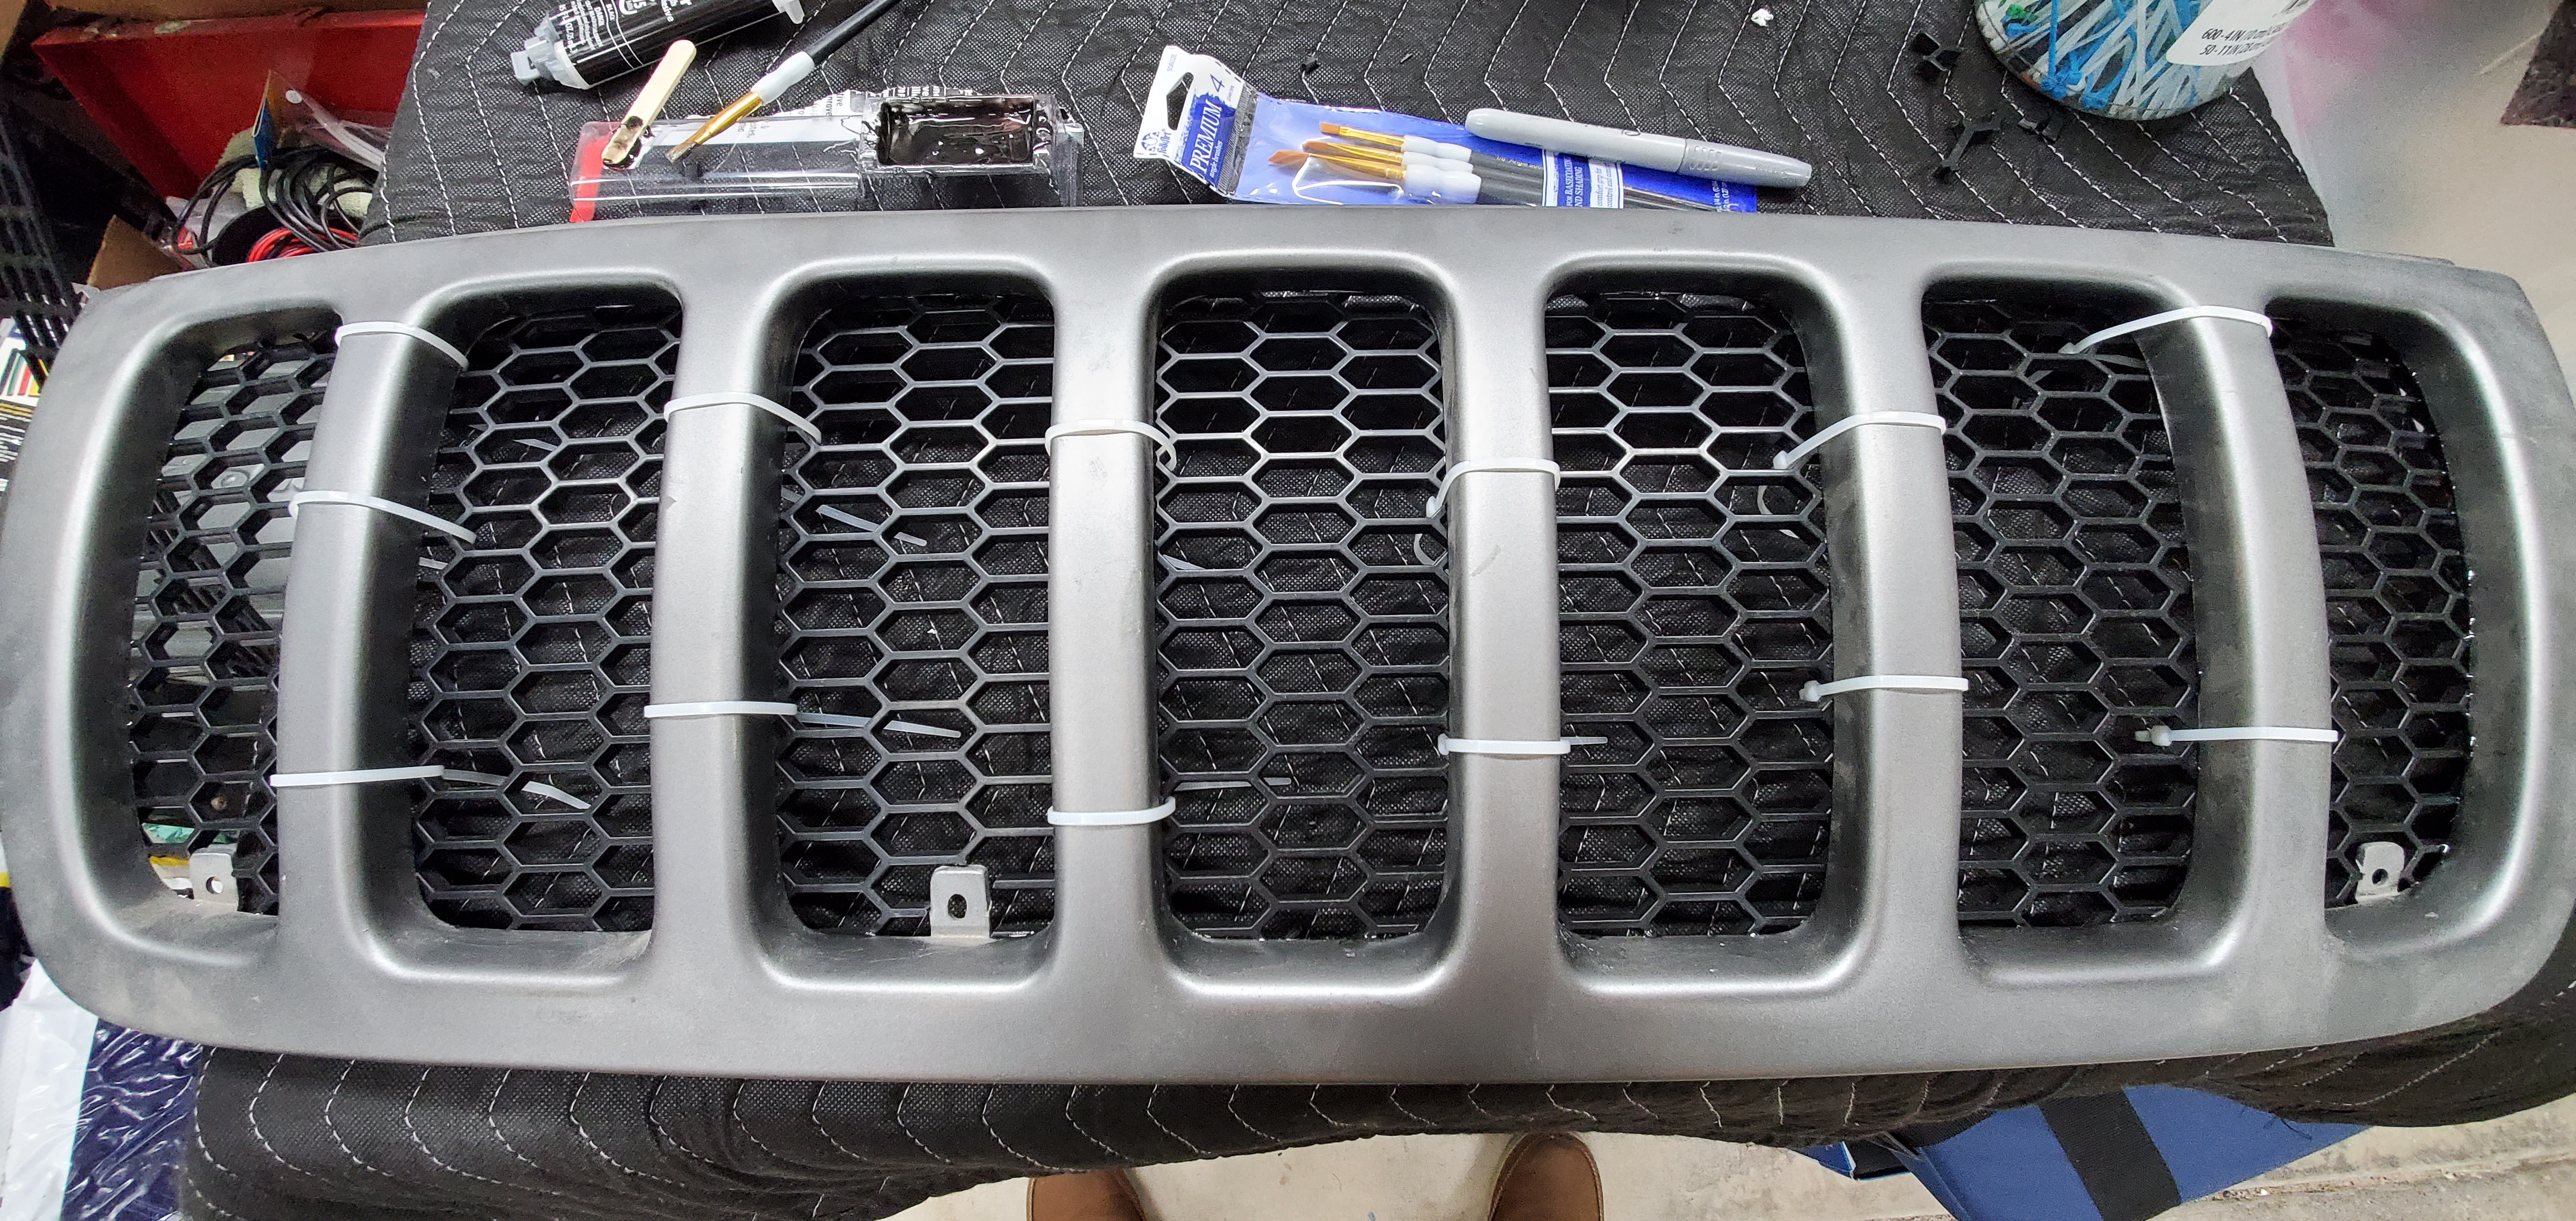
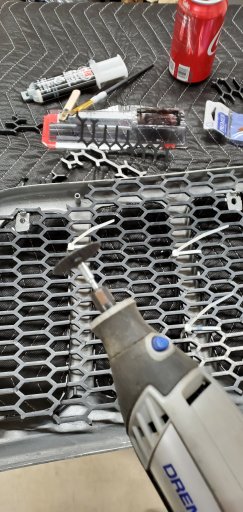
As far as the grille goes, I decided I really like the geometric plastic mesh alot of newer vehicles are incorporating. I wanted to make it subtle, yet stand out, much like the "Plan B" (the wire mesh mod, which always looks pretty sharp I think) I managed to cut out the sections straightly, and attach them using JB Weld Plastic epoxy. The epoxy was diffcult to get from going everywhere, however I found that letting it set for a minute or two makes it less prone to gravity than before. All in all it seems it came out sturdy... so far.

Not quite done with it yet, but this is how it looks so far.


The mock up- letting the epoxy bond
20220108_160255.jpg
Using the Dremel to trim out each section without breaking the first epoxy layer apart


How it looks.... Gosh, I never realized how bad the bumper looks! lol


Yet, it's not quite ready to install... there's more modification to come!
 
  • Like
Reactions: WJ - Firefly

BigTuna117

Rank V
Launch Member

Member II

2,306
Springfield, OR, USA
First Name
Michael
Last Name
Bouman
Member #

1813

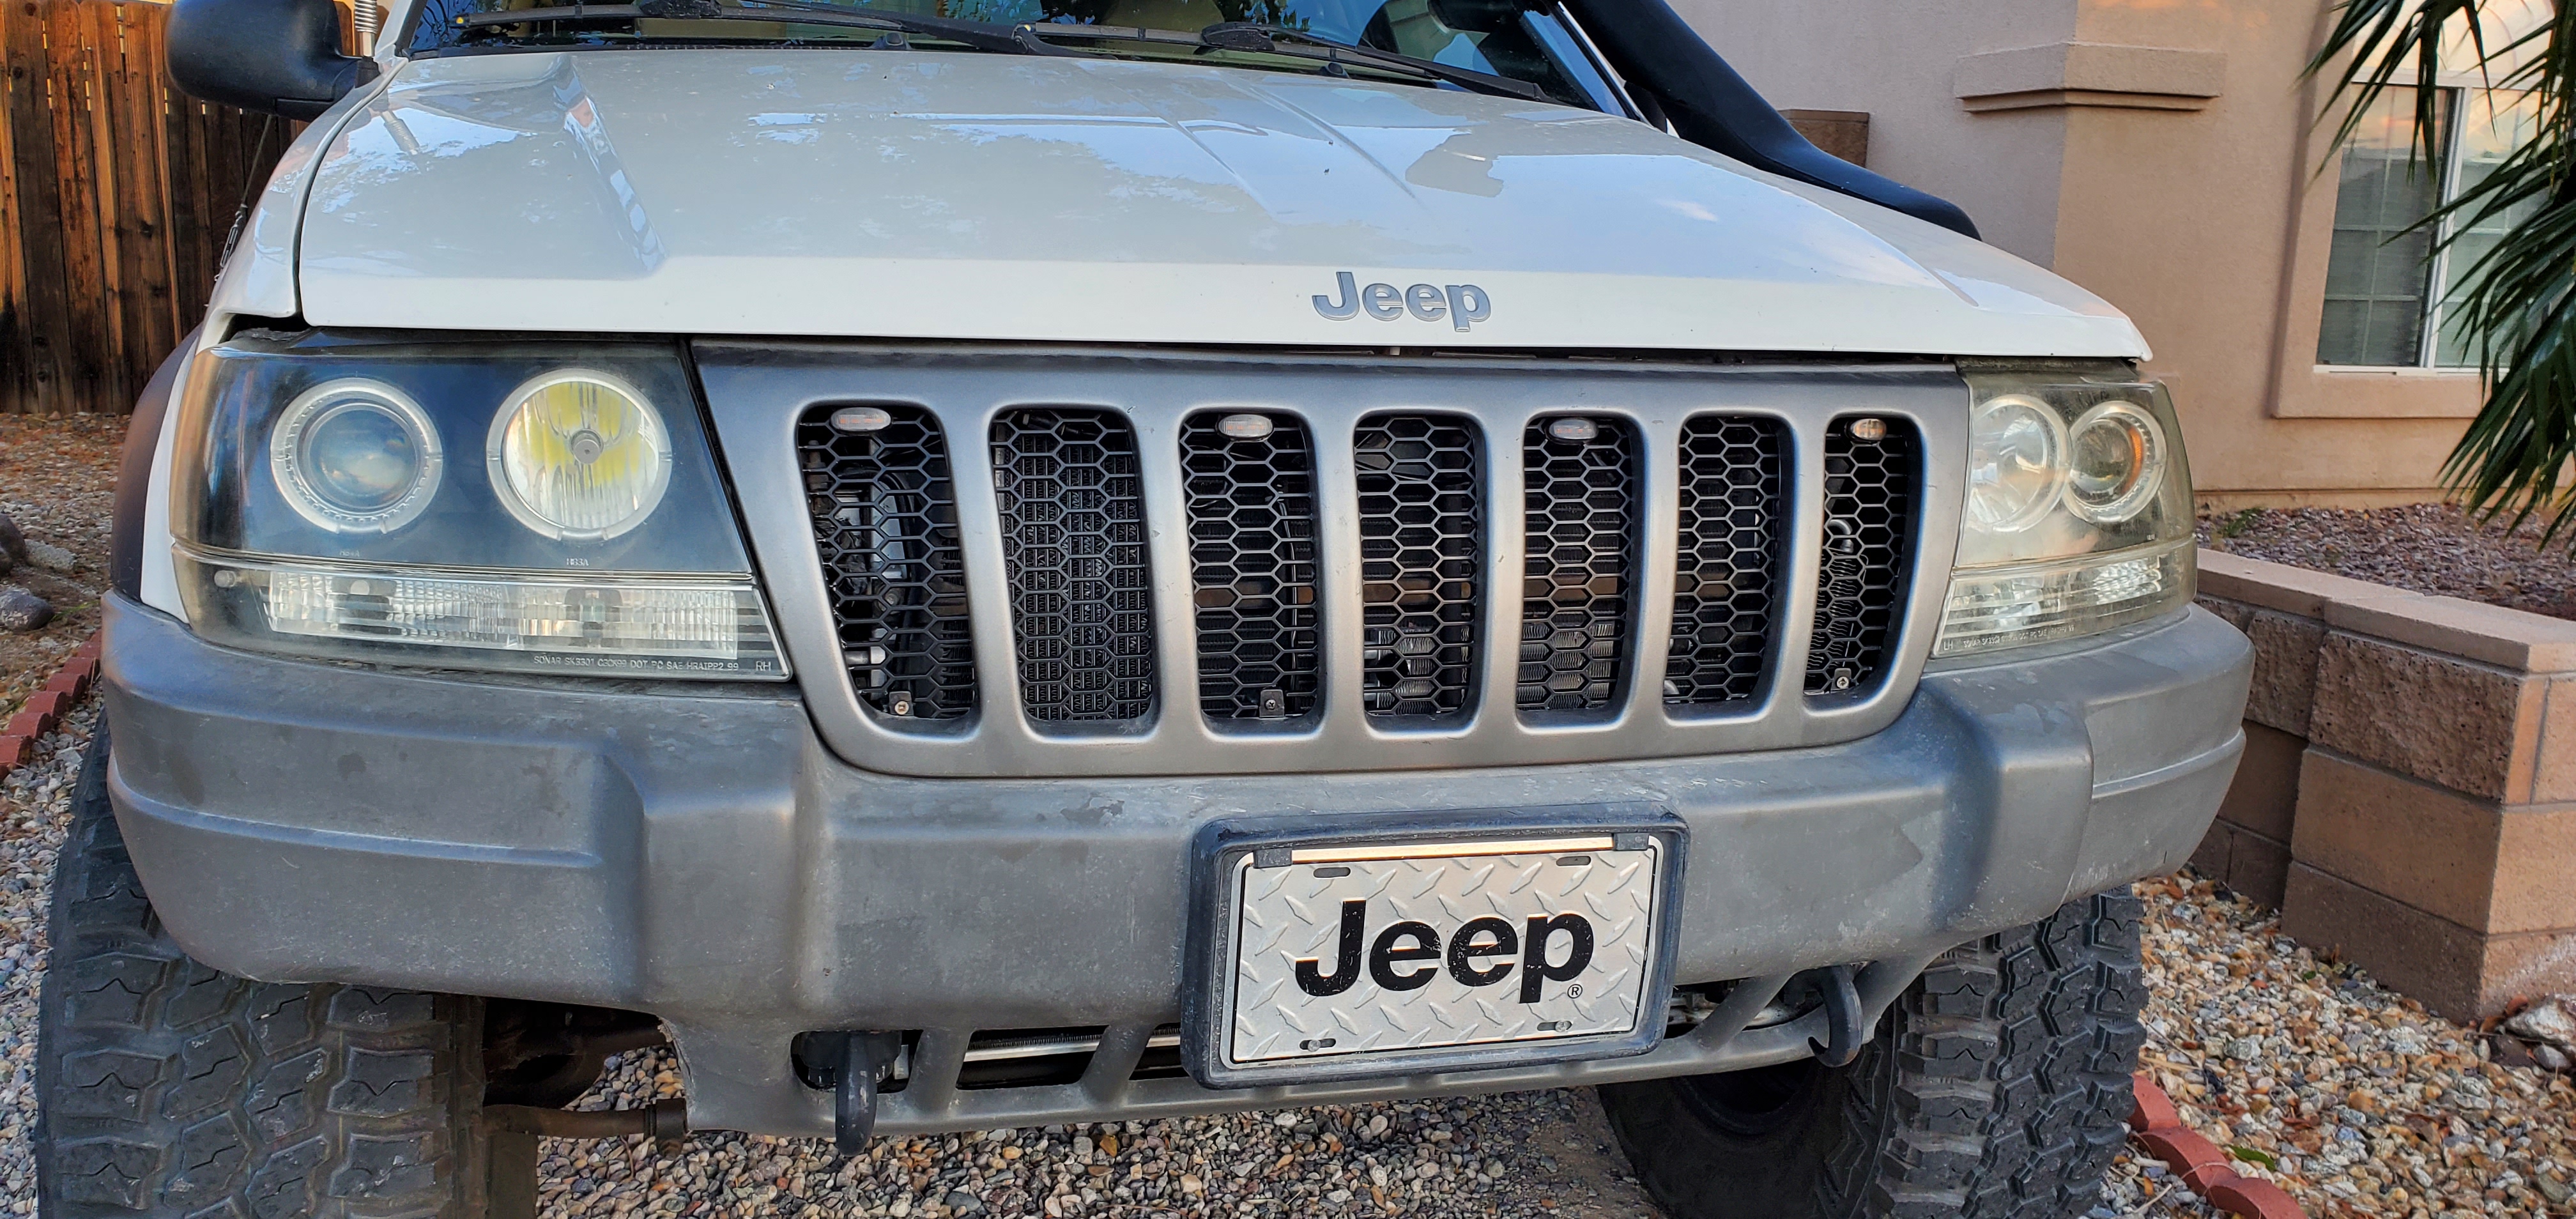
I didn't quite take any pictures of the completion, but here's the completed look:


I did add the marker lights, as commonly seen on alot of modern "utility" vehicles. I quite like the clean look, aside from having to spend several hours plastic welding and resealing the back of the passenger headlight. all of the amber markers along with the new ones have the same color tone, so it looks pretty good. I was able to center the markers and got them seated on pretty straight, too. Just a fun little project in the middle of packing and all of the other shenanigans going on.


Soooooo, aside from how oxidized my headlights are, and the tired plasti-bumper, looks pretty good, I think.


I also re-tuned the fan system to power on at 200F, rather than 180. This way the fan only really kicks on once the rig hits temperature. At highway speeds, enough air gets through the radiator that the fan isn't really necessary, Only really need it currently for slow, stop-and-go street driving.


I also installed some upgrades to my JKS trackbar, Including the IRO flex joint kit, and the Kevins Offroad large hardware kit for the lower. I was running the Hard KOR bushings before, however the bushings are so extremely firm that I managed to actually wallow out the bushings! The upper is now a flex joint, and the lower is an IRO bushing (I've head really good luck with those) but with the oversized inner sleeve to match the significantly larger bolt.


... And with that, I did a torque check on the whole suspension, given all of the modifications I've done recently. All in all, the Jeep is pretty much ready to be loaded and moved when the time comes.
 

BigTuna117

Rank V
Launch Member

Member II

2,306
Springfield, OR, USA
First Name
Michael
Last Name
Bouman
Member #

1813

Apparently I have neglected this version of my build, which of course was not intentional. Fortunately, much of my time in the last two years hasn't been spent on the Jeep, and rather working or working around the house.
----------------------------------------------------------------------
the move went mostly pretty smoothly, both the Jeep and the motorhome were the last assets moved being the "project" vehicles. It was determined that the Jeep was a fair match in range to the motorhome and with a full compliment of tools the Jeep was also a good match incase of a breakdown. Both ran splendidly, until the motorhome suffered an ignition system failure just a few hundred feet short of the Avelar, CA exit on I-5. The Jeep not only ran support ferrying parts from Carquest in Avelar, but also shuttled us back to the motorhome the next day after it was towed to a shop in Avelar. The failure shot about a 10' flame out of both sides of the exhaust, The ol' 440 was unfazed by this, so after replacing parts of the ignition system, we were back in business. The normally 16ish hour trip spread across two days ended up being spread across three due to the overall stress and exhaustion trying to keep the motorhome rolling. A ignition system rebuild is in its future. Or the swap to fuel injection. I'd prefer the latter, after the fact the trip ended up consuming 6 coils, 2 ignition modules, and 3 resistors (1 of which was a duralast coil which was more or less DOA- don't buy 440 parts from autozone).
The jeep on the other hand, performed exceptionally for the whole trip, averaging a staggering 17.7 MPG, a great result that happened to fall within the 10 year anniversary of owning this rig!
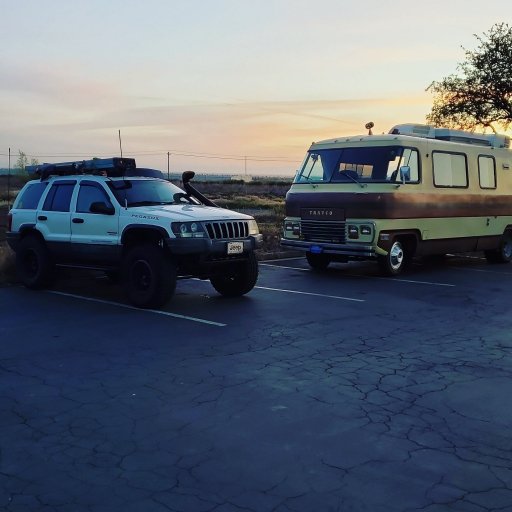
IMG_20220402_063909_555.jpg.5fa311a0e24eb734ca39d19dbf0e84f3.jpg

Some band-aids and repairs have been done since, too. This old rig really shows it has been a desert rig for a very long time. A few short weeks after migrating it, the rains flooded out one of the headlight assemblies. Attempting to remove the affected housing lead to the complete disintegration of the assembly in short order. The assemblies were replaced by the same model, but fitted with the CCFL halos rather than the LED halo model. same look, but with a brighter, cleaner, more DRL-y halo.

Another thing that failed, surprisingly, was one of the Core 4x4 rear lower control arms. At some point shortly after the move, the outer section of the arm became slightly wallowed and allowed the thread half of the arm to rattle and strip itself out. I ended contacting Core about the failure, despite the fact that that these arms predated all of their products pretty extremely. Core's current work offers a "if you manage to break it somehow, we'll replace it" warranty, and they also stood behind these arms despite the age and the fact that they predate said warranty. I ended up taking a credit for the equivalent "tier 1" arms and applying it to the tier 3 arms, which use flex joints. this puts them in line with the IRO arms on the jeep. Their quality has been refined significantly.

Since moving in, I have done a couple of things to the Jeep, mostly maintenance and quality of life updates. As I mentioned previously (the text above is copy-pasted from my other build on offroadpassport), the Jeep can really show it's time in the desert now that it no longer resided there.

- A Mechman 240A Alternator: Even on the PCM Voltage regulator it has made a huge difference in charging. Side note, with the smaller pulley on this alt, the 4.7L uses a shorter serpintine belt, DAYCO 5060870. This retains belt tension correctly. I have in my possession an external adjustable voltage regulator kit which I will eventually add in, however I am in no hurry at the moment since it is maintaining proper charge currently. Both of my Duralast AGM batteries have since failed and have been replaced as well. I have also added in battery breathers since both are located in the back and are no longer in "open air" It helps prevent corrosion on the things around the batteries.
- A new radiator (again) This one failed in the exact same way as it's predecessor, which appears to actually be caused by electrolysis/corrosion. I have worked through engine grounds to ensure this one hopefully won't suffer the same fate. I opted for the same CHR Racing 3 row radiator as before, as I was always satisfied with it's performance. On the recommendation of some old hot-rod builders I talked to, I have added a ground to the radiator, and a Flex-a-lite Sacrificial Anode, which conveniently replaces this radiators HORRIBLE drain petcock.
On a side note, has anyone noticed that worm drive hose clamps have gotten exceptionally horrible as of recently? I have started moving the jeep over to T-bolt hose clamps, which seem to grab more surface area on the hose, and can take significantly more torque, which is a great improvement over the standard worm drive clamps or the special ones recommended for the HPS hoses. So far the T-bolt clamps are a massive improvement.

Some of you may have seen the recent Ice storm in Lane county on the news, a multiple-day-long freezing rain storm which destroyed over 1/3 of our utilities power grid and also damaged the utilities water systems as well. The jeep was put on battery charging duty for the coming days since the Toyotas do not have an always on power port. This ice storm also did in the last AGM battery, and the jeep is currently running dual EFB batteries.

Also, a random fact for y'all, The Milwaukee 2646-20 grease gun tops off at 10,000 PSI. At significantly less pressure, you can actually (rapidly) extrude the rubber interior bushing of a johnny joint right out of the joint! Not having any sort of pressure relief/ grease bleed on these joints seems like a huge design flaw. I will likely replace these with IRO flex joints in the future.
 
Last edited:

BigTuna117

Rank V
Launch Member

Member II

2,306
Springfield, OR, USA
First Name
Michael
Last Name
Bouman
Member #

1813

Well, the last 4-ish weeks, the Jeep spent getting service to the rear axle. Originally I suspected that the pinion bearings had failed, following a loud pop followed by some extreme driveline slop. It uh, wasn't the pinion bearings; though they did get replaced in the end. The left/driver side carrier bearing effectively disintegrated, sending metal shavings and chunks into... everything effectively. The driveline slop was actually caused by the entire carrier shifting in the housing. So yeah, the Jeep ended up with a surprise axle service.

An issue the Dana 44a/HDs are starting to become more prone to in old age is "spinning" carrier bearings; where the housing actually loses proper tolerance to hold the bearing race in place and the entire bearing breaks free. This, fortunately was not the case; in fact, the outer race of the carrier bearing race was all that remained of said bearing pack when the carrier was removed from the axle. After very extensive cleaning, the axle received a full set of new seals and bearings, as well as a carrier out of a junk axle, fresh gears and.... a Spartan Locker! I never really planned to add a locker to either of these axles, however it made more sense to do it since I had to spend the money (and had it apart) anyways. Realistically, the Dana 44a/30 combo is fine for the immediate future anyways. The axle shafts in the Dana 30 are admittedly pretty awful with 35s, so I may swap those in the near future since the D30 really should get a fresh set of seals and bearings as well anyways.
 

JimBill

Rank V
Member
Investor

Advocate I

2,268
San Benito County, CA, USA
First Name
James
Last Name
Madison
Member #

18747

I also installed some upgrades to my JKS trackbar, Including the IRO flex joint kit, and the Kevins Offroad large hardware kit for the lower. I was running the Hard KOR bushings before, however the bushings are so extremely firm that I managed to actually wallow out the bushings! The upper is now a flex joint, and the lower is an IRO bushing (I've head really good luck with those) but with the oversized inner sleeve to match the significantly larger bolt.

I ran the JKS with 9/16 hardware and KOR bushings, but the bushings just would not last and needed to be replaced way too frequently. From there I jumped to a trail Forged track bar with a JJ on one end and the Trail Forged "Better Bushing" on the other. So far so good but I do not like the shape as it causes risk of oil pan damage at extreme stuff of the front axle. My bump stop extensions could be considered way too short but everything works how I want it. Anyhow I like the shape of the JKS better and it looks like you found the exact solution to the bushing issue. I'm already running 9/16" hardware, could you provide the part numbers necessary for the flex joint and IRO joint you used? I'm also buried in house projects and work OT so any help providing the shortcuts to me would be greatly appreciated. Post up or message me if you have that info handy. Also impressed on your motor home adventure. "Good show old boy" as some would say!!!
PS: Running front upper and lower older Core 4x4 arms with Clevite bushings and no issues so far. Also running Core rear upper with all JJs, so far so good other than it does not droop far enough to match the rest of my suspension capability. Decided to ignore it for now.
Thanks!
 
  • Like
Reactions: WJ - Firefly