99 WJ Overland Conversion

  • HTML tutorial

WJJEEPIN

Rank II

Enthusiast III

473
California, USA
First Name
William
Last Name
Mitchell
Hey all,

New to the OB forum but been trail riding and camping in my rig for years. I bought this bare bones jeep used, bone stock with about 100K on the clock back in 2007 to replace my lowered civic I sold to help pay for my wedding. It has the bullet proof 4.0L I6, 4x4 and 242 transfer case. Over the years I started toying with it, 2" budget boost list, 4" springs and short arms with 32's and got bit by the wheeling bug pretty hard before my kids were born so I added long arms from Iron Rock Off Road and 6" of lift. I Swapped out the rear axel for a Spider 9"axel with 4.88 gears and beefed up the D30 to match. I have a full build thread over on Mallcrawin so not going to redo it all but feel free to take a peek. Project Hookup - Now with Solar

The status from tip to tail prior to Overland Shift:

EXTERIOR UPGRADES
- ARB front bumper
- 9K lb winch
- Piaa yellow driving lights
- Rocky Road Rock Sliders
- Kevin's off road TCase skid
- DBM Rear Quarter Panel Guards
- Tube Doors to replace fronts in summer
- Fenders trimmed to fit 35's

UNDER HOOD UPGRADES
- K&N intake
- ARB air compressor
- ZJ washer bottle relocation

AXEL/TIRE UPGRADES
FRONT
- D30 Front with Chromoly axle shafts
- ZJ outters with pressed on tone rings to keep speedo working
- 4.88 R&P with ARB Air Locker
*I have all the parts to build a 609 to make the front bomb proof but not the $$$ to get someone to weld it up.
REAR
- Ford 9" Spidertrax housing
- 4.88 yukon gears and auto locker - (want to replace with arb to make it more street friendly)
- Yukon chromoly axle-shafts
- 87 Rear Caddy disc breaks with e-brake integrated

- Craiger 15" rims w/ Goodyear 35" MTR's

- Wheel Spacer up front to match the rear width

INTERIOR UPGRADES
- Baja Corbeau front seats
- CB Radio
- JK Grab Handles added to A-Pilar
- Fiberglassed Sub Box rear Driver side trunk
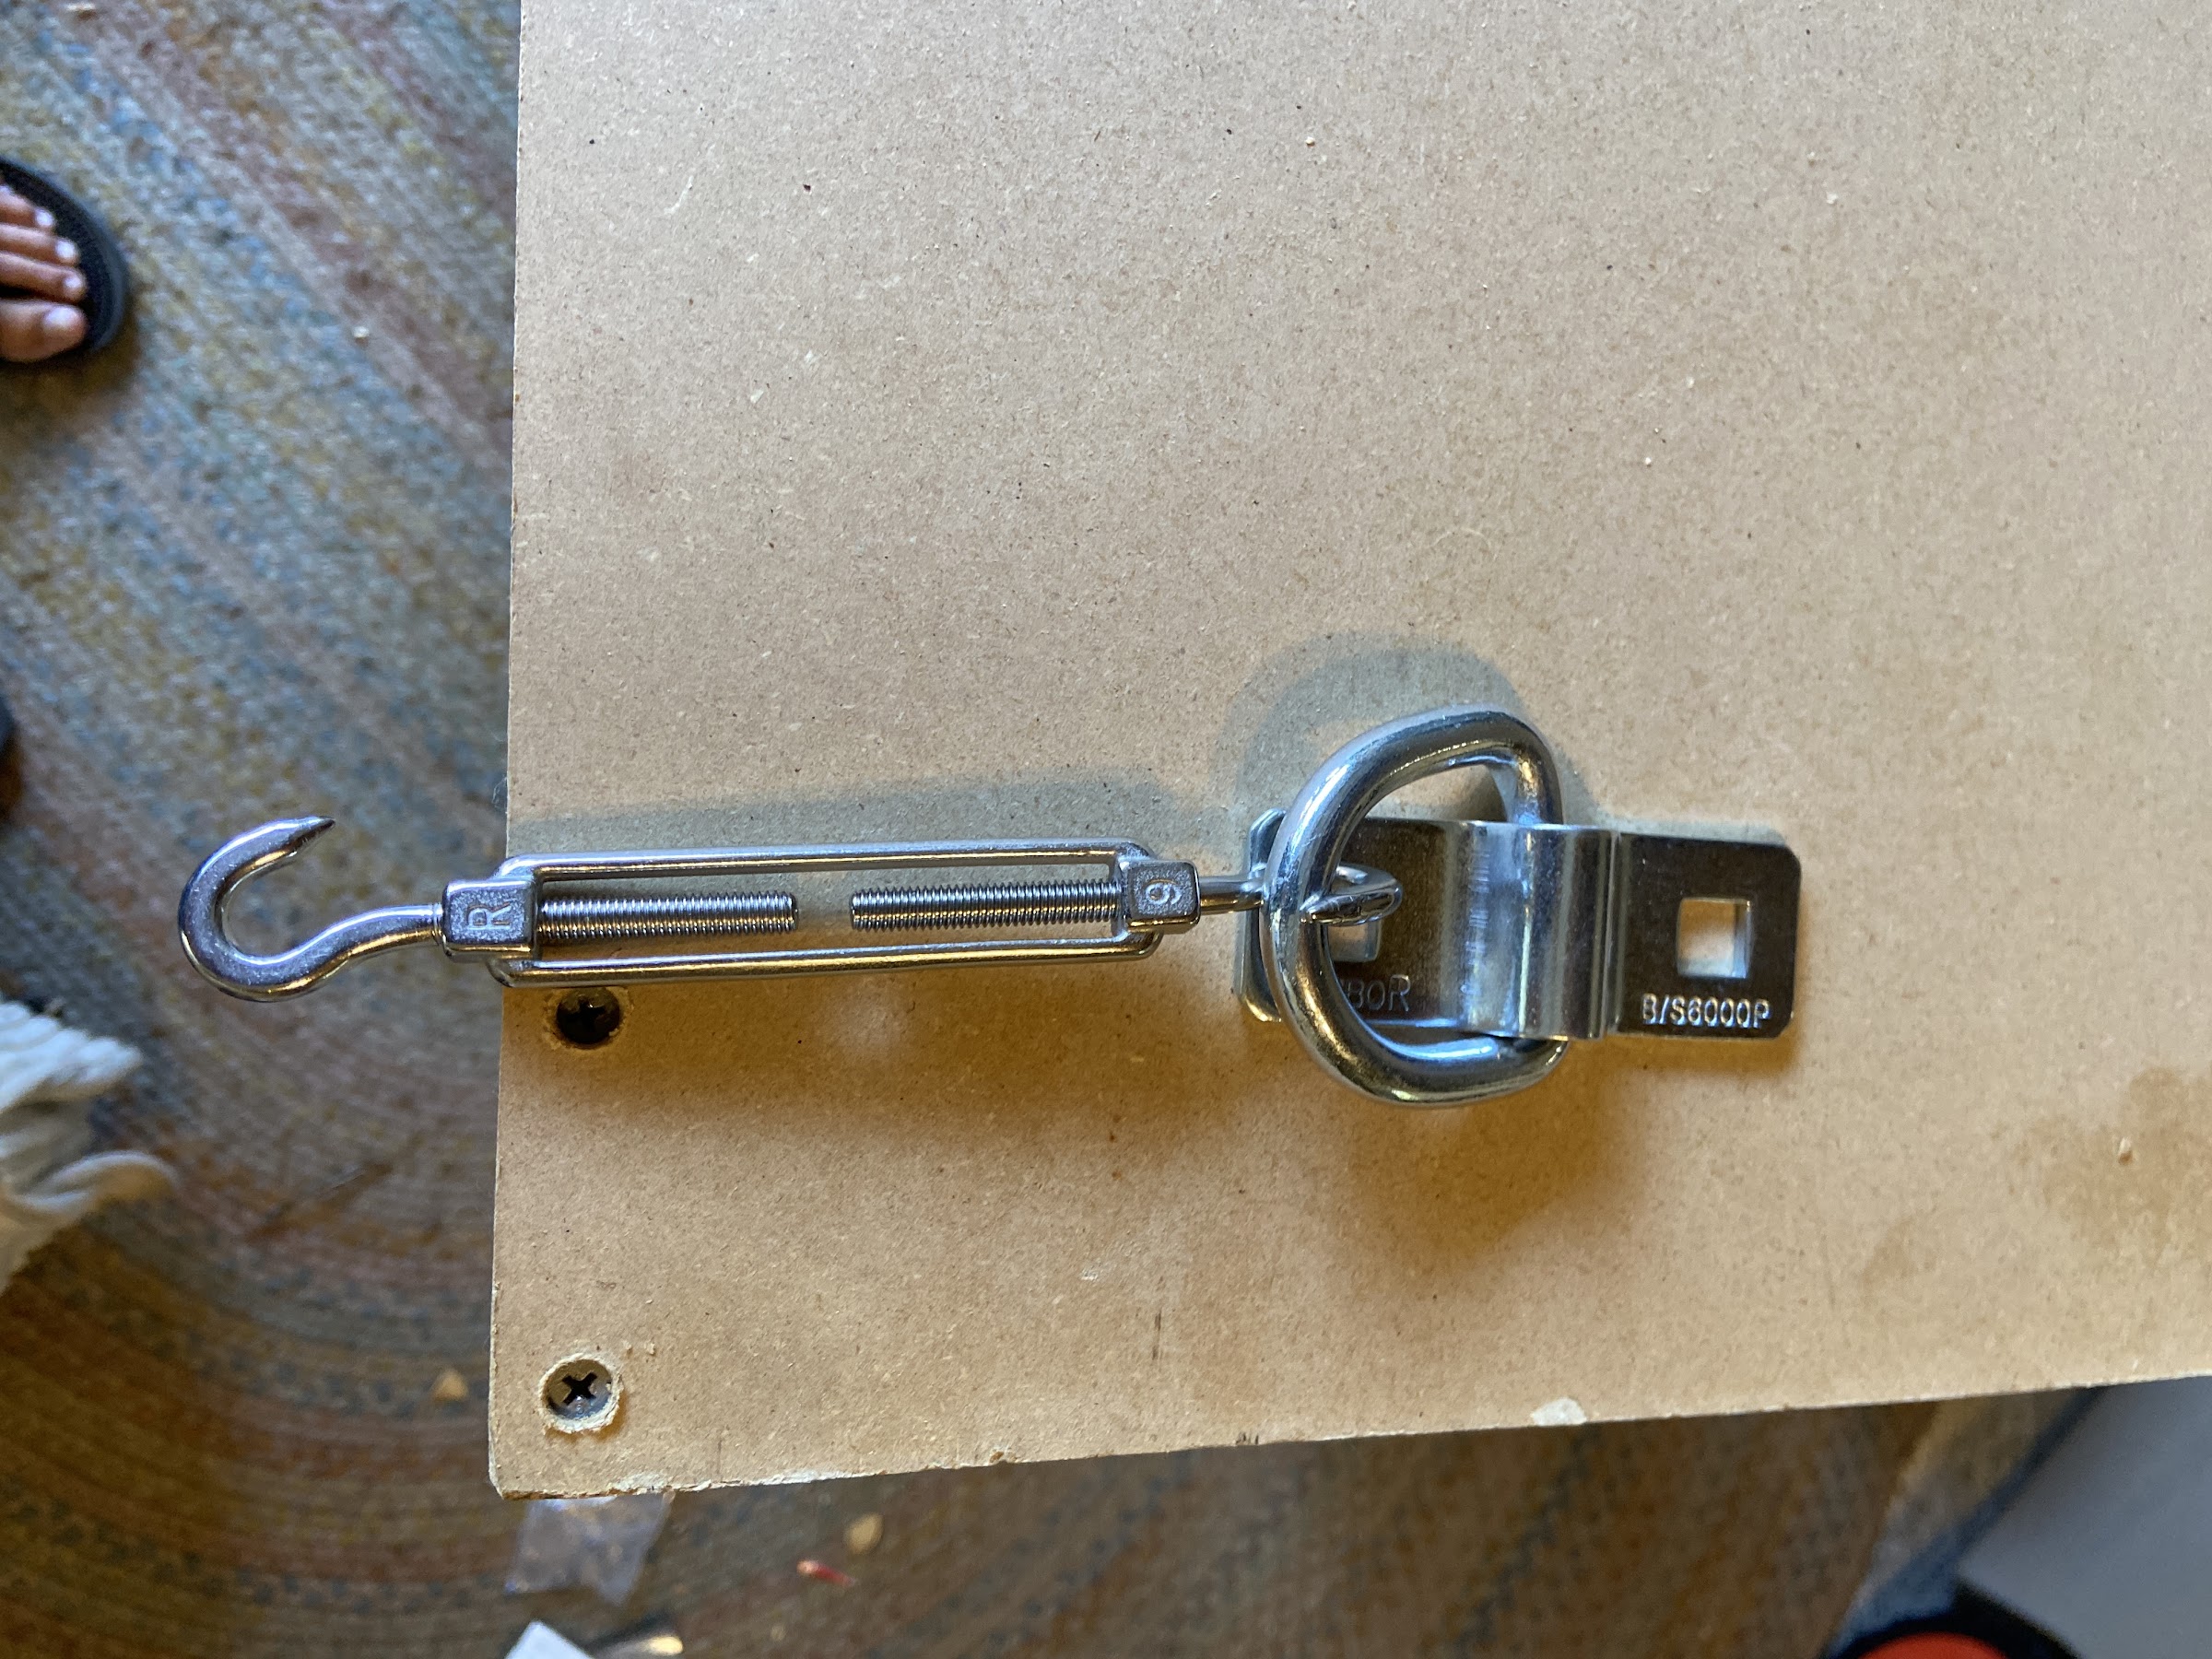
- Spare Tire Delete & Gas tank Tuck - Diamond plated flooring and hook for 35" spare tire to mount inside jeep.
- C02 tank in CD Changer space on Passenger side trunk where CD changer was.

OVERLANDING CHANGES (Ill highlight and talk in detail in replies below)
- Solar charged dual battery
- Goliath Roof Rack replacement to mount solar panel and lighting
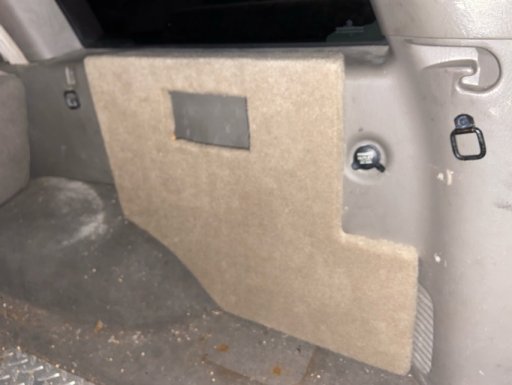
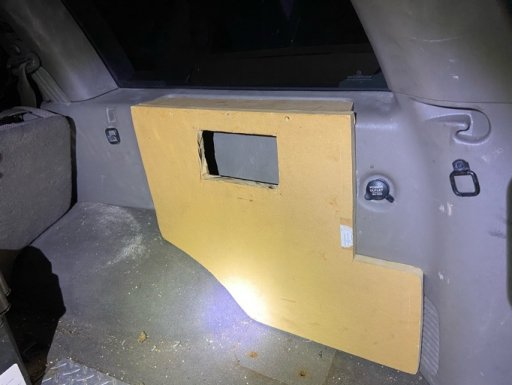
- Trunk Storage Compartment
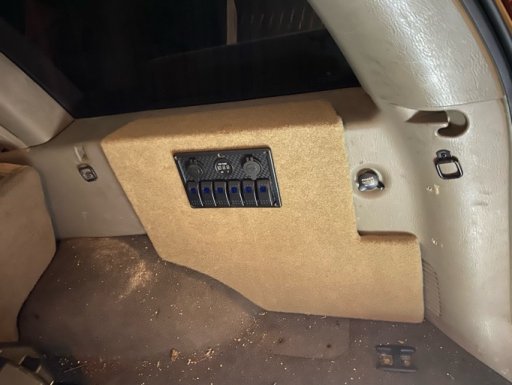
- Interior LED lighting hooked to dual battery
- Exterior LED lighting and light bar
- Bluetooth Pioneer Stereo

OVERLANDish UPDATES TO COME:
- Drawer and table system for trunk storage
- 17" aluminum rims with BFGoodrich 35 A/T tires
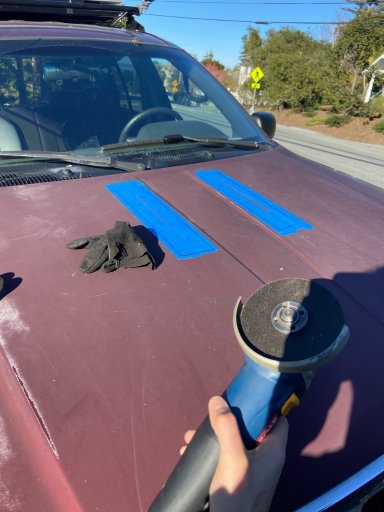
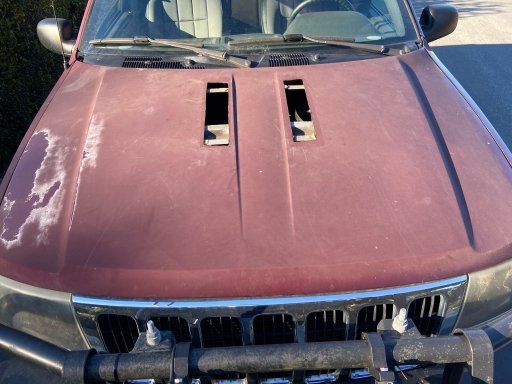
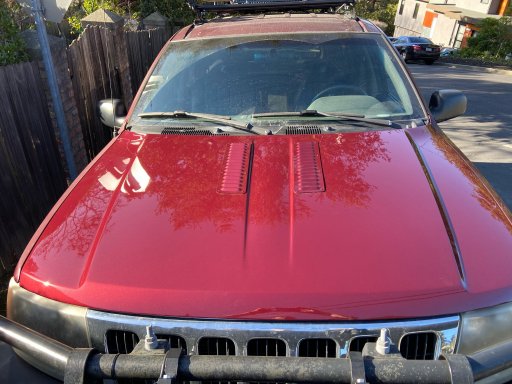
- Hood Vents to help with hot days
- Rhino 8' Side Awning with extensions and side panels
- PVC Shower
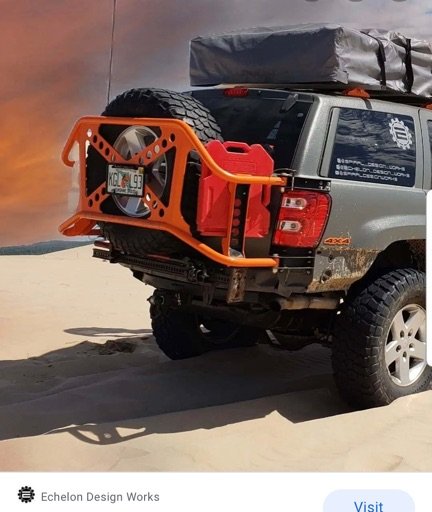
- Steel Bumper w/ tire carrier


*** who knows what else.... Any suggestions?

Here is what she looked like when I first got her.


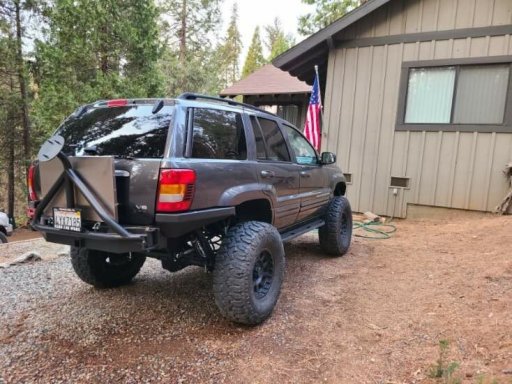
Here is how she looks prior to my Overland Upgrades
 
Last edited:

MrWilsonWJ

Rank V
Launch Member

Member III

1,691
Kennewick, WA
First Name
Dustin
Last Name
Wilson
Member #

23384

Looks like a well put together Grand, hope to get mine to that point some day. What brand are your tube doors or did you have them custom made?
 
  • Like
Reactions: WJJEEPIN

WJJEEPIN

Rank II

Enthusiast III

473
California, USA
First Name
William
Last Name
Mitchell
Awesome WJ, we're really starting to get a decent group of Pac-North-West OB WJs! Here's mine:


If you really want the full saga: 2003 Jeep Grand Cherokee Overland Build

-TJ
Thanks TJ, its been many years of blood sweat and tears into it. I've done all it myself except the welding portions as I have never had enough space or time to get back into it.

Yeah I did a full read through on yours when I joined as I am looking for cool ideas on other Overlander mods for the WJ. That is a sick bumper, is that an original or a DIY kit? Looks like a mash up of a few different bumpers I've been eyeing.

I work from home now so anytime I can I try NOT be inside with the wife and kids so I work on the jeep to stay sane. I am almost wrapped up on my Goliath rack and lighting so Ill get a post up in the next week highlight my recent mods.

Will
 

tjZ06

Rank V
Launch Member

Advocate I

2,268
Las Vegas/Palo Alto
First Name
mynameisntallowed
Last Name
Adams
Member #

20043

Thanks TJ, its been many years of blood sweat and tears into it. I've done all it myself except the welding portions as I have never had enough space or time to get back into it.

Yeah I did a full read through on yours when I joined as I am looking for cool ideas on other Overlander mods for the WJ. That is a sick bumper, is that an original or a DIY kit? Looks like a mash up of a few different bumpers I've been eyeing.

I work from home now so anytime I can I try NOT be inside with the wife and kids so I work on the jeep to stay sane. I am almost wrapped up on my Goliath rack and lighting so Ill get a post up in the next week highlight my recent mods.

Will
That's all Xero Fab Works in Shaver Lake, CA for the bumper. He modded his usual thing a bit to fit the build. All the fab work and everything has been him.

-TJ
 
  • Like
Reactions: WJJEEPIN

WJJEEPIN

Rank II

Enthusiast III

473
California, USA
First Name
William
Last Name
Mitchell
[/QUOTE]

That's all Xero Fab Works in Shaver Lake, CA for the bumper. He modded his usual thing a bit to fit the build. All the fab work and everything has been him.

-TJ[/QUOTE]

Cool, I like the tweaks they made and trimmed rear quarters.

I’m a ways away but I also like the Echelon one:
 

Attachments

  • Like
Reactions: RoarinRow

WJJEEPIN

Rank II

Enthusiast III

473
California, USA
First Name
William
Last Name
Mitchell
Hey guys,

Since I have been locked in the house, not playing soccer or ice hockey, and am trying not to strangle my family I have been back under the jeep. I have upgraded the UCA joints on the axles to the IRO Press in sleeved ones as well as one on the axle side of the Trac-Bar. I also replaced the Heim Joints on the IRO TRE, with an alignment to top it off and she is much tamer driving around now. Nothing really photo worthy with those maintenance items so I will leave it to your imagination.

With all the chaos I have done a ton of research into solar backup generators for the house and in the end the cost to power ratio, plus I don't own the house which meant it was easier to just go with a generator to power the fridge in case of emergency or power loss. I did get a small Goal Zero 400 for charging Phones/tablets/computers and a boulder 200 for recharging it. Its small but functional and even let us run a movie night outside with no need to run extension cords.

I did however get a great deal on a GoalZero extension battery so I pulled the trigger but in the end since I didn't move forward with that plan I needed something to do with a 100AH battery. So in the theme of giving the jeep attention I felt it was time to redo/upgrade the cargo area. I had a bunch of 3/4 MDF around and with all my newly acquired solar knowledge I set out to add a Second Battery to the jeep with a Renogy DC - DC charger that would not only charge the backup battery but would overflow back to the starting battery to keep it full during those longer durations when she is just waiting for me to drive her. It also takes charge from the Alternator during longer drives so when I go camping/overlanding (my new goal with the jeep with the kids) it will keep everything managed and charged for the DC - AC converter I installed.

Where did I put it all, great question. Here are some pics, happy to go into more detail if there is interest.

I started by removing the C02 Tank (still need to find its new home) and in its place I built out of the MDF I prev mentioned I created a spot to locate most of the electrical in the original CD changer location.
 

Attachments

  • Like
Reactions: RoarinRow

PDB

Rank IV
Member

Enthusiast III

1,003
Wales, UK
First Name
PD
Last Name
B
Member #

27464

Being able to escape to the shed has saved many a marriage!

I hear you on the house back up. We have a similar issue of PITA powercuts because we pump our own water. Powering a pump takes a powerful battery and inverter to kick it over. I can live without electricity but not without water.

Because of these needs and limited budget, I still havent got to that, so I focused on everything else to be double duty for the house and jeep.

So I went with portable lithium powerpack. Great space and weight savings in the jeep. Keeps us connected to broadband and can run the home freezer and our camp lights. Downside is it can't be charged quickly in the vehicle from the alternator. But there is a new option Im looking at. So Ill be interested in pics of you running cables from engine bay to cargo bay.

Nice switch panel.
 

WJJEEPIN

Rank II

Enthusiast III

473
California, USA
First Name
William
Last Name
Mitchell
Being able to escape to the shed has saved many a marriage!

I hear you on the house back up. We have a similar issue of PITA powercuts because we pump our own water. Powering a pump takes a powerful battery and inverter to kick it over. I can live without electricity but not without water.

Because of these needs and limited budget, I still havent got to that, so I focused on everything else to be double duty for the house and jeep.

So I went with portable lithium powerpack. Great space and weight savings in the jeep. Keeps us connected to broadband and can run the home freezer and our camp lights. Downside is it can't be charged quickly in the vehicle from the alternator. But there is a new option Im looking at. So Ill be interested in pics of you running cables from engine bay to cargo bay.

Nice switch panel.
I drilled the hole in the passenger side firewall for the stereo amp and ran it down the passenger side. I bought a T splitter for the power to the Dc-DC power converter. Happy to snap pic of wiring but it’s nothing fancy. Haha
 
  • Like
Reactions: PDB

MrWilsonWJ

Rank V
Launch Member

Member III

1,691
Kennewick, WA
First Name
Dustin
Last Name
Wilson
Member #

23384

I finally got done reading you're build over on Mallcrawlin and I like your setup. I plan on upgrading axles at some point and I'm thinking JK 44's for the ease of all the parts being out there to do it without too much being custom made. Knowing what you do now, would you still go 9" and build the 609 for the front or would you do JK 44's? I understand that at the time you did the 9" there wasn't as many kits out there and parts were $$$ and it seems like from that project you have extra parts to do the 609, but looking back would you still go this route? No at all knocking your setup cause I like the whole thing, just trying to get ideas from someone that's already done it.
 

WJJEEPIN

Rank II

Enthusiast III

473
California, USA
First Name
William
Last Name
Mitchell
I finally got done reading you're build over on Mallcrawlin and I like your setup. I plan on upgrading axles at some point and I'm thinking JK 44's for the ease of all the parts being out there to do it without too much being custom made. Knowing what you do now, would you still go 9" and build the 609 for the front or would you do JK 44's? I understand that at the time you did the 9" there wasn't as many kits out there and parts were $$$ and it seems like from that project you have extra parts to do the 609, but looking back would you still go this route? No at all knocking your setup cause I like the whole thing, just trying to get ideas from someone that's already done it.
Hey, no stress, thx for taking the time to read it, haha yeah that thread was done over many years and didn't want to reinvent the wheel here.

Happy to answer that. Your right, not many options when I was working on it but IRO was doing a Jk44 swap at the time but the investment was too big for the wallet at the time. I was able to pick up pieces here and there which kept it under the radar from the wife. :tonguewink: I built the rear 9" thinking I was going to keep growing the jeep beyond 35/37" tires so the 44's would have been a weak link if I wanted to make that next step without dumping some serious coin to make them the same level as a 9". I really like the removable 3rd member and plug and play of it. Leveraging my job at GoPro to get cross vendor discounts which made it worth it to me to be able to take small steps at a time. I have all the parts for the front 9" but w/o the welding its going to be a huge investment to get someone to finish it off. In the next year depending on work I will find a shop to help wrap it up. Hope that helps!
 
  • Like
Reactions: MrWilsonWJ

WJJEEPIN

Rank II

Enthusiast III

473
California, USA
First Name
William
Last Name
Mitchell
With some time on my hands I'll update the rear cargo space updates that I have been working on.

Last time I showed you the first part I worked on which was a place to land all the elctrical, I then started working on the framing for the drawer in the cargo area. I built the sides and lower bracing with 3/4" MDF I had in the garage and topped it with some 1/2" to keep weight down the intent to update it in phases. I started with a box type frame, carpeted it in the closest to my interior and D hooks to be able to tie down gear and or my spare tire when I go on longer trips. I put 4 spring loaded D rings, one in each corner and a larger one in center for the spare tire. I added an eye ring bolt on the under side so I would be able to strap it down and attach it to the hook on the floor further securing it to the rig. I stole the idea from aftermarket Yoda drawer systems to put D rings on the 4 sides and using adjustable double sided hooks to hold the whole thing down.


I then added the DC - AC converter and have since used it to run drills to install the rear quarter panel protection.


WJJEEPIN

Rank II

Enthusiast III

473
California, USA
First Name
William
Last Name
Mitchell
You can see in the above pic here where the fiberglass box is not matching. It was bothering me so in the below I have finished carpeting of the box and then I pulled the fiberglassed sub box and redid it to match with the left over carpet I had.


With all the wiring done it was time to add some lighting. I got some adhesive LED lighting to brighten up the interior during camping and was using one switch per light. I have since rewired it to be one switch for the interior lights.


WJJEEPIN

Rank II

Enthusiast III

473
California, USA
First Name
William
Last Name
Mitchell
Here is the pic of all the internal lighting hooked to one switch and with the tire secured to the top of the box. I bought a tire cover and put some vinyl flooring to keep the carpet and anything I pack around it clean.


The next thing I bought is a HD rack from Gladiator off road in FL and had him upgrade his flat full replacement rack to incorporate a raised bar to help tie things down to. I then added 4 more LED lights, one for each corner.


WJJEEPIN

Rank II

Enthusiast III

473
California, USA
First Name
William
Last Name
Mitchell
So the next thing I built was a 4" PVC pipe air compressed shower. Its about 6' which holds about 4.5 gallons of water and I bought a tire compressor that hooks up to the Schrader valve to keep the pressure during longer runs.


I'm still working on the mounting so its currently sitting on my DD which I surf with for the more frequent use. The last part was installing the solar panel so i got some Thule square rack mounts for the snowboard holder and built some brackets out of L steel and wing nuts to it can be tilted up to catch the sun better. You can get a better view of it in the below pic before I finished adding all the LED lighting.


Last week I was smoking a 14lb brisket on my Traeger and I was about 3hr into the process when we lost power..... I was about to lose it when I realized I could run an extension cord to the smoker from the jeep and proceeded to run off the solar.


Thankfully it took me for the next few hours till the power came back on and I could swap it back.


WJJEEPIN

Rank II

Enthusiast III

473
California, USA
First Name
William
Last Name
Mitchell
Hey all, been a while since I’ve posted. I’ve been crazy busy moving my family across the state. Before I moved I cut the hood and installed some GenRight hood louvers and had the hood painted. I also ordered some IRO springs and their new heim draglink. I haven’t had a chance to pull the OTK RHD Canada DL since I’ve had some overheating and charging issues.
 

Attachments

NC-Trooper

US SouthEast Region Member Rep
Launch Member

Member III

3,278
Charlotte
First Name
John
Last Name
Holland
Member #

4197

This is a great looking WJ. I'd still have my 99 4.0 from high school if I was smart. I hope to see more updates on this in the future but as someone with 2 small kids I understand how a truck build thread can be low on the priority list.