Alright, today's theme is going to be complications and changes in plans. Warning LONG, run away now.
This has turned into a deep dive of wire so if you already know the basics or dont care to see if you can help fix anything I get wrong just skip this post and go to the next.
All of these OE systems are HIGHLY engineered over a long period of time to operate under a whole slew of conditions for usually about 10 years solid. Does this mean it is all following best practices, nope. It means that'll do, but for a very high reliability under a lot of varying conditions. Once we tweak something, all bets are off. GM, along with the other companies for sure, have really complex interwoven systems because they have developed over a long period of time. Many times, even with their testing and budgets they still end up with recalls (or worse, denying the problem).
When something is highly engineered, it's important to remember the parameters of the design. I'll give the example of wire size. There are numerous examples in my vehicle alone. But to keep things simple I'll use an example that is more commonly found on the internet.
Let's talk for a minute about Marine wire. Often this is touted as a huge upgrade to automotive wire. There are some good reasons for this, and some myths. Specifically, there's a lot of branding and advertising with Ancor brand wire, with influencers using "only" this wire. I also have and use this wire, along with many others. It's perfectly good wire. But it's not magic. There's a lot to unpack here, for now I'll skip past the branding and Navico group pro's and cons and focus on just the wire itself. What is more important is if the wire is certified to meet certain standards.
"Marine Grade" wire does not exist outside of branding, however there are qualities to look for that help to understand when and where to use such wire and when it is appropriate, an upgrade, or even a downgrade to other wires.
Let's work our way from inside to out.
Copper.
Always use copper. The copper should be annealed, this means it has been heat treated and the molecules that make up the copper are relaxed and spread out on the molecular level. This is very important for a number of reasons. When copper hardens, a product of cutting, bending, crimping or high pressure, etc. It changes its properties. The metal becomes more brittle, and electricity doesnt flow through it as well, causing higher resistance. Annealing can be a DIY thing if you know what you're doing, it's not hard. As for the quality of copper, audio companies will tout "oxygen free" copper and so on. As long as the wire is from a reputable company, and especially if following mil spec or Ul, etc. it is quality copper.
How careful do we need to be about all this? Well, it is best not to be rough with the wire, and it's best to use wire that hasn't been abused. Older wire will indeed have higher resistance than newer wire in a highly vibration prone situation. When installing wire I try to move it and bend it as little as possible to get it into position, but unless you are really tweaking the wire I would not worry too much about it. It's not fragile.
Solid vs stranded / class of stranding.
Marine wire is always going to be stranded. Automotive wire is always going to be stranded. Welding wire is always going to be stranded. Any time there is vibration or movement, stranded wire is important. There are specific classes of stranding as well. Wire stranding classes categorize stranded wires based on their flexibility and application. Common classes include Class B for moderate flexibility in power cables, Class C for enhanced flexibility in dynamic environments, Class D for maximum flexibility in high-movement applications, and Class G through M for various specialized uses, including portable and constant service cables.
For 10 awg wire:
Class B Stranding:
Typically, a 10 AWG Class B stranded wire consists of 7 strands of wire. These strands are usually larger in diameter, providing a balance of flexibility and strength suitable for general applications. I have not found any of this wire on the suburban.
Class C Stranding: A 10 AWG Class C stranded wire usually consists of 19 strands of finer wire. This configuration allows for greater flexibility, making it ideal for applications where the wire needs to bend or flex frequently. This is the wire that GM uses on my vehicle.
Class K stranding: A 10 AWG Class K stranded wire often has around 105 strands to offer even greater flexibility and is designed for specialized applications where extreme flexibility is necessary, such as in robotics, portable equipment, or other dynamic environments and is often used in portable power cords, flexible cables, and other applications where flexibility and durability are critical.
Marine wire is generally classified as Class C stranding. Many brands will use class K stranding.
Next is raw or tinned. Automotive wire is almost never tinned, but then neither is marine wire (though becoming more common). Aftermarket higher end wire is often tinned though. Tinning each strand offers extra protection of the copper (as well as making it easier to solder, but thats a very different topic). I have personally seen wire where the corrosion has crept through the entire thing on the inside, I am a huge believer in sealing and protecting wire.
Coating/covering/insulation:
This is really where a lot of the action happens that I think gets overlooked.
Automotive wires are typically insulated with materials that provide durability, heat resistance, and protection against environmental factors. Common insulation types used for automotive wire include:
- PVC (Polyvinyl Chloride): This is one of the most common insulation materials for automotive wiring. It is cost-effective, provides good electrical insulation, and is resistant to moisture and chemicals.
- XLPE (Cross-Linked Polyethylene): XLPE insulation offers higher temperature resistance and better mechanical properties compared to PVC. It is often used in applications where wires may be exposed to higher temperatures.
- TPU (Thermoplastic Polyurethane): TPU is known for its flexibility and resistance to abrasion, making it suitable for applications where wires may be subject to movement or wear.
- TPE (Thermoplastic Elastomer): TPE insulation provides good flexibility and resistance to extreme temperatures, making it suitable for automotive applications that require durability and flexibility.
- Silicone: Silicone insulation is used in high-temperature applications due to its excellent heat resistance. It is often found in engine compartments and other areas exposed to high heat.
- Nylon: Sometimes used as an outer jacket, nylon provides additional protection against abrasion and environmental factors.
GPT wire:
General Purpose Thermoplastic wire, is a type of automotive wire that is designed for general-purpose applications. It is typically insulated with PVC (Polyvinyl Chloride) and is used in a variety of automotive wiring applications, including lighting, power distribution, and other electrical systems within vehicles. GM uses this wire inside the cabin. GM specifies GPT as not suitable for engine bay as GM recommends and uses wore with a higher temperature resistance 125c, whereas PVC resists heat up to 105c.
GXL, SXL, and TXL wires:
Cross-linked polyethylene (XLPE) with variations of thickness and are types of automotive wiring that are designed for specific applications, particularly in environments where temperature and flexibility are important, GM specifies these wires for engine bay use. TXL is the thinnest insulation, GXL is middle, and SXL is thickest. All *XL wires have a resistance to heat of 125c.
Other things to consider:
When designing a circuit, these temp ratings affect the ampacity of the wire, as well as the location and how it is installed. This is all incredibly important and is often overlooked. When choosing a wire, we need to consider if the wire is in open air or not. Often people design a circuit and choose a wire right at the edge of its ampacity based on a chart they see. Let's go through this with an example in mind.
Let's say we choose our example wire of Ancor 10awg wire. We are diligent so we look up the chart floating around the internet everywhere:
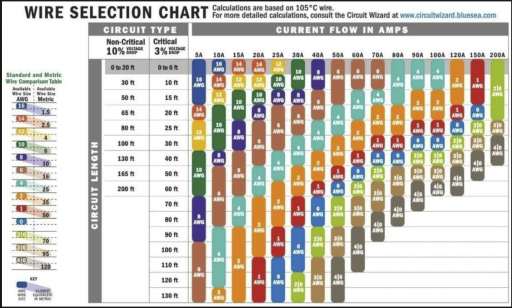
This chart, it's pretty safe to follow for a wire like Ancor. Here we can see we can safely use a constant 30a and if its a non critical (so not a sensor) we can run that wire up to about 30ft and we can expect up to about 10% voltage drop. Most people will just go for this and not think about it any more. This chart is everywhere because it is generally safe but it isn't actually a chart about ampacity. My 10awg Ancor branded wire, running 15ft from B+ source to load, in open air, with an ambient air temperature of 22c, running 30 Amps constant, will heat up, adding resistance. Is this safe? Sort of, it depends on how we define safe. Will the wire in this situation fail? no. But...What happens when the ambient temperature rises, what happens if I'm running a bunch of wires in a harness? What happens if that constant amperage sees a spike? What happens if this wire is touching something that cant handle that heat safely? The above chart is good to follow cause its about voltage drop and not ampacity, so it is more conservative.
Here is what Navico Group specify:

Here is where things get complicated. This is based on 30c ambient air temperature, the wire being in open air, even if in engine space. Even then...this is also the edge of what the insulation can withstand without degradation or even fire. What does that mean? It means that we should interpret this chart as saying the following:
My 10awg Ancor branded wire, running 15ft from B+ source to load, in open air, with an ambient air temperature of 50c, running 51 Amps constant, will heat up to 105c. That is hotter than boiling water. Is this safe? Sort of, it depends on how we define safe. Will the wire in this situation fail? no. But...What happens when the ambient temperature rises, what happens if I'm running a bunch of wires in a harness? What happens if that constant amperage sees a spike? What happens if this wire is touching something that cant handle that heat safely?
Here is where we run into problems and complications. This only gets worse when we add connectors.
This is why we rate our fuses to the wire, so the wire never gets to the point of damaging the insulation. Easy right? Sort of.
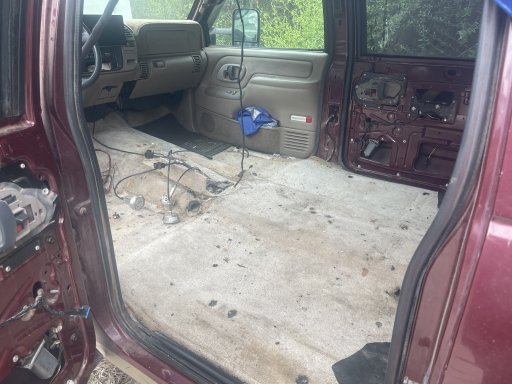
Here is an example in my own use where I have now had to change a design due to variations and differences from theory to practice.
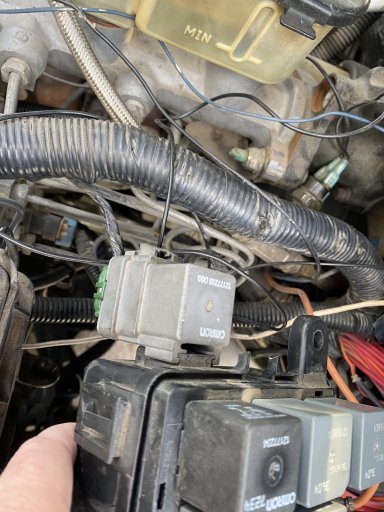
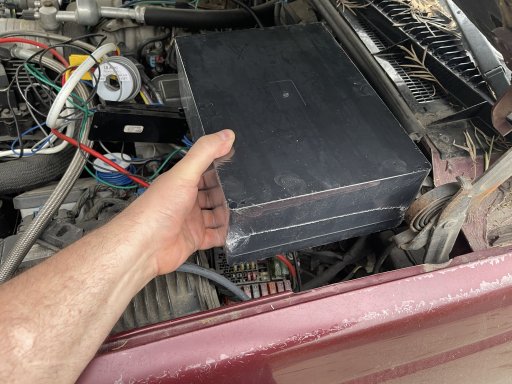
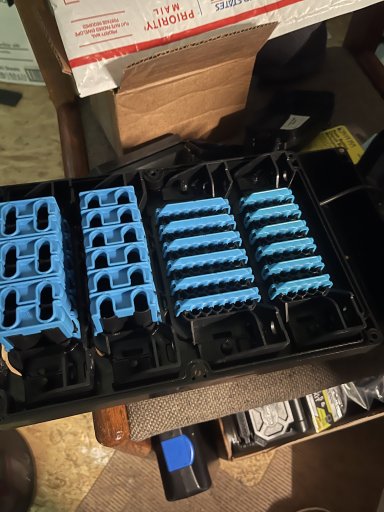
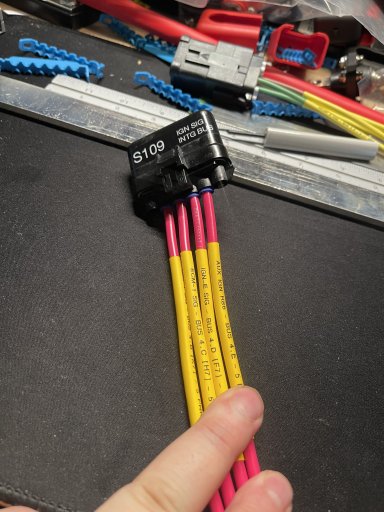
Best practice is to keep OEM circuits unmolested. Added circuits and aftermarket systems should not interfere or even really interact with OE circuits at all. So my initial design was a small under hood PDM to integrate the ignition signal for all added circuits. Here is what that kinda looked like.


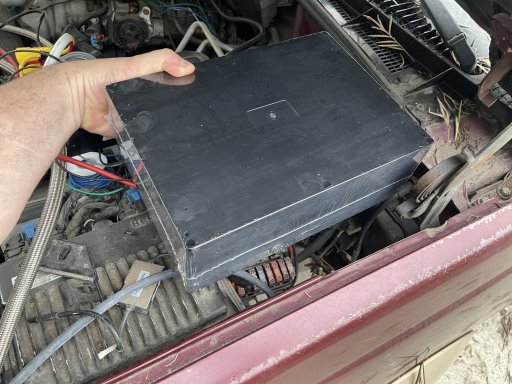
Well that ended up not working out for a number of reasons.
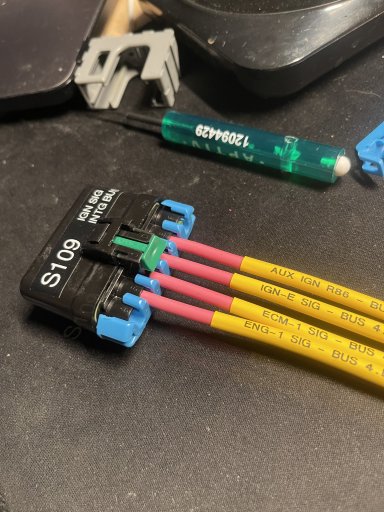
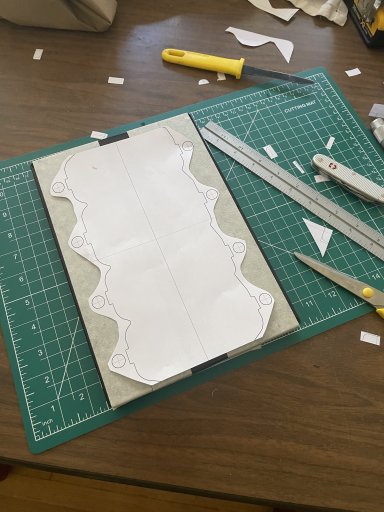
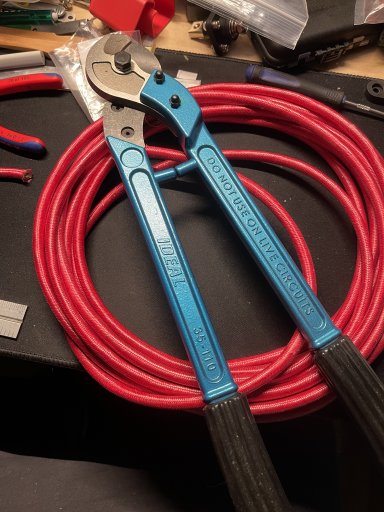
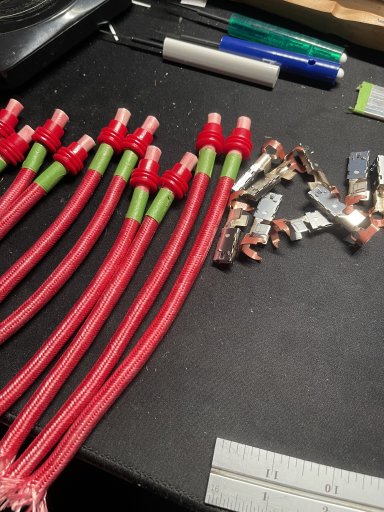
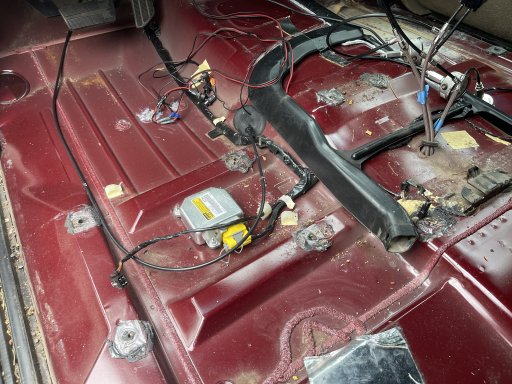
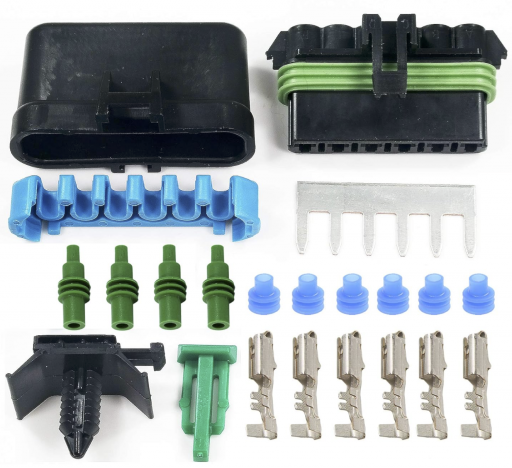
Now I am building a whole new under hood electrical system. So I have a new way to integrate into the ignition system, and it is still an attempt to minimize interaction. Here is what that looks like...
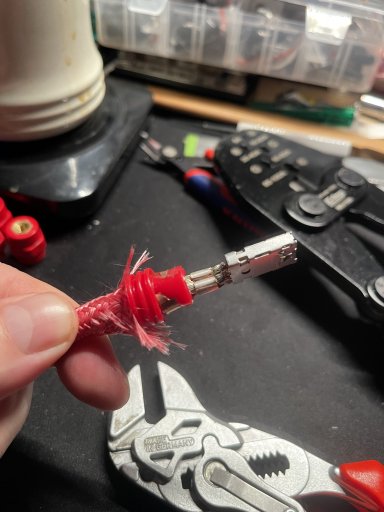
This wire here is "marine" wire that is pink 10awg. It is UL listed and is basically identical to Ancor or Pacer, but those brands do not offer pink in 10awg.
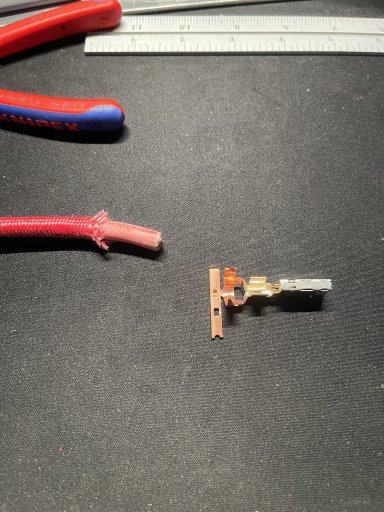
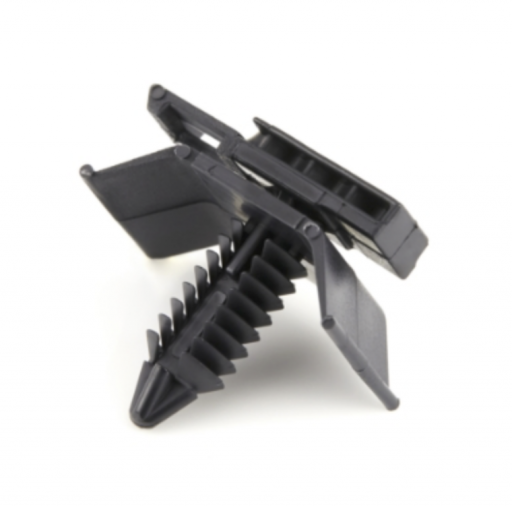
And here is a problem, 1. Marine wire is PVC coated so 105c rating which means further derating for underwood use...so upping to 10awg should work here, except...marine wire insulation is thicker (premium) so there is a fitment issue as these are now all compounding.
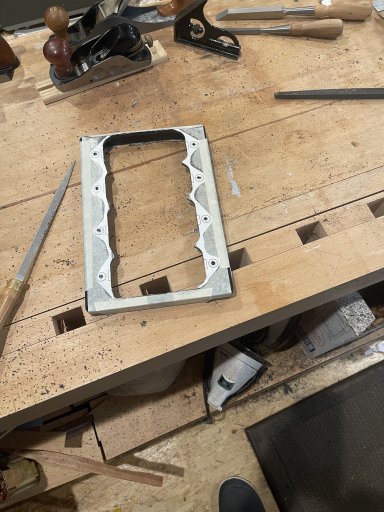
Here you can see two issues...
1) the silicone seal and strain relief doesnt quite fit with this thick of insulation, stressing the system.
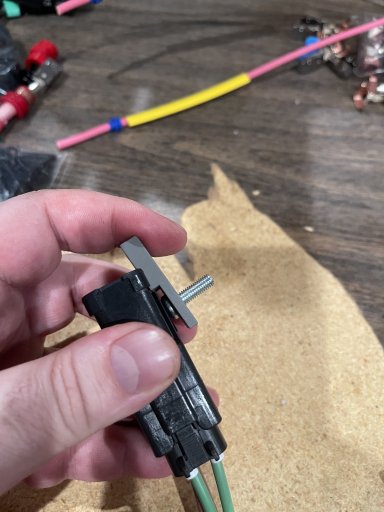
2) the terminal position assurance clip, that holds everything together and assures strain relief and wire position will not fit.
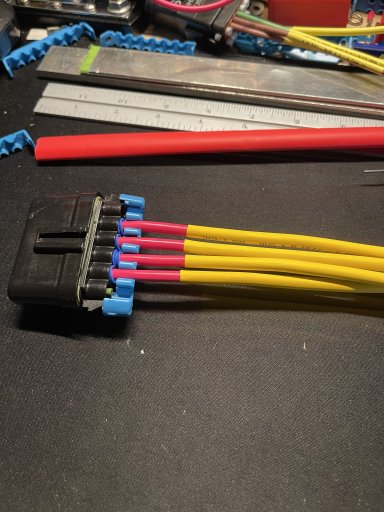
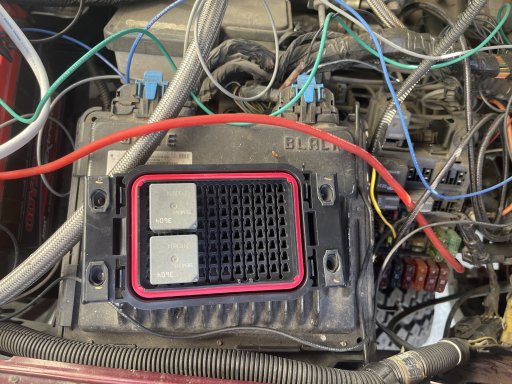
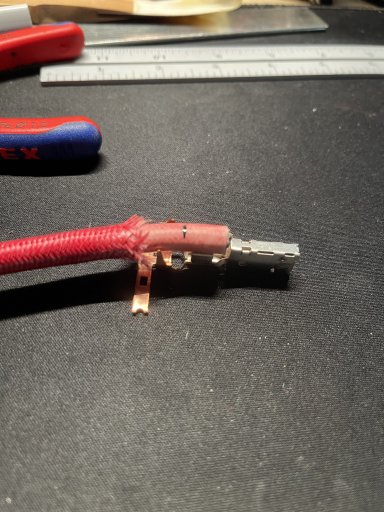
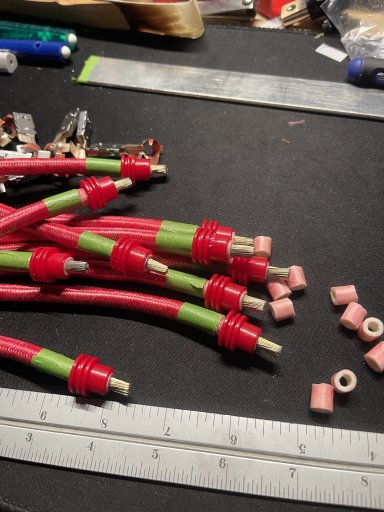
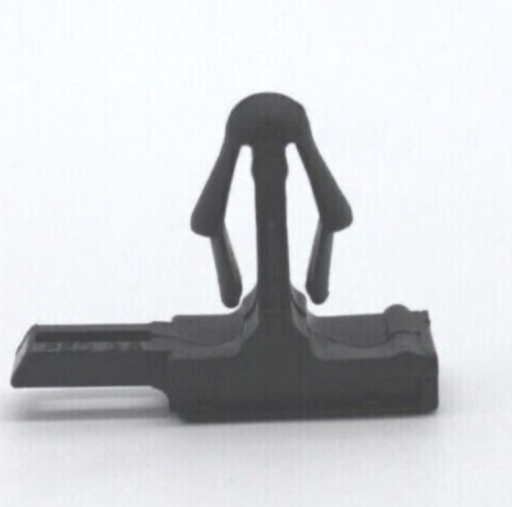
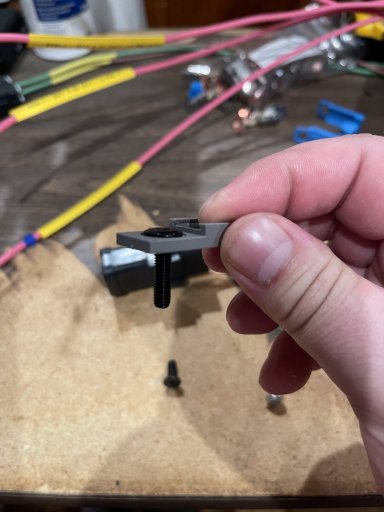
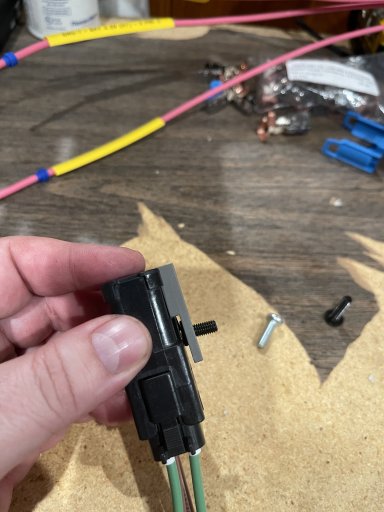
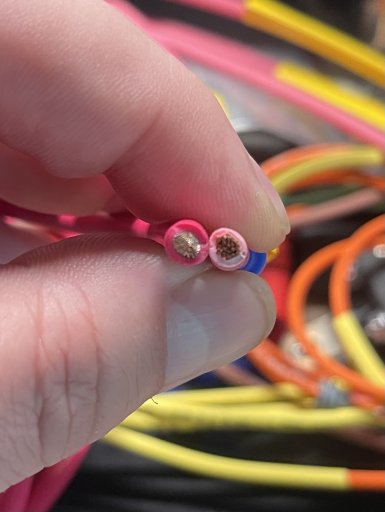
So with that, what to do. Well, I could switch to 12awg marine wire, which would cut it close in terms of ampacity. I've chosen to go back to GXL automotive wire of 10awg. The insulation is slightly less thick. You can see the difference below. It's not much, but it makes all the difference. Now the wires will easily handle the power.
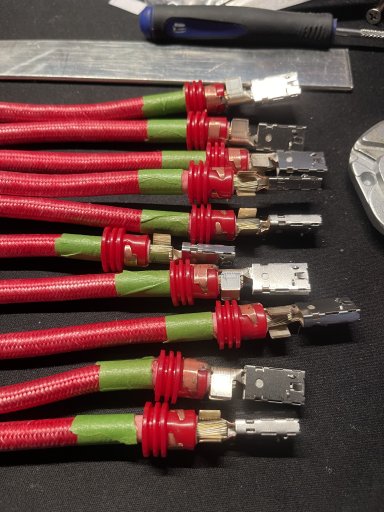
Here you can see the seals are all seated properly and the TPA is seated all without strain. The wire isn't tinned, nor is it class K, but it's rated to 125c and isn't going to be moving around so the Class C wire is a good fit. As well, I added Deoxit D100 to the fresh wire and it now sits in a sealed connector. This is a much better situation even though some would rather choose 12awg "marine" wire, which would fit, but in my opinion would be the downgrade here.