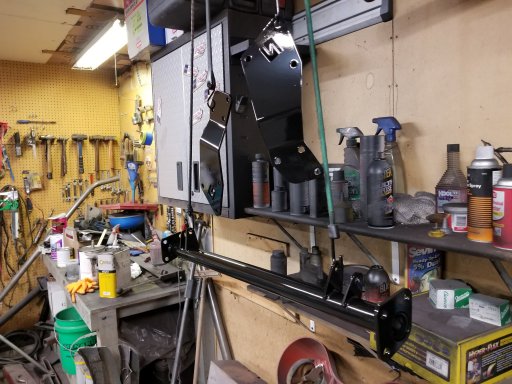
1984 Ford Bronco Project

  • HTML tutorial

M Rose

Local Expert
Mod Team
Member

Advocate III

5,584
Northeast Oregon, United States
First Name
Michael
Last Name
Rose
Member #

20990

Ham/GMRS Callsign
W7FSB
Service Branch
US ARMY Retired
How hard is it to pull the dash assembly out... I want to get to the under side of the dash to mount some coms gear.
 

Enthusiast II

1,250
Hartford, SD
How hard is it to pull the dash assembly out... I want to get to the under side of the dash to mount some coms gear.
I have done the 1980-86 and the 1992-96 ones. And they aren't as bad as it looks. Just remember to unhook the cable for the shift position on the steering column before you drop or remove it. Also the cable for hvac temp door. It's time consuming but not to difficult.
 

M Rose

Local Expert
Mod Team
Member

Advocate III

5,584
Northeast Oregon, United States
First Name
Michael
Last Name
Rose
Member #

20990

Ham/GMRS Callsign
W7FSB
Service Branch
US ARMY Retired
I have done the 1980-86 and the 1992-96 ones. And they aren't as bad as it looks. Just remember to unhook the cable for the shift position on the steering column before you drop or remove it. Also the cable for hvac temp door. It's time consuming but not to difficult.
Well shift indicator wire is broken, so no problem there, and removing the HVAC controls are hard either... wish I had time to pull it all apart right now... got a day trip planned for tomorrow.
 

Enthusiast II

1,250
Hartford, SD
Started doing a little body work. The drivers rocker panel and door are a little dinged up and pushed in so I was debating between just cutting it out and replacing it with a leftover patch panel I've had for awhile. But, I decided to try and straighten it out first. Figured it is solid and if I failed I can still cut the old one out and weld in the replacement.

20200424_204504.jpg

I started using a 2x4 and a hammer with minimal success.

20200424_204508.jpg

20200429_225842.jpg

20200429_225845.jpg

Then I remembered I have some J and U shaped attachments for my slide hammer. I also picked up a cheapish set of body hammers and dollies. The slide hammer made pretty quick work at pulling the rocker back into place. It still needs more fine tuning. But I think I'll see how well I can get the door shape back before I work the rocker anymore.

20200508_230208.jpg

Managed to pull the rocker a good distance back out.

20200508_230212.jpg
 

Lanlubber In Remembrance

Rank V
Launch Member

Member III

2,827
Mimbres, NM, USA
First Name
Jim
Last Name
covey sr
Member #

16986

Ham/GMRS Callsign
none - BREAKER BREAKER HAND HELD CB AND WALKIE TALKIE
Started on some of the body work on the upper wheel well.

View attachment 159018

View attachment 159019

Old rusty metal removed.

View attachment 159020

New piece clamped in place and ready for cutting and welding.

View attachment 159021

Cut and tacked.

View attachment 159022

Welded in.

View attachment 159023

Cleaned up again.

View attachment 159024

Now for some primer and filler. Then sand and repeat a few times.
Excellent patch job. What kind of welder did you use. Dosent show any warpage at this point.
 

Enthusiast II

1,250
Hartford, SD
Drivers side ready for some more primer.

20200620_172151.jpg

20200627_193400.jpg

I managed to get the passengers side sanded down. I have repairs to make to the wheel well, a small spot behind the door, and the rest of the bolt holes for the original tire carrier.

20200620_172136.jpg

20200621_185019.jpg

20200621_185024.jpg

20200621_185029.jpg

Patch panned trimmed close to fitting.

20200623_212354.jpg

Final fitted and welded in.

20200623_230739.jpg

20200625_234323.jpg

Then it was time for the bolt holes.

20200627_131245.jpg

One patch made to fit.

20200627_131253.jpg

And I managed a pretty good fit on the other as well.

20200627_131301.jpg

After welding and grinding. Turned out pretty good.

20200627_154602.jpg

20200627_154604.jpg

After 2 coats of epoxy primer.

20200627_193328.jpg

20200627_193336.jpg

Now for the fun part of some filler and lots of sanding.
 

Enthusiast II

1,250
Hartford, SD
While I was painting the quarter panels I decided to get some primer and paint on a few of the new rear suspension parts.

20200627_162252.jpg

20200627_162225.jpg

20200627_162238.jpg

Some mildly more durable rear spring shackles.

20200627_162242.jpg

20200627_193325.jpg

A little paint on the new upper shock mounts for the rear.

20200627_193346.jpg

20200627_213626.jpg

With a little luck I'll be spending some quality time with a sanding block tomorrow.
 

Enthusiast II

1,250
Hartford, SD
A skim coat of filler on the passenger side quarter all sanded.

20200628_181340.jpg

Then some more epoxy. It's starting to look pretty good.

20200628_192619.jpg

Then a few coats of High Build primer.

20200628_222214.jpg

And more sanding. Went all the way to 400 grit.

20200714_185426.jpg

20200714_185438.jpg

Time for 2 coats of epoxy and on to the next. Still laughing at myself for putting this much into something that I'll probably scratch all up within 2 years.
 

M Rose

Local Expert
Mod Team
Member

Advocate III

5,584
Northeast Oregon, United States
First Name
Michael
Last Name
Rose
Member #

20990

Ham/GMRS Callsign
W7FSB
Service Branch
US ARMY Retired
A skim coat of filler on the passenger side quarter all sanded.

View attachment 162927

Then some more epoxy. It's starting to look pretty good.

View attachment 162928

Then a few coats of High Build primer.

View attachment 162929

And more sanding. Went all the way to 400 grit.

View attachment 162930

View attachment 162931

Time for 2 coats of epoxy and on to the next. Still laughing at myself for putting this much into something that I'll probably scratch all up within 2 years.
Looking good... the amount of work and detail you are putting in is awesome... gives me inspiration to buy a welder and an air compressor and start working on my body.
Now if only I could find the motivation to install my ZF5, and start figuring out where my coolant is going.
 

M Rose

Local Expert
Mod Team
Member

Advocate III

5,584
Northeast Oregon, United States
First Name
Michael
Last Name
Rose
Member #

20990

Ham/GMRS Callsign
W7FSB
Service Branch
US ARMY Retired
While I was painting the quarter panels I decided to get some primer and paint on a few of the new rear suspension parts.

View attachment 160187

View attachment 160188

View attachment 160189

Some mildly more durable rear spring shackles.

View attachment 160190

View attachment 160191

A little paint on the new upper shock mounts for the rear.

View attachment 160192

View attachment 160193

With a little luck I'll be spending some quality time with a sanding block tomorrow.
Where did you get those spring hangers from?
 

Lanlubber In Remembrance

Rank V
Launch Member

Member III

2,827
Mimbres, NM, USA
First Name
Jim
Last Name
covey sr
Member #

16986

Ham/GMRS Callsign
none - BREAKER BREAKER HAND HELD CB AND WALKIE TALKIE
Always enjoy seeing your work. That rear fender repair was really good. Amazing that your not getting any warpage .
 

Enthusiast II

1,250
Hartford, SD
Looking good... the amount of work and detail you are putting in is awesome... gives me inspiration to buy a welder and an air compressor and start working on my body.
Now if only I could find the motivation to install my ZF5, and start figuring out where my coolant is going.
Thanks. Careful buying a welder and big compressor that leads to building random things and the open space in your garage shrinking.

The spring shackles are from Solo Motorsports.
 

Enthusiast II

1,250
Hartford, SD
Primer on the rear quarters. Turned out pretty good. Smooth and straight.

20200726_173023.jpg

20200726_173040.jpg

20200726_173035.jpg

Cutting the rust out from the lower door skin. Had to patch some of the inside as well.

20200724_101247.jpg

20200724_175742.jpg

Had to straighten the inner parts as well.

20200724_184727.jpg

Primer on the inside of the door.

20200726_173108.jpg

I flanged the upper part and decided to try panel bond on it instead of welding. Unfortunately I couldn't clamp the upper so I put some small sheet metal screws to hold it. We'll see if it is less or more work than welding. I do like that all the edges are sealed.

20200727_225514.jpg

Now on to the passenger side.
 
Last edited: