Enthusiast III
- 1,345
- First Name
- Josh
- Last Name
- Nalley
- Member #
-
10711
- Ham/GMRS Callsign
- N0AFK
This is how my truck looked when I initially purchased it with only 8000 miles in 2016.
My chosen rig is a Generation 2, 2015 Toyota Tacoma Off-road (I wanted the rear locker)
Below the photo you will find all the additional things I have added to the truck.
(I used to have links to all of it, but unfortunately the post will not save with so many links)
View attachment 92769
Other than the original nerf bars that I put on, I have kept all original parts this way If I ever sell it the new owner can remove anything or return it to stock.
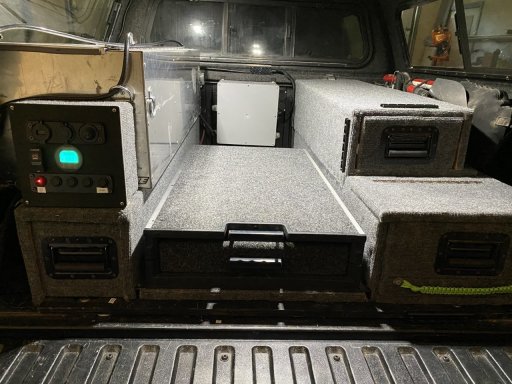
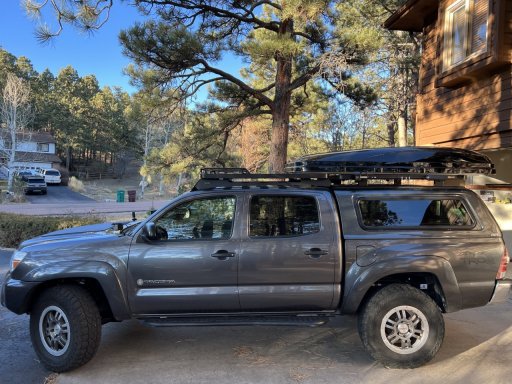
How she sits today:
View attachment 217570
I have been keeping a build thread with various installations over on Tacoma World if you are interested in checking out installations etc.
@Instagram 1000.taco.0001 is where I post some photos of my adventures. I don't post everything I do, mainly because I forget and would rather just enjoy the time outdoors.
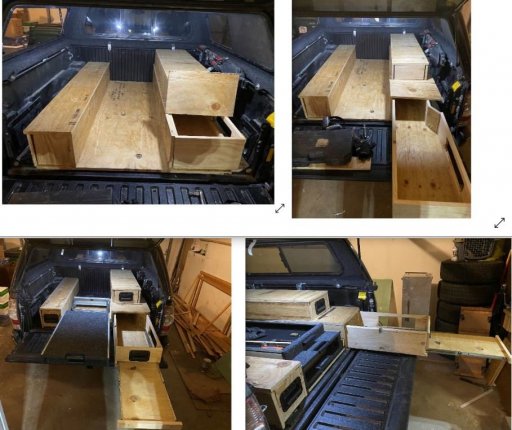
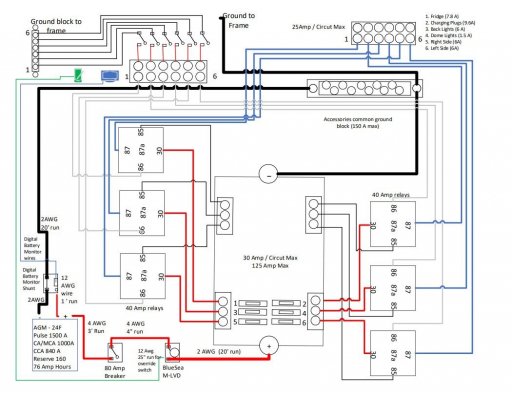
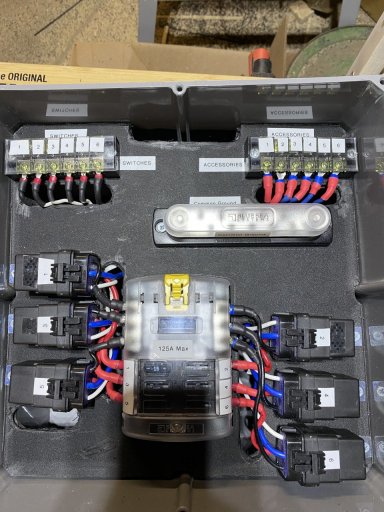
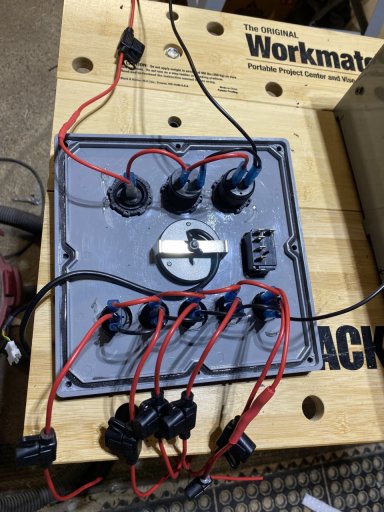
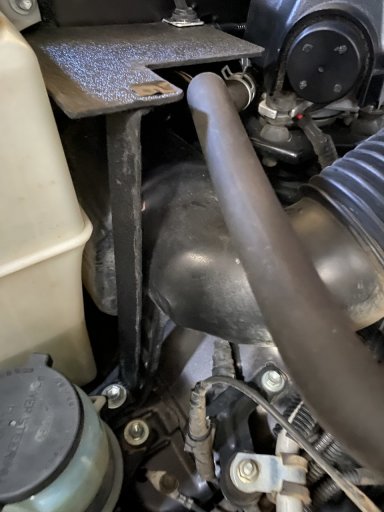
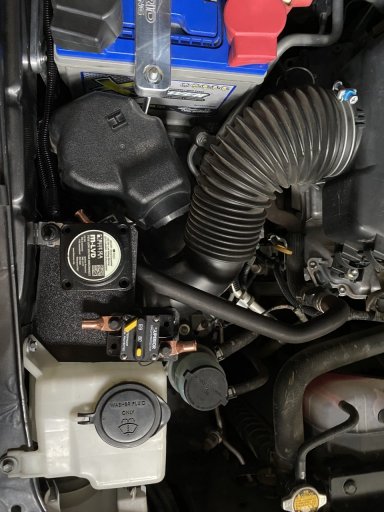
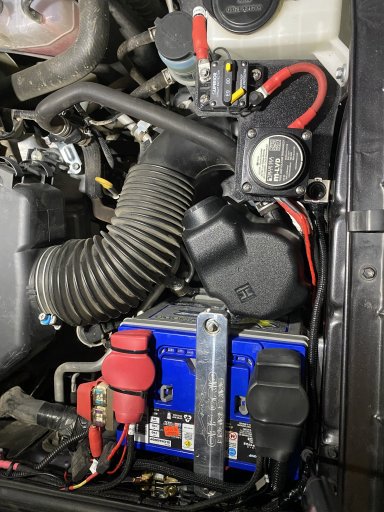
The posts below are mostly photos because I figured it would be better than a detailed install step by step. (and since most of has been done over the last 5 years it would be a long long write up) Feel free to ask questions or comments I will respond.
My chosen rig is a Generation 2, 2015 Toyota Tacoma Off-road (I wanted the rear locker)
Below the photo you will find all the additional things I have added to the truck.
(I used to have links to all of it, but unfortunately the post will not save with so many links)
View attachment 92769
- Armor
- Mobtown
- IFS with reinforcement ribs (Aluminum) - Painted black
- TC Skid (Aluminum) - Painted black
- Transmission Skid with reinforcement ribs (Aluminum) - Painted black
- RCI
- Rear Diff Skid (Steel) - (Black PC)
- A-Arm Skids (Aluminum) -Painted black
- Aluminum gas tank skid (painted black)
- Sliders with fill plates (Black PC)
- Relentless
- Singray Lo-pro bumper
- Slee *coming in July*
- Rear Bumper with swing-out, w/ backup camera and Rotopax Mount
- Mobtown
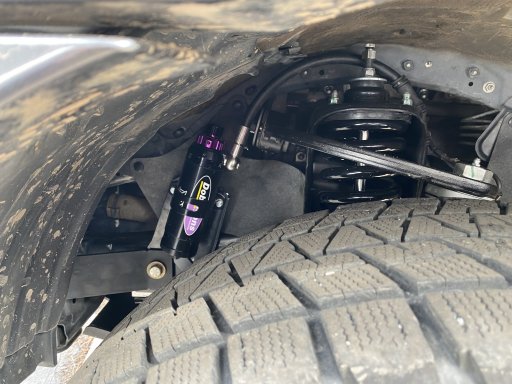
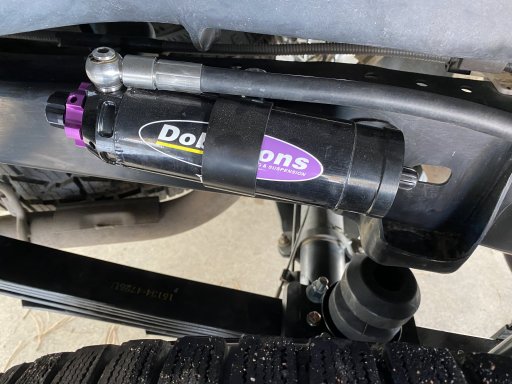
- Suspension
- (SOLD) Icon Stage 3 suspension (2.5' lift)
- Icon Tubular Uniball UCAs + cover caps
- 2.5 IFP Extended Travel Coil-overs + Neoprene Coil-Over wraps
- 2.0 Aluminum Rear Shocks w/ Res
- Multi-Leaf Progressive Add A Leaf
- (Upgraded) Dobinson's MRA adjustable setup for heavy load.
- Black Coil Springs (just could not do the turquoise)
- 2.1/4" Lift Selected the following:
- 110-240LBS Front Coils (C59-352) (considered the MRA59-A220 but didn't want to end up pushing 3")
- MRA59-A221 Front adjustable Struts
- 213MM SEAT HEIGHT (Stock Seat Hight)
- SC59-001 DOBINSONS STRUT TOP PLATES
- BS59-560 DOBINSONS ADJUSTABLE FRONT BUMP-STOP KIT
- MRA59-A940 Rear Shocks
- L59-111-R DOBINSONS 2.1" LIFT 600LB CONSTANT LOAD HD
- PB59-110K Bushing kit bundle
- Greaseable Bolts for leaf bushings
- SPC UPPER CONTROL ARMS (Considered the JBAs and almost went with Red Coils but the deal on SPC was too good)
- Timbren Flipkit with new U-bolts and bumpstops
- I'm had a BMC (Body Mount Chop) along with the install (no more rubbing!)
- (SOLD) Icon Stage 3 suspension (2.5' lift)
- Wheels and tires
- 17" Tacoma sport wheels (5)
- 285 70 R 17 Blizzak Snowtires (Wider for better ice traction in winter. ) Spare is an off brand winter traction tire from LesSchwab
- 17" TRD RockWarriorsin a 5 tire rotation (
- 255/80 R 17 (Skinny for better summer trail running)
- **17" Procomp Helldorado wheels and tires above were sold last summer.
- 17" Tacoma sport wheels (5)
- Recovery
- Warn 9.5xp-s (w/ contactor pack)
- power interrupt kit and Mictuning internal switch on / off (great safety feature)
- Tree Saver Straps
- Tow Straps + Snatch Straps
- Gator Jaw Shackles
- Rear Hitch for D-Dring Shackles
- Warn Winch Damper
- Warn 9.5xp-s (w/ contactor pack)
- Communications
- Radio
- AnyTone AT-778UV Dual Band Transceiver Mobile Radio VHF/Uhf Two Way Amateur Radio
- Radio Antennas
- Tram 140MHz-170MHz + 430MHz-470MHz Dual Band NMO Antenna
- Youmei Dual Band NMO Antenna Small Cannon Style Antenna UHF/VHF 400-470/136-174MHz 50W for Car Radio
- Diamond K400S-NMO Lip mount, 2-axis adjustable Antenna Vehicle Mount
- WeBoost 471254
- CB:
- Uniden PRO505XL 40-Channel CB Radio. Pro-Series, Compact Design. Public Address (PA) Function. Instant Emergency Channel 9, External Speaker Jack, Large Easy to Read Display. - Black
- CB Antenna
- Firestik Fire-Flex Cable Assembly W/Low-Profile Fire-Ring and Stud (1) (will require you to solder the end, but makes it really nice to run it through the floor grommet.)
- Firestik SS-3H Heavy Duty Stainless Steel Antenna Spring
- FireStik FL3-B Three Foot FireFly Antenna With Tuneable Tip (Black)
- Antenna/LED Pod Mount (Passenger Side) Fits 2005-2015 Toyota Tacoma
- Radio
- Wheels and tires
- 17" Tacoma sport wheels (5)
- 285 70 R 17 Blizzak Snowtires (Wider for better ice traction in winter. ) Spare is an off brand winter traction tire from LesSchwab
- 17" TRD RockWarriorsin a 5 tire rotation
- 255/80 R 17 (Skinny for better summer trail running)
- **17" Procomp Helldorado wheels and tires above were sold last summer.
- 17" Tacoma sport wheels (5)
- Recovery
- Warn 9.5xp-s (w/ contactor pack)
- power interrupt kit and Mictuning internal switch on / off (great safety feature)
- Tree Saver Straps
- Tow Straps + Snatch Straps
- Gator Jaw Shackles
- Rear Hitch for D-Dring Shackles
- Warn Winch Damper
- Warn 9.5xp-s (w/ contactor pack)
- Communications
- Radio
- AnyTone AT-778UV Dual Band Transceiver Mobile Radio VHF/Uhf Two Way Amateur Radio
- Radio Antennas
- Tram 140MHz-170MHz + 430MHz-470MHz Dual Band NMO Antenna
- Youmei Dual Band NMO Antenna Small Cannon Style Antenna UHF/VHF 400-470/136-174MHz 50W for Car Radio
- Diamond K400S-NMO Lip mount, 2-axis adjustable Antenna Vehicle Mount
- WeBoost 471254
- CB:
- Uniden PRO505XL 40-Channel CB Radio. Pro-Series, Compact Design. Public Address (PA) Function. Instant Emergency Channel 9, External Speaker Jack, Large Easy to Read Display. - Black
- CB Antenna
- Firestik Fire-Flex Cable Assembly W/Low-Profile Fire-Ring and Stud (1) (will require you to solder the end, but makes it really nice to run it through the floor grommet.)
- Firestik SS-3H Heavy Duty Stainless Steel Antenna Spring
- FireStik FL3-B Three Foot FireFly Antenna With Tuneable Tip (Black)
- Antenna/LED Pod Mount (Passenger Side) Fits 2005-2015 Toyota Tacoma
- Radio
Other than the original nerf bars that I put on, I have kept all original parts this way If I ever sell it the new owner can remove anything or return it to stock.
How she sits today:
View attachment 217570
I have been keeping a build thread with various installations over on Tacoma World if you are interested in checking out installations etc.
@Instagram 1000.taco.0001 is where I post some photos of my adventures. I don't post everything I do, mainly because I forget and would rather just enjoy the time outdoors.
The posts below are mostly photos because I figured it would be better than a detailed install step by step. (and since most of has been done over the last 5 years it would be a long long write up) Feel free to ask questions or comments I will respond.
Last edited: