WJ TrailRunner (Building a Capable 2WD Overlander)
- Thread starter GoHeels
- Start date
-
Guest, UPDATE We went through the site migration runbook and completed all steps. We will need to complete the migration next week, but will leave the forums up for the weekend. A few days after maintenance, a major upgrade revision to the forum site will occur.


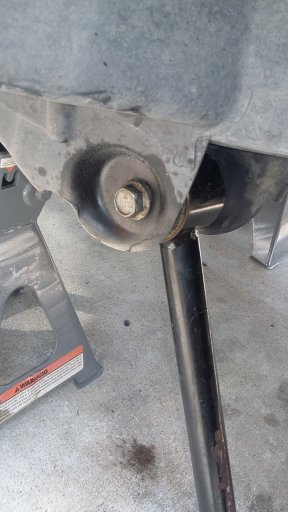
So the only major complications i ran into were the shocks (RC). They forgot to send all hardware so i had to make a run for some bolts, nuts, washers etc for the lower section of the front shocks.
And whatever engineer designed the WJ front top shock mount location is a idiot
And whatever engineer designed the WJ front top shock mount location is a idiot
Last edited:
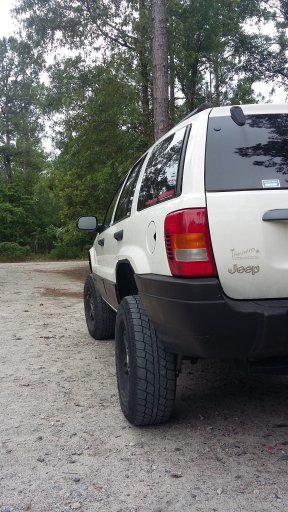
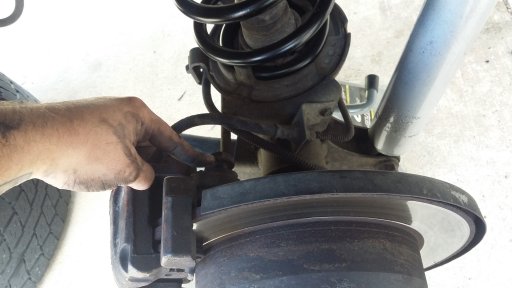
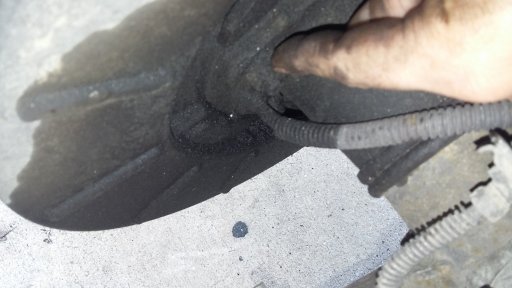
Also found this moisture build up on rear axle / rotor area not sure if seal leak or the old shock was blown. So ill take a look at that when Locker goes in, in a few days. (hard to tell in pic.)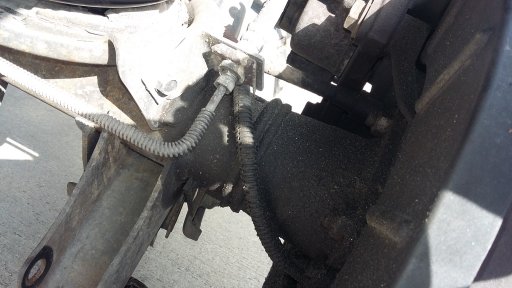
Got it all wrapped up today, and just need to do a Toe-in alignment which i'll work on in the next few days.
Then tires, and cleaning up those ugly cut lines on the fenders, and paint.
-Its not squatting just took the pic holding the camera unlevel.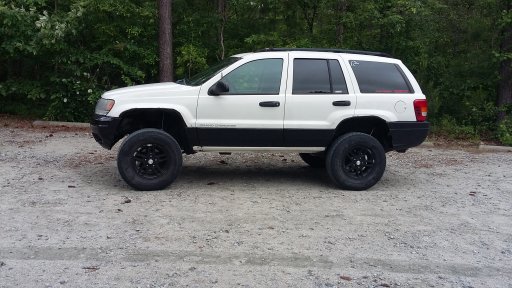
Then tires, and cleaning up those ugly cut lines on the fenders, and paint.
-Its not squatting just took the pic holding the camera unlevel.

Well a 2wd lift kit and a 4wd lift kit are exactly the same, minus the transfer case drop. (2wd don't have one).
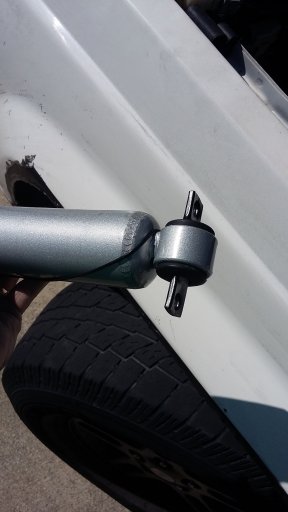
This is basically a hybrid I pieced together. Got the Iron Rock arms off a Facebook group at a good deal, the Shocks and trackbar and sway links are Rough Country, and got the coils from a dealer guy I met on a Facebook group.
-I'll check the shocks, I'm assuming you mean the rears? The front don't have the ball pin eliminaters.
Sent from my SM-S920L using Overland Bound Talk mobile app
Last edited:
Just Googled it, your right rears are upside down. Not sure if it matters either. But I'm gonna switch em.
Thanks nice catch.
Sent from my SM-S920L using Overland Bound Talk mobile app
Thanks nice catch.
Sent from my SM-S920L using Overland Bound Talk mobile app
Last edited:
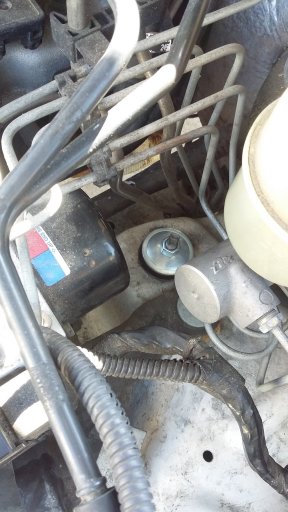
So bouncing around some ideas of my upcoming dual battery setup. I'm leaning towards putting in the spare tire well in the back. Seen it done before and works good. This would also give a little more weight towards rear axle for traction. 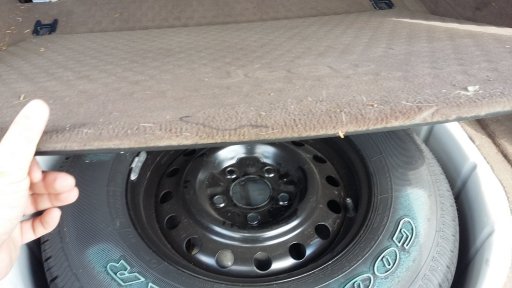
Gonna add an old power converter I already had for Flounder gigging. nothing special but it does have 2 regular plug outlets and a USB.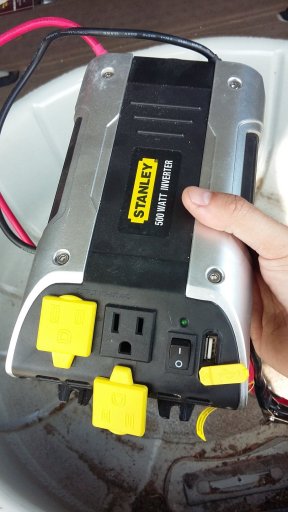
So ill have to pick up some cables, fuses and an isolator and get started on this setup. not sure exactly how I will mount it inside the wheel well gonna look at battery trays first.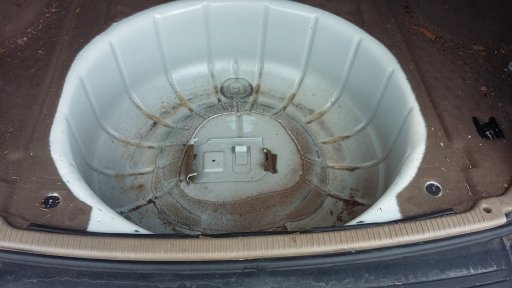
Starting the Rear different locker install today.

Sent from my SM-S920L using Overland Bound Talk mobile app
Sent from my SM-S920L using Overland Bound Talk mobile app
Installing the LOKKA rear dif Auto-Locker.
(Dana 35, 27 spline, non-Clip)
-THIS WILL BE INTO THE DANA 35, BUT THE PROCESS SHOULD BE GENERALLY SIMILAR FOR ANY AUTO LOCKER INTO ANY DIFFERENTIAL-
First of all chock wheels, loosen lugs and jack vehicle high enough to remove wheels and work under it.
So after putting it on jack stands, and removing the wheels, the first step is to remove the brake calipers.
Remove the 2 bolts on backside of caliper.
Then bleed the Brakes a little, just enough to compress the cylinder and slide caliper off. Make sure to tighten bleeder back up, so no air gets into the system.
Then take off 4 nuts on backside of rotors, and the ABS sensor bracket bolt (then abs sensor can be unclipped).
This is where it gets a little tricky, if you have a slide hammer or puller you should be fine, I did not!
Undo parking brake if it's on. Attach slide hammer (if you have one) to the studs on rotor and begin to pull axle shafts out. I just bolted a couple wrenches to the studs and pulled by hand.... it took some strength and tugging.
Last edited:
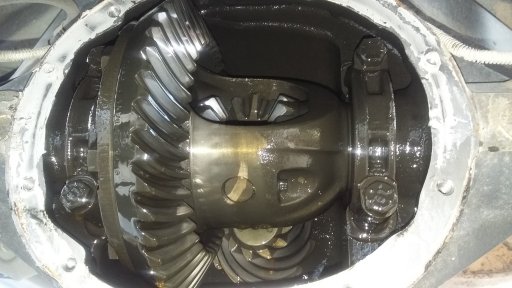
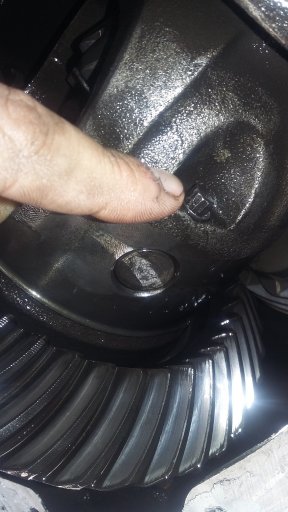
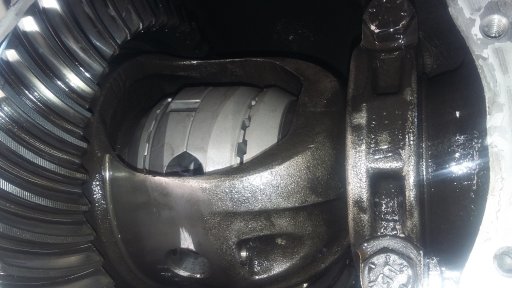
Next comes the differential work.
This is the Dana 35 (same on all 99-04 Grands, unless they had the 44a)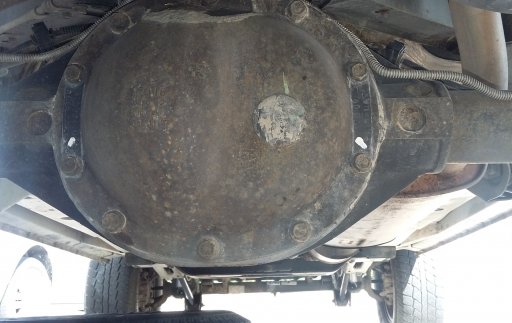
Undo all the bolts along the outside of the Dif cover plate, except the top bolt. When you get to this one just loosen it a little.
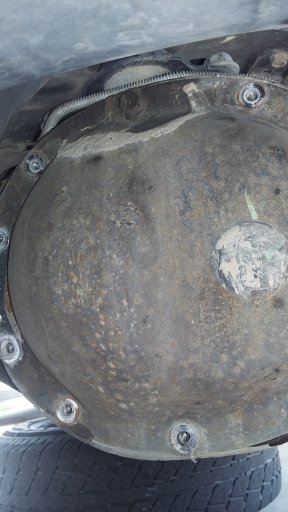
With the top bolt loosened but still in, you can break the seal. I used a screwdriver but be careful not to scratch the dif or cover plate this could potentially cause a leak later on.
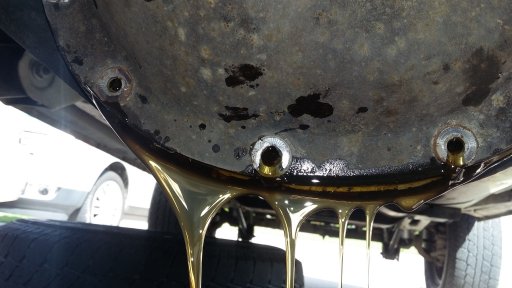
Drain all the fluid out, then you can remove the cover completely.
This is the Dana 35 (same on all 99-04 Grands, unless they had the 44a)
Undo all the bolts along the outside of the Dif cover plate, except the top bolt. When you get to this one just loosen it a little.
With the top bolt loosened but still in, you can break the seal. I used a screwdriver but be careful not to scratch the dif or cover plate this could potentially cause a leak later on.
Drain all the fluid out, then you can remove the cover completely.
Last edited:
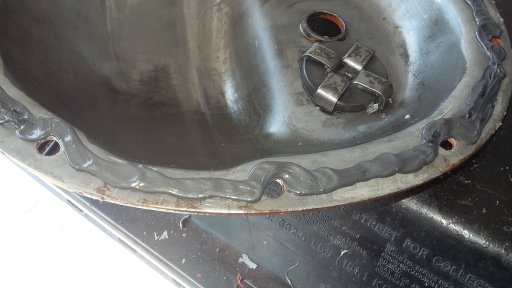
With the cover off Scrape all the sealant from around the cover, make sure to use a plastic scraper so it doesn't damage the cover ( again scratches or gouges could cause leaks).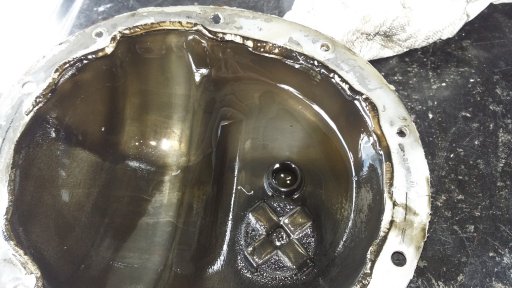
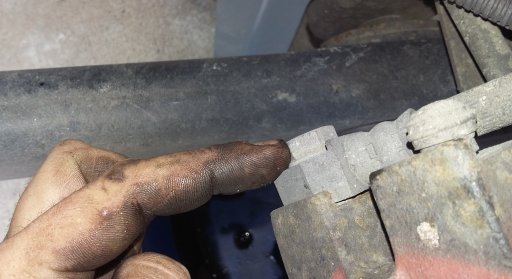
Inside the Dana 35 cover (and a lot of others) has a magnet to catch metal shaving from the gears.
As you can see this one had a bunch. Clean the magnet as well so it can keep doing its job.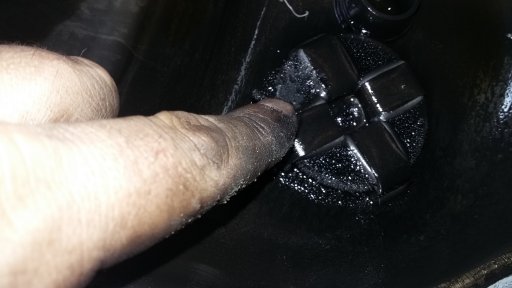
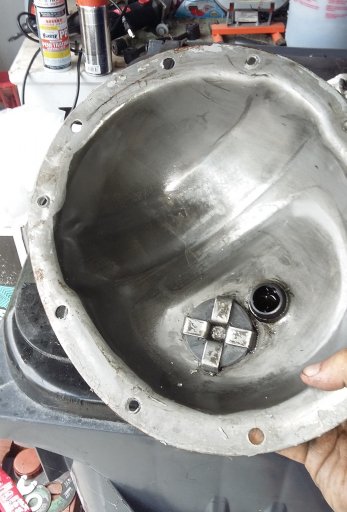
Got to finish cleaning this up but here is an idea.
...also gonna paint it as the outside has seen better days.
Inside the Dana 35 cover (and a lot of others) has a magnet to catch metal shaving from the gears.
As you can see this one had a bunch. Clean the magnet as well so it can keep doing its job.
Got to finish cleaning this up but here is an idea.
...also gonna paint it as the outside has seen better days.
Last edited:
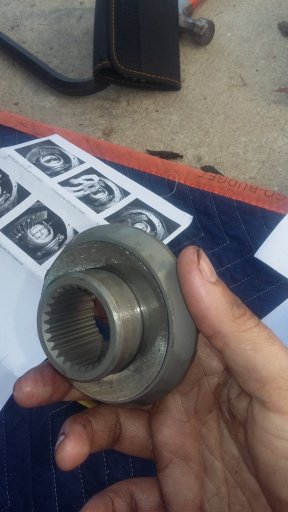
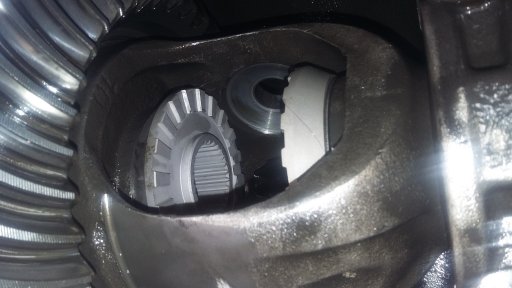
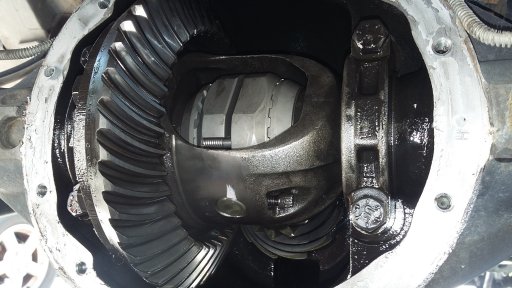
Next remove the stock gears, undo this bolt that holds in the Cross-shaft.
I had to use a small wrench as i could not get a socket to fit into the carrier.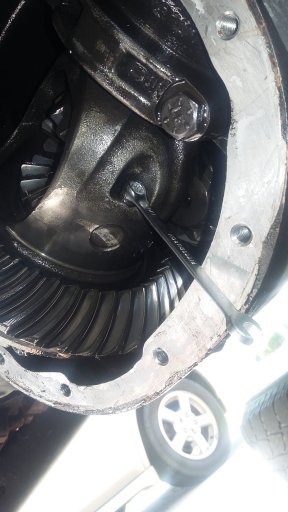
Then pull out the stock cross-shaft.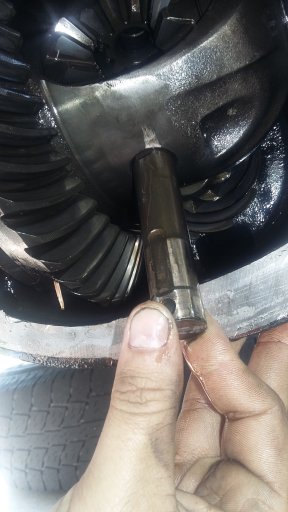
All Gears and washers should now just fall out (this is what you want). Save these incase there is an issue with locker or you want to remove it later.
This is what you are left with...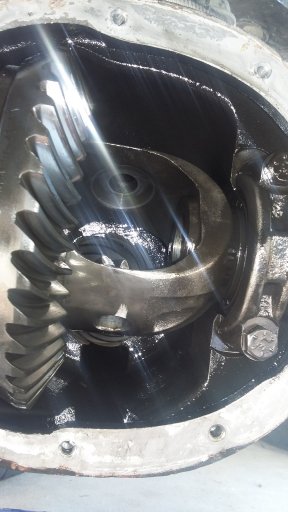
Last edited:
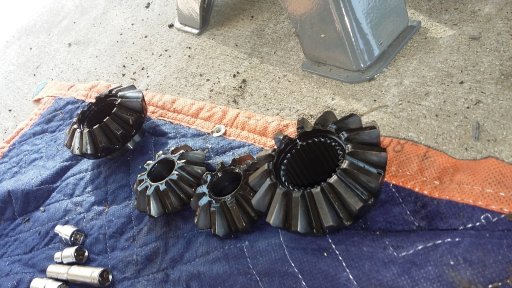
Next do a couple of dry fits outside the carrier to see how all parts should look installed. 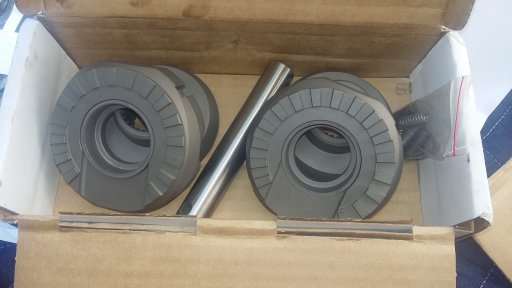
You will need the thrust washers from the original gears to go onto the locker.
Now fit the new axle gears into place with the old thrust washer on. Mine were a snug fit.
Then an even snugger fit, put the new cam gears with spacers inside already, into place, one at a time.
Then rotate the locker slipping pins/studs into all the appropriate holes, and squeeze springs ontop of the pins. (again this is a really tight fit.)
Now just install the new HD cross-shaft and replace the bolt that holds it into place.
Axle shafts, brakes etc go on basically in reverse of the removal process... I will say that the shafts go in much easier than they pull out.
Next to replace the dif cover, use RTV or a gasket to create a seal and prevent leaks. This is the AutoZone version, basically the same just quick drying.
Run a good bead all the way around the cover, and give it 10-15mins before you put it on.
This is fast drying so I just hand tightened the bolts, and left it for a few hours. Depending on the brand of sealant, it may take upto 24hrs before you can torque to specs. Then just fill the dif with appropriate gear oil, and amount (in this case it was 1.27qrts of 80w-90).
I painted the cover cause it was a little scratched up and in rough condition, this is Chrysler Engine Orange (they do call them pumpkins lol)
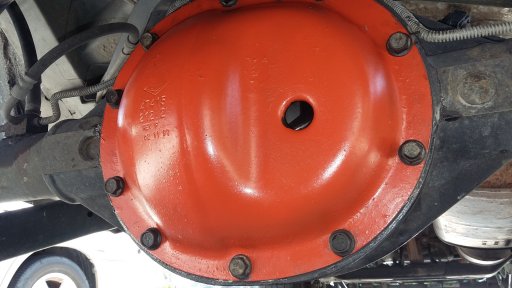
Next to replace the dif cover, use RTV or a gasket to create a seal and prevent leaks. This is the AutoZone version, basically the same just quick drying.
Run a good bead all the way around the cover, and give it 10-15mins before you put it on.
This is fast drying so I just hand tightened the bolts, and left it for a few hours. Depending on the brand of sealant, it may take upto 24hrs before you can torque to specs. Then just fill the dif with appropriate gear oil, and amount (in this case it was 1.27qrts of 80w-90).
I painted the cover cause it was a little scratched up and in rough condition, this is Chrysler Engine Orange (they do call them pumpkins lol
) Update: locker behaves very good on road. Can only be heard ratcheting with windows down, and only ever heard 2 loud unlock/pops so far. (About 35-40miles city driving)
-Not off road tested yet-
Sent from my SM-S920L using Overland Bound Talk mobile app
-Not off road tested yet-
Sent from my SM-S920L using Overland Bound Talk mobile app
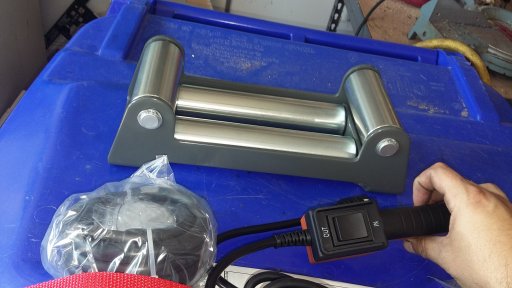
Spontaneous buy moment of the build. On sell at local harbor freight, plus 20% off.
Normally I would not buy from harbor freight, but it was such a good deal I went for it.
Now gotta explain it to the wife somehow :\

Sent from my SM-S920L using Overland Bound Talk mobile app
Normally I would not buy from harbor freight, but it was such a good deal I went for it.
Now gotta explain it to the wife somehow :\
Sent from my SM-S920L using Overland Bound Talk mobile app
BADLANDS 9000lbs Winch Install:
So after unboxing I was surprised that it came with no install Instructions.
I brushed up on some Youtube Videos and got on it.
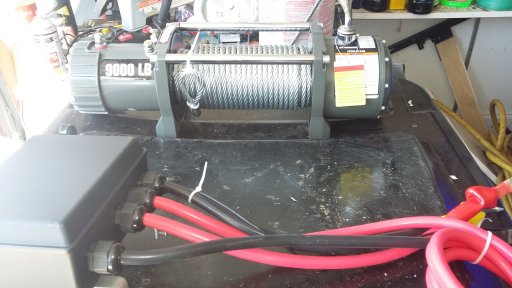
Pretty straight forward, the Solenoid wires are color coded on the ends, then there's just a ground, Negative and Positive.
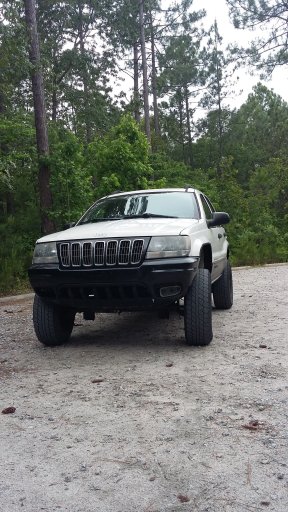
Winch plate install took a little modding and cutting into the unibody.... Also lost the recovery point tow hooks. But i'm planning something for that.
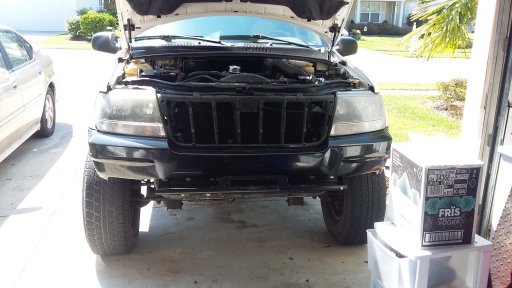
Not quite finished. Removing the lights probably. I just bolted them up to see how lights might look on it.
Gonna add a front skid to protect the Lower Radiator. I can Mig, Flux core, stick weld but i dont have a welder so ill get someone else to weld it up for me.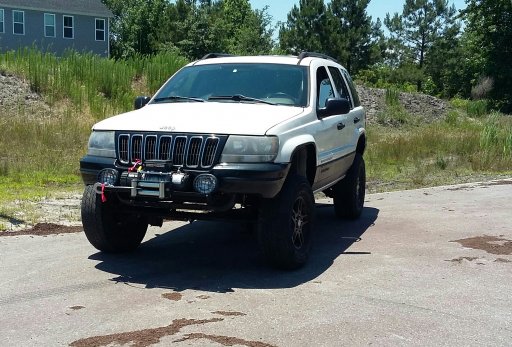
So after unboxing I was surprised that it came with no install Instructions.
I brushed up on some Youtube Videos and got on it.
Pretty straight forward, the Solenoid wires are color coded on the ends, then there's just a ground, Negative and Positive.
Winch plate install took a little modding and cutting into the unibody.... Also lost the recovery point tow hooks. But i'm planning something for that.
Not quite finished. Removing the lights probably. I just bolted them up to see how lights might look on it.
Gonna add a front skid to protect the Lower Radiator. I can Mig, Flux core, stick weld but i dont have a welder so ill get someone else to weld it up for me.
Last edited:
