Advocate II
- 1,033
- First Name
- Jack
- Last Name
- Coleman
- Member #
-
30326
- Ham/GMRS Callsign
- K7JDC
- Service Branch
- US Army
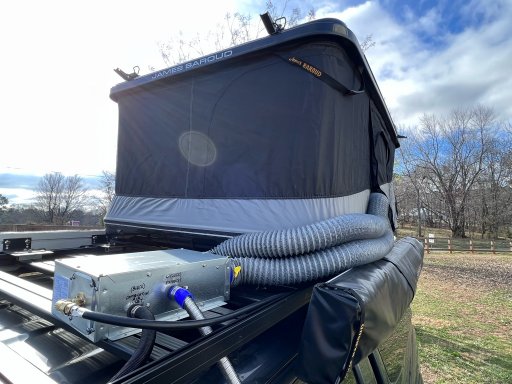
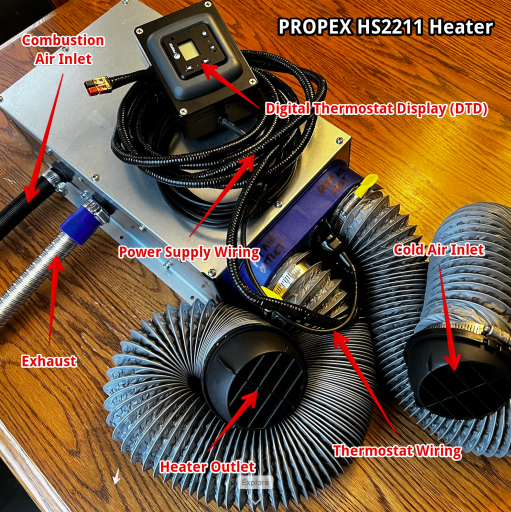
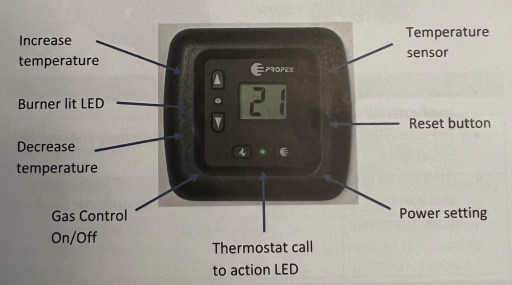
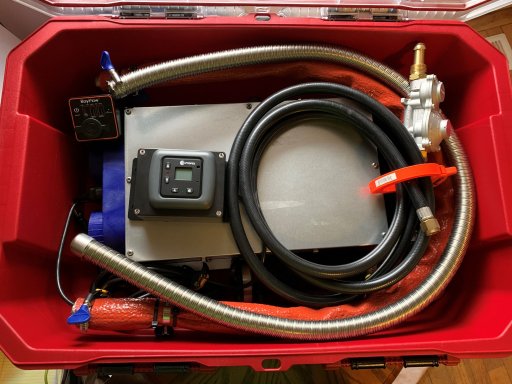
I have in operation the Propex HS2211 Heater. It uses propane and was not difficult to modify and install. Most of the work involved wiring.
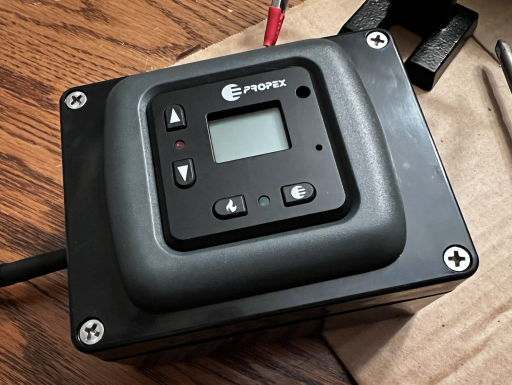
This model comes with a digital thermostat which keeps the tent at a constant temperature. This unit is also equipped with a countdown timer and is another function of the digital thermostat. What you can do is set the heater to come on automatically anywhere from 1-16 hours. The timer will start counting down and when it reaches zero, the heater will start and operate. I could see this being useful as a means of warming up the tent before going to bed if you're out hiking.
Although pricey, I feel very safe and don’t need another fuel source. I haven’t used it enough to provide an accurate assessment. I will provide more detail at a later date.
-------
Highly encourage y’all to watch Rob’s video (Revere Overland) of this popular product: He was the spark for me to go this route and with his help, I’ve created my own heater. This parts list is based on this particular product being used in a roof top tent application.
Save the 75mm air outlet covers, I purchased most of these items from Amazon. I tried to use the exact wording so it will be easy to locate.
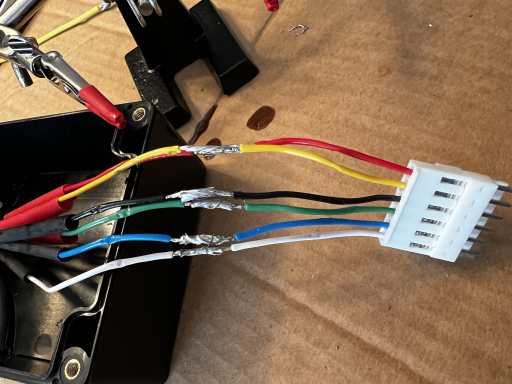
This project requires either the use of soldering equipment and/or crimp connection tools to add additional length to power supply and thermostat wiring.
————-
Parts list:
Propex Heater Model HS2211. I ordered mine directly from the manufacturer and only waited a couple of weeks for the product to arrive: HS2211 External Gas Air Heater | Propex Air Heaters Canada Current price: $1,036.87 USD.
2 - 1 1/2” Key Hose Clamps/Stainless Steel 1.5” w/ Thumb Screws (used to connect the combustion air inlet and exhaust hoses to the heater; these come in handy as you have to disconnect these hoses each time you’ve finished using the tent heater)
2 - Ideal Turn-Key Clamps 5Y04858, 2 1/2” - 3 1/2” Carded Turn-Key (Thumb screw) Clamps for RV Hose (used to connect the 2, 3” air ducts {Hot Air Outlet and Cold Air Intake} at the heater which then go into the tent). Much easier to use these thumb screw clamps as these air ducts also have to be disconnected from the heater after use.
Hon & Guan 3 inch air duct - 16 ft long, Flexible Ducting HVAC Ventilation Air Hose (Cut this into 2 halves to use as the air ducts that go from the heater into the tent).
75mm Air Outlet Vent Net Cover Cap of Exhaust Pipe for Air Diesel Parking Heater (153964453221) (These are the black end caps that attach to the 3” air ducts which will be positioned inside your tent). This was the only item I had to purchase from eBay.
2, 3” metal hose clamps to secure the black, 75mm air outlet vent net cover cap to the 3” duct work.
1 1/2" metal hose clamp to secure blue, rubber sleeve to exhaust hose.
1/4" BSP to 3/8" NPT (1786N204) and Optional 3/8" NPT elbow (50785K441) and 3/8" NPT to 3/8" flare fittings (used to connect propane supply line to the heater).
Teflon tape.
Power Supply Wiring:
#16AWG (red and black) to connect to the supplied #22AWG power supply wiring in order to increase the length from the heater into the truck cab and to the battery/power supply. You could use #22AWG but I wanted a slightly larger diameter wire primarily for the connection I was going to have to make at my battery/power supply. The length of wire you will need will of course be dependent upon where you plan on placing your heater (distance from the tent) and its relation to your battery/power supply.
3/8 inch Split Loom Wire Flexible Tubing Conduit Hose (I used this to cover the two, #16AWG wires).
Anderson Power Pole Connectors (I recommend you go this route instead of a 12v cigarette lighter connection.)
15 amp fuse
Thermostat Parts:
Project Box IP65 Waterproof Junction Box ABS Plastic Black. Dimensions: 4/53” x 3.54” x 2.17” (since there’s no wall to mount the thermostat, I picked up an ABS Plastic junction box and cut two openings; one opening to mount the thermostat and one to run the thermostat wiring back to the heater). You could purchase a smaller size box but I preferred something a little larger so it’s easier to locate in our tent.
Rubber grommet 3/8” (I drilled a hole in the waterproof junction box for the wiring and wanted the hole lined).
1/2” split wire loom tubing wire conduit (I used two strands of #16AWG as opposed to a duplex wire which is already joined. IMO, the two separate strands of #16AWG is a lot more flexible than the duplex).
Recommended parts which were not included with the heater:
Handheld Carbon Monoxide Meter
Storage Container for entire unit: Plano Sportsman’s Trunk / 56 Quart Capacity. Dimensions: 24 x 15 x 13 inches
—————
This project isn’t a necessity and isn’t cheap. I was willing to spend the cash and time and I do believe it’s a much safer alternative for my particular roof top setup.
Attachments
-
506.8 KB Views: 173
-
3 MB Views: 107
-
3.2 MB Views: 104
-
5 MB Views: 114
-
2.3 MB Views: 103
Last edited:

