TxTerra build

  • HTML tutorial

TxTerra

Rank V
Founder 500
Launch Member

Influencer II

2,853
prosper, tx
Member #

#0335

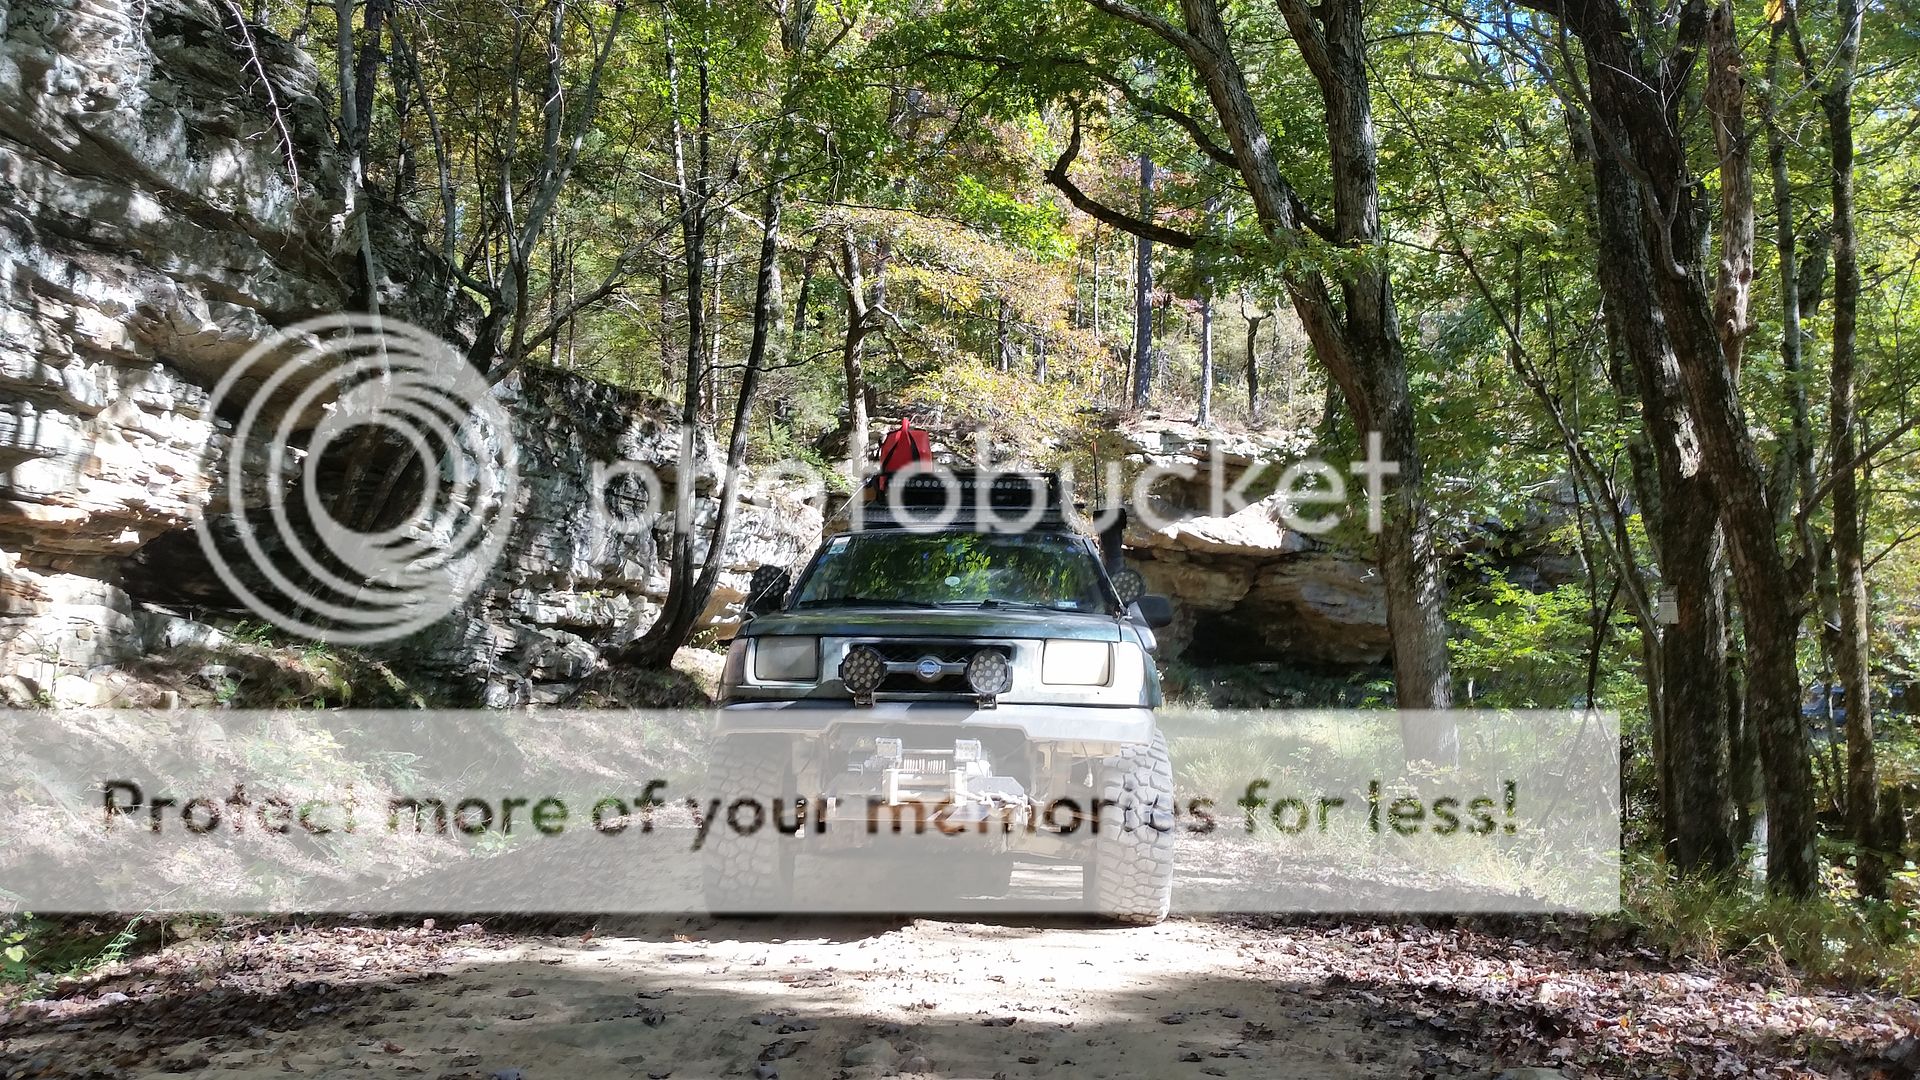
This is extremely overdue to-do list item on my truck.

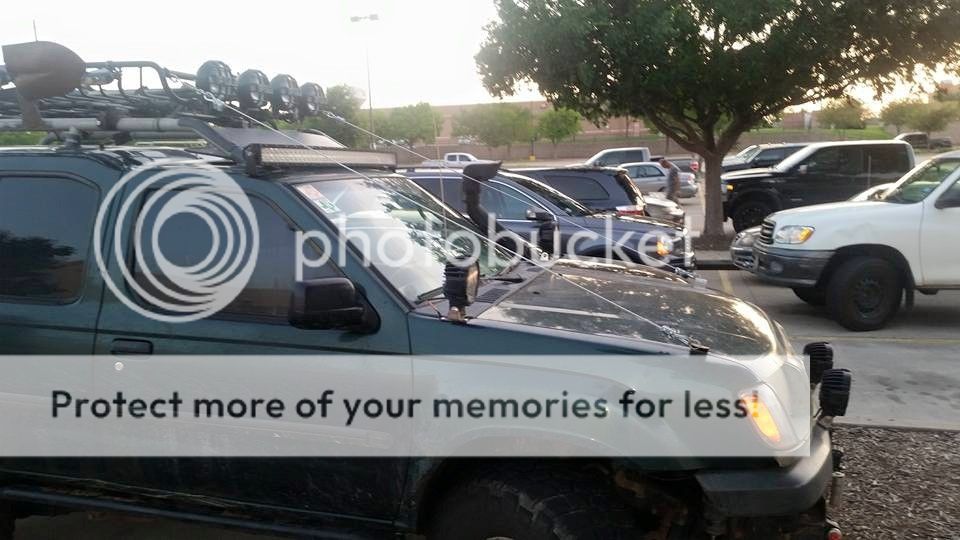
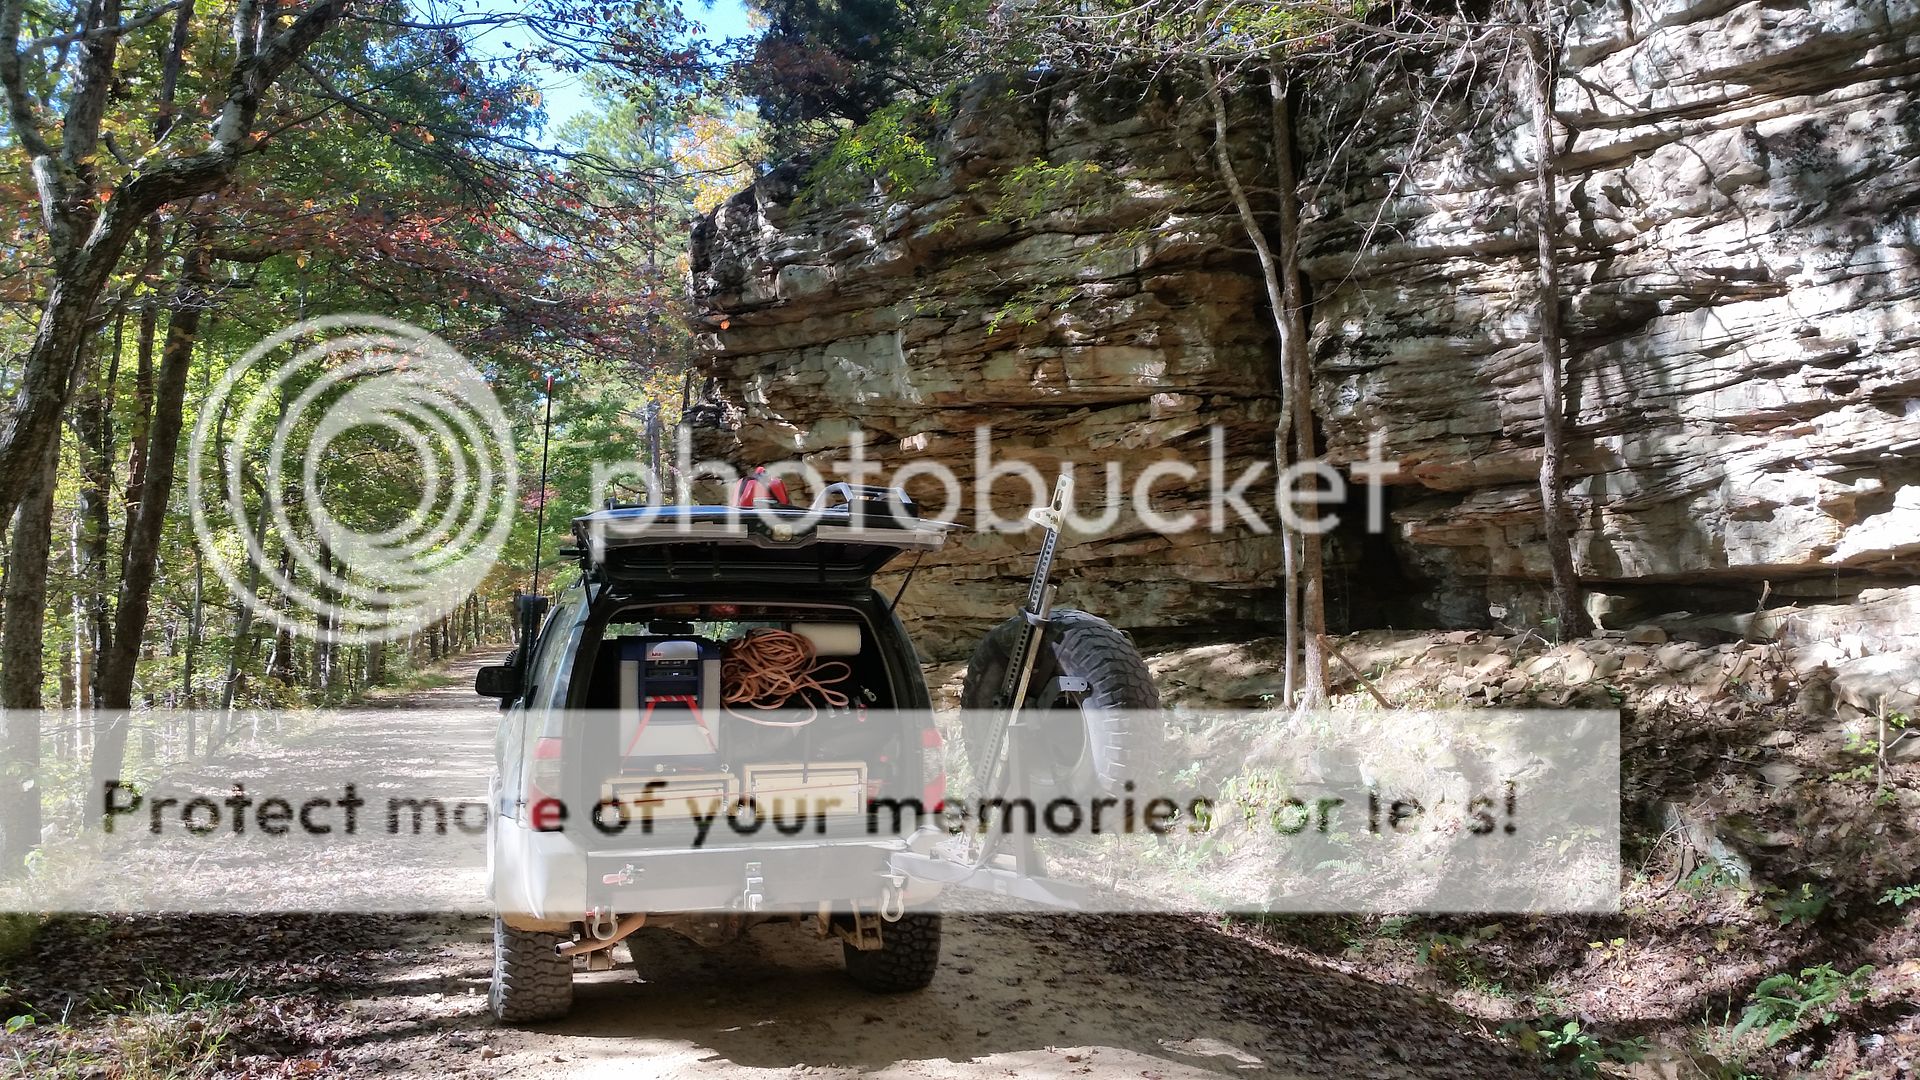
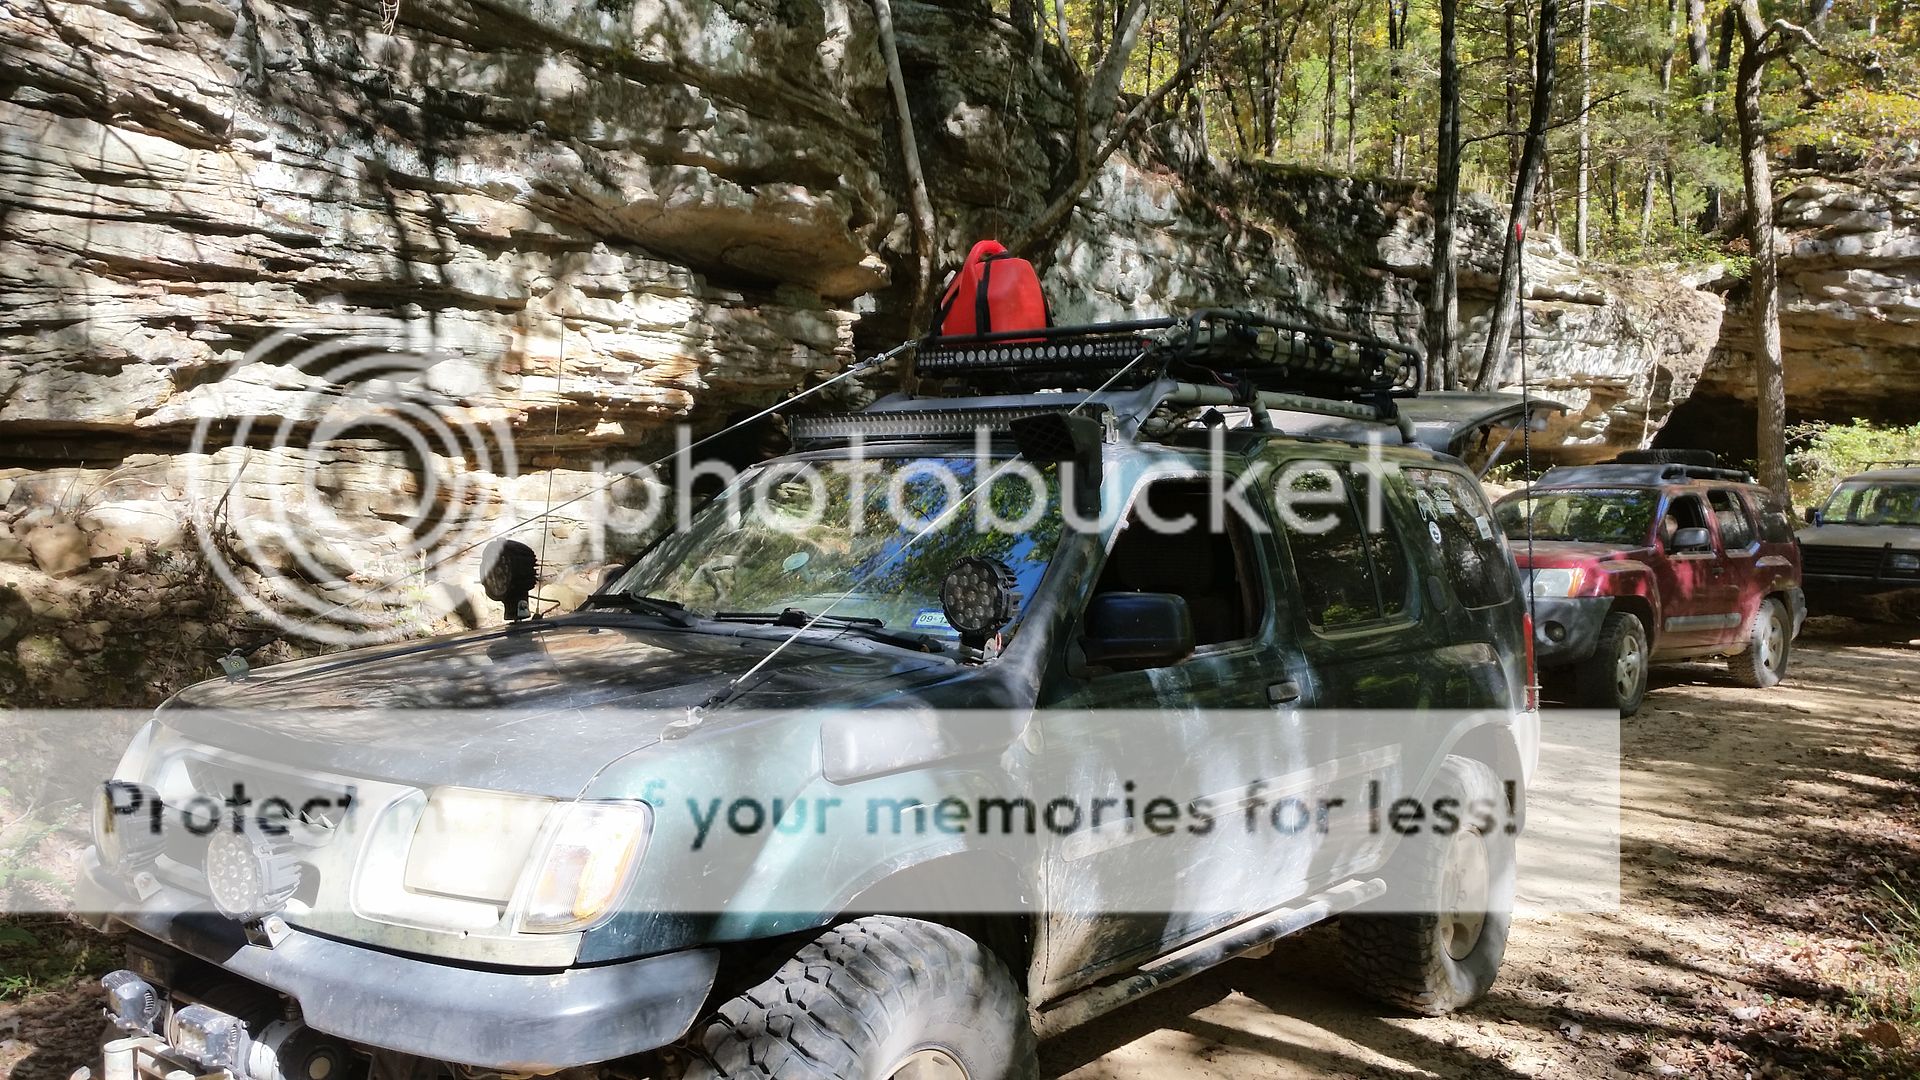
The rig is a 2000 Nissan Xterra, SE model. I picked it up used in 2006 with about 130k miles. I have seemed to lost all the stock pictures i had of her over the years.

I didnt start to get serious into off roading until early 2010. Thats when the projects kept piling up on the truck.

Here is a list of mods to date:

  • 2″ BODY LIFT (4X4PARTS.COM)
  • 2″ SUSPENSION LIFT (pml)
  • DUAL COMPRESSOR ON-BOARD AIR SYSTEM (AIR ZENITH OB2 COMPRESSOR, 5 GALLON AIR TANK)
  • PIAA 525 FRONT PIAA OFF ROAD LIGHTS ON ROOF BASKET
  • HELLA OPTILUX FOG LIGHTS ON SIDES OF ROOF BASKET
  • PIAA 1500 REVERSE LIGHTS ON ROOF BASKET
  • UNKNOWN BRAKE 50″ CURVED LED BAR
  • INFINITI KAPPA 6.5″ COMPONENTS IN FRONT DOORS
  • INFINITI KAPPA 6X9 3-WAY SPEAKERS IN REAR
  • KENWOOD KDC-895 STEREO RECEIVER
  • INFINITI KAPPA-FOUR AMP
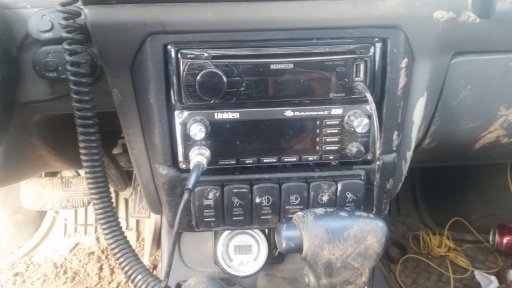
  • UNIDEN BEARKAT 980 CB RADIO MOUNTED IN DASH
  • FIRESTIK II ADJUSTABLE 5 FT FIBERGLASS ANTENNA
  • CUSTOM HEIM JOINT TIE RODS WITH ROUGH STUFF SPECIALTIES 5/8″ TIE RODS
  • BFG MUD TERRAIN KM2 33X12.50X15 TIRES
  • SHROCKWORKS FRONT SKID PLATE
  • SHROCKWORKS ENGINE/TRANSMISSION SKID PLATE
  • SHROCKWORKS TRANSFER CASE SKID PLATE
  • SHROCKWORKS GAS TANK SKID PLATE
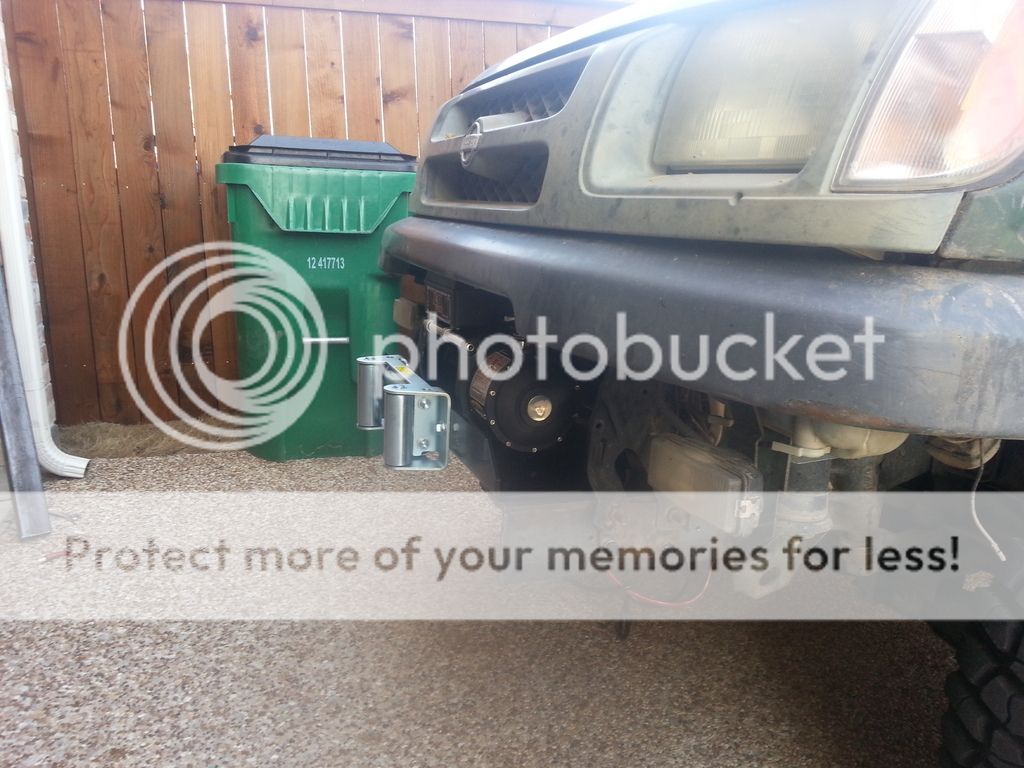
  • CUSTOMER FRONT WINCH MOUNT
  • SMITTYBILT X20 10K WATERPROOF WINCH
  • NILIGHTS 51W LED FOG LIGHTS ON FRONT BUMPER
  • NILIGHTS 51W LED SPOT LIGHTS ON FENDERS
  • NISSAN NAVARRA SNORKEL
  • MODIFED STOCK AIR BOX FOR SNORKEL
  • CUSTOM SWITCH PANEL MOUNTED IN RADIO BEZEL
  • BLUE SEA FUSE BOX INSTALLED UNDER DRIVERS REAR SEAT CUSHION
  • POWER DISTRIBUTION BLOCK LOCATED UNDER PASSENGER REAR SEAT CUSHION
  • HELLA 4 PC RELAY BOX LOCATED UNDER DRIVERS FRONT SEAT
  • CUSTOM “LOBO” RACK IN REAR CARGO AREA
  • YAKIMA LOAD WARRIOR BASKET
  • YAKIMA LOAD WARRIOR BASKET HI-LIFT JACK MOUNT
  • CUSTOM AXE/SHOVEL MOUNT ON LOAD WARRIOR BASKET
  • 18W FLOOD LEDS MOUNTED ON WINCH FAIRLEAD
  • ROUGH STUFF SPECIALTIES WELD ON D-RING MOUNTS ON FRONT WINCH MOUNT
  • SMITTYBILT 7/8″ D-RINGS ON WINCH MOUNT
  • INSAIN FAB REAR BUMPER WITH TIRE CARRIER8
  • 3″ HALOGEN FOG LIGHTS UNDERNEATH VEHICLE FOR ROCK LIGHTS
  • SHROCKWORKS ROCK SLIDERS
  • 60″ HI-LIFT EXTREME OFF-ROAD JACK
  • SMITTYBILT D-RING RECEIVER MOUNT
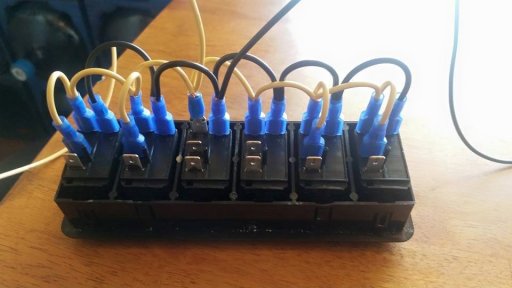
  • CUSTOM SWITCHES FROM OTRATTW.COM FOR LIGHTS, COMPRESSORS, AND IN CAB WINCH CONTROLS
  • Limb risers using 1/4" coated cable

Upcoming/to-do list:

  • Rear corner cupholders
  • Ham Radio installation
  • Customize rear interior panels to cover compressors
  • Install additional usb outlets in front center console
  • Install usb & aux power outlets in rear of center console for back seat passengers
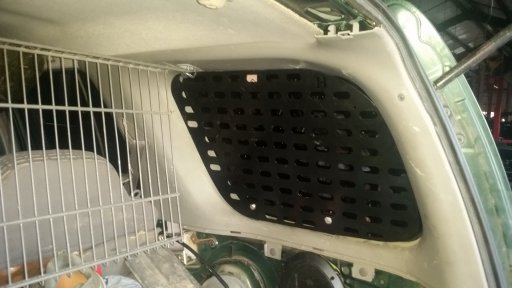
  • Install Hep-Designs Molle panels in cargo area
  • Customer drawer system with slides for tool storage and possibly a fridge
  • Dual battery and management system

I will be updating with pictures as the days/weeks progress, but this is something that is long overdue to get started! feel free to ask any questions or post comments about anything


What a stock one looks like VS what it looks like now
 

Michael

Rank IX
Staff member
Founder 500
Member

Benefactor

15,584
Auburn, California, United States
First Name
Michael
Last Name
Murguia
Member #

0000

Ham/GMRS Callsign
KM6YSL
Thanks for the great list and the sources you provided. I might have missed it, but I didn't see "Alarm"!

-M
 

TxTerra

Rank V
Founder 500
Launch Member

Influencer II

2,853
prosper, tx
Member #

#0335

WINCH MOUNT BUILD

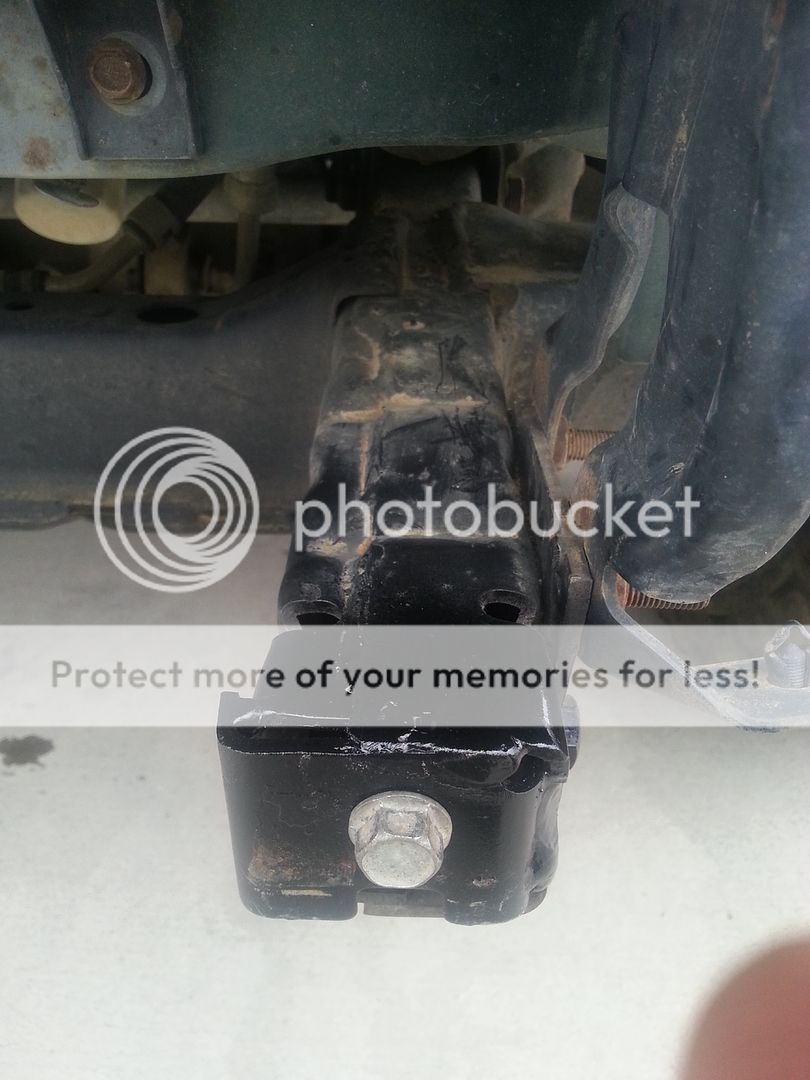
Started off by going to a metal yard and picking up the needed steel for this project. I picked up 2 feet of 3x3 angle iron, and some 3x1.5 tubing. All the steel is 1/4 thick for needed strength. I also purchased a warn universal winch channel that would have fit perfectly between the frame rails, but i wanted this to be totally bombproof and capable to take at least up to a 12k lb winch later on if i wanted.

First i had to trim some off the frame for the angle iron to sit flush


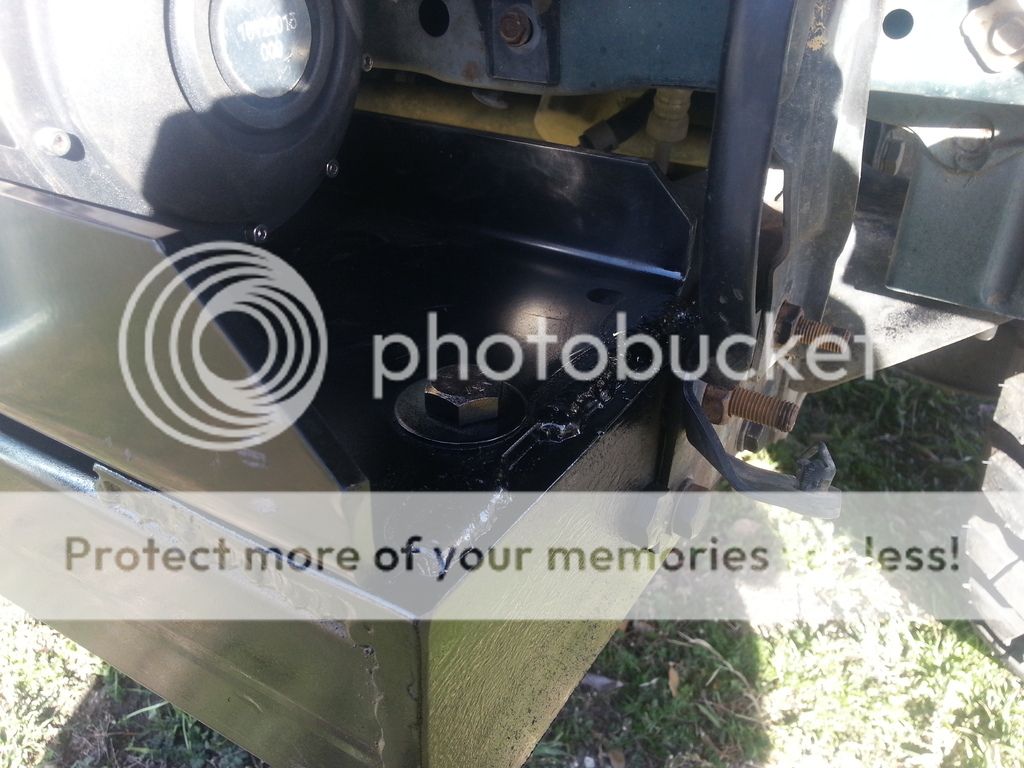
then i cut the angle to reinforce the frame. backed the angle iron all the way up to the body mounts. Then i drilled 2 holes on each side for some 1/2" grade 8 bolts. I also used the stock bumper bolts to make a total of 4 bolts per side in the frame to hold everything in place.


after that, i then squared everything up with the rectangle tubing and welded it all together.


shot a couple coats of rattle can paint on there to finish it off. mounted the winch onto the plate, then bolted the setup into place


what good is a winch without a good recovery kit?


and how do you deal with you idiot friends who decide to get themselves stuck in the mud late at night, and you dont want to get out of your vehicle?


thats right! in cab winch controls!
 

TxTerra

Rank V
Founder 500
Launch Member

Influencer II

2,853
prosper, tx
Member #

#0335

SKID PLATES

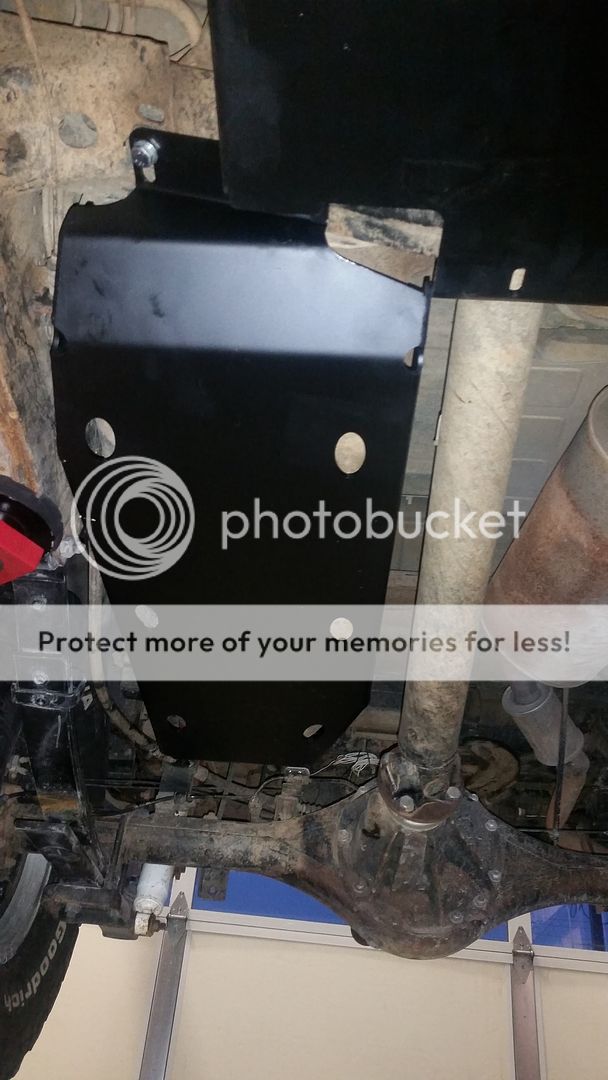
After damaging a gas tank many years ago and not having a functioning fuel guage, it was time to replace the tank and armor up the truck. I had a very tight deadline to get these, and the guys over at Shrockworks in Houston, Tx did a fantastic job. The company is known to have long wait and lead times, but from the date of payment to actually getting to put my hands on the skids was only 3 weeks! it would have been 2 weeks had UPS not screwed up and delivered to me at work (a auto shop) that is a commercial location. As this is being settled, texas gets one of the crazy snow storms that comes about once a decade. This slowed them down extensively for a week. I had planned on getting the skids power coated, but the delay with UPS and a upcoming trip i was taking wouldnt allow it.

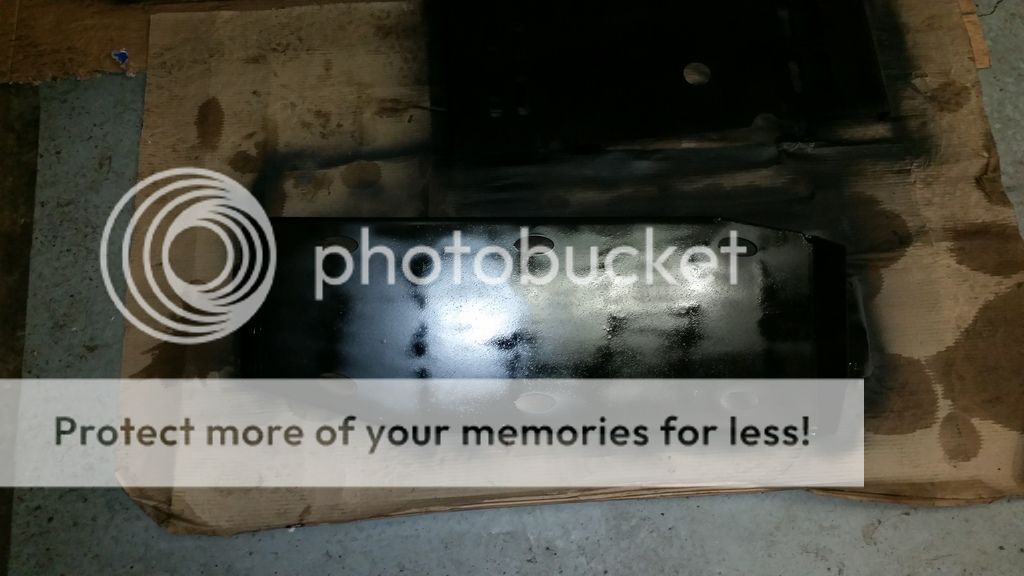
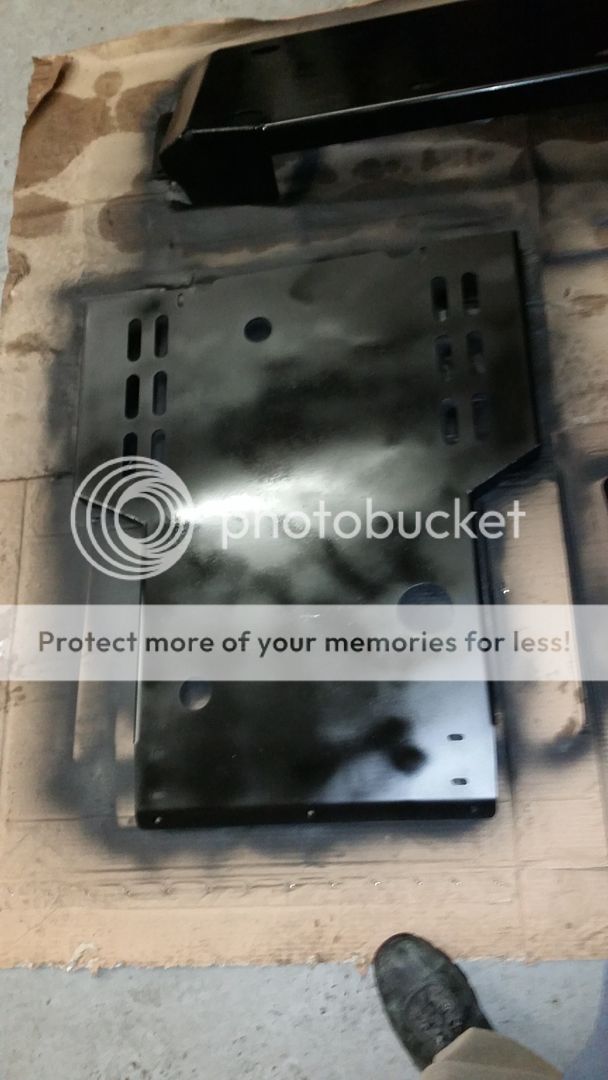
They were shipped bare steel, so they had to be painted. I used a matte black self etching paint i picked up at home depot. I laid down a few coats on each one and let them sit overnight so the paint could dry.


They turned out pretty good for someone who never paints anything! Then it was time to get them installed. It took a couple hours to get everything done and included me having to drill a few parts on the frame to mount them correctly. Overall im very happy with the protection they give.


TxTerra

Rank V
Founder 500
Launch Member

Influencer II

2,853
prosper, tx
Member #

#0335

OBA

*I dont have many pictures that i can find from the original install*

Ive been wheeling many times by this point and I always got tired of having to wait in line at the park to use their compressors to air up my tires. It was time to start planning my air system.

I wanted something that would have the output to air up my tires quickly, air my buddies tires up (of course i would charge them a drink or two), and run air tools when needed.

After doing some extensive research, i finally came across the Air Zenith OB2 compressors. They are designed for air suspensions, but they decided to put a "off-road" kit together for the ever growing crowd. The system is expensive, but its well worth it! I purchased a kit off autoanything.com that included 2 compressors, a 5 gallon tank, a pressure switch, a pressure gauge and sensor, and the relays. I also made a large purchase from air ride fittings for some good quality quick connect fittings for the entire system.

I used 1/2" air brake hose from the compressors to the tank. I ran 2 3/8" air brake hoses to inside the truck. One for each side of the vehicle, one side would be regulated for air tools at 100 psi, the other would be what ever pressure is in the tank. I though about regulating both sides, but i figured that if i had to re-seat a bead on the trail at some point, the extra 100 psi of pressure would come in very handy without having to mess with adjusting the regulator.

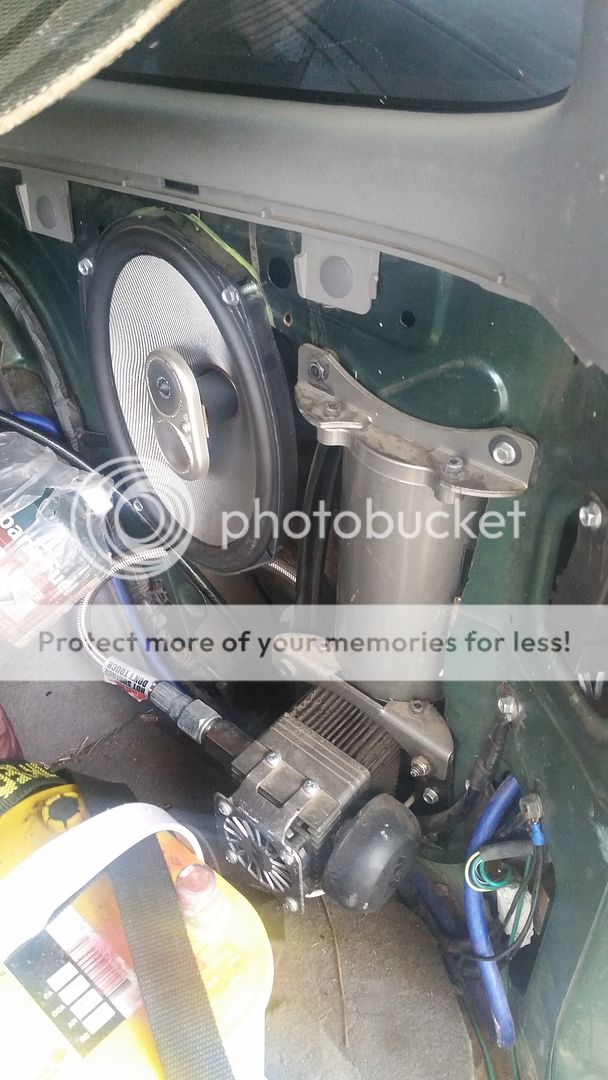
I wanted to mount the compressors inside my vehicle to keep them out of the elements. I had thought about trying to shoe-horn them under the hood somewhere, but if you have ever looked at a first generation xterra engine bay you would know there just isnt any room to add anything in there. I removed the lower cargo trim panels and found that if i cut out a section of the sheet metal, there would be enough room to squeeze the compressors in there.


I had to find a place to mount my air tank next. After looking around and trying to figure out the best way to mount it, i decided to bolt it to the backside of my rear bumper.

*image to follow*

In doing so, i had to relocate the speakers which required more trimming of the sheet metal. Overall, im very happy with how the install went. I still need to finish this project up. All i have left to do is purchase more air line and fittings and run them to the front of the vehicle to have outputs up there. Im going to wait on this until i complete my front bumper build out that way the connections will stay protected.

In all, the entire setup cost about $1200. Its a huge price tag for something that wont get overly used, but it is awesome to have a near shop quality system out on the trail when you have to do some trail side repairs.

After the system was broken in, i decided to test how well this system works. I aired down all 4 of my 33x12.50x15 BFG Mud Terrain KM2 tires to 0 psi. I removed the valve cores on all 4 to make sure they didnt have any air left in them. I then aired them all up to 35 psi and set a stop watch to see how long it takes. It was finished on all 4 tires in about 7 1/2 minutes! i was majorly impressed!
 

TxTerra

Rank V
Founder 500
Launch Member

Influencer II

2,853
prosper, tx
Member #

#0335

LIMB RISERS

Im getting ready to take a trip out the Ozark National Forest to explore the overland trail out there. I was out there earlier this year in april, and found some spots that were very overgrown. I also traveled the K-Trail (kiamichi trail) in oklahoma twice earlier this year and had the pleasure of "pinstrip alley".

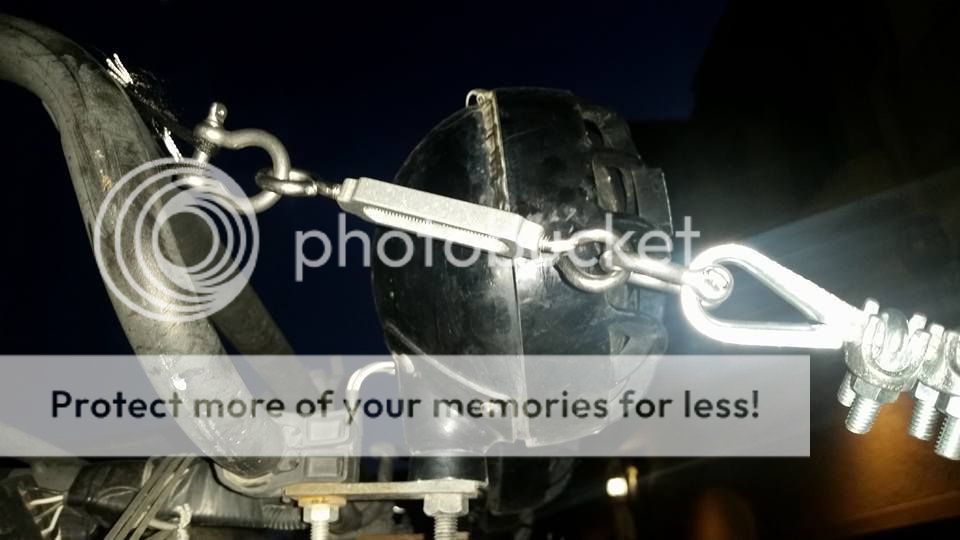
I was bored one day at work and decided i wanted to put together some limb risers. I dont have a front bumper with headlight guards yet, so i had to come up with a solution to mount the lower end of them.

I came up with the idea of using a antenna mount for the hood! this will serve two fold. Right now it will give me a point to mount my limb risers until i get a full bumper, and 2. it will give me a place to mount antennas for additional coms later on.


Next I had to assemble the cables. I went to home depot and purchased some 1/4" coated steel wire, some thimble kits, a few d-rings to make them easily removable, and some adjusters.


the completed setup!


I initially used some paracord i had laying around to make a loop around my roof basket, but it was only temporary. I picked up some 6.5 mm cording from a climbing shop and tied a prussic knot around the bars of the basket to make sure they do not slide around.
 

TxTerra

Rank V
Founder 500
Launch Member

Influencer II

2,853
prosper, tx
Member #

#0335

Front locker

For a while I was needing some additional traction due to the limitations of the IFS front end, especially being a torsion bar setup. With me having a Xterra, there isnt many companies out there who manufacture lockers for us. I had a choice of ARB or a company out of australia, LOKKA.

The Lokka Locker is very similar in design to a aussie locker or "lunch box" locker. It just couldnt be beat for the price. It was about $400 shipped to my door, vs being nearly $1100 for just locker by going arb.

http://lokka.com/site/

The one thing the engineers did at Nissan was put on locking hubs. This prevents the CV axles from turning unless the vehicle is in 4wd. The lokka is a full time automatic locker and does not have a way to "disengage" like a selectable locker does. By having the locking hubs though, when in 2wd you will never notice a difference in turning or steering.

It was a fairly easy install. Just dropped to front differential down with the crossmemebers attached, then pulled out the carrier assembly. The locker only replaces the spiders and side gears, so you dont really have to mess with the ring and pinion at all. The ring gear does have to be removed off the carrier though to get the locker in, but it was carefully marked so it went exactly where it did when it was pulled off.


After that, i just reassembled everything, and re-installed the front diff. The difference was night and day on my first wheeling trip!
 

TxTerra

Rank V
Founder 500
Launch Member

Influencer II

2,853
prosper, tx
Member #

#0335

SWITCH PANEL AND ELECTRICAL ACCESSORIES

I cant seem to find the pics of me hacking up the radio bezel to make room for the CB radio or the switches.

This all started off by me adding more lighting up on the roof for different purposes. I added side lights (left and right side), backup lights, and some rock lights. I had installed some really cheap rocker switches that came with some lights at walmart, but i wanted something that looked much more professional.

I placed a order at OTRATTW.com for some of the contura v switches. They are all laser etched and back-lit and are good for 20 amps each, but each one only controls a relay.

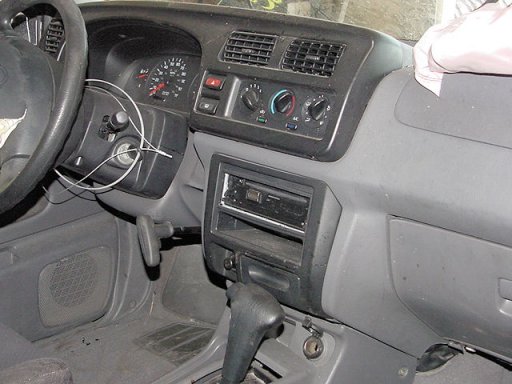
here is what it started out looking like (random picture i found on google images)
003222_dash.jpg

I pulled the trim off around the radio and butched it up pretty good. I used some plexiglass to make a mounting surface for the switch panel and used some epoxy putty to hold it in place.

20150727_192549.jpg 11403019_10100346930811617_5670806117242530745_n.jpg

I installed a relay box under the drivers seat with 6 relays to control all the lights. I also installed a 12 position blue sea fuse box under the drivers rear seat cushion.

To power the fuse box and other accessories ive added, i ran a 0 gauge cable from the battery to a junction block. The junction block splits it into 4x 4 ga outputs (1 for each compressor, 1 for the radio amp, and 1 for the fuse box). I also added a 120 amp circuit breaker next the fuse block for added protection.


UPDATE:
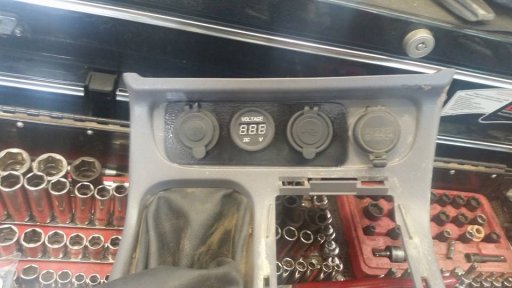
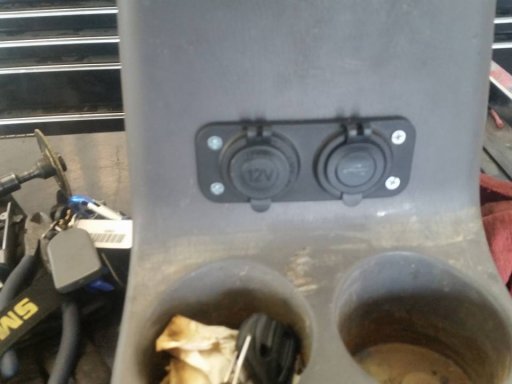
Ive recently added some more power outlets for charging different devices and to have some outlets for the back seat passengers when there are some.

I ordered 2x dual USB ports, 2x 12v outlets, and a voltmeter. 1x usb and power outlet went up front in the shfter console, and 1x usb and 12v in the back of the center console.

12019930_10100391318902527_7805209196915847320_n.jpg
12037988_10100391318877577_6101375257682147192_n.jpg

In the front i have it powering my phone, tablet (running topo gps), my road gps (garmin nuvi 255), my arb fridge monitor, and have 1 open usb port. All ports are open on the back.
 
Last edited:

TxTerra

Rank V
Founder 500
Launch Member

Influencer II

2,853
prosper, tx
Member #

#0335

OZARK OVERLAND TRAIL REPORT (TAKE 1)

We started this trip on April 24th. Our plan was to follow a gps route we found online for the High water mark trail, ozark overland trail, ozark trail, etc.

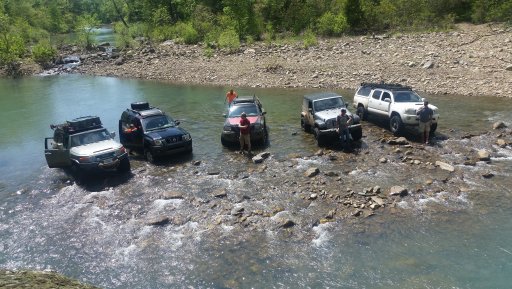
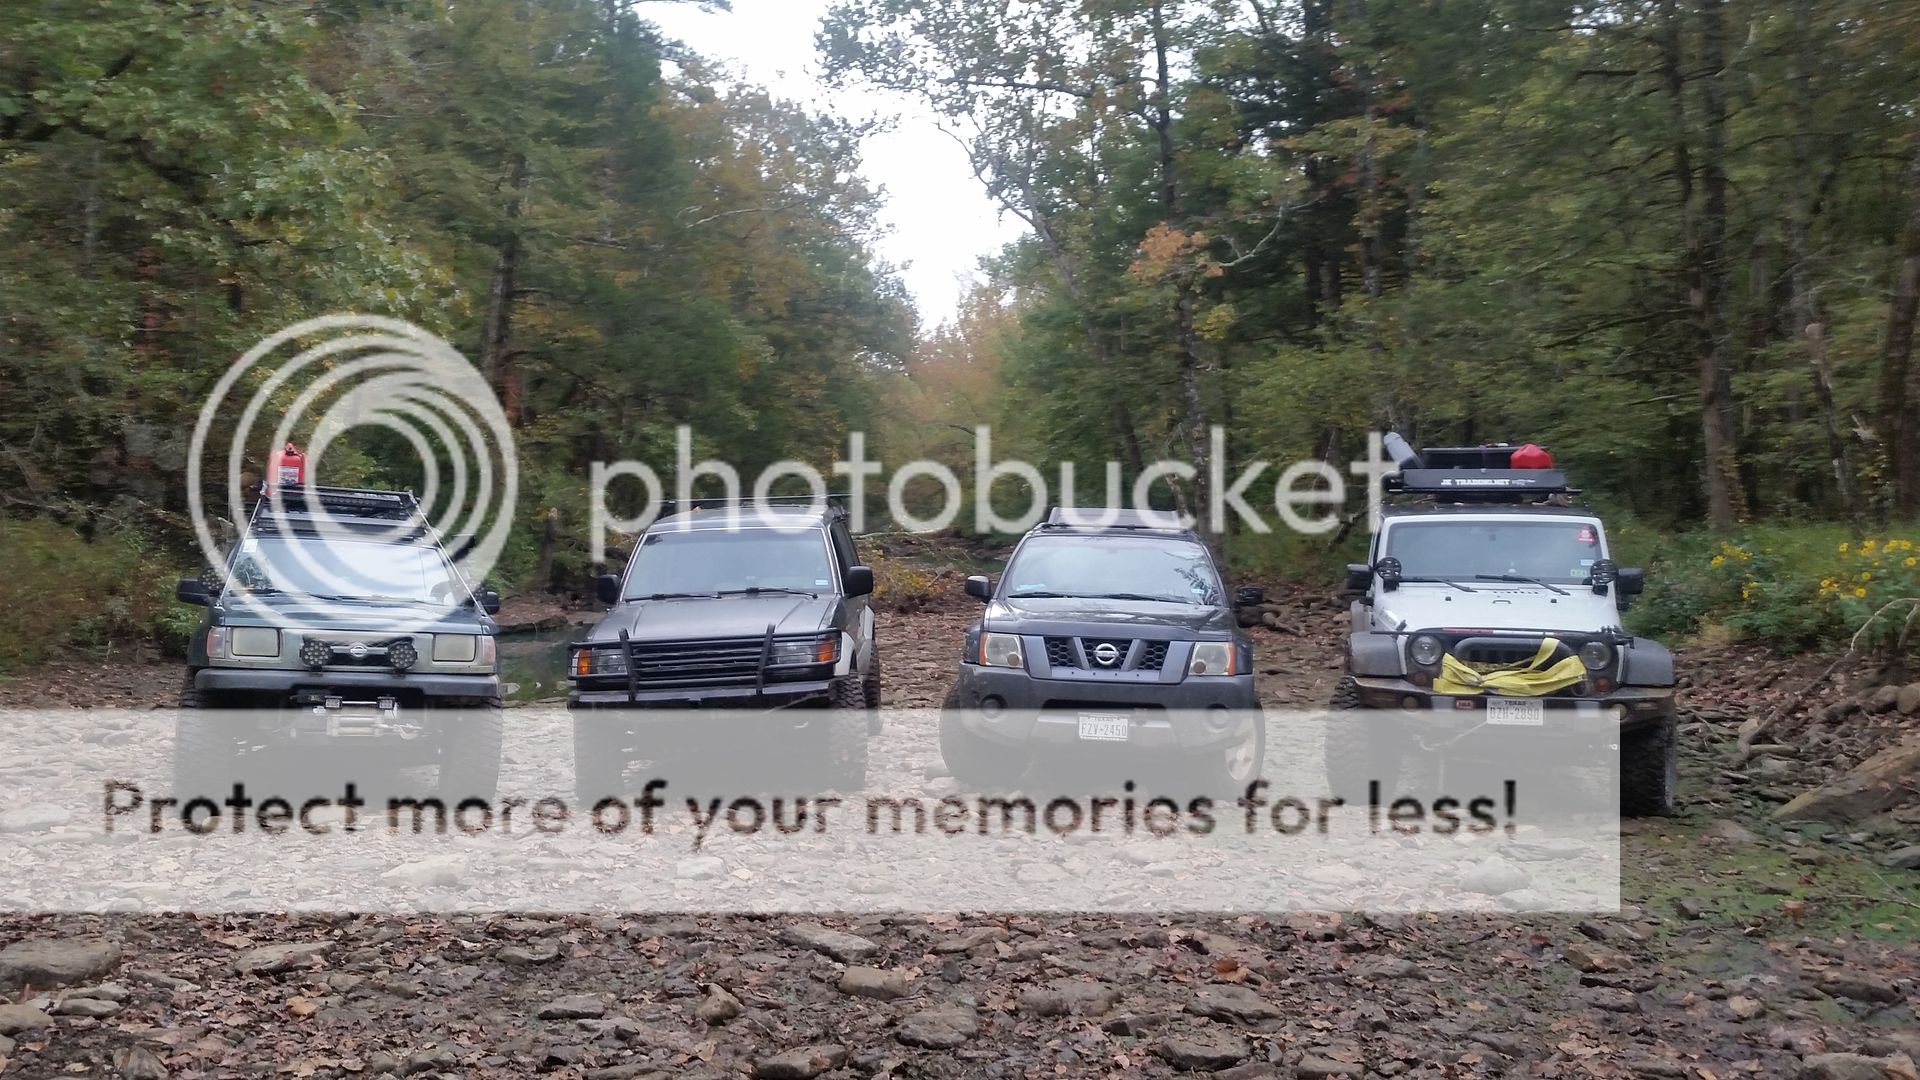
Our group started off as a 4 vehicle group. My xterra, a toyota tacoma, a fj cruiser, and a Jeep JK.

The scenery was amazing, but sadly the trip did not go as planned for many of us.

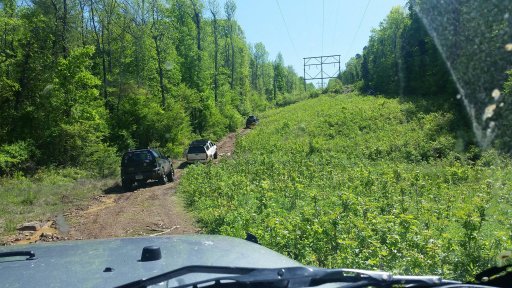
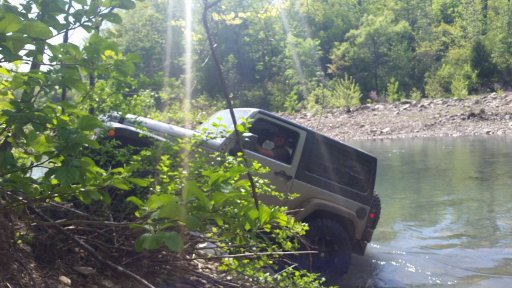
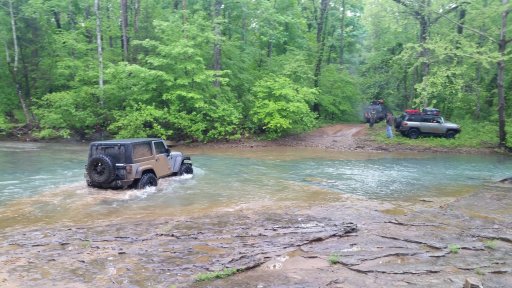
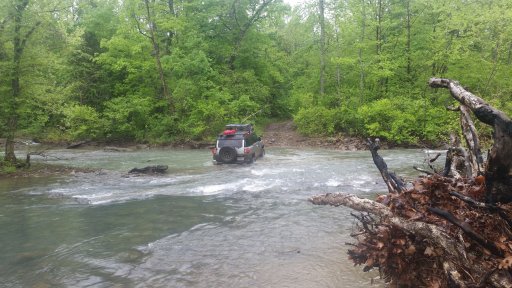
Friday, the day started off great. We had amazing weather and plenty of sunshine. There was several water crossings that we came across early on. We played around in the rivers and creeks for a while, and within a few hours we started to have some problems.

10841966_937287006324045_1827751038391220875_o.jpg
11162061_937286866324059_8175939300976599343_o.jpg
11182558_937286862990726_1126524288775488547_o.jpg
20150424_103909_edit.jpg

11174306_937287069657372_4910164613942067569_o.jpg


We were on some decent climbs, and i felt something odd in my xterra, but didnt think much about it at the time. Come to find out about 30 mins later, my transmission decided to let go. It would not shift out of 2nd gear at all. This started to ruin the plans for the weekend as we were going about 200 miles north of where we started.

At this point it was early afternoon, so we decided to limp back into town to try and figure out what was going on. By now, my truck has about 240k miles on the transmission and the rest of the drivetrain. Its not surprising that something has finally happened to it. Anyways, we get into town and head to the nearest parts store, which happens to be a oreillys. Being a mechanic by trade, i start by doing some quick checks. Transmission fluid level was full, borrowed a scanner and found no codes in the PCM or TCM. With having gone through some really deep water earlier in the day (everyone else took a bypass), i decided to try a drain and fill of the transmission. Had no luck doing so.

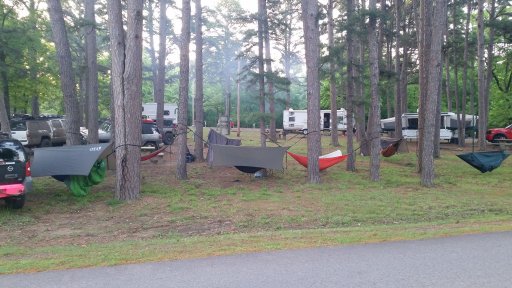
by this time, its getting pretty late in the afternoon, and we head to a local diner to regroup and replan our trip. Instead of sleeping on the trail, we head to a local state park. I had a buddy coming out that night to meetup with us to head out the next day. He happened to have some spare transmission parts from another xterra he had at home that we were going to use to try and fix mine. After dropping the pan down, we found some good chunks of metal, and best we could come up with was the torque converter went bad. Im not wanting to risk further damage to anything, so we decide to leave it at the local walmart for saturday and make a plan to get it back home for sunday.

Saturday comes around, and another buddy came out to meet up with us. We have decided to stay local in the National forest. My buddies who joined us that night/morning are locals and know the forest pretty good. Im riding along with someone else in our group who brought his tacoma out. It has a mild lift with some decent all terrain tires.

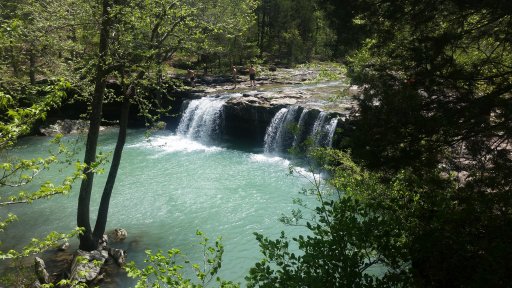
We had a great morning of trail riding, and then we decided to head over to another section of the forest around Richland Falls. We knew of a secret spot with some good swimming holes on the river and decided to go there to have some lunch and chill out for a while.

10467126_937287122990700_1244328927200355755_o.jpg

20150425_123215_edit.jpg 20150425_141622_edit.jpg

After that, we started on a trail on the other side of the river that we had to do some trail blazing on. After about 1/2 mile into the trail, we had to do some tree clearing to make room for us all. After about 2 miles the forest was too thick for us to continue and forced us to turn around. In the process, we heard a extremely loud pop come from the front end of the tacoma. We got out and did a quick inspection and didnt see anything broken, so we continued forward. When we got back to the river, we knew what had happened and caused more headaches for us.

11143162_937287382990674_5779201804519996047_o.jpg

We went down one side of the hill vs taking the longer way around and got hung up on some rocks. We tried to rock oursleves free, but the dirt was just too soft and we just kept digging in more and more. At this point we heard another odd noise and the front tires stopped having any power behind them. we figured we broke something but wasnt sure what. We wound up having to get winched backwards off the hill and made it to the rocks on the other side. This is where we found the damage.

The loud pop we heard earlier on was the passenger sway bar link snapping. The loose part had then got wedged into the passenger cv axle down at the river and cause it to shatter pretty bad. This posed a major problem as none of had brought any spare parts. We now had to come up with a game plan to get this fixed cause toyotas do not have any axle disconnects, and we still had a long drive back home.
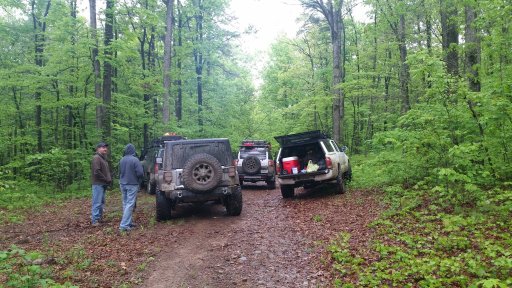
Our group split up at this point. I went with the guy in the JK to go back into town before they closed to try and get a cv axle for the tacoma, and one of my buddies who joined us that morning had to leave to get back home to his family. That left the toyotas and a xterra back a the river to make a plan for the repairs.

We make it back to the local oreillys who had a axle in stock and waiting on us. We get a phone call from the other part of the group saying they are going to just drive back into town where we are that way we didnt have to drive all the way back to them and find them at a campsite. We then head over to autozone to get a tow bar so we can flat tow my xterra back home with us.

We all meet back up at the walmart we had left my truck at to do our repairs. By this time, its early on in the evening and we figured it would be best to go back to the state park again to camp. The repairs went pretty quick in the parking lot. I had to remove my winch fairlead and drill a couple holes in my winch mount to put on the attachment points for the tow bar. At the same time, the other guys are working on getting the axle replaced on the tacoma.

Back at the state park, we get our camp all setup. We are greeted in camp by a campground supervisor who lives at the park. We had a great conversation with her about the last couple days, our breakdowns, how the trails were, and she wished us good luck on the drive home.

11126891_937287452990667_8567180695082224033_o.jpg

We wake up sunday morning and decide to cut our losses at this point. we break camp and hook up my truck to tow it back. Took us alot longer getting home cause of the towing, but didnt have any other issues on the way home.

All in all, it was a great trip!
 
Last edited:

TxTerra

Rank V
Founder 500
Launch Member

Influencer II

2,853
prosper, tx
Member #

#0335

Its been a awesome day today!

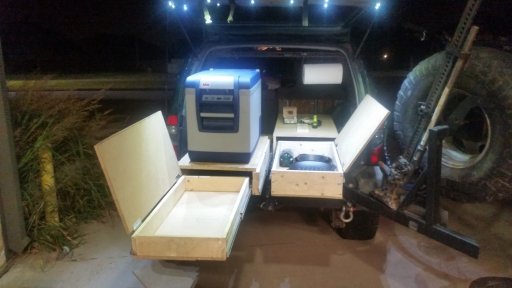
I finally broke down and ordered me a fridge. After researching for quite sometime, i finally decided on getting the ARB 50 qt. There was some close competition from Equipt1, smittybilt, and edgestar, but the arb won due to the lower height and the ease of access to it since the top is fairly easily removed. I have it temporarily setup, but will eventually be building a drawer system in the back with a slide out for the fridge and a couple tables to cook on & work on.

Its going to be a little while before i can give it a through test for off-road purposes, but as of now i have it in the back and wired up.
For anyone looking at getting one on a great deal, the guys over at xterraperformance.com have it on sale.

http://www.xterraperformance.com/ARB-Fridge-Freezer-50qt_p_217.html
 

TxTerra

Rank V
Founder 500
Launch Member

Influencer II

2,853
prosper, tx
Member #

#0335

finally got around to installing my MOLLE panels. These things are great! now to start purchasing some pouches to organize all my gear that i keep in the truck

20150914_192231.jpg FB_IMG_1442277201039.jpg
 

TxTerra

Rank V
Founder 500
Launch Member

Influencer II

2,853
prosper, tx
Member #

#0335

Storage and Kitchen system build

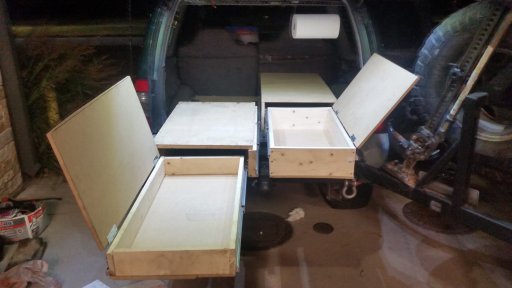
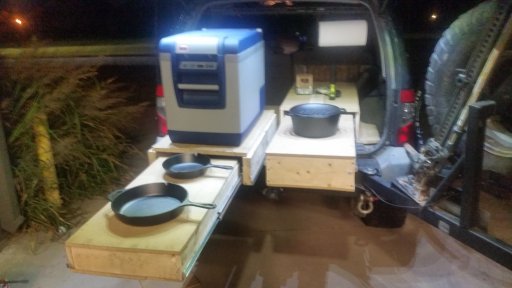
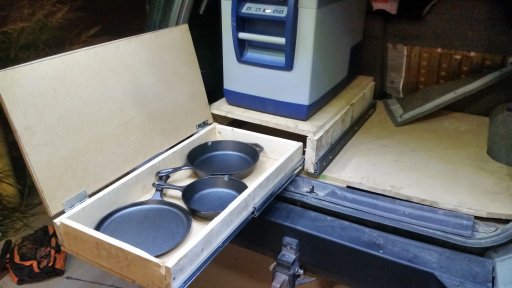
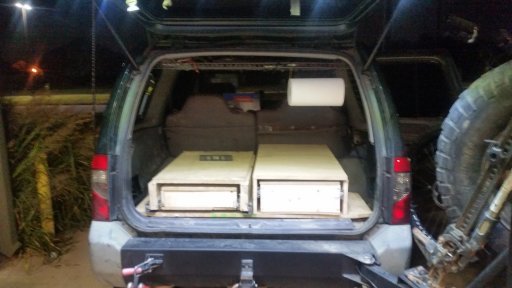
Now that i have fridge for my truck, I was needing a better way to get into it. Ive also been wanting to build some storage drawers to help keep more of my camping supplies, tools, and recovery equipment more organized. What i came up with works very well.
I decided to build 2 integrated tables into the system with tops that would open up for storage below. There is also a slide out for the fridge. I do plan to go back and remake the left table into a 6" tall vs 4" tall drawer, and make both tops out of a cutting board instead of MDF. Im also going to go back and replace them with locking slides to make sure they stay open and closed when i want them too. One other thing i noticed while using this last weekend in the ozarks, is that the left table would sag down when items are on top of it. I dont have room anywhere in my gearset to add table legs, but found that my hiking poles work perfectly to put under it for extra support.

20151007_205527.jpg

20151007_231255.jpg
20151006_225533.jpg
20151007_205730.jpg

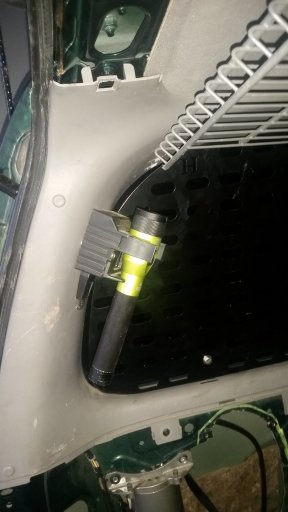
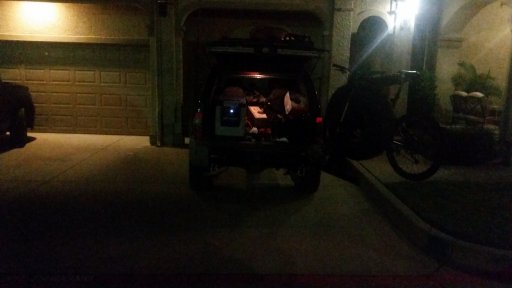
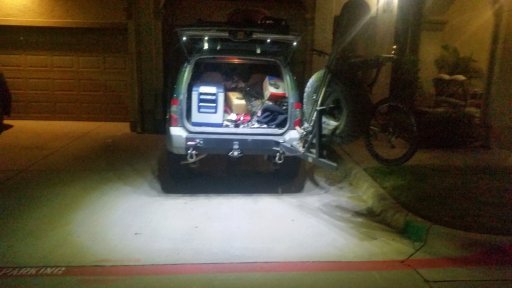
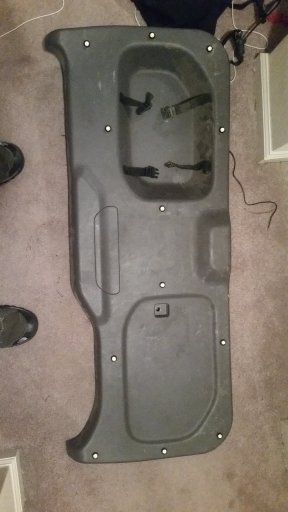
One other thing i did was install some LED lights into the rear hatch trim panel to light up the kitchen area when cooking in the evening/night time. I ordered these off amazon to light it up. The wire on them is something like 24 ga and is very thin. It made it a bit of a headache to wire it all together into one main power and ground wire, but patience and persistence paid off. I also added a toggle switch to manually turn them on and off. I was thinking about an automatic switch, but decided that i didnt want them on all the time while the hatch was open.

20151004_012235.jpg
20151004_012221.jpg
20151004_012206.jpg

20150831_201156.jpg
 

Attachments

TxTerra

Rank V
Founder 500
Launch Member

Influencer II

2,853
prosper, tx
Member #

#0335

OZARK OVERLAND TRAIL (TAKE 2) (10/9/15 to 10/11/15)


we had a great time in the ozarks this last weekend. had a couple guys i know from arkansas join us for saturday.
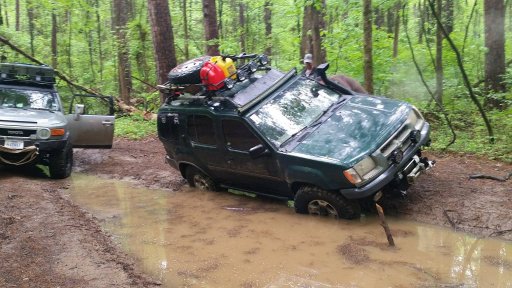


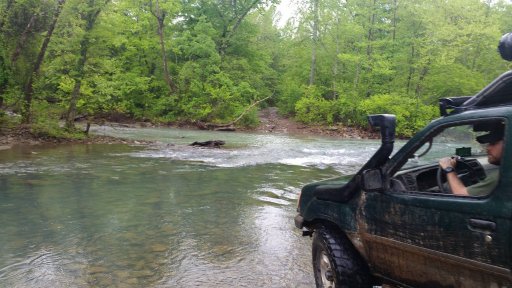
Friday was the most exciting day for trails. We had stopped at this rangers supervisors office to pick up some information and some maps to help us locate the "official trails". Some of the main roads were more of a trail than a road, and the few trails we did find were severely overgrown. We started calling them "hobbit trails" cause there were very tight. Our campsite that we planned out of the map was apparently on private property, so we had to backtrack a little ways to find one that could hold us all.


The recent additions to the Xterra in the back made this a very easy process, and as Gyula pointed out, step into the office. The lights were amazing for looking a the map at night. No matter where you stood or how many people were looking at this map, you just never got any shadows and made the job extremely easy.


on the west side that we were exploring, we couldnt find too many backcountry campsites, but there were a few campgrounds that are cheap and public.


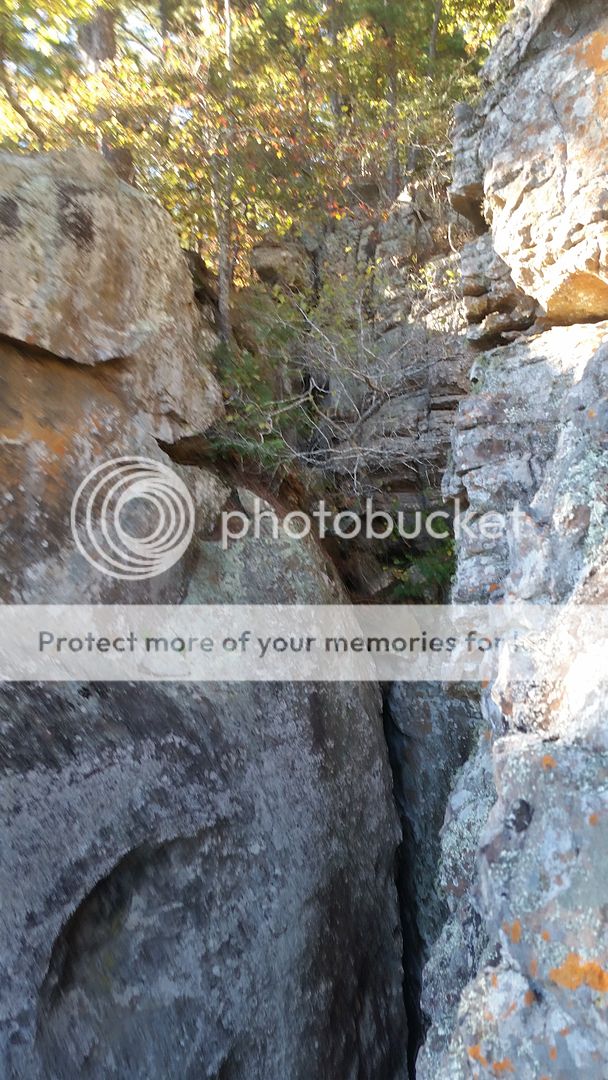
On saturday, we started heading more north west trying to find some trails. what trails were showing on the map and gps, we couldnt find them trailheads. The one that we did find, was WAY too overgrown to go through. Didnt want to risk vehicle damage blazing through. We wound up driving on the main roads mapping it out with the gps and tagging some points of interest. found a nice spot that we did a little bit of rock climbing, then found a neat little creek that we almost decided to call camp, but cody wanted to camp at a waterfall spot of the northeast side, about 30 mins away.


>


we called it a weekend for the most part and said our goodbye's to the group. On the way home, me and Tommy decided to go a scenic route home. This took us south in arkansas through the ouachita national forest, through mena, then through talhimena and clayton oklahoma. We stopped at a few overlooks and got some nice timelapse video of the roads. (sadly my phone was acting up and didnt want to save any pictures of the way back home :( )


this was a great end to the weekend!
 
Last edited:
  • Like
Reactions: SLO Rob

Overland-Indiana

Overland Bound - Midwest Regional Ambassador
Launch Member

Influencer II

3,316
Kokomo
Member #

0750

Nice rig man. Looks like you have done tons of work to it. I need to get on building a winch front bumper and some better skids myself.
 

TxTerra

Rank V
Founder 500
Launch Member

Influencer II

2,853
prosper, tx
Member #

#0335

Thanks!!

its been a very long process getting it this far, and its nowhere near completion (are they ever though?)

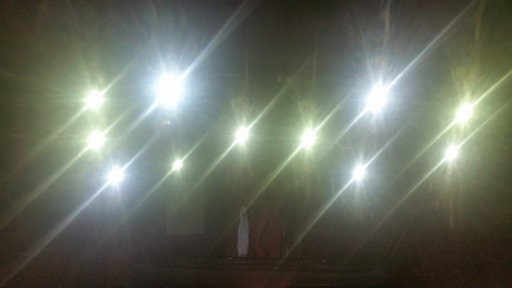
changes coming in the next 2 weeks are lighting upgrades for the roof with LED lights all the way around, wiring up front light bars, adding rock lights back in, securing base of storage with bolts through the body, and a switch panel on the ceiling for the light bars.

im competing in the overland challenge series this fall and have quite a bit of work to do to get it ready.
 

Overland-Indiana

Overland Bound - Midwest Regional Ambassador
Launch Member

Influencer II

3,316
Kokomo
Member #

0750

That Overland Challenge looks awesome!! Just read through their website, looks like a great challenge and a great time.