Telescopic Awning 1.0

  • HTML tutorial

CurrentlyRockhoundin

Rank IV
Launch Member

Enthusiast III

1,310
Spokane, WA
First Name
Jared
Last Name
Goguen
Member #

20084

A photo is worth a thousand words, so I a video is worth at least 1250 words.

So this is the first version of my telescopic awning and already I see changes and improvements I would like to make for the next one. Clearly welding vs hose clamps is going to happen but for testing this works fine.

The design considerations for my awning were as follows.
1. NO pvc pipe
2. Low profile
3. Affordable
4. Lightweight
5. Simple and sleek design
6. Replaceable tarp (sil, poly, or nylon) all work here
7. The ability to run a larger tarp simply by drilling one hole in the exterior tube.

I'm open to thoughts and constructive criticism since this is the first pancake.


Tvot84

Rank II
Launch Member

Enthusiast I

404
Topeka, KS, USA
First Name
Tony
Last Name
Votaw
Member #

22917

That's pretty awesome! I love the simple/cheap ingenuity in that. I don't have any thoughts or criticism as of right now, but if I think of some, I'll be sure to let you know!
 

persquank

Rank V
Launch Member

Enthusiast III

2,191
DFW
First Name
Randall
Last Name
Stephens
Member #

9377

This is a great idea. Get some collapsible poles for the corners or just tie it to a near by tree.
 
  • Like
Reactions: RSWiser

PapaDave

Local Expert Northern ID and North East WA
Member

Protector II

8,868
Coeur d'Alene, ID, USA
First Name
Dave
Last Name
Addington
Member #

10123

Ham/GMRS Callsign
KN6BKH
One additional design consideration for you is if you can nest one more smaller pole inside of your extending pole, then cut a square notch into the end of that middle size square tube, the smallest nesting pole can swing out on your locking pin as a hinge fitting snuggly into the middle tubes square notch at a right angle and give you hard sides to lash your tarp to. Make sense?
 

CurrentlyRockhoundin

Rank IV
Launch Member

Enthusiast III

1,310
Spokane, WA
First Name
Jared
Last Name
Goguen
Member #

20084

One additional design consideration for you is if you can nest one more smaller pole inside of your extending pole, then cut a square notch into the end of that middle size square tube, the smallest nesting pole can swing out on your locking pin as a hinge fitting snuggly into the middle tubes square notch at a right angle and give you hard sides to lash your tarp to. Make sense?
I like that idea.
 

max.grun

Rank V
Launch Member

Enthusiast III

1,807
Turlock, California
Member #

8118

Ham/GMRS Callsign
KM6YSE
A photo is worth a thousand words, so I a video is worth at least 1250 words.

So this is the first version of my telescopic awning and already I see changes and improvements I would like to make for the next one. Clearly welding vs hose clamps is going to happen but for testing this works fine.

The design considerations for my awning were as follows.
1. NO pvc pipe
2. Low profile
3. Affordable
4. Lightweight
5. Simple and sleek design
6. Replaceable tarp (sil, poly, or nylon) all work here
7. The ability to run a larger tarp simply by drilling one hole in the exterior tube.

I'm open to thoughts and constructive criticism since this is the first pancake.

I really like this. Maybe you can braze/solder the brackets to the pipes if a welder is not available? I'm not sure though.

If you don't mind i may use a similar idea to setup a tarp on my rig. I like the Slumberjack tarp but necessarily want to run it over the back of the rig like i see so many others do.
 

CurrentlyRockhoundin

Rank IV
Launch Member

Enthusiast III

1,310
Spokane, WA
First Name
Jared
Last Name
Goguen
Member #

20084

I really like this. Maybe you can braze/solder the brackets to the pipes if a welder is not available? I'm not sure though.

If you don't mind i may use a similar idea to setup a tarp on my rig. I like the Slumberjack tarp but necessarily want to run it over the back of the rig like i see so many others do.
I can weld aluminum, I just didn't for this first setup so I can take it apart and change thing around.

Do I would love to see some of photos of what you come up with when your done.
 
  • Like
Reactions: max.grun

Kardolf

Rank III
Launch Member

Enthusiast II

539
Washington
First Name
David
Last Name
Uthmann
Member #

12825

Ham/GMRS Callsign
KG7LZJ
How about cutting some kind of "finger notch" on the ends of the larger exterior tube, to make it easier to grab the inner extension? Or, setting it up so the inside sticks out by 1" when the retention pin is in place?
 

CurrentlyRockhoundin

Rank IV
Launch Member

Enthusiast III

1,310
Spokane, WA
First Name
Jared
Last Name
Goguen
Member #

20084

How about cutting some kind of "finger notch" on the ends of the larger exterior tube, to make it easier to grab the inner extension? Or, setting it up so the inside sticks out by 1" when the retention pin is in place?
I like that idea!
 

RusD

Rank III
Launch Member

Enthusiast III

646
Choctaw, Oklahoma, USA
First Name
Rusty
Last Name
D
Member #

24276

One additional design consideration for you is if you can nest one more smaller pole inside of your extending pole, then cut a square notch into the end of that middle size square tube, the smallest nesting pole can swing out on your locking pin as a hinge fitting snuggly into the middle tubes square notch at a right angle and give you hard sides to lash your tarp to. Make sense?
My ARB awning uses the side poles, but honestly I have wondered it they are really necessary. I highly recommend guying out the free end regardless of wind conditions; I've learned that lesson the hard way. With the tension in the guy lines and adjustable height legs, you don't have to have side supports.

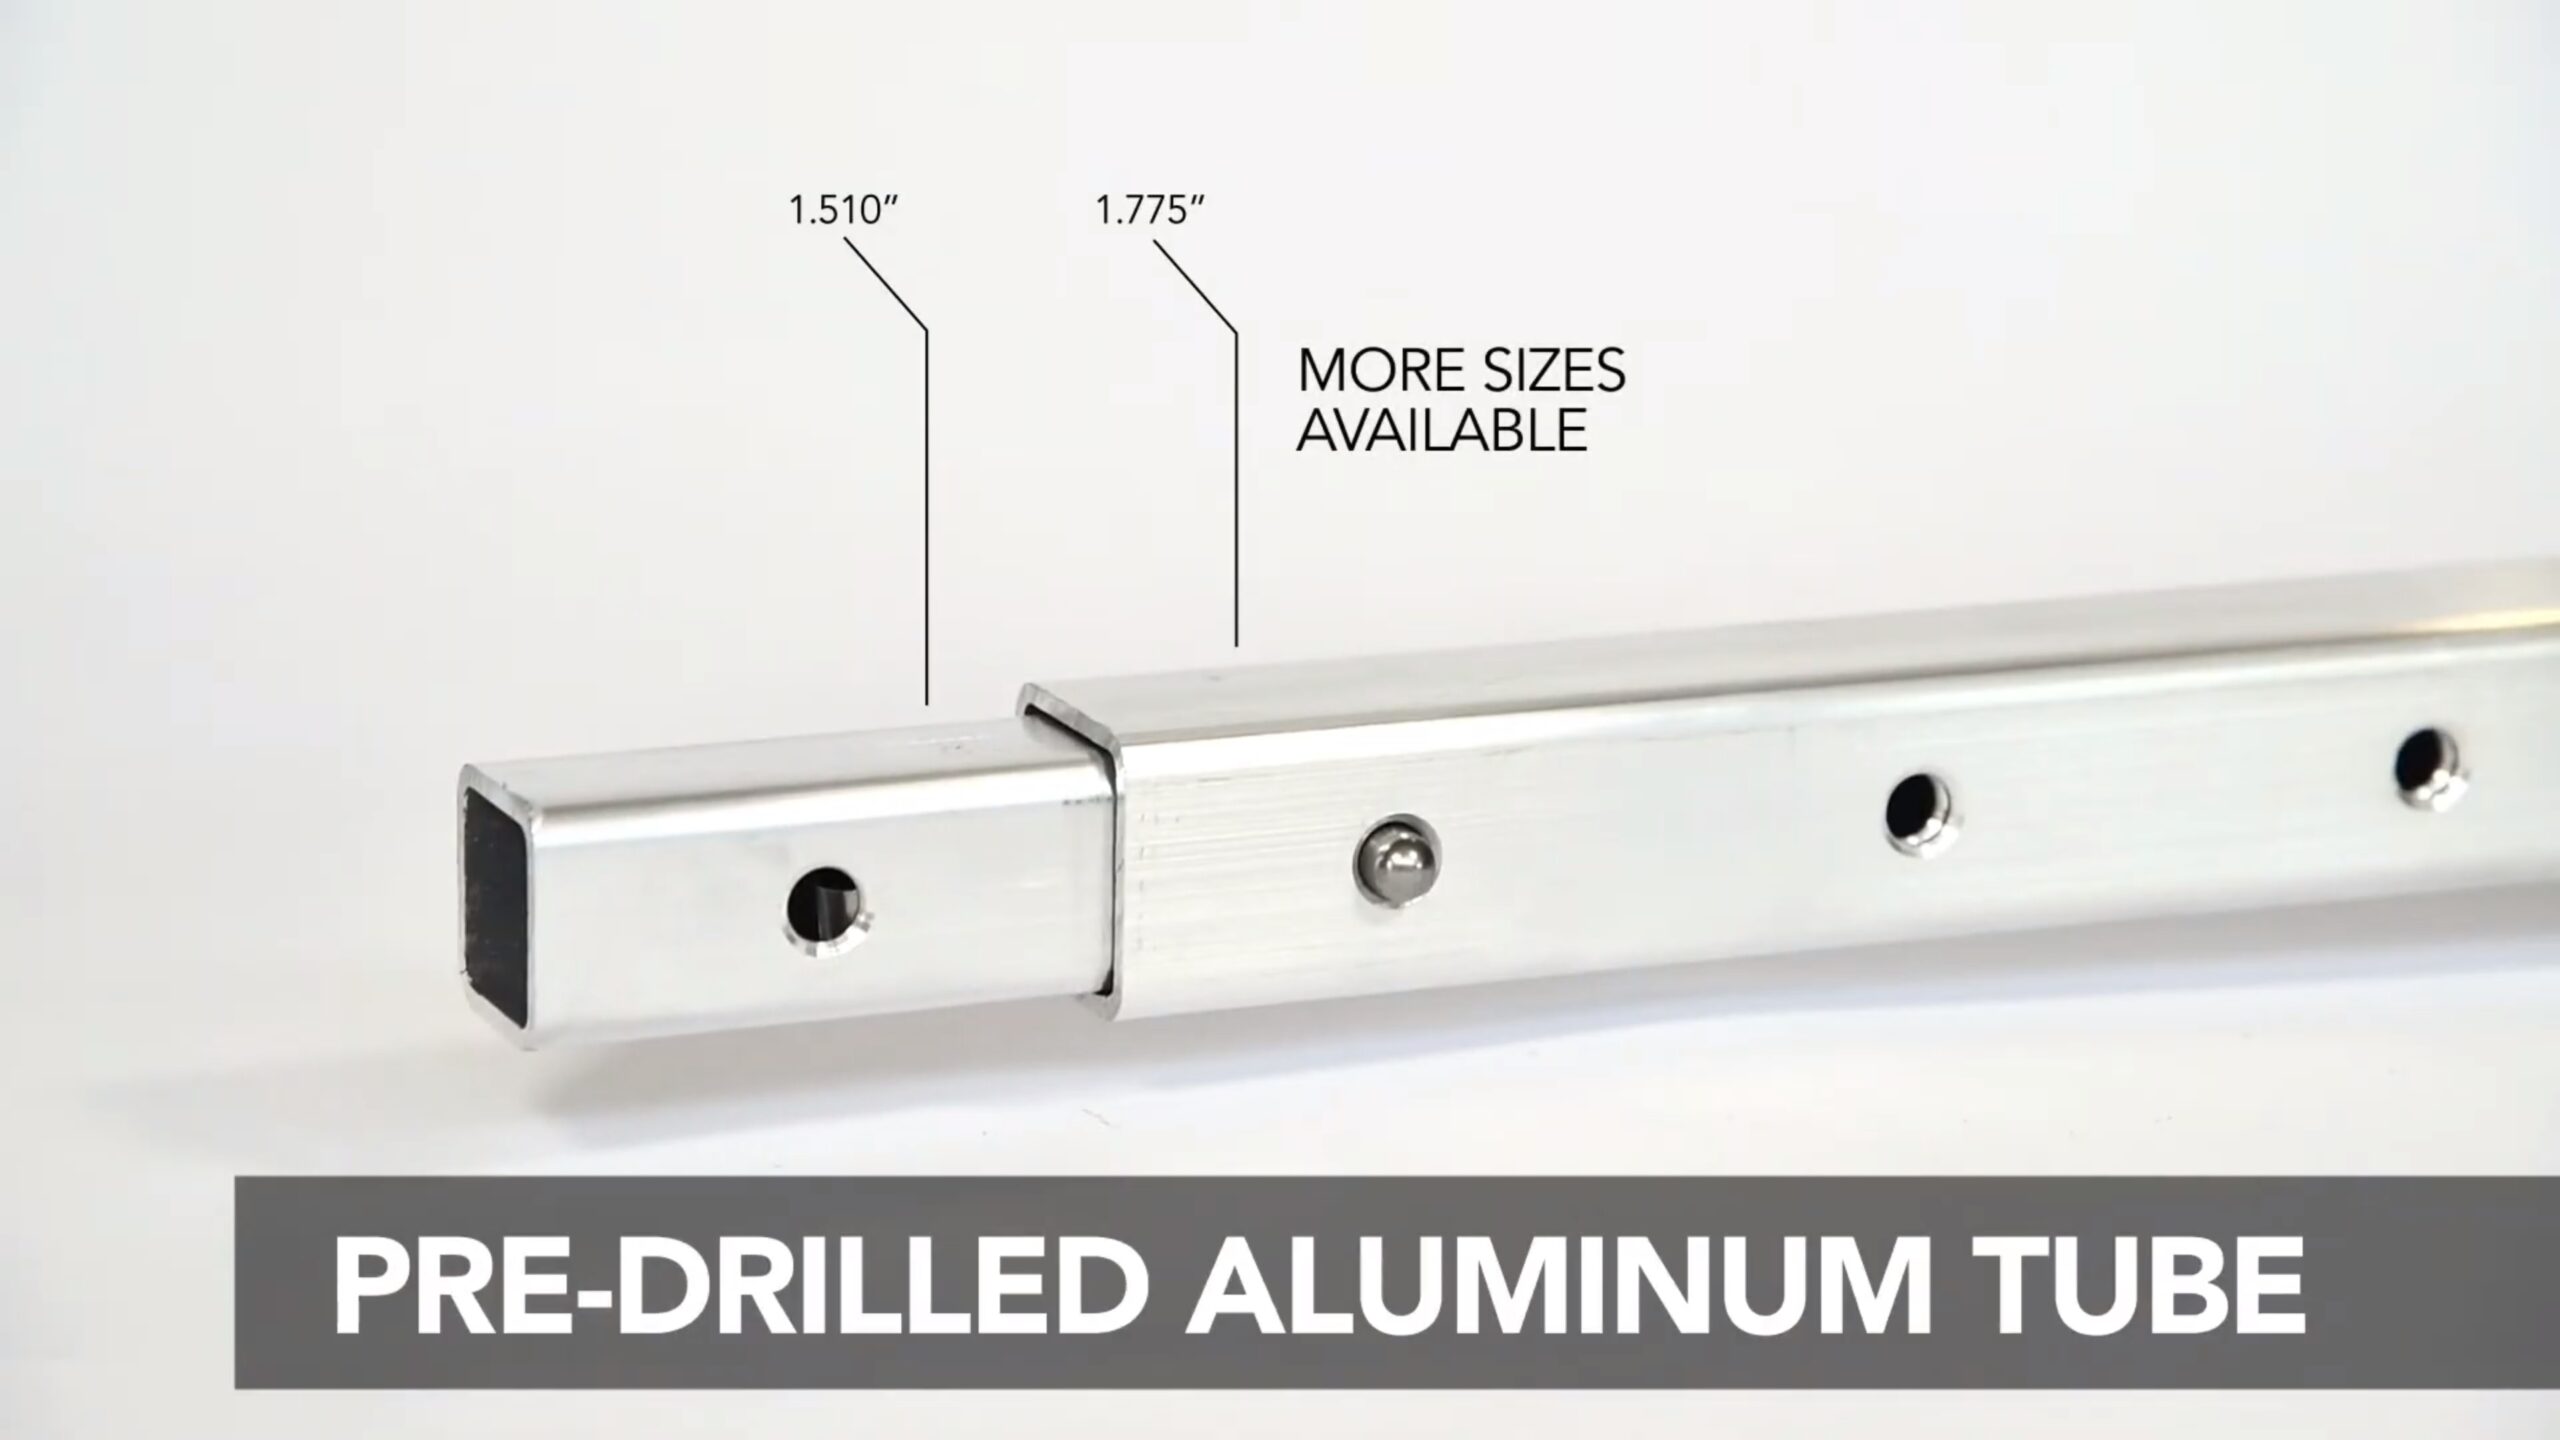
I like the design, its looking good. I would like to know where you got the aluminum that fits inside so snugly. Everything at my local stores fit too loosely when I was working on legs for my kitchen setup.
 

M Rose

Local Expert
Mod Team
Member

Advocate III

5,584
Northeast Oregon, United States
First Name
Michael
Last Name
Rose
Member #

20990

Ham/GMRS Callsign
W7FSB
Service Branch
US ARMY Retired
I like your awning Jared, for cheap side protection you could get some nylon backpacking tarps from Walmart. They are super compact and light weight...

I carry 4 of these to make awning shelters between my backpacking tents, and to make a lean-to against my rigC15E4808-0C8E-45DD-9A03-7F1CFE81FD8D.jpeg
 

Prerunner1982

Local Expert, Oklahoma USA
Launch Member
Member

Member III

3,372
Navina, Oklahoma
First Name
Jon
Last Name
B
Member #

16274

Well done. I like the telescoping mount.
I will be interested to see how it holds up.
I made a "Tactical Awning for Rain Protection"....aka T.A.R.P. :tearsofjoy: using 10' of conduit (9' wide tarp) and the end that sticks out over the hood has started to bend as it's been through a couple of storms and high wind events.
The conduit is 3 sections so I will likely do away with that last section and just angle that end of the tarp down, tied off to the front of the Jeep.
 

CurrentlyRockhoundin

Rank IV
Launch Member

Enthusiast III

1,310
Spokane, WA
First Name
Jared
Last Name
Goguen
Member #

20084

Well done. I like the telescoping mount.
I will be interested to see how it holds up.
I made a "Tactical Awning for Rain Protection"....aka T.A.R.P. :tearsofjoy: using 10' of conduit (9' wide tarp) and the end that sticks out over the hood has started to bend as it's been through a couple of storms and high wind events.
The conduit is 3 sections so I will likely do away with that last section and just angle that end of the tarp down, tied off to the front of the Jeep.
So far it has held up very well. There's really nothing at all to break on it and from what I can tell it's far more simple and robust then anything else I have seen on the market so I'll be making a fully welded one soon as well.
T6 Aluminum square tube with a .110 wall is really strong.
 
  • Like
Reactions: Prerunner1982