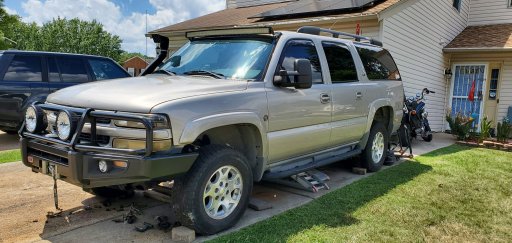
Suburban turned to Zombie Response Vehicle

  • HTML tutorial

Asuarez_673

Rank III
Launch Member

Enthusiast III

859
Virginia Beach, VA
First Name
Alexis
Last Name
Suarez
Member #

4389

Hello everyone, my name is Alex and I have a 2006 Chevy Suburban Z71 that I bought back in 2014 and planned on making it one of the most unique off road capable rigs to ever exist.

So I originally started posting about this build in Z71tahoe-suburban forum but as that forum has slowly died ill try and catch up as much as I can here. Currently it is a pretty mild build as I had a bit of a rough time when I originally planned to start building it. Well I'm currently deployed so I have been going crazy looking up parts and finally am in a good spot that I could afford them so here it goes.

I'll try my best with pictures, but please bear with me as internet on Navy ship is slow and sometimes difficult to work with, and I also have some pictures on my phone so I wont be able to download them until I pull into port.

It all started with a clean and lightly used 2006 Suburban with the Z71 package. I always loved the way they looked and have always been a fan of full size vehicles, so when I was stationed in Chicago, I found this one for a great deal. Honestly it was a bit too good to be true, but I knew that if it needed any work, I'd be able to fix it myself being that I had worked on cars for about 6 years and had built mutable engines as well as a factory 5 cobra. Well needless to say, the day I got it, it broke. I was maybe a mile away from home, I wanted to hit the speed bump kind of fast just for fun, and when I did, I heard a clunk and there went my transmission. I had no choice but to send it to a transmission shop, so it got a fresh rebuild.

Long story short, I eventually got orders to Virginia Beach, and so I moved. I saved up some cash and bought some off road tires, they were Nitto Terra Grappler G2s, put on some new brakes, and changed out the headlights. 14310437_1286735648005729_8410945089640018386_o.jpg
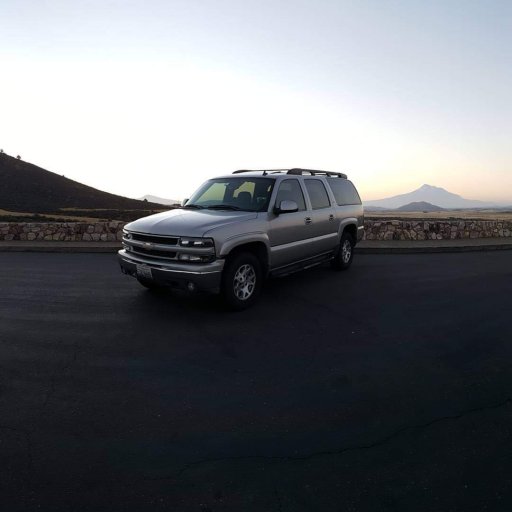
So this is what my base platform was and from this point on my burb had gotten a name. After multiple roadtrips and this vehicle never quitting on me it became known as Tank.

So here is the story with tank :)
 

Asuarez_673

Rank III
Launch Member

Enthusiast III

859
Virginia Beach, VA
First Name
Alexis
Last Name
Suarez
Member #

4389

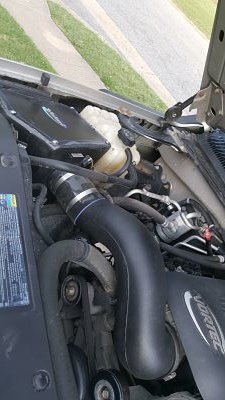
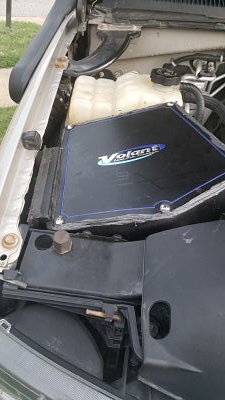
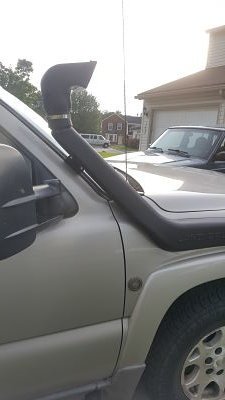
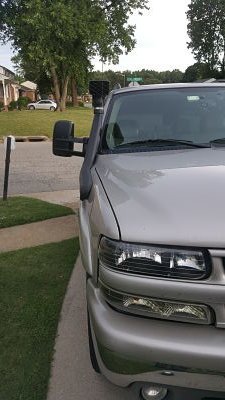
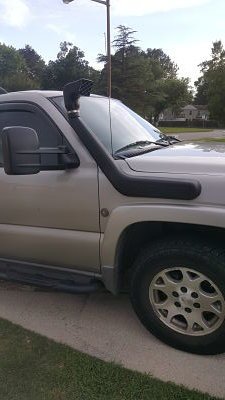
So for the first mod, I converted a 80 series Land Cruiser snorkel to fit the suburban. I started with this mod because I was driving home one day after being on duty and my street had flooded so bad that the water was to the top of my hood. I made it home safely, but that was a huge eye opener and since I wanted to do river crossings and all sorts of other off road adventures I figured what better mod than a snorkel. As most of you probably know, there is no one out there that makes a snorkel for a suburban, so I did some research and noticed that the 80 series a pillar and fender are pretty close to that of my burb so I bought a cheapo off brand snorkel from ebay for 120 dollars and worked with it to see if it would really work. Needless to say it worked flawlessly.

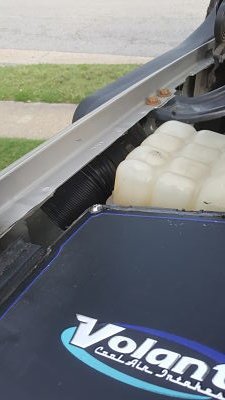
well now I needed to pair it with a air box. well the factory box isn't going to work too well, so again looked around and I looked at Volant. Reviews were great, and it had an opening on the fender side that I figured I could probably seal up. The bottom of the box had a circular connection that was made for a ram air, so I thought id use that to plug the snorkel up to it.

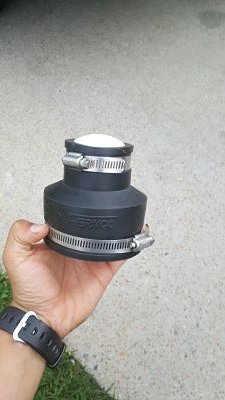
After multiple attempts at trying to get to the ram air connection, and talking with my tuner (black bear performance), they suggested I find a way to vent the box for whenever I wasn't in need for the snorkel, so instead of using the ram air connection, I decided to connect the snorkel to the side. I sealed the side using lexan, and ran the snorkel tube through it. For non-offroad related travel, I kept the bottom of the snorkel where the ram air connects open. I went to Home Depot and found a cap that I could use to seal the snorkel quick if I needed to seal it.

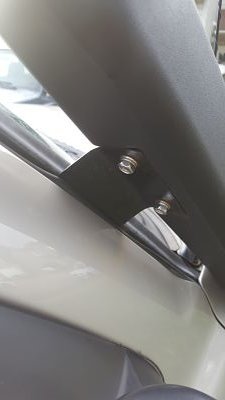
The Bracket to support the snorkel I made out of 3/16th steel sheet metal, and then I primered and painted it.

So far I haven't had any issues with the snorkel and as far as I know, everything works the way it should

20170619_190132_opt.jpg 20170619_190146_opt.jpg 20170619_190139_opt.jpg 20170619_190109_opt.jpg 20170619_190105_opt.jpg 20170619_190056_opt.jpg 20170619_190051_opt_2.jpg 20170619_190044_opt.jpg
 

Asuarez_673

Rank III
Launch Member

Enthusiast III

859
Virginia Beach, VA
First Name
Alexis
Last Name
Suarez
Member #

4389

With the engine being able to suck in much better, cleaner, fresher air, I needed to now help the engine flow its gases out better. It was now time to do exhaust.

I went long tube headers, to a corsa sport exhaust. Unfortunately I got a little too excited to install the exhaust that I didn't take any pictures of the exhaust, but then again its nothing really unique. Here's a link to what it sounds like though. Hopefully it works.

 
  • Like
Reactions: Cyclemoe

Asuarez_673

Rank III
Launch Member

Enthusiast III

859
Virginia Beach, VA
First Name
Alexis
Last Name
Suarez
Member #

4389

Well Im about to revive this thread as a lot has happened since i last posted. Not really surprised that no one is really following this thread, but if there is anyone out there interested, this is for you!

Alright so since the last time I posted here, life has happened and it has postponed a lot of my plans. So December of 2017, I went out for a drive and somehow my rear differential fill plug popped out, and by the time I noticed, it was too late. At that point, I truly didn't know what the damage was, but I put it on the back burner because I had other projects I needed to finish, plus at the time I was getting ready to deploy.

All deployment I saved up money, and waited till black friday deals to splurge, and let me tell you, I splurged more than I could of expected. I ordered, tires (BFGoodRich KM3), Lightforce HTX lights, Bilstein 5160 shocks, and a couple of other things that I really wanted for my Subie.

So I got back from deployment, and did everything that I could to start working on my project, but again life happens, and with my schedule, I wasn't able to start anything until recently when I started terminal.

As of right now, I purchased everything else that I needed to get my suburban back on the road. So I will post the rest of my purchases below as I show you what I have done.

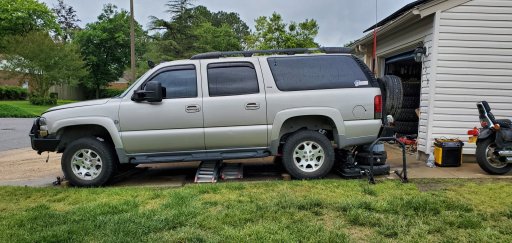
As far as the rear swing out bumper that I have in the picture I posted, I made it after mocking it up with some cardboard. It's made out of 3/16th diamond plated steel, that I got for free from a friend who was in school for welding. Between my mock ups, and his skills, we made this bumper. Its not perfect, but it does the job, and its real hard to find any aftermarket parts. I don't have any pictures of the build, but if anyone is interested, I can try and search for the pictures or at least point you in the right direction of what to do.

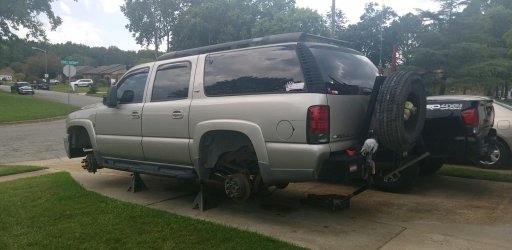
So this picture shows how it currently sat when I began tearing into it 2 months ago!32761.jpeg
 
Last edited:

Asuarez_673

Rank III
Launch Member

Enthusiast III

859
Virginia Beach, VA
First Name
Alexis
Last Name
Suarez
Member #

4389

So with work, I was never home, so I was able to do a lot of research on what I was going to do with the rear end. After months on reading how to make the 10 bolt stronger, I opted for a 14 bolt conversion. With GM, if you search around and find a Cadillac with RPO AXN, that came with a 14 bolt, 9.5 inch diff, that also has 6 lugs so that I didn't have to get adapters or different axles to keep my current pattern.

Being that the Caddy is also a GMT800, the differential should be a direct bolt on. Unfortunately, the caddys came with 3.73 gearing, while the Z71 burb came with 4.10 which meant once I found a decent rear, I'd have to get it rebuilt with the proper gearing.

So I got on car-part.com and starting hunting down the right rear for me, but at the same time I didn't want to spend a crazy amount of money on it because I still needed to rebuild it, and I was planning on putting an air locker in there. So after shooting emails out to the yards, I finally got a call from fenix parts, and they had the rear I wanted. It had come out of a 06 Escalade with AXN code, and the car only had 88k miles and was out of FL. Best part about the whole thing, was that I was able to steal the rear for 300 Shipped! Sadly they shipped it to Greensboro, NC which was still a good 4 hours away from me since I live in Virginia Beach.

So about 3 days after I told them I wanted it, it arrived at Greensboro, so I made the drive, and man this thing looked WAY better than I could of ever expected! 20190823_092522.jpg

So once I made it home, I began taking the good old 10 bolt out. So before I even start talking about the 10 bolt removal, lets talk about the troubleshooting for the damages when i ran the diff dry.

Right before I put the burb in the drive way, I tried backing up and all I heard was clunking. I was unsure if the transmission was blown, but all I knew was that the only way to move the truck was in 4WD. With putting the truck from the street to the driveway, I had to make a turn, so the front diff will need a rebuild as well, especially after I could feel it binding while I parked the truck.

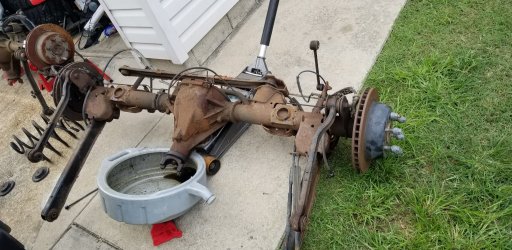
Anyways, pulling the 10 bolt was actually fairly easy! Undo the sway bars, unplug the wheel sensors, get rid of the rusty shocks, unbolt and remove the driveshaft, undo the ebrake and the brake lines, then undo the control arms and panhard, and finally when you drop the rear, take the coil springs out and the whole thing should slide out. Once I had the rear out I started to see really how rusted and just corroded the whole rear was, and that's when I noticed the yoke on the rear had a lot of play, so hopefully the transmission is still good! The oil pan was placed in front of the yoke because when I dropped the rear, it started pouring out the rest of fluid that was in it through the yoke.
20190825_143818.jpg
 
  • Like
Reactions: Stoked

Asuarez_673

Rank III
Launch Member

Enthusiast III

859
Virginia Beach, VA
First Name
Alexis
Last Name
Suarez
Member #

4389

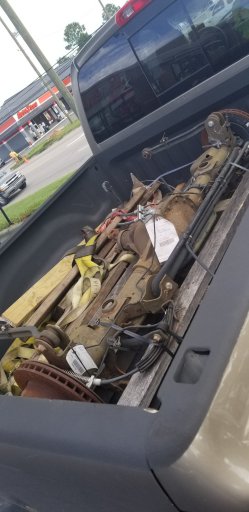
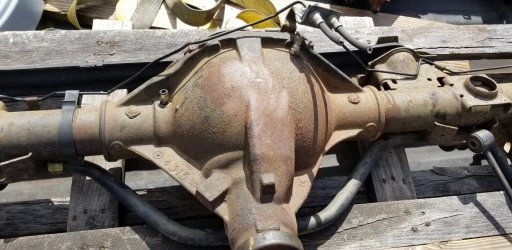
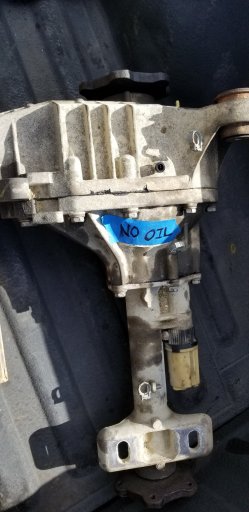
So after pulling the front differential out, I loaded it into the back of my truck along with the 14 bolt I had just picked up, threw the Arb air locker for the rear that I had just bought into the truck, and headed to Bealeton, VA to Full Awn Fab. There I met Brandon the owner and told him that I wanted the rear to get rebuilt with the air locker, and I needed the front rebuilt as well. I also had the Arb breather kit with me and needed the fittings installed in both the front and rear. So we unloaded the parts and told me he'd give me a call.

3 days later, I get a call from Brandon, telling me that my stuff was ready to go, so i made the 3 hour trip back north to grab the gear. When I got there, he told me that the rear end looked perfect! That everyone that worked at his shop or came by were super jealous of how clean and perfect the 14 really was. The front diff on the other hand, the carrier bearings looked like someone had shot them with a shotgun, so I'm real glad I got both of them built. Both the Front and Rear are set to 4.10 gearing. So we loaded both of them in the truck, and I headed back home! While I was at Full Awn Fab, Brandon got me a super good deal on some Raceline Beadlock wheels, so I also placed that order with him as well.

20191005_124526.jpg20191005_124532.jpg
 
  • Like
Reactions: Stoked and MazeVX

Asuarez_673

Rank III
Launch Member

Enthusiast III

859
Virginia Beach, VA
First Name
Alexis
Last Name
Suarez
Member #

4389

Once I got home, I unloaded the differentials, and I began to prep everything to go back in. I looked at the rear control arms, and they looked really rough from all the rust, so I went online and did some research on if there was something else that i could use. My goal when I started doing the build was so that I could take the burb out on trails that a regular suburban, or even any other vehicle could only dream of, unless they were built for the extreme.

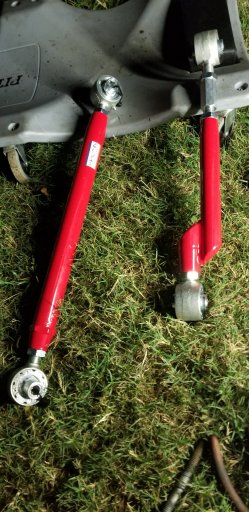
After a day or 2 of doing some online searches, and getting the frame sanded and painted with undercoating, I came upon a company called Spohn Performance. They basically make a kit that replaces factory upper and lower control arms and the pan hard, and everything is adjustable and rebuildable. Its designed for off road and provides 28 degrees of articulation. This was exactly what I needed.
20191005_201210.jpg

The nice thing about these control arms and panhard is that they're are adjustable so with bigger tires you can adjust your driveshaft angle and not worry about having the wrong angle. They're also really hefty and are not rusted like my factory stuff!

So before putting the rear differential in, I decided to take my sway bars off. I still kept them just in case once I get the burb rolling and i don't like how it feels I can put them back on, but from a lot of reading on forums, most people said that they couldn't even tell that they didn't have them on. Plus the burb isn't really going to be a daily, so sway wasn't really a concern for me, but if i see any issues while driving, I plan on making a sway bar quick disconnect for it so that right before I hit a trail, I can undo it and get my articulation back.

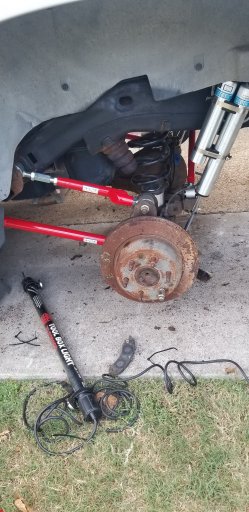
The install was fairly straightforward. I ordered a 2 inch spacer for the coil spring so that I can level the truck. I went to my local parts store and ordered 4 new coil spring isolators. The spacer goes on the bottom, and then the coil goes right on top of it. Everything else is fairly easy. With the Spohn kit, you need to make sure you put the correct one for the upper control arm as those have a bend in them that correlates to the factory bend. After having everything in, the shocks went in and the install was complete.
20191006_163223.jpg
 

Asuarez_673

Rank III
Launch Member

Enthusiast III

859
Virginia Beach, VA
First Name
Alexis
Last Name
Suarez
Member #

4389

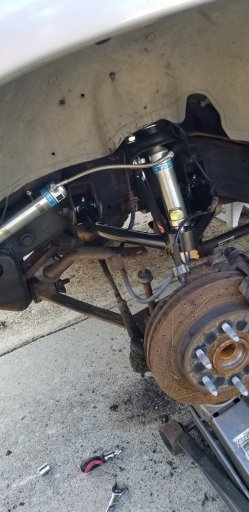
Well once the rear went in, I needed to upgrade the front. For that I went with Cognito Upper Control Arms, Bilstein 5160, Suspension Maxx Torsion Keys, and Kryptonite HD Tie Rods.

In order to put the Cognito control arms in, it requires you to drill the hole just a little bigger. After doing that, the control arm slid right in. After putting the arms in, I had to get the limiting straps measure and then drilled out to fit the clamp that holds the straps. You need to be careful to not drill the hole too close to the shock so that it doesn't interfere. Once the strap goes in, you begin adjusting until you are 1/4 inch from the upper control arm hitting a frame stop. The shock reservoir goes on before the control arms, and I mounted it using 1/4 inch self tapping screws.
20191002_165136.jpg

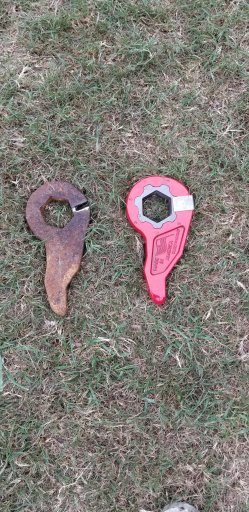
Removing the torsion bars was some what of a nightmare. The bars I'm assuming were factory and have never even been touched. It took me almost an hour just to get one side. I looked online to see what people did, and all videos show people cutting the crossmember, and that was something I didn't want to do. One person said he drilled the keys, and took the piece out. I decided to make it a mixture of drilling the holes and hammering the crap out of it. So after drilling holes in a row, I got my air hammer, and a flat tip chisel, and went to it until it cracked. Once the key had a slit in it, I went from behind the crossmember, and swapped the tip to a pointed chisel, and hammered and the torsion bar went and the key fell out. The passenger side on the other hand didn't want to give, and in the process of doing what I had just done, my air hammer broke. Went to my local parts store and got this spray called freeze out. Basically freezes whatever you're trying to break free, and it will penetrate the rust deep. So I let it sit for about 5 min, and started hammering at the torsion bar and BAM there it went. Here is the picture of the Suspension MAXX keys, and the other one is my factory one. You can see the slit that I made to get the keys to come off.
20191013_142127.jpg
 
  • Like
Reactions: ZRex

Asuarez_673

Rank III
Launch Member

Enthusiast III

859
Virginia Beach, VA
First Name
Alexis
Last Name
Suarez
Member #

4389

As of right now, I'm currently waiting for some parts to come in. While I was taking the torsion bars out, I noticed that the crossmember bushing had dry rotted and had a lot of play, so I went to the dealer and got some new ones. With the burb being 13 years old, the dealer didn't have any in stock so in the next few days I should be able to swap out the bushings and finally get the keys and torsion bars back in, and get the truck leveled. So for now I will tease what comes next and hopefully get more people subscribed.

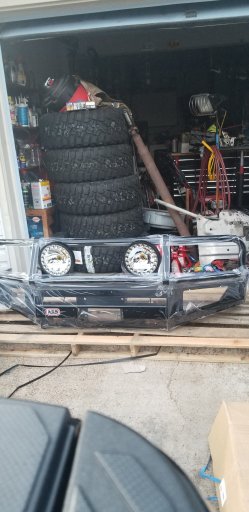
I really wanted a winch bumper, looked all over and finally came up that ARB really was the best. Unfortunately, ARB doesn't make a bumper for the Suburban that has fog lights. The one that they sell is kind of ugly in my opinion, so while I was on another forum, I read about a guy who swapped a 100 series Land Cruiser one onto his Tahoe, so I figured I'd attempt the task. Worst case i have a bumper that is cut up and completely useless.

So here is the teaser. The day I got my bumper and test fitted my Lightforce HTX lights on it. You can also see my KM3s just waiting to get put on.
20190927_184935.jpg
 

Dahoe

Rank III
Launch Member

Enthusiast III

646
North Alabama
First Name
Morgan
Last Name
Doster
Member #

21807

As of right now, I'm currently waiting for some parts to come in. While I was taking the torsion bars out, I noticed that the crossmember bushing had dry rotted and had a lot of play, so I went to the dealer and got some new ones. With the burb being 13 years old, the dealer didn't have any in stock so in the next few days I should be able to swap out the bushings and finally get the keys and torsion bars back in, and get the truck leveled. So for now I will tease what comes next and hopefully get more people subscribed.

I really wanted a winch bumper, looked all over and finally came up that ARB really was the best. Unfortunately, ARB doesn't make a bumper for the Suburban that has fog lights. The one that they sell is kind of ugly in my opinion, so while I was on another forum, I read about a guy who swapped a 100 series Land Cruiser one onto his Tahoe, so I figured I'd attempt the task. Worst case i have a bumper that is cut up and completely useless.

So here is the teaser. The day I got my bumper and test fitted my Lightforce HTX lights on it. You can also see my KM3s just waiting to get put on.
View attachment 121911
Found the same bumper online for $800 but was bummed when I found out I would have to get a different winch... pfft..
 

LTG515

Rank 0

Contributor I

60
San Diego, CA
First Name
Lane
Last Name
Gregg
Dang, this is tight! Definitely doing it the right way. I’ve got an 04 Tahoe Z71 and am looking to get the Bilstein 5160s as well. The Cognito UCA set up is ideal for sure. How much did all that run you? I too would like my Tahoe to be bulletproof but I gotta balance the line between bulletproof and affordable mods haha.
 

Asuarez_673

Rank III
Launch Member

Enthusiast III

859
Virginia Beach, VA
First Name
Alexis
Last Name
Suarez
Member #

4389

Well hello again everyone, sorry I have been offline for a while. Last time I posted, I was in the process of transitioning out of the US Navy, and with over 60 days of terminal, I had A LOT of time on my hands. In the middle of the whole transition, I was also going through Police testing as I really wanted to go into Law Enforcement. After completing the whole interview process and then sitting down with the Chiefs of Police for the job acceptance, I began to realize Law Enforcement wasn't what I thought it was going to be, and decided I wanted to expand on a small business I had started while I was Active Duty, which was hauling cars. That in itself took a lot of time, and just getting my business started took a lot of time. Then of course COVID hit and that made things rough for a bit, but just meant I had to work twice as hard to make the losses back up. I promise ill do my best to keep up with updates and questions as much as possible. Getting some pictures uploaded and ill be adding some updates here in a few! Stay Tuned!
 

Asuarez_673

Rank III
Launch Member

Enthusiast III

859
Virginia Beach, VA
First Name
Alexis
Last Name
Suarez
Member #

4389

Dang, this is tight! Definitely doing it the right way. I’ve got an 04 Tahoe Z71 and am looking to get the Bilstein 5160s as well. The Cognito UCA set up is ideal for sure. How much did all that run you? I too would like my Tahoe to be bulletproof but I gotta balance the line between bulletproof and affordable mods haha.
I don't remember its been so long. I think it was somewhere near 700ish. Definitely worth the money, and after being at a few expos, seeing people who went cheap on their builds really made me think twice about what I put on. I do a lot of research on stuff and also try and use up and coming companies as I know their quality is usually top notch as they're competing with all the big companies to make it.
 

Asuarez_673

Rank III
Launch Member

Enthusiast III

859
Virginia Beach, VA
First Name
Alexis
Last Name
Suarez
Member #

4389

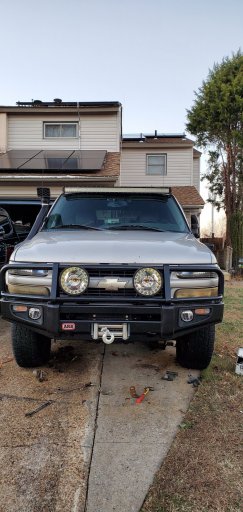
So for the ARB bumper. I hate that I didn't take any pictures, I can search deep into my files if anyone needs me to, but the Chevy brackets and LandCruiser (LC) bumper don't line up. Test fitting the bumper will show you what you need to cut in order to make the bumper and the brackets line up. its roughly 2ish inches on the front side of the bracket and then about an inch on the top side. Once the cuts are made, you should be able to line up the bumper to all the holes on the bracket, and whatever isn't aligned, if its close, just take a file to it because the last thing you need to do is over cut it.

As far as fitment goes, its honestly super close. Since this bumper isn't made for the Burb, it took a lot of bolting on and taking off to get it just right. Unfortunately, the bumper wing (sides of the bumper) and the headlight hoops don't fit. I got in touch with a fab shop that has a tube bender and the plan is to cut the hoop and make our own hoop so that the headlights can clear. Its not that you can't see anything with the headlights, but the tube runs practically down the middle of the light and personally, I'm really big on good lighting so I wanted to make sure, I could see as far down the road as possible. The wings on the bumper are going to be cut and capped so that it matches the fender line. Hoping to do this here soon once I get the brake lines swapped out and put my new steering in.

20191215_164701.jpg20200528_113640.jpg20200727_141911.jpg