Saving a 2001 Land Rover Discovery

  • HTML tutorial

KyleGrant

Rank IV
Launch Member

Enthusiast III

981
Wichita, KS
First Name
Kyle
Last Name
Soldani
Member #

2565

Ham/GMRS Callsign
KSØTOR
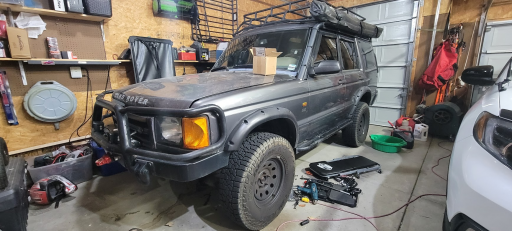
For some time I've craved having a more purpose built vehicle, I started with a Sierra years back before I knew about OB and kinda did my own thing. Came across this, got a lot of ideas but also learned that platform didn't have a lot of aftermarket support nor did I have a real good wheelbase/size for some of the areas I want to explore. I've since gotten much more into two-wheel exploration and run a BMW F800GSA but still had a hankering for the primary vehicle to be purpose-built. Enter, the '01 Land Rover Discovery. She isn't named yet. She's been a bit neglected but it's time to restore her back to her former glory. I picked this up for $7k w/ 150k on the odo, little rust, perhaps a bit high but considering the additions it was less work I needed to pump into it with aftermarket parts at retail value and my focus pivoted to maintenance/restoration efforts.
1674313720147.png

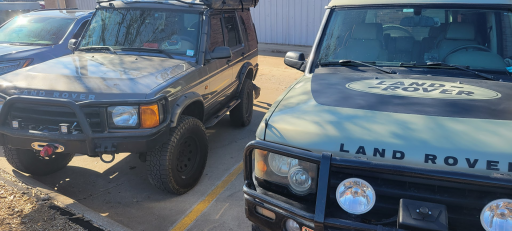
Now to the goods. Mine is on the left, and a buddy of mine (Ron) is on the right. He's been an LR aficionado for years, they've owned them since new in '99 and currently own two. He's been my go-to for local support and ran with me to Oklahoma (pictured here) to pick this one up. A true gent of the Overland community here in Kansas and has assisted me with tons of knowledge and hands-on work thus far.

At time of purchase, it came to me with...
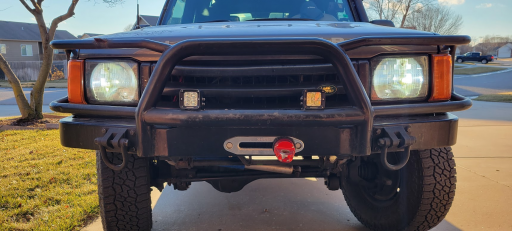
  1. Steel front bumper w/ factory brush-guard/headlight guards welded - looks alright from a distance and is plenty functional, some blemishes up close that I'll resolve later
  2. Sylvania LED cube lights
  3. X-Bull 13k winch w/ synthetic rope
  4. 3" Terrafirma Lift front/rear
  5. Terrafirma fender flares
  6. Rock sliders
  7. Steelie wheels
  8. Falken Wildpeak A/Ts, 75% tread remains
  9. 270 Batwing awning
  10. Safety Devices Disco2 roof rack (evidently these are spendy, nice it came with)
  11. Rear steel bumper
  12. Hi-lift jack
  13. Aftermarket head-unit w/ Bluetooth and reverse cam input (older, but works)
  14. DIY PVC Snorkel that's been disconnected at the airbox
Now into what she needs. This is my 'live' list as I work through; discovering issues, resolving, etc. Everything is prioritized from 1 (driveability) down to a 4 (not a priority, cool to have items). Items completed thus far are in green at the bottom.


I've owned it for a little over a week so there's still much to do, focusing on tackling drivetrain issues and catching maintenance back up. I'll update here with the progress thus far.
 
Last edited:

KyleGrant

Rank IV
Launch Member

Enthusiast III

981
Wichita, KS
First Name
Kyle
Last Name
Soldani
Member #

2565

Ham/GMRS Callsign
KSØTOR
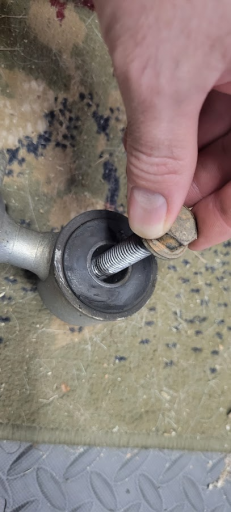
One of the first issues noted on the drive home was noise in the rear suspension. Found the shock bushings to be oversized for the bolts causing slop in the rear end. We were able to press in some metal stock to take up the added space.

1674337856391.png

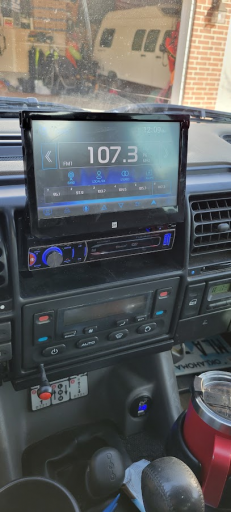
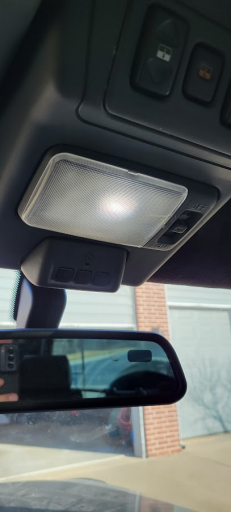
OBD, radio and interior lights were inoperable. Located a blown fuse which was likely caused by shoddy butt connections on the radio power. Repaired those connections, new fuse resulted in some tunes and the ability to truly understand where we stood on the drivetrain.

1674337915363.png 1674337927118.png 1674337943599.png

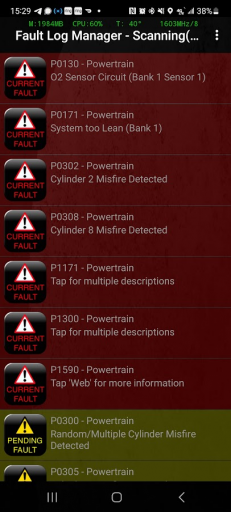
With quite the laundry list via OBD, I noted these and reset the ECM. My current consistent fault is the bank 1 sensor 1 O2 sensor (upstream driver side). New BOSCH replacements have been ordered and will hopefully be swapped in the coming week. I've been leaving the Rover parked as much as possible due to the rich condition it's currently running in.

Front main seal was leaking terribly and was known at purchase. According to my buddy, this was an easy service he'd completed four (now five...) times. We took the opportunity to replace my belt tensioner, all three idlers and get a new belt in place. In doing so my already struggling power steering pump bearing gave way to the new (proper) tension of the belt. So, add a new power steering pump to the laundry list.

I suffer from the dreaded 'Three Amigos' ABS lights; affecting ABS, downhill descent and TSC. Rovers are so well known for this the three lights have been dubbed, the Three Amigos. Ron has a scanner able to interface with my ABS and we found seven active codes ranging from wheel sensors, non-communication with ECM and a potential pump/flutter valve issue. Not critical to my daily driving at the moment but this will be heavily investigated and resolved as temperature/time allow.

1674338608360.png
Oil flush and change was completed this week. Due to the rich condition the oil was in poor shape. I had some 10w30 I'd had for years sitting around, took the opportunity to drain, fill up with 10w30, let idle for half an hour, flush, and we're now running on Rotella Triple T 15w40 w/ ZDDP - hopefully a better balance long term to keep the cam/lifters in better shape than the synthetic it was running on.

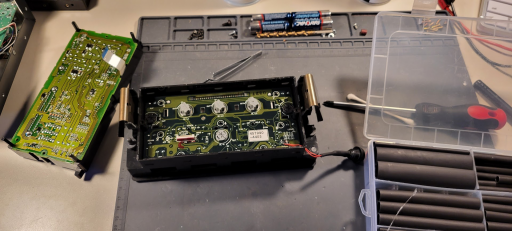
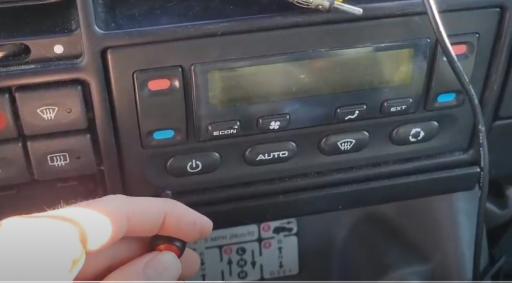
During a cold snap here my factory HVAC on/off button was giving me fits. For a quick fix late at night I fashioned up this fancy resolution. It'll do for now, but a new HVAC controller will be in the works for future. The contact pads of the existing button are simply worn out.

1674338677778.png
1674338742671.png

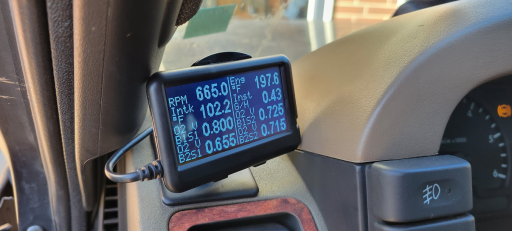
From an electrical standpoint, I began working on my Yaesu FTM400 installation and was able to mount the OBD monitor - an UltraGauge. I plan to embark on POTA/SOTA HAM events with the Rover and am still working on my ideas for HF operation, but those will come with time.

About it for the time being! On the chopping block this coming week is the power steering pump, driver O2 sensors and ordering the passenger side to complete that service.
 

Troy Laffey

Rank III
Member

Enthusiast II

509
Colorado Springs, CO, USA
First Name
Troy
Last Name
Laffey
Member #

30413

2001 is one of the best years for D2, well done. Easy fix for the cruise control is to check the rear center tail light. If it's out the cruise control will not engage.
 

KyleGrant

Rank IV
Launch Member

Enthusiast III

981
Wichita, KS
First Name
Kyle
Last Name
Soldani
Member #

2565

Ham/GMRS Callsign
KSØTOR
2001 is one of the best years for D2, well done. Easy fix for the cruise control is to check the rear center tail light. If it's out the cruise control will not engage.
I'll be darn... that's a good tip. Never would've thought. In my case the vacuum circuit running the diaphragm is missing. I'll study the service manual to see where this needs to ultimately end up. We tested the diaphragm the other day while under the hood, seems to hold good suction so hopefully, all I need is a vacuum source. There's a few oddities similar to the cruise issue; windshield washer/headlight washer system is pretty well missing entirely, throttle body coolant loop is disconnected, some dingleberry spray painted a lot of the interior pieces so I'll be on the hunt for a wrecked D2 - though some of it isn't' terrible; overall a pretty significant list to tackle.

Wednesday this week will hopefully be O2 sensors and PSP.
 
  • Like
Reactions: El-Dracho
El-Dracho

Ambassador, Europe
Moderator
Member
Supporter
Investor

Off-Road Ranger III

13,288
Lampertheim, Germany
First Name
Bjoern
Last Name
Eldracher
Member #

20111

Ham/GMRS Callsign
DO3BE
For some time I've craved having a more purpose built vehicle, I started with a Sierra years back before I knew about OB and kinda did my own thing. Came across this, got a lot of ideas but also learned that platform didn't have a lot of aftermarket support nor did I have a real good wheelbase/size for some of the areas I want to explore. I've since gotten much more into two-wheel exploration and run a BMW F800GSA but still had a hankering for the primary vehicle to be purpose-built. Enter, the '01 Land Rover Discovery. She isn't named yet. She's been a bit neglected but it's time to restore her back to her former glory. I picked this up for $7k w/ 150k on the odo, little rust, perhaps a bit high but considering the additions it was less work I needed to pump into it with aftermarket parts at retail value and my focus pivoted to maintenance/restoration efforts.

View attachment 248772

Now to the goods. Mine is on the left, and a buddy of mine (Ron) is on the right. He's been an LR aficionado for years, they've owned them since new in '99 and currently own two. He's been my go-to for local support and ran with me to Oklahoma (pictured here) to pick this one up. A true gent of the Overland community here in Kansas and has assisted me with tons of knowledge and hands-on work thus far.

At time of purchase, it came to me with...
  1. Steel front bumper w/ factory brush-guard/headlight guards welded - looks alright from a distance and is plenty functional, some blemishes up close that I'll resolve later
  2. Sylvania LED cube lights
  3. X-Bull 13k winch w/ synthetic rope
  4. 3" Terrafirma Lift front/rear
  5. Terrafirma fender flares
  6. Rock sliders
  7. Steelie wheels
  8. Wildpeak 10-ply's, 75% tread remains
  9. 270 Batwing awning
  10. Safety Devices Disco2 roof rack (evidently these are spendy, nice it came with)
  11. Rear steel bumper
  12. Hi-lift jack
  13. Aftermarket head-unit w/ bluetooth and reverse cam input (older, but works)
Now into what she needs. This is my 'live' list as I work through; discovering issues, resolving, etc. Everything is prioritized from 1 (driveability) down to a 4 (not a priority, cool to have items). Items completed thus far are in green at the bottom.


I've owned it for a little over a week so there's still much to do, focusing on tackling drivetrain issues and catching maintenance back up. I'll update here with the progress thus far.
These D2 are awesome rigs. I really like them. Is yours a diesel or gas engine?

Your approach with the to do and priority list is great - it looks like a very professional and stringent approach. Such a list is very helpful, you can track all identified issues properly. Have fun with this awesome project. Thanks for sharing.
 

KyleGrant

Rank IV
Launch Member

Enthusiast III

981
Wichita, KS
First Name
Kyle
Last Name
Soldani
Member #

2565

Ham/GMRS Callsign
KSØTOR
These D2 are awesome rigs. I really like them. Is yours a diesel or gas engine?

Your approach with the to do and priority list is great - it looks like a very professional and stringent approach. Such a list is very helpful, you can track all identified issues properly. Have fun with this awesome project. Thanks for sharing.
I've come to take quite a liking to it, I love the footprint and overall size - it's kind of akin to a Wrangler off-road with the added creature comforts of a luxury SUV. I think I'll really enjoy the smaller wheelbase, properly built suspension, frame - just seems like it'll be a great platform going forward. This is the 4.0 gas, sure wish it was a diesel! Maybe that will be a later-in-life upgrade when this engine has completed its tour.

Ah, thank you. I had been generating 'brain dump' lists in my notebook for a while and needed a centralized place to track and prioritize purchases. Little by little it will get closer to an OEM condition and former glory.
 
  • Like
Reactions: El-Dracho

KyleGrant

Rank IV
Launch Member

Enthusiast III

981
Wichita, KS
First Name
Kyle
Last Name
Soldani
Member #

2565

Ham/GMRS Callsign
KSØTOR
Another day well within the confines of maintenance catch-up, one of these days we'll get to the 'build'. Though, progress nonetheless!

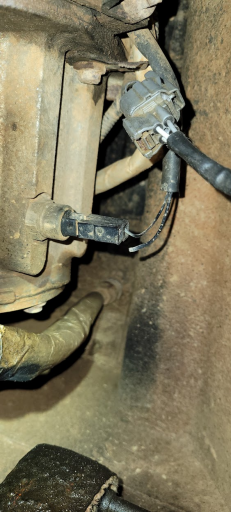
I continued my saga of working on removing O2 sensors. In the process, I noted this connector with a wire badly corroded and broken. Appears to be the transmission temperature sensor perhaps, but I need to verify. Add that to the list.
1674528213338.png

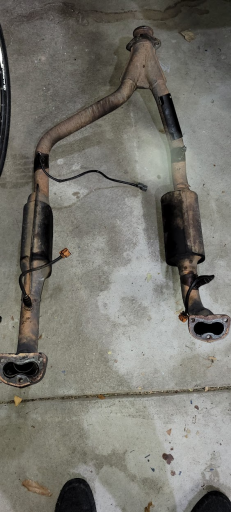
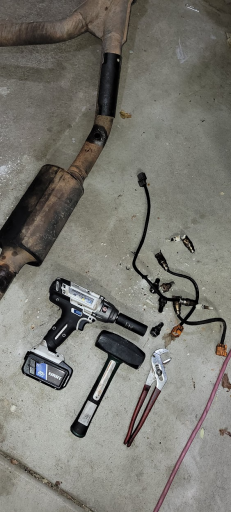
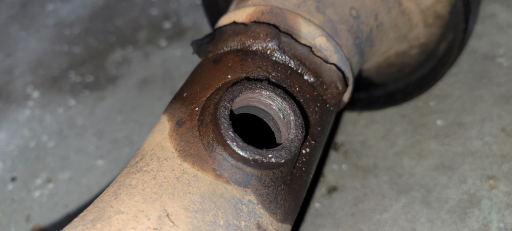
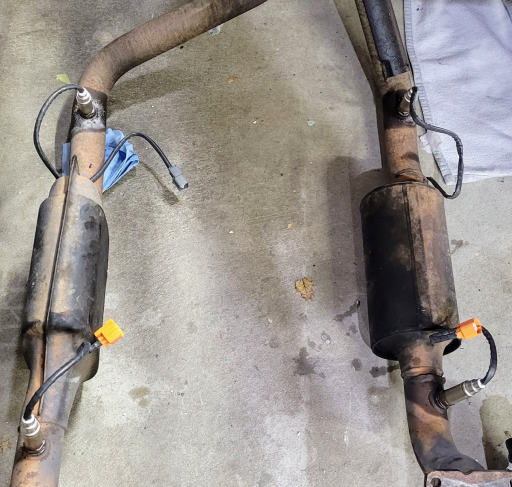
Today marked the second evening I'd spent nearly an hour messing around with the O2 sensors. Trying various tools, different angles, heat, penetrating lubricant - to no avail. I finally thought I'd see how difficult it might be to remove the CATs and pipe assembly. Turns out, with the tools I have on hand - quite a bit easier than what I'd been trying to do. So, massive extensions and my impact in-hand, CATs were removed in about 10 minutes versus my prior time investment and frustration with O2 sensors in their positions. I then engaged my 4lb. tool of frustration on breaking the O2 sensors so as to access with an impact socket and whallah, all four removed quite easily with MUCH less time. If I'd only done this from the start the whole ordeal would've taken half an hour and one evening. Oh well, now I know for next time. The only casualty here was a slightly marred threadset on the driver upstream side, a quick clean with a tap will handle that. I also approached this project with the mindset to prioritize and replace what immediately needed something; IE the B1S1 sensor. However, not knowing the run-time and mileage on these sensors, easy access, an effort to improve efficiency, etc. I'm taking this opportunity to handle all four with another RockAuto order. An ounce of prevention now... as they say.
1674528326120.png 1674528338898.png 1674528511673.png

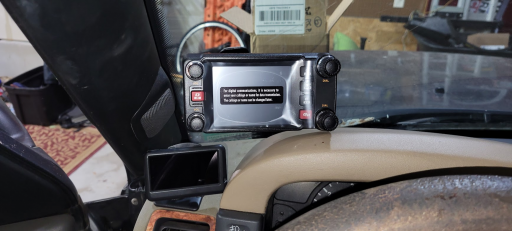
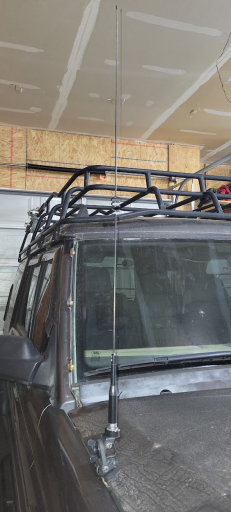
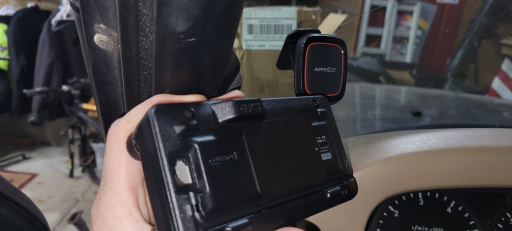
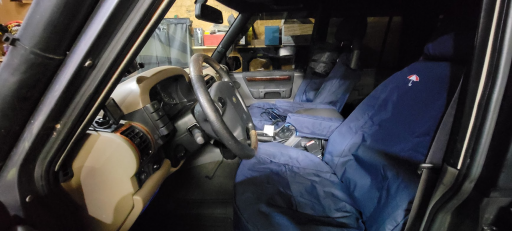
In one of my frustration redirects the other day (mainly a stretch the neck break from being on the crawler) I decided to spend some time on a couple other projects. I was able to find positions for my UltraGauge OBD tool, Yaesu FTM400XDR head, Comet Dual-Band NMO antenna and getting some BritPart seat covers on. For the FTM head I decided to use one of the magnetic phone mounts and give that a try. This is my third FTM, I love these things and the ability to share the codeplug via SDCard to every other vehicle and have my radios match is shear nerdy bliss. Anyway, this is the first one I've tried this magnetic mount on - I'll be curious to evaluate and see how it goes. My primary thought is this makes removal and hiding from a long day in the sun, or prying eyes; easier. Thus far it seems rather stout, trails will be the judge in short time. (Gah, look at that nasty steering wheel! Add that to the list...)
1674529186285.png 1674529598662.png
1674529433710.png
1674529455063.png

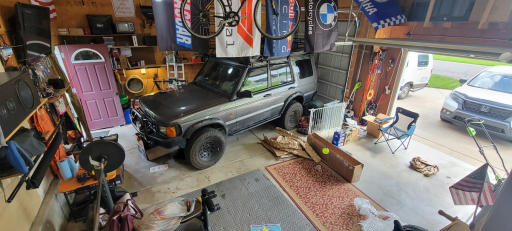
I'll add a little parting shot for the evening since my intro shot is a bit cut-off. Not much will change in the plans here, other than replacing missing trim pieces and getting a proper snorkel. This DIY PVC job is less than attractive and not to mention, the prior owner disconnected it due to the heart gasping to breathe. A proper snorkel will be a welcomed addition in the future. Things are a tad messy at the moment! Pardon the mess.
1674529561182.png
 
  • Like
Reactions: El-Dracho

KyleGrant

Rank IV
Launch Member

Enthusiast III

981
Wichita, KS
First Name
Kyle
Last Name
Soldani
Member #

2565

Ham/GMRS Callsign
KSØTOR
Glad to see you have already jumped in with this rig. I am sure mentor Rover Ron is well pleased :tonguewink:

Hurry up and get the Disco ready. We need to properly concur the Arkansas!
Heyy, there you are! Making swift progress, hopefully it'll be a bit more mechanically sound in a few weeks. Ideally well before the weather warms up!
 

KyleGrant

Rank IV
Launch Member

Enthusiast III

981
Wichita, KS
First Name
Kyle
Last Name
Soldani
Member #

2565

Ham/GMRS Callsign
KSØTOR
Progress today included the installed new to me (salvage yard) PSP. Atlantic British videos have been a true Godsend on this ordeal, walking me through a lot of various projects on the Discovery platform coupled with parts kits and diagrams as needed - kudos to you gents if any of you are here. As per the norm on this project, I found more questionable or 'notice' worthy items to resolve and keep tabs on for the future.

A quick note about my approach - Not all my parts will be salvage such as the case with this PSP, I'm a large believer in "An ounce of prevention now is worth a pound of cure". That said, I'm balancing budgets with future tasks (and let's be honest, wife happiness of an ever-expanding maintenance budget) on the Rover and in some cases, the understanding of 'this will need more work later' is known. In the future, my plan is to move through all various systems and refresh them. Power steering (new pump, hoses, perhaps steering box, etc.); cooling (new hoses, fittings, thermostat); braking (new booster, inspect/replace lines); drivetrain (u-joints, transmission service, coolant lines); underbody (rust cleanup and Waxoyl treatment). For the time being I'm working to prioritize what will make this a reliable local and regional vehicle with the future goals of picking a system per year to invest in and refurbish. Anywho, perhaps a pointless mention but wanted to verbalize my approach on this project.

Onto today!

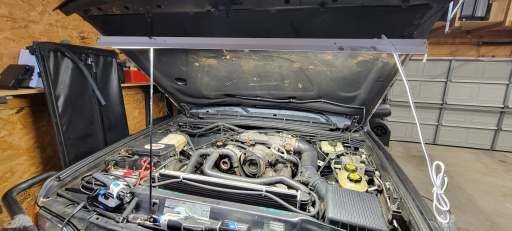
Rigged up a little shop light I had with paracord to use as a hood light. I was unnecessarily proud of this little start to the day... Knots into the screw holes held it just fine. So, if you need a hood light and don't want to spend some Benjamins on one - there ya have it. Of note, you'll see some green writing. I'm a big fan of writing the various socket/tool sizes needed. Makes for easier/quicker trail-side repairs without a few rounds of trial and error.
1674675276163.png

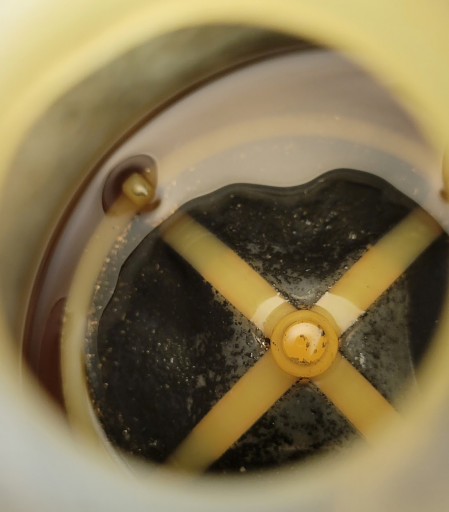
My first fun discovery today was the metal shavings in the PSP reservoir screen. This certainly confirmed the pump was indeed beginning a rapid unplanned internal disassembly.
1674675544860.png

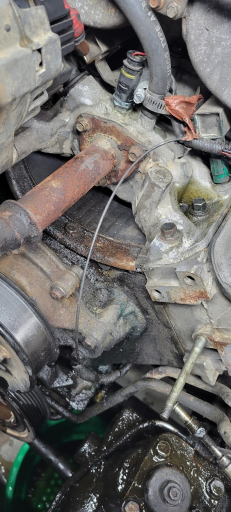
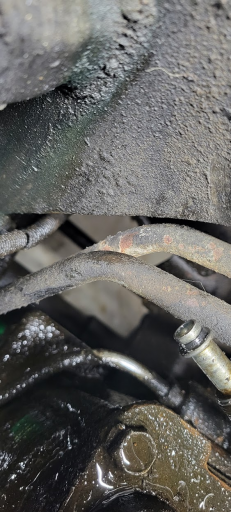
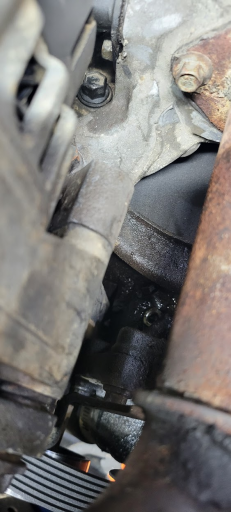
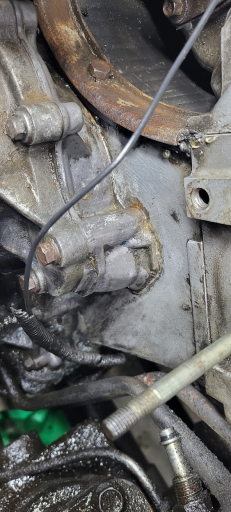
Jumped right in to removing the bracket which the A/C compressor, ACE pump (no longer outfitted on mine) and PSP are mounted to. I found some bits of coolant on the ground, nothing major but a note to keep an eye on. First shot is an overall view behind the bracket, quite a bit of gunk remains from the prior leaking front main seal. I also noted the various green spots. Second shot is degredation of the oil cooler lines, nothing that'll blow tomorrow but I'll replace those in the future. Also noted is the gravity feed/intake to the PSP, I replaced the o-ring which was flat and worn out.
1674675718124.png 1674675846508.png

I Spy a random bolt and washer atop the water pump... Dad jokes aside, I noted the coolant elbow bracket missing its bolt and the bolt underneath the A/C compressor missing. A couple random items to track down.
1674675972776.png

Water pump area cleaned up for better inspection. Frankly the corrosion up at the block seems a tad concerning, this may require pulling the entire front cover to truly resolve. For the time being it's not weaping badly and I can handle a little drip, it'll certainly be monitored and might be tied into a larger project down the line for proper resolution.
1674676217654.png

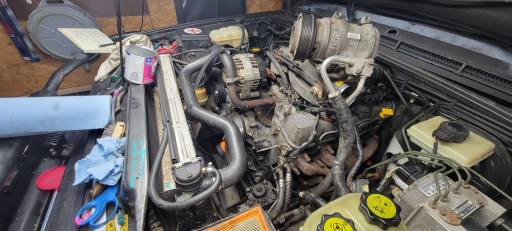
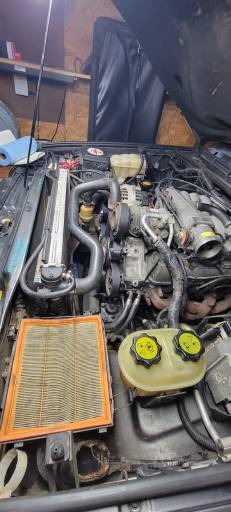
Overall look at the work area.
1674676311120.png

'New' PSP installed with my previously installed new idler pulley. I've left the intake off for work later in the week. Air filter, plugs, and one more set of O2 sensors arrive late in the week; at that point exhaust can go back in (driveable again), new air filter, and once O2 operation is verified I'll get a new set of plugs in place as I'm sure these are toast from running rich. That'll wrap up today!
1674676483546.png
 

El-Dracho

Ambassador, Europe
Moderator
Member
Supporter
Investor

Off-Road Ranger III

13,288
Lampertheim, Germany
First Name
Bjoern
Last Name
Eldracher
Member #

20111

Ham/GMRS Callsign
DO3BE
That´s what I call a speedy progress in such a project. Great job! It´s fun following.
 
  • Like
Reactions: KyleGrant

KyleGrant

Rank IV
Launch Member

Enthusiast III

981
Wichita, KS
First Name
Kyle
Last Name
Soldani
Member #

2565

Ham/GMRS Callsign
KSØTOR
The Rover is back to roving, it successfully shuttled me to work and back yesterday; a roughly 50-mile round-trip with no concerns noted. Belt, pulleys and "new" PSP all seem happy. I went with Dexron III spec fluid for the PSP, after reading online that seems to meet specs of the older LR specific fluids. We'll see how that goes... I figure the duty is similar and according to other forums, should be fine. Cleaned out a fair bit of metal shavings from the PSP res. filter, after pulling the old PSP apart to inspect failure mode I'm left a bit clueless and assuming it must've been bearing related. Internal pump components looked fine but I didn't have anything on hand to press the shaft out and inspect further. Oh well. New one seems happy.

All four O2 sensors back in and ready for exhaust install. Not sure I'll ever replace these underneath, as easy as this exhaust section is to get out and if running into issues removing the O2's; this sure made things easy. Reinstalling this section took about 10 minutes.
1674923091888.png

Back to a happy idle, the slight tick I think is from my passenger side exhaust manifold to CAT; not quite sure I have a good seal there. New video by KSØTOR

UltraGauge looks happy, now reporting a B1S1 voltage. I need to learn what normal ranges are here alongside the fuel trim, but this is a good step. No SES codes were given during my commute which was a nice change. This thing still drives like a dog (not that it should be sporty), but still has some things I'd like to investigate for engine performance.
1674923178565.png

Took the opportunity to replace the halogen bulbs with LED. I'm always leary about this in a reflector type housing so as to not be 'that guy' on the road, I was very pleased with the beam pattern and sharp cutoff between low/high-beams. It was a cheap $40 and very worthwhile upgrade for my dark morning commute on country roads. In the future I'll probably upgrade those Sylvanias that came with it and repurpose those elsewhere.
1674923323020.png

Onto the next items...
 

KyleGrant

Rank IV
Launch Member

Enthusiast III

981
Wichita, KS
First Name
Kyle
Last Name
Soldani
Member #

2565

Ham/GMRS Callsign
KSØTOR
Efforts continued this week and shifted to electronics. I mentioned prior, but my ignition key broke off in the tumbler, it was in ragged shape anyhow. So! With new switches going in and a separate door key anyway I've opted to go the push-button route.

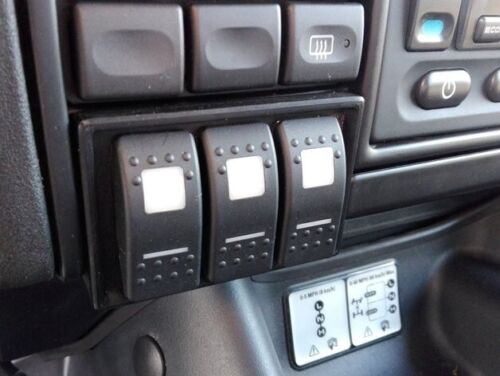
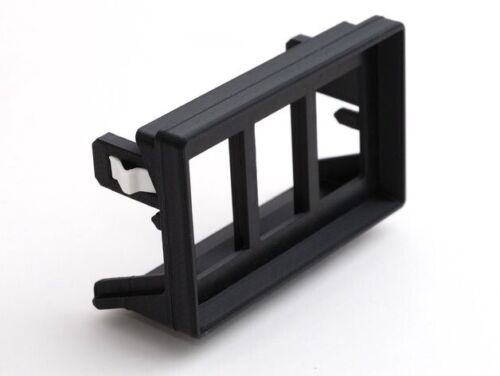
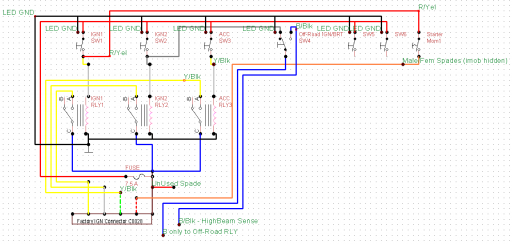
I found these custom inserts on eBay that replace cigarette trays with useful rocker switch positions. I'll be using these for various functions but primarily the left ones will handle Ignition 1, 2 and Accessory modes that the key did prior. The actual starter momentary will be hidden alongside an immobilization switch (if not turned on, the ignition switch inside will not work).
1676163309022.png1676163317318.png

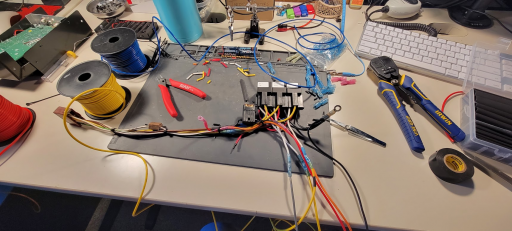
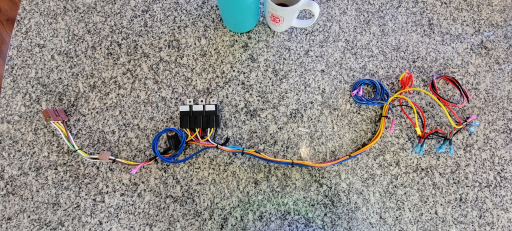
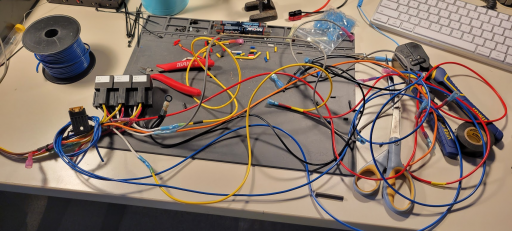
I started with researching the wiring diagrams for the Rover and developed my own diagram to digest switch and relay functions, as well as wire colors. I've added relays in to handle the primary current of these circuits, interestingly (or maybe not, just to me) the vast majority of ignition current was being ran through the tumbler itself. Igntion 1 is fused at 40 amps, 2 at 30 which necessitates the use of relays.

1676163383240.png

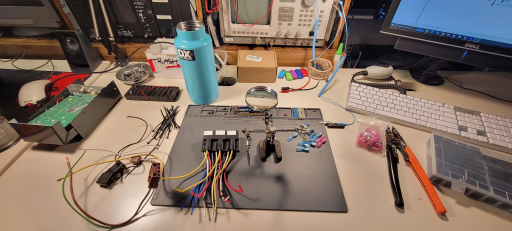
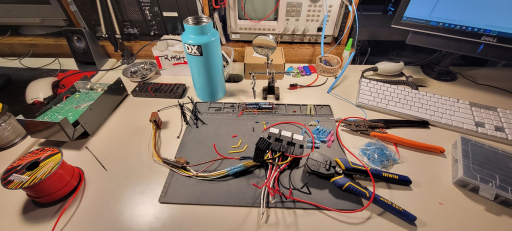
With a couple hours of effort a makeshift ignition harness is now ready to go in. Overall I'd planned to replace the tumbler, but after looking at pricing and pros/cons plus a future goal of adding remote start/fob interlock, I opted to go this route. It gives me additional control over the electronics for future projects, adds easy interface with remote start, and I don't feel I've lost any security; in fact with hidden switches I feel I'll probably have gained some.

1676163494234.png
1676163511843.png

My company working hard.

1676163526698.png

1676163556421.png
1676163573763.png
1676163608001.png

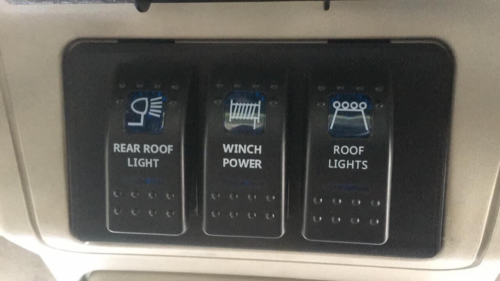
I really like OEM integration with accessories where I can muster it. I'll have six of these rockers on the dash, the first three will handle key functions as a mentioned prior. Fourth will handle off-road lighting (a double throw rocker for Ignition [DRL] or high-beam trigger, I hate having to press other buttons when I need light or need to shut them off while driving). A fifth will probably be used for winch power, as the previous owner mentioned it drains the battery when constantly connected? Interesting, but I'll have to look at that further. A sixth will likely be area/scene lighting.

More to come in the following days as I get all this installed.
 

KyleGrant

Rank IV
Launch Member

Enthusiast III

981
Wichita, KS
First Name
Kyle
Last Name
Soldani
Member #

2565

Ham/GMRS Callsign
KSØTOR
I've gotten a tad behind on my updates. Here's the progress as of lately...

Continuing to handle driveability issues and just getting this sucker more approachable as a DD. I recently discovered it has a pretty solid leak(s) in the roof. I figured it was likely from the sunroof and sure enough after pulling the headliner, somebody had rigged up the drains which didn't hold at all. Only the rear sunroof is operable and frankly, I have no desire to diagnose the front, with the roof rack and future plans to install a solar panel, perhaps an RTT at some point; I don't see myself using them. For the time being, they'll be sealed up, maybe someday in the future if I do a deep restoration I'll get them going again... but for now, it's one less thing to ever worry about again for water intrusion.

IMG_20230402_170552.jpg 20230331_055825.jpg20230331_055805.jpg

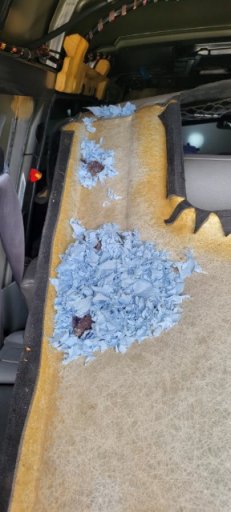
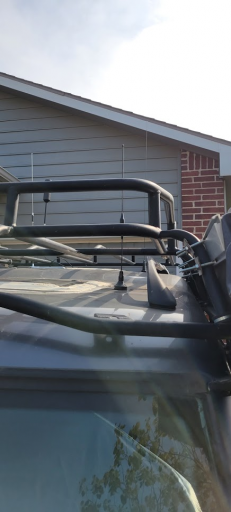
Dropping the headliner yielded the fun discovery that mice/pack rats had been in here at one point. Part of the headliner project was to identify leaks but also on reinstall, the interior will be refreshed. I'd mentioned in a previous post somebody had spray painted the OEM pillars and grab handles, why? I have no idea... because it looked horrible. Anyway, new grab handles, A/B, and overhead console will all be installed when the headliner goes back in. While it's down though, some additional work will be completed. Three NMO hole antennas will be installed in the roof to provide an HF, VHF/UHF, and scanner antenna.

1680473746608.png1680474019341.png

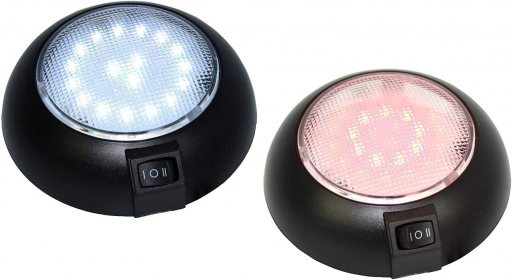
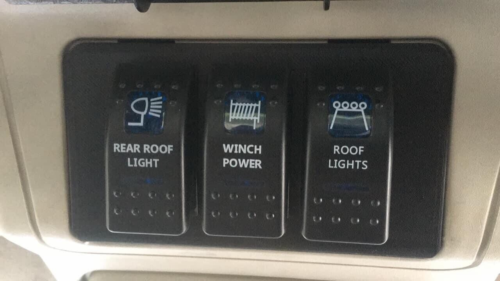
An eBay seller provides a triple rocker switch insert where the sunroof controls go, I'll use this spot to control lighting or other accessories. I'll also add a white/red dome light to add some additional working light in the passenger area.


20230323_150714.jpg20230323_150720.jpg20230323_152930.jpg20230323_152934.jpg

1680474160824.pngIMG_20230402_172314.png1680474257040.png

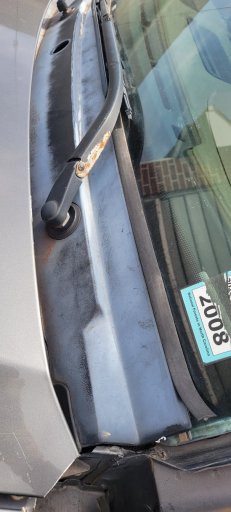
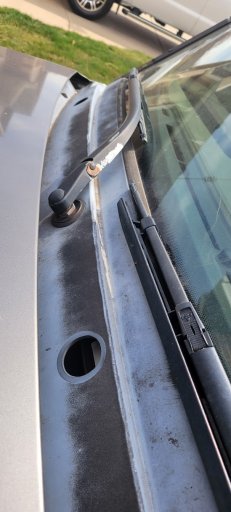
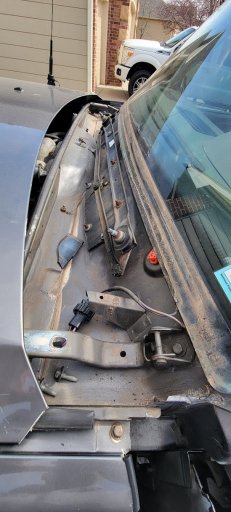
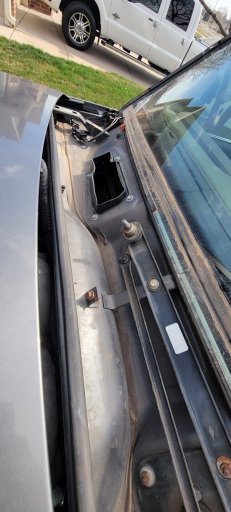
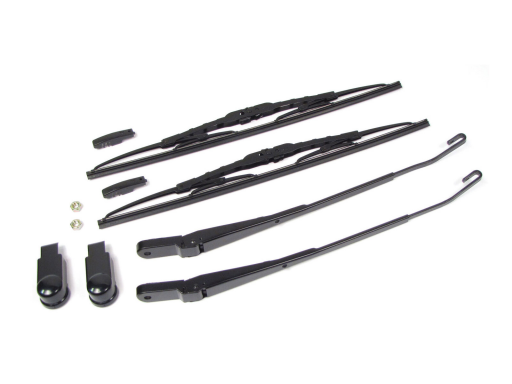
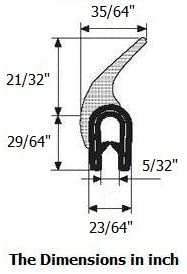
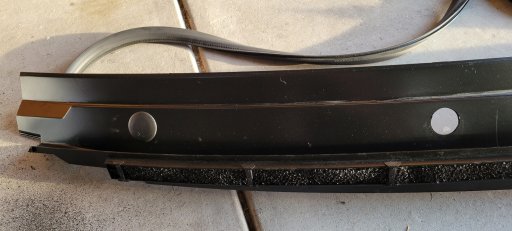
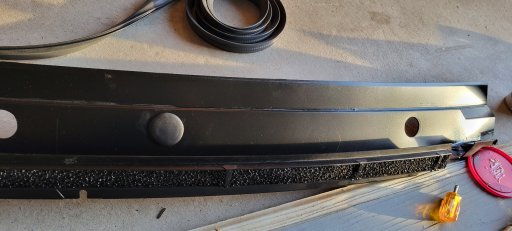
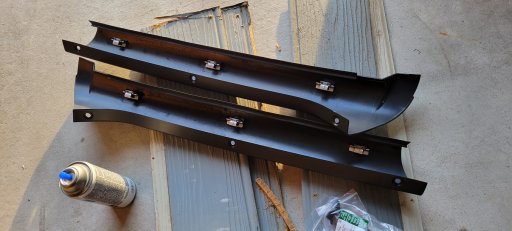
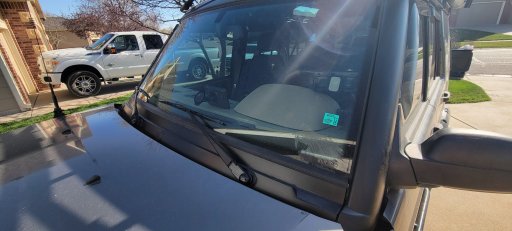
Next up came a cowl refurb, A-pillars, and refreshed wiper arms. This whole ordeal started with me just trying to replace the wiper blades which became a huge pain. Then after looking at the cowl, I realized I was missing OEM hole plugs, how worn out the windshield strip was, its faded color, etc. An OEM cowl runs $340, yikes! The OEM cowl price scared me away, and with other items I'd much rather spend $300 on at the moment with the truck I decided to buy some time with a can of Krylon bumper paint, finding my own replacement seal on Amazon (OEM was around $150, again yikes!) but I did spring for some OEM scrivets, hole plugs and pre-cabin filter medium courtesy of Rovers North. For the new wiper arms I went with an Atlantic British retrofit kit which yielded a nice new finish and attachment mechanism I can find blades for in any US auto parts store.

Wiper Arm Upgrade Retrofit Kit DKB102840 for Land Rover Discovery 2 (1999-2004) | eBay


20230329_190042.jpg20230329_190045.jpg20230329_190049.jpg

20230402_170640.jpg

Here's the refreshed cowl, new blade arms, blades, and driver-side A-pillar. I still need to get the passenger side on and verify I'm properly sealed up but this made for a nice facelift! Another drive on this was finding water on my floorboards. I can't confirm it came via the HVAC intake, though I can't disprove that either... very well could've been the sunroof(s). Either way, these are known to be a water ingress issue via the firewall and hopefully this prevention effort will be one less area to worry about. You can also see an added Garmin mount there in the center. I use a Garmin ZUMO XT on the F800, now I can move it between the two without spending a ton more on another. It's the little things.

Next up items, some already mentioned here...
- 3 NMO roof antennas (HF, VHF/UHF, Scanner)
- Run multi-conductor wire to the old sunroof control area for new rocker switches and their functions
- Refreshed interior grab handles, overhead console, A/B pillars
- Reinstall headliner
- Add white/red manual dome light
- Add small 12v fan off the overhead console for driver/passenger and rear seats (to keep the kiddo and his sweaty dad cool)
- Setup a mount for my Yaesu FT857 control head and 'docking' area with pre-ran power/antenna connections, easy POTA activations and HF use
- Going to start diving into the front-end linkages, ball joints, etc.
 
  • Love
Reactions: KonzaLander

KyleGrant

Rank IV
Launch Member

Enthusiast III

981
Wichita, KS
First Name
Kyle
Last Name
Soldani
Member #

2565

Ham/GMRS Callsign
KSØTOR
Updates on the project.

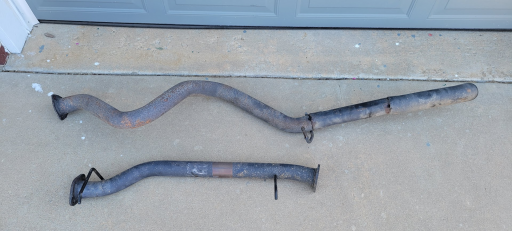
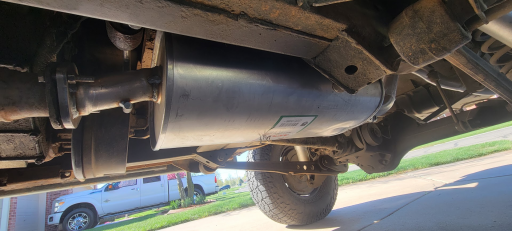
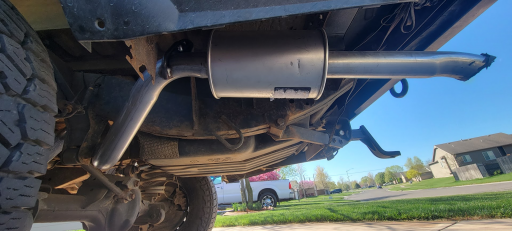
I bought it straight piped, which isn't really my thing. The drone on the road was rather annoying and leaving for work early in the morning had me feeling like 'that guy' in the neighborhood. So, on went a new mid-muffler and resonator. Much more pleasant to drive around.
1683900039124.png
1683900051517.png
1683900071408.png

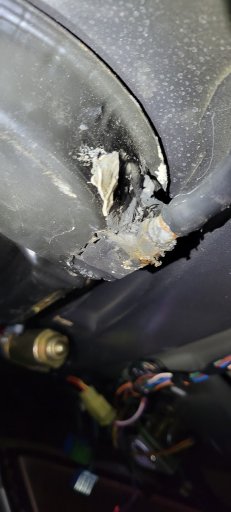
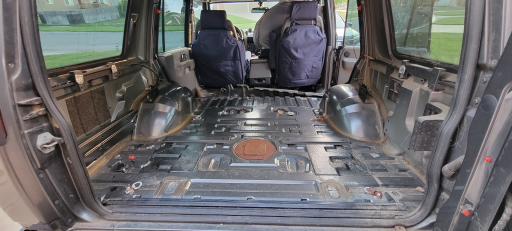
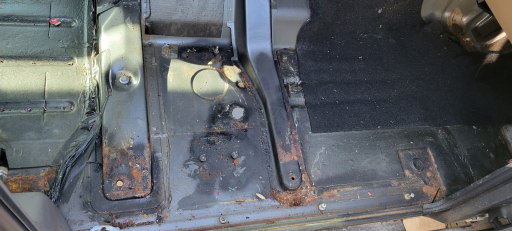
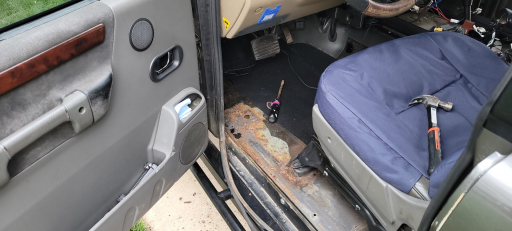
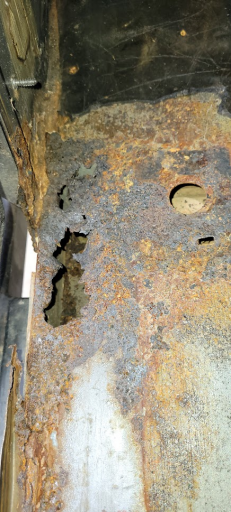
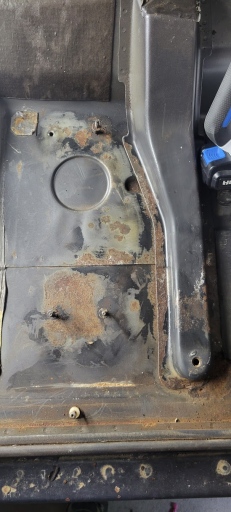
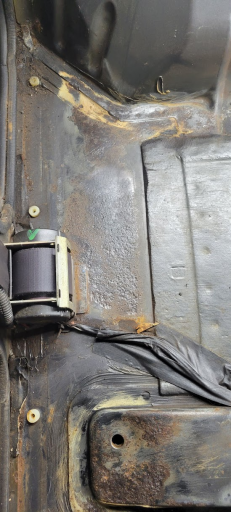
I've since begun a full interior refresh, with the primary goal of inspecting for rust. Fortunately there wasn't a ton found, but the typical suspects from sunroof leaks in the driver/passenger footwells. Driver side will take some cutting and repair, for the rest I have a POR15 kit on the way.

1683900177174.png

A previous owner had already been in here it appears, attempting to cover up surface rust. The bottom left seat mount threads are entirely gone, I'll have to get a stainless bolt in or something of the sort and seal that up better for moisture ingress.
1683900202477.png

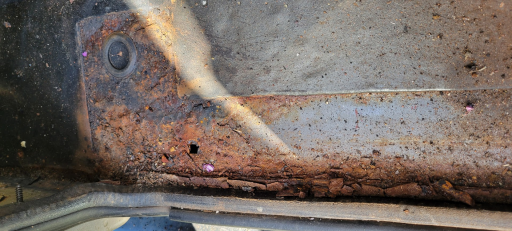
Driver side is the worst, didn't look too terrible at first glance but once inspected with my trusty pokey stick (screwdriver), Houston we have a problem.
1683900300825.png
1683900321455.png
1683900343672.png

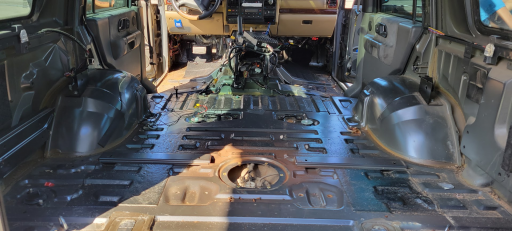
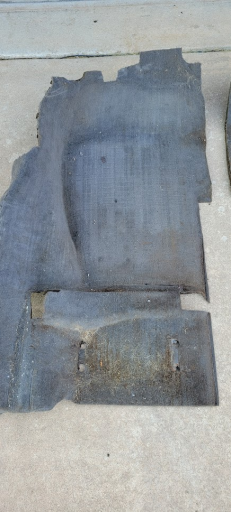
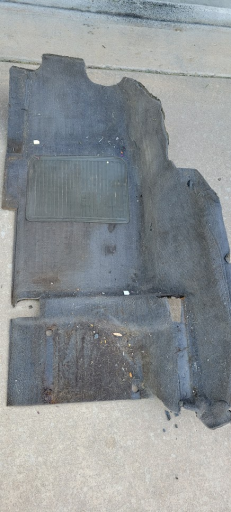
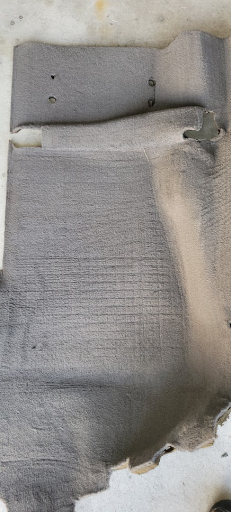
Now then, the entire interior is gutted I took some time to clean up the carpet which appeared to have a few integrated Coca-Cola products. Not a feature I desire.
1683900382746.png
1683900405511.png 1683900459868.png 1683900479459.png

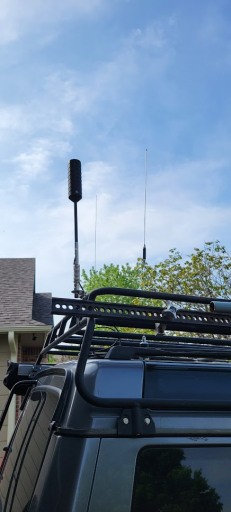
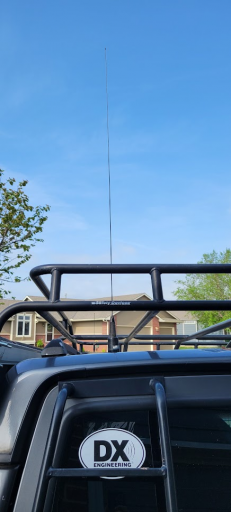
With the interior out, I've been able to prep for my electronics. Bearing in mind I don't 'need' near any of this for traveling, my single V/U hood antenna off the FTM400 is plenty. This truck will be used for storm chasing, traveling, POTA & SOTA activations so I went ahead and added everything to make setup super easy. The two antennas for the 857 man-pack are terminated in BNC, linking up easily to the radio. I'll pre-wire a spot for the radio to sit with power and antenna terminations readily accessible. A lot of my uses overlap in this case, plus I'm a radio nerd so why not!
  • Left Rear Antenna - 110W Motorola XTL2500 for HAM 2M Frequencies
  • Right Rear Antenna - V/U for HAM 2M Frequencies for use with my Yaesu 857d Man-pack
  • Rear Cellular - For a future cell booster
  • Center Antenna - NMO for use with HF antennas off the Yaesu 857d Man-pack, very interested to see how HF mobile works off this spot with a solid ground-plane. It'll be a bit of an experiment.
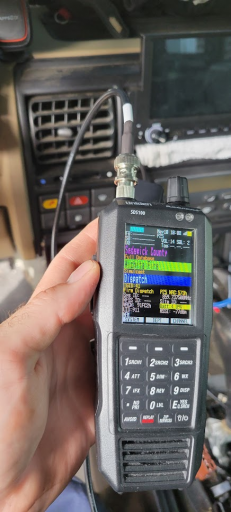
  • Front Left Antenna - Scanner
  • Existing Hood Antenna - V/U for HAM/GMRS - Yaesu FTM400
1683900719462.png 1683900736099.png 1683900817068.png 1683900833798.png

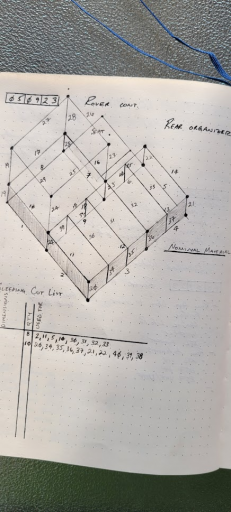
Additionally, I'll be building a sleeping platform out of extruded aluminum. It'll be my first time working with the material but so far it seems like a promising way to do it, otherwise I'd use wood. I'll keep the 60 side of the rear seat out and leave the 40 for my kiddo. This platform will essentially wrap around the 40 seat providing for a sleeping platform on the passenger side and a spot for my fridge on the driver side cargo area. Underneath I plan to get maybe some rifle cases or something to easily pull out and use as storage. Here's my initial mock-up and trying to wrap my brain around a cut list.
1683900962115.png

The last bit of electrical will be running larger gauge wire from the primary battery to a secondary deep cycle 'house' battery in the rear. In previous vehicles I've used a solenoid to tie the two together on ignition or manually (solenoid powered from the house battery). This allows the battery to charge automatically but is also a cheap mans jump start system if the need arises. Just behind the passenger seat and under the front of the sleeping platform, I'll have 120v inverter and the other electronics associated with the house battery. I plan to add a 100W solar panel on the roof to top off the house battery, which should be more than sufficient (plus alternator) to keep the house battery well topped off and happily running the fridge, LED lighting and a fan to sleep.

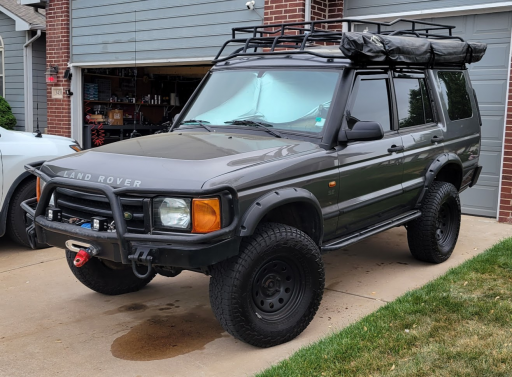
About it for the time being! She's coming together. Here's a parting shot of her all shined up, complete with a nice low-pressure side power steering leak!
1683901162205.png
 

nickburt

Rank VII
Launch Member

Creator III

5,613
Wallasey, Wirral. UK
First Name
Nick
Last Name
Burt
Member #

2714

Nice build. Those D2s can be a right pain, but if you get a good one, they're good. Nice to see the boot (trunk :sunglasses: ) floor hasn't fallen out of it, although the sunroof is fairly typical.
Will be watching with interest. :grinning:
 
  • Like
Reactions: KyleGrant

KyleGrant

Rank IV
Launch Member

Enthusiast III

981
Wichita, KS
First Name
Kyle
Last Name
Soldani
Member #

2565

Ham/GMRS Callsign
KSØTOR
Nice build. Those D2s can be a right pain, but if you get a good one, they're good. Nice to see the boot (trunk :sunglasses: ) floor hasn't fallen out of it, although the sunroof is fairly typical.
Will be watching with interest. :grinning:
Thanks much! I can't take too much credit for as it sits currently, purchased with the lift, bumpers, wheel/tire, rack, awning, etc. Just whipping her back into shape! Fortunately KonzaLander and I have a good buddy near here who's a LR expert, he's been a great resource to address a lot of the common issues. I was sure pleased to find the lack of rust myself, just gotta get this taken care of slowly but surely.
 

KyleGrant

Rank IV
Launch Member

Enthusiast III

981
Wichita, KS
First Name
Kyle
Last Name
Soldani
Member #

2565

Ham/GMRS Callsign
KSØTOR
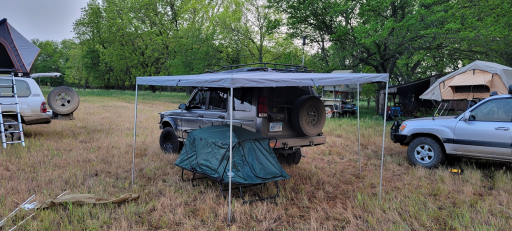
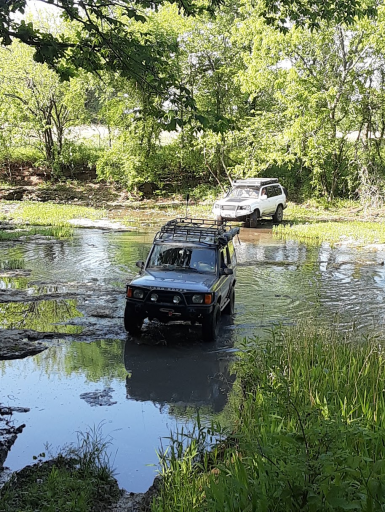
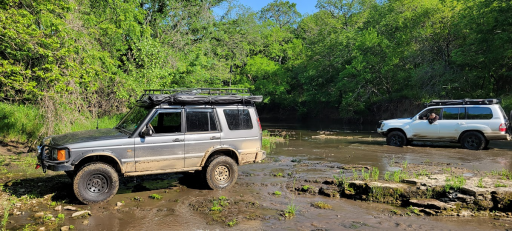
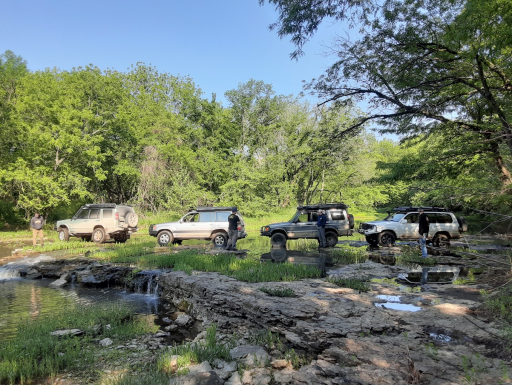
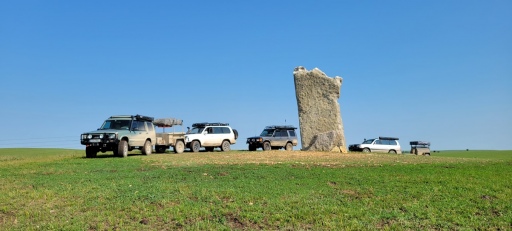
More progress coming along on the Rover. Recently got out on a little overnight trip with KonzaLander (LC100), another Rover buddy (Disco II) from around here, and a work cohort of his (LX470). We enjoyed some exploration of SE Kansas, a fun private water crossing, and some campfire time. My Rover was far from ready for this trip but I slapped the driver seat in (no other interior), it made for an enjoyable build of humility to enjoy creature comforts and sound deadening! During the trip I noted some significant noise from the front end correlated with a high-frequency vibration. During highway turns it would disappear entirely and drive smoothly. I believe I have a combination of potential issues from bad front hubs to perhaps poor alignment. Overall she did a solid 240 miles with no major issues and netted 13MPG! Here's a few shots from that weekend and then we'll get into the latest work.

1685840778640.png
Thanks to my buddies we were able to deploy the 270° awning for the first time. Came with the truck but I hadn't messed with it yet, it'll sure be nice! Makes plenty of room for my little cot tent and future tailgate cooking area.

1685841081426.png1685840962239.png1685841045182.png1685841199557.png
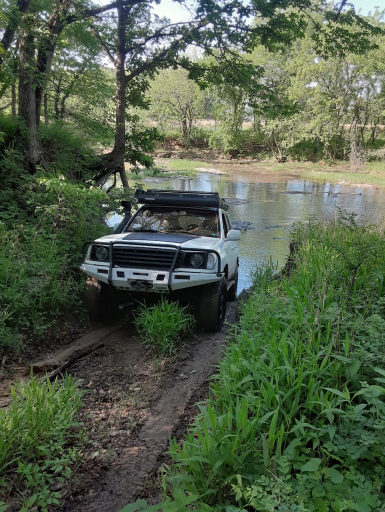
Us messing around on the water crossing, some spots deeper than others. I've gotta say, the little muddy hill really made me appreciate what this Rover will be capable of when I've got it ready to go. I had no TCS (three amigo lights currently for ABS), I didn't have the center diff locked in and have no lockers currently front/rear. Despite this, as long as all four tires remain in contact she is full-time 4x4 and made it up that obstacle with ease. My Sierra previously wouldn't have handled the approach/departure angles. Made me pretty excited to get this Rover really setup to go explore, I think it'll be a lot of fun with some new capabilities I've never had in one of my vehicles.
1685841257818.png1685841335311.png
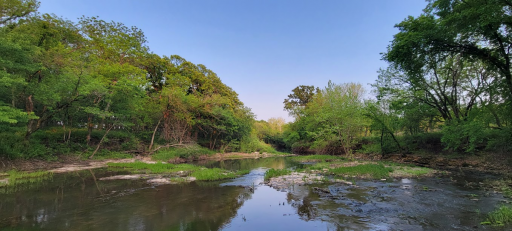
Teter rock with the group and a view down the creek at our camping area.

On to the work!

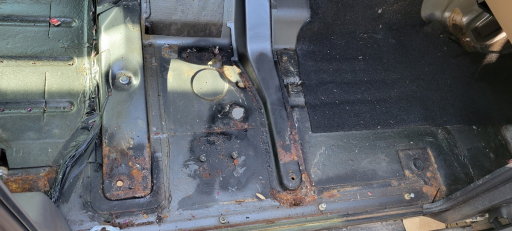
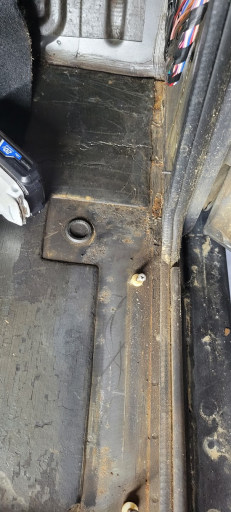
With interior out and mentioned in a previous post, the goal was to identify and address rust concerns. Fortunately for me this thing is relatively clean, though not entirely. Here is the work to clear loose rust on the passenger floorboard. I'll use the three part POR15 program to seal things up hopefully for the long run.

1685840588900.png
Here's passenger side as I found it. Clear a previous owner had rust issues as well, having tried to clear them up but it didn't stick. Hopefully mine will... time will tell.

1685840628170.png1685840632196.png1685840635904.png
Prep work pictures of passenger side floorboard for POR15. Cleaning up relatively well.


1685842082177.png1685842098193.png
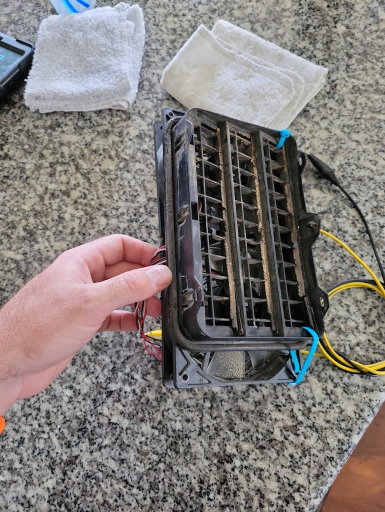
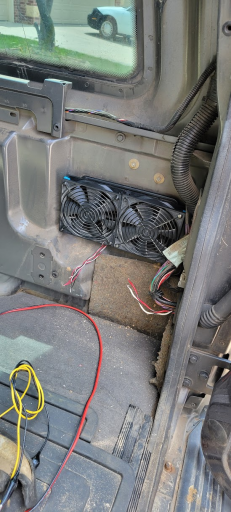
Following the trip I found a ton of sand and dirt in the cargo area, remember the interior is out of it. The cab vent is missing all of its one-way rubber flaps, letting everything in. I'll get that sorted out with a filter medium of some kind but also took the opportunity to build a little ventilation system for camping at night. Being a computer nerd, I have plenty of 12V computer fans laying around. I slapped a couple 120MM on the cab vent that will act as 'pushers'. I'll now be able to crack the window near where I'm sleeping inside and run these fans off the future house battery for a low current draw method of bringing in fresh air over night. I plan to have solar as well, so this may find use during hot Kansas days when the truck sits I can leave these on to help keep the interior cooled off a few degrees.

1685842195780.png
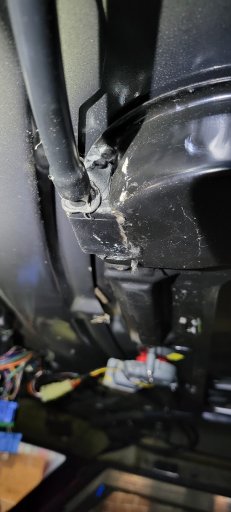
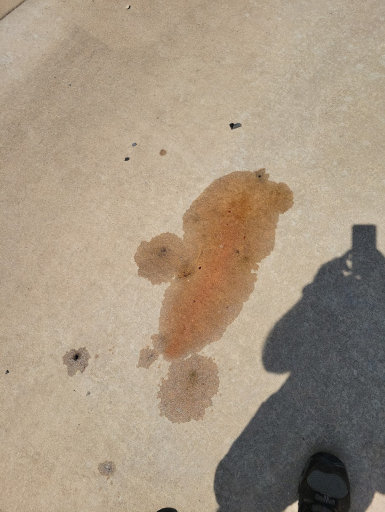
Another post-trip discovery... a significant low-side power steering leak. This was on the driveway after just two hours of sitting. I had a small leak prior, from me not getting a clamp situated quite right during the PSP swap, the trip sure escalated that leak.

1685843173972.png
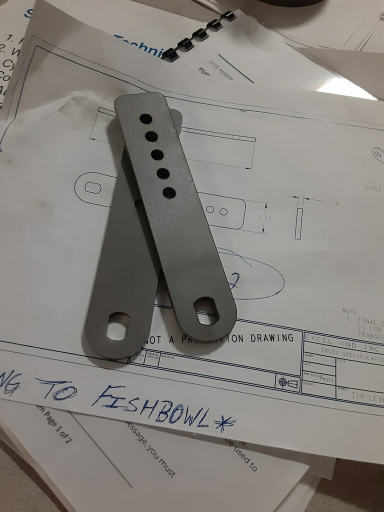
My other Rover buddy is a manufacturing engineer and was able to draft up some brackets that will allow me to access the locking mechanism of our center differential. With this bracket and a simple push/pull cable, I'll be able to lock the center diff from the cab. Pretty handy, thanks Ron! Ultimately my Rover will be double-locked, front diff with a center diff lock. Perhaps a rear lock some day... but I'll start with front for now.


1685843343838.png
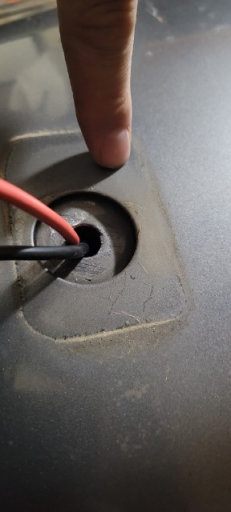
I've taken off the OEM roof rack considering I have the Safety Systems rack; for a couple reasons... the front driver mount was yet another roof leak, you can see the dirt following all the way to the interior hole. I also re-purposed the holes to run wires to the roof for my front LED bar, a future solar panel, rear chase bar, and rear cell booster antenna. I'll seal these holes up entirely and be done with leaks, knock on wood.

1685842904865.png1685842912145.png
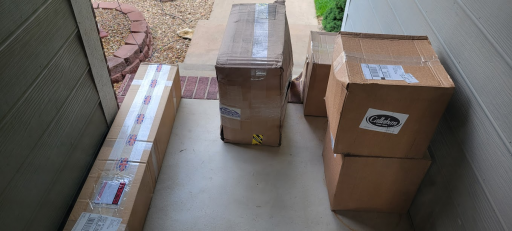
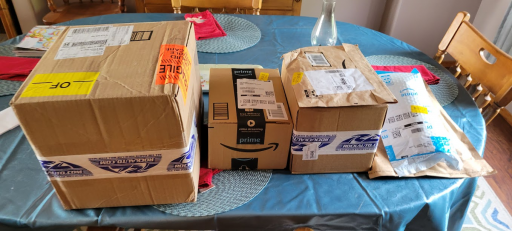
Now for the latest with parts overflowing the stoop. With the amount of steering slop, PSP leak, coolant leak from the water pump - it's time for a nice overhaul. I'm serious about returning this to an enjoyable driving experience so this is quite a list. Some are current needs, some could arguably be pushed off. That said, I'm a large believer in "An ounce of prevention is worth a pound of cure", especially on a vehicle I plan to take remote trips in. So, items that may still have life left will be replaced therefore I have a known replacement timeline. Components in good used shape will be cleaned up and refurbed as best I can, stocked, and placed on a garage shelf as a backup. Parts below have either been ordered or are on the way, this is the next big phase of work to be completed in the next couple weeks.

  • Reman power steering pump
  • Reman steering gear
  • New power-steering hoses
  • New water pump/gaskets
  • New radiator hoses
  • Thermostat relocation to top side, replacing OEM plastic
  • All-around new hubs front/rear
  • All-around new drilled/slotted brake rotors and pads
  • New Terrafirma track rod and drag link (bit beefier for trails and to handle the larger tires/lift)
  • New Terrafirma steering damper
  • Reinstall interior
With those out of the way, the next phase will be another good overhaul but may take place next year. All new balljoints, front differential swap with new bearings & front locker, rear differential overhaul on bearings and gears.

1685843053701.png
For the time being, here she sits! Ready to go under the proverbial ratchet. Until next time.