Project 'Yeller' Trailer Build

  • HTML tutorial

KonzaLander

Rank VI
Member

Traveler II

3,402
Junction City, Kansas, USA
Member #

15814

Ham/GMRS Callsign
KE0EBF
The time has come for me to pull the RTT and awning off of my Land Cruiser and permanently attach them to a trailer...a trailer that is always ready to go!

Objective: Have a trailer that is always ready for adventure.

Goals:
  • Small cargo trailer that gear can be permanently stored in
  • Water tight construction
  • Have the ability to haul two kayaks
  • Hold a RTT and awning high enough so that I can walk under without ducking
  • Have the ability to mount my fridge on a slide
  • Tongue that allows for 90° jackknife
  • Run dedicated trailer 30/31" tires and spare to allow use behind a TJ or Land Cruiser
  • Allow for [future] electrical system expansion
  • Allow for [future] permanent mount water tank
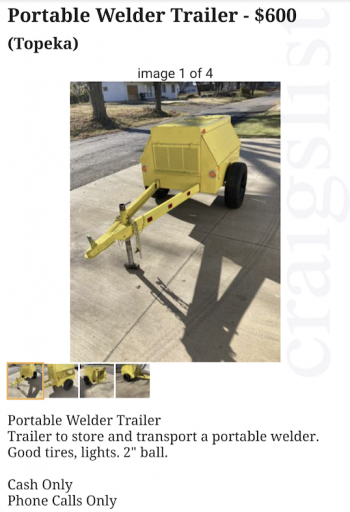
I spent an agonizing amount of time reading various trailer build threads across the web to learn what sort of design would work best for my needs. I then searched various forums, craigslist, FB marketplace and local classified postings for a trailer that could be modified for my use. In most cases a good trailer candidate was sold before I could take a look, or it was astronomically priced. I then happened along a craigslist ad for a slightly overpriced trailer that looked to have potential. The ad had been up for over 20 days but it was still available when I inquired. It was probably still available because the seller would only take phone calls.
1619126958089.png

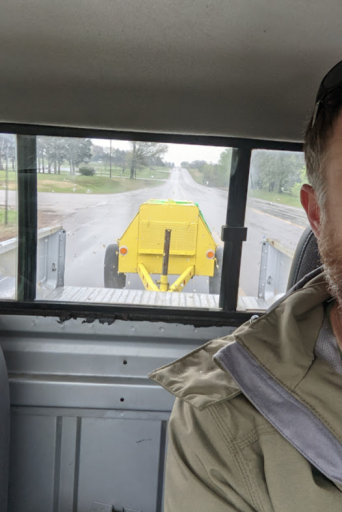
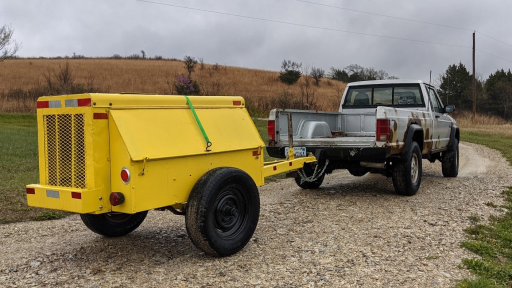
I went to check it out, negotiated a bit and proceeded to drag it home. My anxiety was sky high at the thought of dragging a trailer 80 miles home (in the rain) with no fenders, lights or knowledge of how the bearings looked.
1619127554251.png

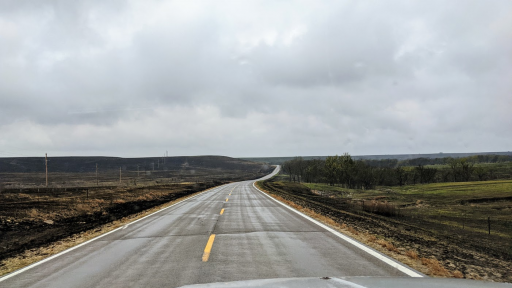
The back way home took me through some of my favorite parts of Kansas.
1619127707319.png

I made it home with out incident. The hubs were nice and cool :sunglasses:
1619127814303.png

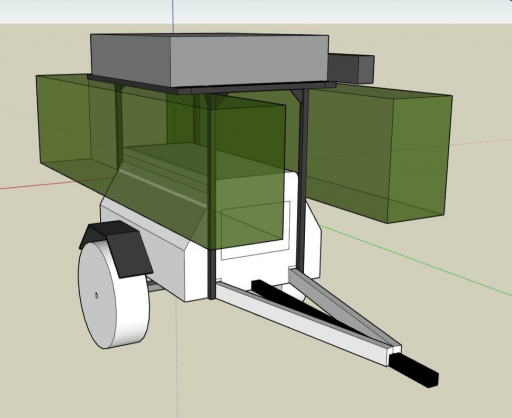
This is my arm chair plan for 'Yeller' the trailer:
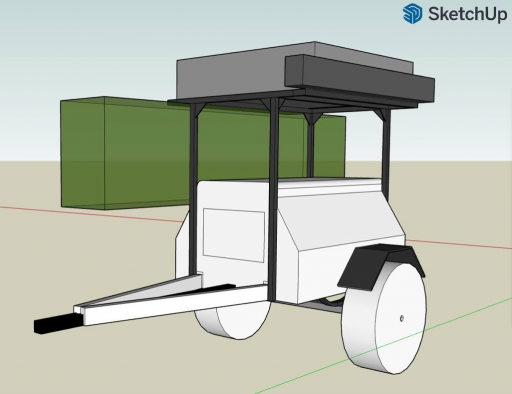
  • Relocate axle under the tub at 60/40
  • SOA and shocks with 235/75R15 tires
  • 2-1/2x2-1/2x0.25 hitch 'backbone' with receivers at the front and rear
  • 1-1/2x1-1/2x0.1875 rack structure
  • The green boxes represent a kayak
  • Awning and RTT height is 6' 6" from the ground
  • Access doors front and year
  • Weatherproof side flip up doors
  • Paint (the yellow might go away, but the 'Yeller' never will)
1619127843648.png 1619127878273.png
 
Last edited:
PCO6

Rank V
Launch Member

Member III

2,268
Newmarket, Ontario
First Name
Stew
Last Name
Beatty
Member #

12534

Looks like a good project. Coincidentally, I picked up a welding trailer (basically a flat bed though) that was about the same distance away. I had the same concerns especially about the bearings. Everything went well and it was a fun project.

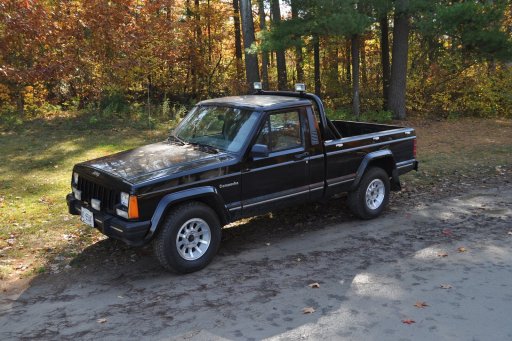
I also like your Comanche. I have one too.
 

KonzaLander

Rank VI
Member

Traveler II

3,402
Junction City, Kansas, USA
Member #

15814

Ham/GMRS Callsign
KE0EBF
Looks like a good project. Coincidentally, I picked up a welding trailer (basically a flat bed though) that was about the same distance away. I had the same concerns especially about the bearings. Everything went well and it was a fun project.

I also like your Comanche. I have one too.
I have been following your welding trailer build :) It seems like trailers designed to carry a welder have a substantial and sturdy frame; one of the aspects that attracted me to Yeller.

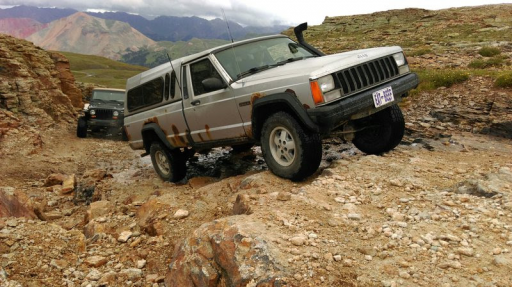
Thanks for the comment about the Comanche. I have a few MJ's and this one is by far the roughest but is the only one that drives. It is an '86 that I saved it from going to an Iowa scrap yard in 2010. It has been all over Colorado and really dumbfounded a hiker who witnessed it coming down the Black Bear Pass steps :laughing:
1620914891100.png

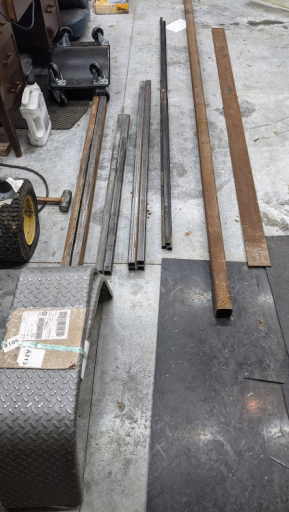
Progress has been slow since I am obligated to finish a basement remodel before I can spend a lot of time in the shop on the trailer. Since I am in rural Kansas, I had to make a trip to the big city of Wichita to pick up metal for the build. Good grief, metal is expensive these days.

2.5" - 0.25 square tube
4" - 0.25 plate
1" - 14 gauge square tube
1.5" - 0.188 square tube
...over $400

1620914343342.png

Fenders and the front and rear doors also arrived. Now I am itching to actually start the build!
 
  • Like
Reactions: Shahn

PCO6

Rank V
Launch Member

Member III

2,268
Newmarket, Ontario
First Name
Stew
Last Name
Beatty
Member #

12534

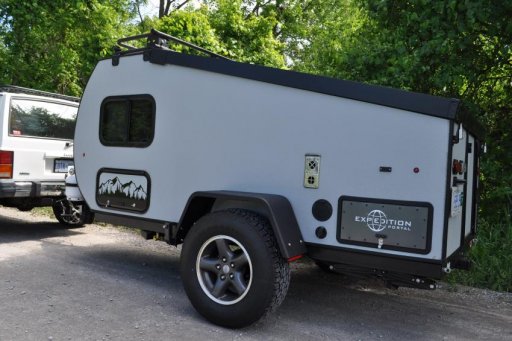
I need to fess up. :sob: My trailer build (in my sig below if others haven't seen it) did NOT turn out the way I intended. At some point along in the build my wife decided she wanted to take up camping. It shocked the hell out of me as she was always an "anti-camper". That trailer wasn't going to cut it and we ended up buying a "soft" pop-up tear drop. I had fun modifying it but it is more HER trailer than mine. When I camp alone I take MY trailer or simply sleep in my Jeep XJ.

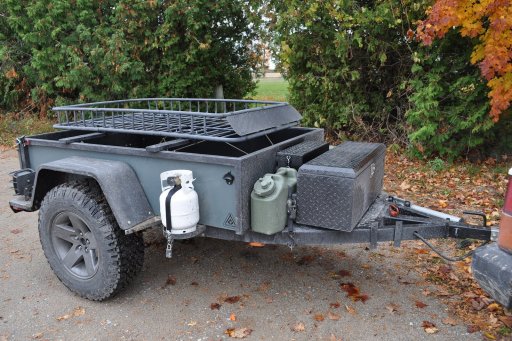
Anyway, I reconfigured trailer #1, mine, and it's actually more suitable for what I do. I need to up date my build thread but here's what it looks like now. A welding trailer into a "do everything" trailer ... for me anyway. I've also included a pic of my MJ which I don't use for trailering. It's great for parts runs though!
 

Attachments

  • Like
Reactions: Shahn

spazegun2213

Rank V
Member

Advocate I

1,421
San Diego
First Name
ross
Last Name
miller
Member #

28854

What the heck ... here's my wife's trailer even though she doesn't have a clue how to tow it. lol It's a Coachmen Clipper Express that I modified and she lets me camp in with her.


View attachment 198281.
How do you like the clipper? I've been eyeing them for a little while as an inexpensive (and maybe capable?) trailer. Mrs. Spaze and I are 6'+ so we are always worried about space.
 

PCO6

Rank V
Launch Member

Member III

2,268
Newmarket, Ontario
First Name
Stew
Last Name
Beatty
Member #

12534

How do you like the clipper? I've been eyeing them for a little while as an inexpensive (and maybe capable?) trailer. Mrs. Spaze and I are 6'+ so we are always worried about space.
It's been great. I wouldn't say that it's all that capable off road but I have done some mild stuff (dirt, gravel, making my own, etc.) and it's held up. I've made some modifications to the frame to toughen it up a bit and I think the have helped. I'd provide you with a link but there have been some photo hosting issues and things are a bit mixed up at the moment. I may have to do a proper build thread here!
 

KonzaLander

Rank VI
Member

Traveler II

3,402
Junction City, Kansas, USA
Member #

15814

Ham/GMRS Callsign
KE0EBF
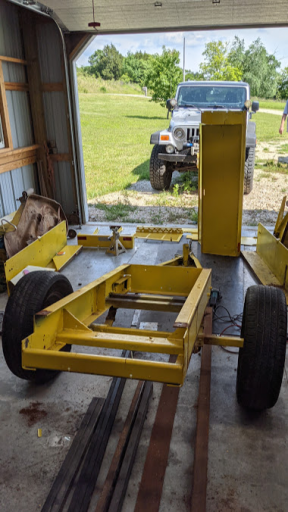
I have slowly been getting the frame done on the trailer.

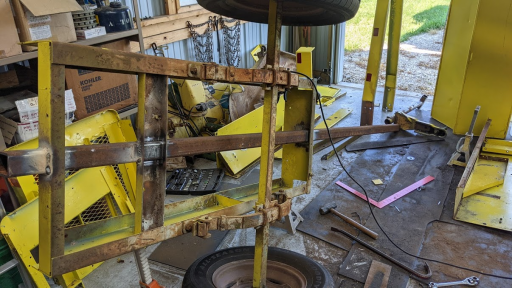
The first step was to remove the "box" from the frame. The construction of this trailer is interesting; the box bolts together and is a lot wider than the frame. I don't anticipate this being a problem, but if necessary I may add a swaybar to the frame and axle if side-side sway is an issue.
1624989962816.png

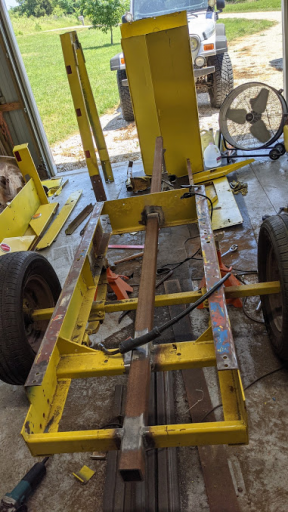
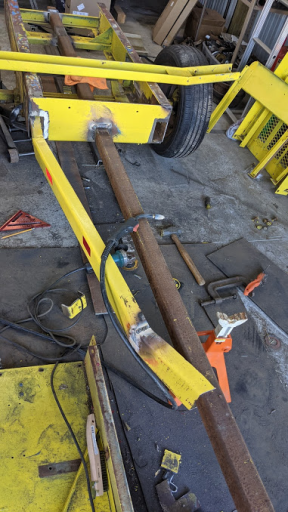
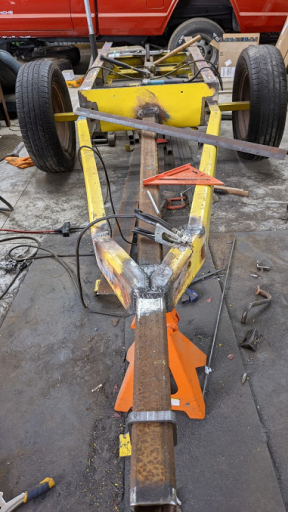
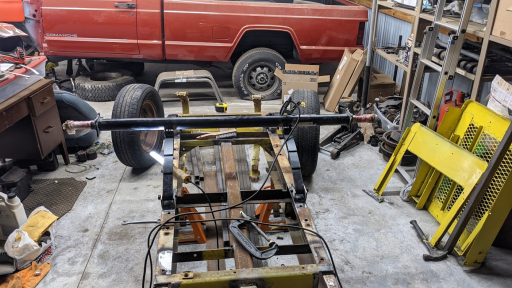
Adding the backbone to the trailer. This is a piece of 11'-2.5x2.5x0.25" square tube. Since this is square tube and not receiver stock, I will need to grind a small seam on the inside of it to fit 2" hitch accessories. The joy of working with old material can be seen on the floor. I spend 1/2 of my time grinding rust and paint to find clean metal. After the frame and rack are welded, I will media blast and paint.
1624990235511.png

1624991610835.png

The original tongue was bent and twisted, so I spent some time trying to straighten it out and figure out how it might attach to the new backbone.
1624991721100.png

With the tongue complete I started adding supports in the inner frame for a floor. This trailer never had a proper floor since a welder used to occupy that space. Never mine the old MJ EGR tube sitting there. I almost used it for a wire passthrough.
1624991842359.png
 

Phillysteak

Rank IV

Enthusiast III

1,116
Arizona
First Name
Philip
Last Name
Haasnoot
Member #

24385

Looking good so far! The first thing that popped into my mind when I saw the backbone was "Ahh the old Shish Kabob technique."
 
  • Like
Reactions: KonzaLander

KonzaLander

Rank VI
Member

Traveler II

3,402
Junction City, Kansas, USA
Member #

15814

Ham/GMRS Callsign
KE0EBF
Looking good so far! The first thing that popped into my mind when I saw the backbone was "Ahh the old Shish Kabob technique."
Haha, that is a great way to describe it! It makes for a heavy skewer.

In the last few days I have received a lot of goodies for the project. It should be a productive weekend :)
- 3500lb Dexter axle
- Self Adjusting TruRyde brakes
- U-bolt kit
- Soft Ride springs/hangers from Compact Camping Solutions
- Shock kit from Compact Camping Solutions
- Weld on swivel Jack
 

KonzaLander

Rank VI
Member

Traveler II

3,402
Junction City, Kansas, USA
Member #

15814

Ham/GMRS Callsign
KE0EBF
@KonzaLander I'm not sure what your current pre/paint plans are for the trailer. You might want to consider something like this rust converter prior to paint, stuff works like magic:

I have never used the Eastwood product, but I have used the POR15 process on Jeep projects in the past. Since I plan to media blast the trailer prior to paint, my hope is that there will be no rust remaining and a good primer should be all the paint surface prep that needs done.
 

KonzaLander

Rank VI
Member

Traveler II

3,402
Junction City, Kansas, USA
Member #

15814

Ham/GMRS Callsign
KE0EBF
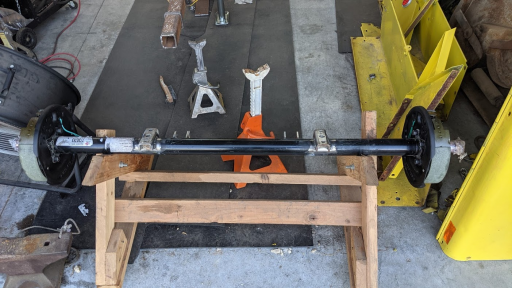
I flipped the trailer over and finally stripped out the old/stiff suspension to layout the double eye Compact Camping Solutions soft ride springs and hangers. My initial thought was to position the axle at 40/60 on the box. I choose to bring the axle forward a little to 45/55 since I plan to have water storage in the front portion of the trailer box.
1625587038257.png

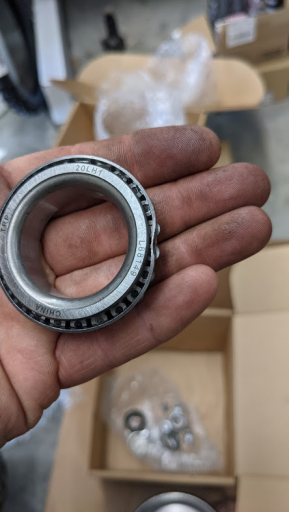
I also got the Compact Camping Solutions shock kit configured and the brackets attached to the axle. While working on the axle I attached the brakes and went to pack the bearings to mount the hubs. All of the bearings were damaged and looked like this:
1625587574111.png

I have two sets of Timken bearings on order so the axle sits unfinished.
1625587775588.png

I flipped the frame back over and loosely installed the springs and old axle to get an idea of how high the trailer will sit.
1625588055997.png

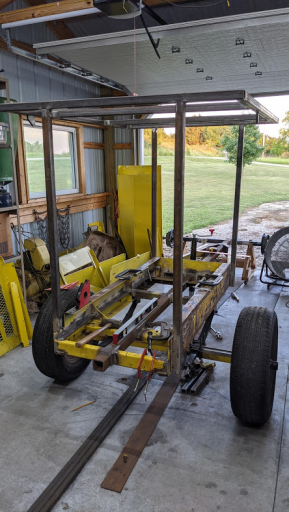
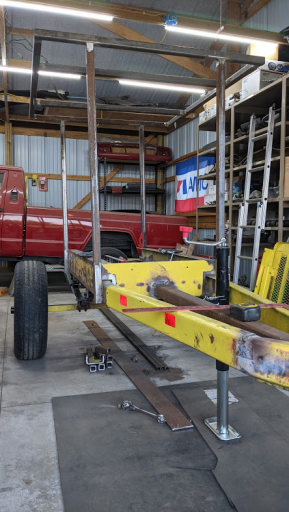
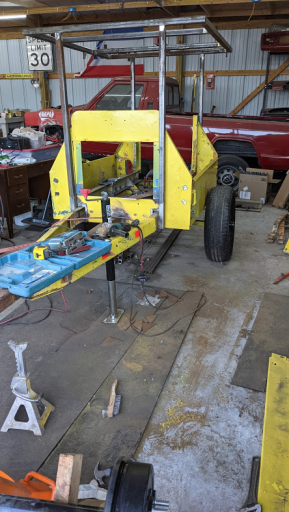
Now that I had an idea of how high the trailer would sit, I attached the front jack started working on the RTT and awning rack. This is made of 1.5x0.1875" tube. Once I had the height established (just above my noggin) I tacked the whole thing together. The next step is to cut a bunch of 45° gussets for the rack and burn it all in.
1625588625617.png
1625588640631.png
 

KonzaLander

Rank VI
Member

Traveler II

3,402
Junction City, Kansas, USA
Member #

15814

Ham/GMRS Callsign
KE0EBF
I've started to test fit the "box body" back onto the trailer frame. I quickly discovered that working around the rack was somewhat challenging. I found out that the rear rack supports did not provide adequate clearance for the rear most section of the "box body" to slide into position. The solution was to move the rear most vertical supports out a 1/4" on each side.
1626461250437.png

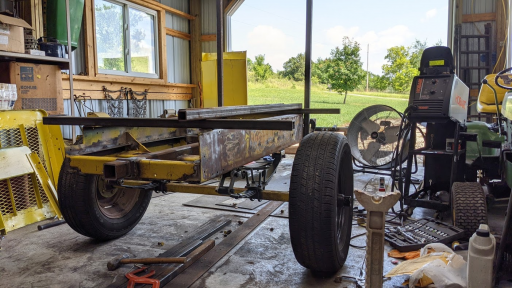
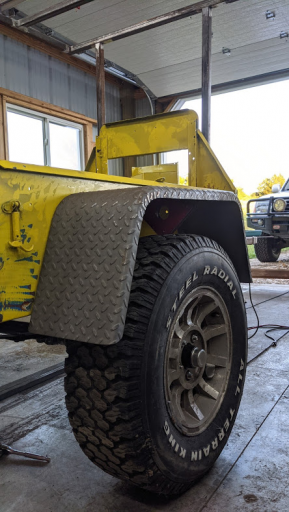
I received new Timken bearings for the axle hubs and spent some time cleaning, greasing and assembling the hubs thenn slid the axle under the trailer. To my surprise, the new assembled 3,500lb axle weighed substantially less than the old square tube axle. I found a pair of Jeep Turbine wheels with 235/75R15 tires in my pile of parts and decided to mount them to the trailer. The wheels are the same size as the wheels I intend to run on the trailer and the tire size is right too. To my surprise the bore on the Turbine wheel was big enough to let the trailer hub pass through.

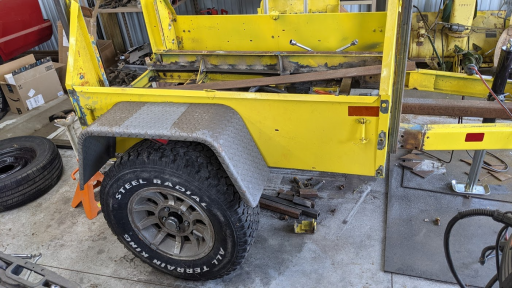
Test fitting the fenders. I was worried these 10" fenders would be overkill, but I think they will work great!
1626461175883.png

The fender top will also make for a convenient work surface on both sides of the trailer.
1626462484764.png

As I have continued to put the trailer back together (prior to taking all apart again for paint) I have noticed the Compact Camping Solutions soft ride springs allow the trailer to sway a lot. I am worried these springs might not be able to handle the weight of this trailer when loaded, so I picked up a pair of 1,250lb (ea) leaf springs from Stengel Bros to have on hand.
 

PCO6

Rank V
Launch Member

Member III

2,268
Newmarket, Ontario
First Name
Stew
Last Name
Beatty
Member #

12534

That's coming along very nicely. I like the Turbines ... my favourite Jeep wheels. I found 4 for my '88 MJ and am half way there to having 4 for my '89 XJ. They're hard to find!
 

grubworm

Rank V
Launch Member

Member III

2,358
louisiana
First Name
grub
Last Name
worm
Member #

17464

Service Branch
USN-Submarines
What the heck ... here's my wife's trailer even though she doesn't have a clue how to tow it. lol It's a Coachmen Clipper Express that I modified and she lets me camp in with her.


View attachment 198281.
not to derail the OP, which is a very cool project...just wondering if your tear drop came as a pop-up or is that one of your mods? i have a 5x8 square drop i guess you would call it and its only 50" tall and i would absolutely LOVE to make it a pop-up. i'm decent at building and all, but not sure if a pop-up is a difficult mod to make or not. its a forest river trailer that i bought new and the thing leaks around the ac unit, so cutting the roof is not that big a deal to me if there is a good way to seal for the pop-up. i'm getting older and fatter and that extra height getting up in the morning would be great
 

PCO6

Rank V
Launch Member

Member III

2,268
Newmarket, Ontario
First Name
Stew
Last Name
Beatty
Member #

12534

not to derail the OP, which is a very cool project...just wondering if your tear drop came as a pop-up or is that one of your mods? i have a 5x8 square drop i guess you would call it and its only 50" tall and i would absolutely LOVE to make it a pop-up. i'm decent at building and all, but not sure if a pop-up is a difficult mod to make or not. its a forest river trailer that i bought new and the thing leaks around the ac unit, so cutting the roof is not that big a deal to me if there is a good way to seal for the pop-up. i'm getting older and fatter and that extra height getting up in the morning would be great
It’s a Coachmen Clipper Express 9.0td (like the NoBo's also Forest River) and it came with the pop-up lid. The lid has worked well – no leaks and lots of ventilation with the side flaps open. There’s plenty of head room inside with the lid up and heading into the double wide bed from the end is easy; no crouching at all.

I’ve made a lot of mods to it … kayak rack, frame stiffening, 2” hitch receiver, Jeep wheels, 10” wide square top fenders, spare tire mount underneath, removed the fridge and AC and installed cabinets, added a hot water system, front tongue box, double propane cylinders on separate circuits, lighting inside and out and a lot of little things with more to come. There is a thread on these trailers on the Teardrops n Tiny Trailers forum. Unfortunately, my pics were deleted as they were hosted on a forum that changed its format.

Teardrops n Tiny Travel Trailers • View topic - Coachmen Clipper Express 9.0TD V-PKG (tnttt.com)

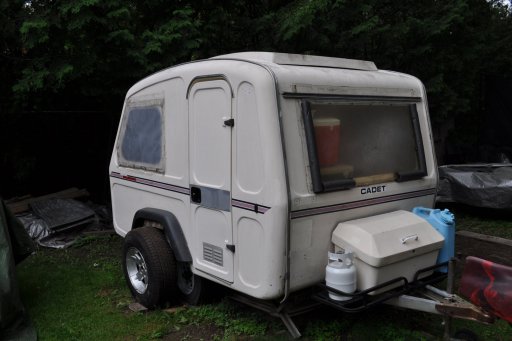
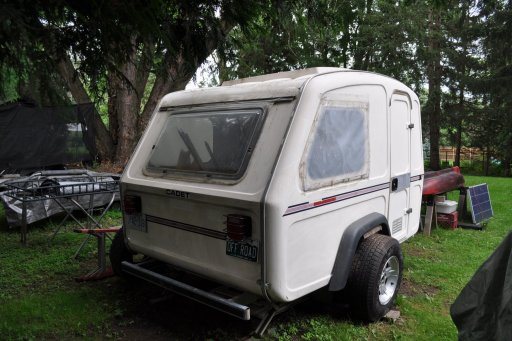
There are a lot of trailer builds on the TnTT forum and some include “lifted lids”. The main issue for most is sewing, a skill I need to learn. At the risk of further derailing this thread (sorry @KonzaLander) I’m working on another pop up of sorts. It’s a mid 80s fibreglass trailer body that I’m putting on a home made off-roadish frame. I have to crouch a bit with the top down but when up the extra 6” makes all the difference. It will have a Jeep TJ theme as both tow vehicles are Jeeps (LJ & XJ). I’ve got lots of spare parts laying around so … “why not”!
 

Attachments

Last edited:
  • Love
Reactions: grubworm

KonzaLander

Rank VI
Member

Traveler II

3,402
Junction City, Kansas, USA
Member #

15814

Ham/GMRS Callsign
KE0EBF
That's coming along very nicely. I like the Turbines ... my favourite Jeep wheels. I found 4 for my '88 MJ and am half way there to having 4 for my '89 XJ. They're hard to find!
The Turbines came off of a rolled and smashed 99 XJ I bought for a donor years ago. Initially I planned to run the steelies down below on the trailer since I knew the hub bore would fit the 3500lb hubs, but the more I see the Turbines on it the more I am liking them! A lighter rolling mass with aluminum wheels wouldn't hurt either :sunglasses:
1626708790245.png

that is an impressive build @KonzaLander and the 10" fenders are nice. i have close to that on mine and use the flat surface a lot, especially during meal prep where it makes a good countertop. i would think that trailer would go anywhere your vehicle could pull it. my factory made camp trailer is considered to be "offroad", but the frame is around 14ga , so nowhere near the strength you have and i cant really weld or do too much to reinforce something that thin. wishi i had my camper body on a frame built like yours...
The frame on this old welder trailer is a hybrid of 3/16 and 1/4" c-channel, plate and my addition of the 1/4" tube backbone. It is way overkill for my intended use and if I was starting from scratch I would certainly make a more efficient use of materials. Total trailer weight shouldn't be more than 120lbs over the original trailers weight.

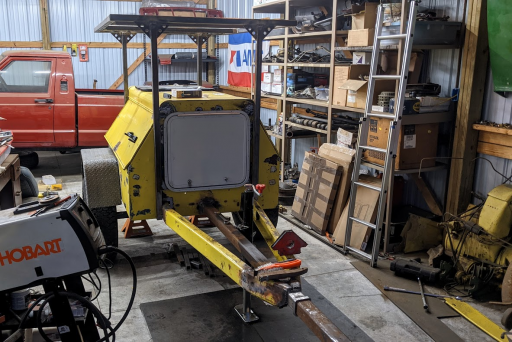
This weekend I welded shut all of the old drilled holes in the "box body" and attached the fenders. Now that the rear panel of the "box body" fit between the rear rack supports, I worked on incorporating a rear door. I am thankful to be nearing the end of the grinding through 8 layers of paint to find clean metal ritual.
1626710623764.png

I am struggling to locate a suitable sized front door and really don't want to seal off the opening with a chuck of sheet metal.
1626711292768.png
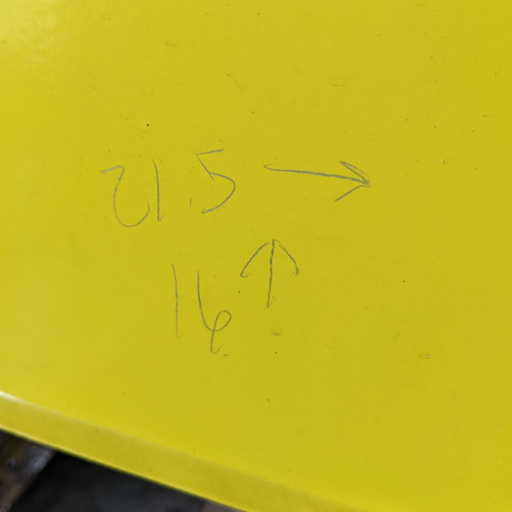
A perfect door size would be 21.5"x16", but realistically it could be (20-22)"x(16-23)". I've exhausted every resource I can find for either a RV cargo door or marine style hatch. It looks like a 20x20 marine hatch might be as close as it comes. Any suggestions on where to look? I found the rear door on eBay, but have not had the same luck for the front door.
 
Last edited:
  • Like
Reactions: grubworm

PCO6

Rank V
Launch Member

Member III

2,268
Newmarket, Ontario
First Name
Stew
Last Name
Beatty
Member #

12534

The Turbines came off of a rolled and smashed 99 XJ I bought for a donor years ago. Initially I planned to run the steelies down below on the trailer since I knew the hub bore would fit the 3500lb hubs, but the more I see the Turbines on it the more I am liking them! A lighter rolling mass with aluminum wheels wouldn't hurt either :sunglasses:
I know what you mean re the hub bore. I've had to use 2" spacers to clear the hubs when using other types of Jeep wheels on trailer axles. They look great in the dark silver you have them in.

I can't help you with the front door but want to say that your back door looks about perfect!
 
  • Like
Reactions: KonzaLander

KonzaLander

Rank VI
Member

Traveler II

3,402
Junction City, Kansas, USA
Member #

15814

Ham/GMRS Callsign
KE0EBF
Despite a busy week and an influx of in-laws at the house, I did get a couple of items complete on the trailer.

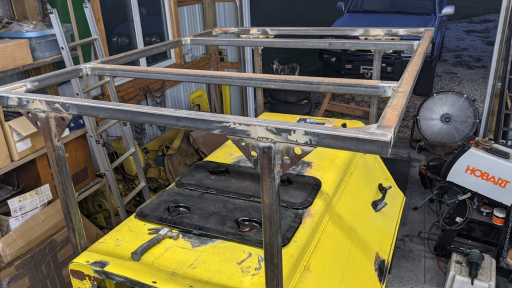
I cut and drilled the rack gussets and also put gussets in the corners of the rack.. These should help prevent the rack from twisting. The drilled gussets will also make for nice tie down points or a place to hang stuff while at camp. The top of the "box body" had a giant hole in it with a haphazard lid when I bought the trailer. I settled on using boat deck hatches to fill the hole on the top. These should provide a water resistant cover and allow for easy venting of the "box body" in extreme heat.
1627313793184.png

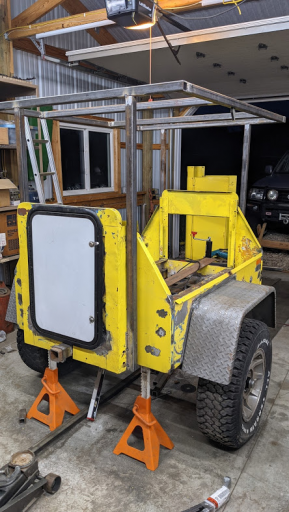
I did find a front door solution that worked out pretty well.
1627313845909.png

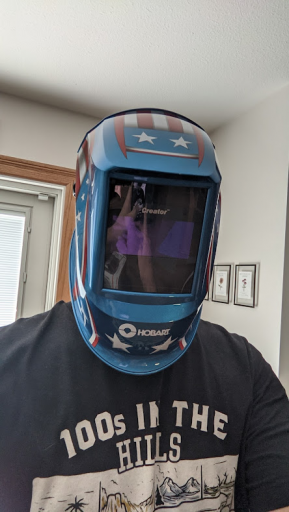
I did grab a new welding helmet. WOW. I've only used a cheap variable shade helmet from Amazon and have always struggled to see the puddle clearly. Figured it was just the way welding was. With this new Hobart helmet the puddle is crisp and clear!
1627315408017.png
 
  • Like
Reactions: grubworm