Member III
This is one of the projects I've had on my list for a while. I wanted a water can I can use as shower, washing dish's or whatever.
All the ones I saw didn't quite fit what I needed so, here's mine.
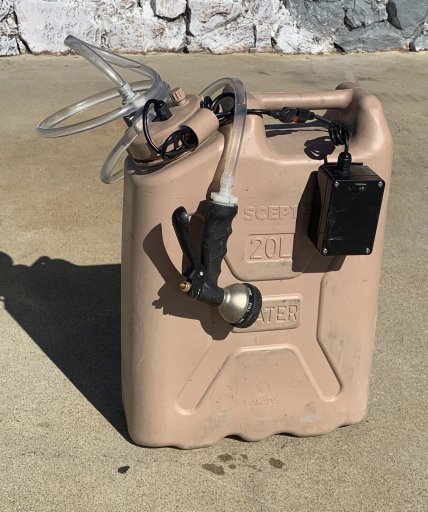
Pic first then parts list and description.
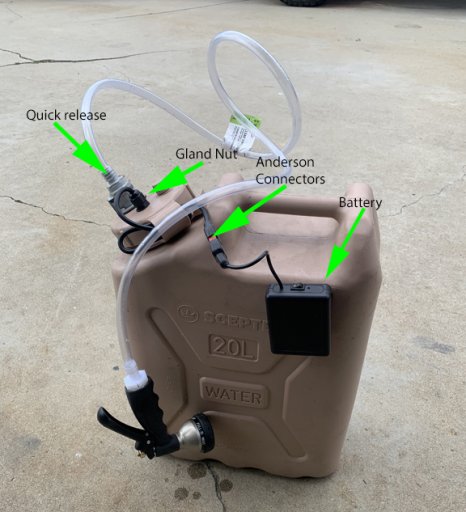
Parts list
1. Scepter Can lid
2. Submersible water pump
3. Small 12 volt battery
4. Anderson connectors (2 red 2 black)
5. Quick release fitting (if needed). Lid side Hose side
6. Small Gland nut (if needed). Link is for a box of them. I have a bunch so I didn't buy any for project.
7. ½” clear tubing
8. Stainless hose clamps
9. Zip Ties
10.Small switch (if needed)
11.Small LED (if needed)
12. Small box for battery (if needed). I had a few of these left over from another project.
13. Velcro
14. Spray nozzle. Home Depo garden section.
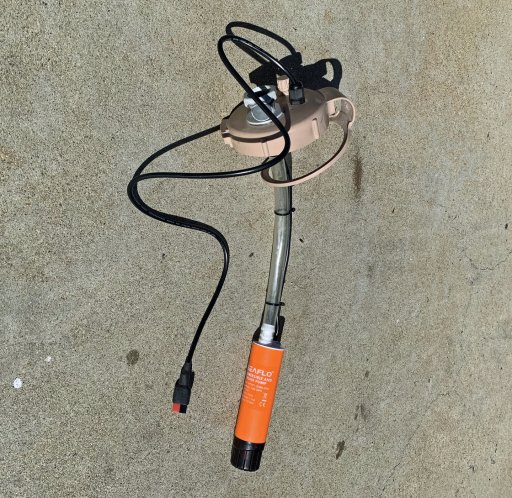
First was drilling a hole and mounting the Quick release. Then a hole for the wiring. I used a gland nut for the wiring but if the hole was drilled tight, it wouldn't be necessary. Cut tubing to length, mount pump and run wire. The pump comes prewired with THREE wires. The colors are Yellow, Blue, brown. The Brown and Blue are cut and tinned. I used the Brown for Pos and Blue for neg. It actually didn't seem to care which way I wired it.
Once the wire was through the lid, I cut it down to where I had enough to plug into another battery box with Anderson connectors. As you can see, I have covers on my Anderson plugs. I got those off Amazon when I ordered them last. This is the first time I've used them. Zip tied the wire and installed the clamps.
Congratulations, your halfway there.
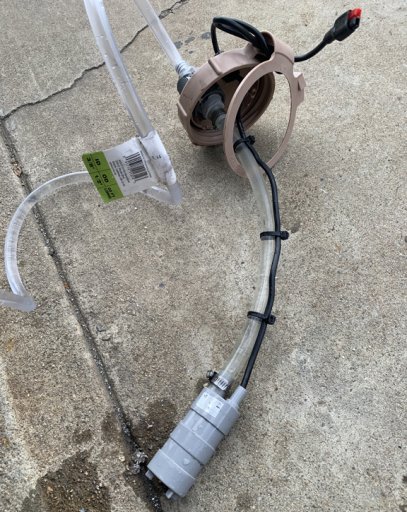
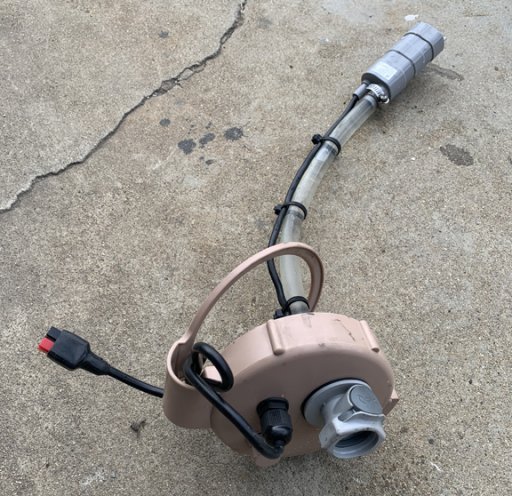
Next was the Battery. I opted for a 1.8AH Lithium. I wanted it small so I could attach it to the side of the can. Its on a Velcro tab so I could take it off to charge. The battery is rated to 14 volts. I literally just hooked it up to my trailer battery and left it there for 12 hours (forgot to unhook it). The charged voltage matched my 12.3 trailer voltage and it didn't blow up.
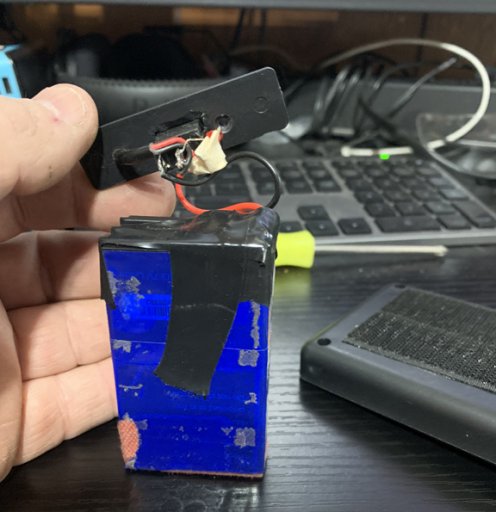
My battery came with a built in on/off switch and led. That told me, the battery was smaller and inside its own box. I wanted better access to the switch so, I opened the box. The actual battery was a bit smaller and was two 6volt Prismatic cells. Not bad.
The battery switch was on the side, I wanted it top and it was a bit awkward. My original plan was, remove it, put it in one of my project boxes with my own switch and light. Fortunately I was able to use both and didn't have to buy anything. At this point you have two choices, mount it anyway (nothing wrong with that) or get a battery with a better located switch.
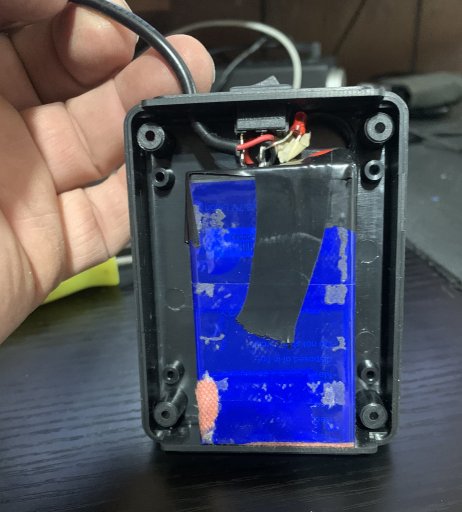
Here's my battery pic's. I didn't get one of the battery in the original box. You can see it in the link. The battery would fit in my plastic box but I would have had to cut the mount posts off and glue the case together. I notched the lid for the switch, drilled a hole to see the light and a hole for the wire. Added the Anderson Connectors and Velcro.
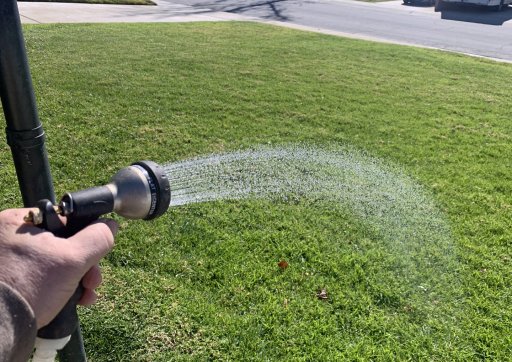
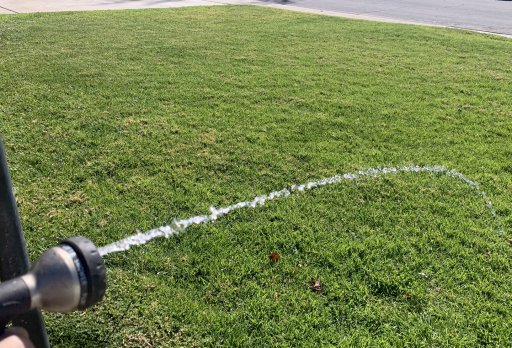
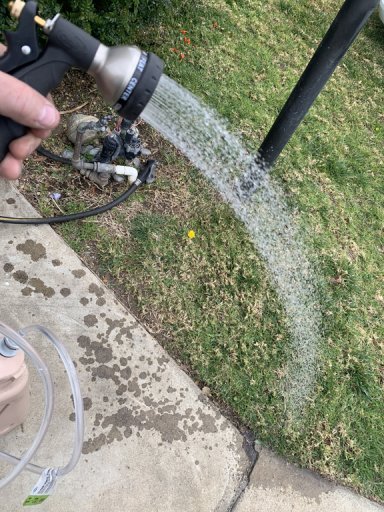
Test
Final Thoughts.
The pump could be more powerful. Its actually on par with the others I've seen. I ran it long enough to pump the water can half way with juice left in the battery. I didn't anticipate having to mod the battery but I had the extra parts so no big deal. You could save a bit of money by not installing quick connects and do something else for the connectors. You could even get an inline rocker switch to control it.
Over all I think it will work just fine.
All the ones I saw didn't quite fit what I needed so, here's mine.
Pic first then parts list and description.

Parts list
1. Scepter Can lid
2. Submersible water pump
3. Small 12 volt battery
4. Anderson connectors (2 red 2 black)
5. Quick release fitting (if needed). Lid side Hose side
6. Small Gland nut (if needed). Link is for a box of them. I have a bunch so I didn't buy any for project.
7. ½” clear tubing
8. Stainless hose clamps
9. Zip Ties
10.Small switch (if needed)
11.Small LED (if needed)
12. Small box for battery (if needed). I had a few of these left over from another project.
13. Velcro
14. Spray nozzle. Home Depo garden section.
First was drilling a hole and mounting the Quick release. Then a hole for the wiring. I used a gland nut for the wiring but if the hole was drilled tight, it wouldn't be necessary. Cut tubing to length, mount pump and run wire. The pump comes prewired with THREE wires. The colors are Yellow, Blue, brown. The Brown and Blue are cut and tinned. I used the Brown for Pos and Blue for neg. It actually didn't seem to care which way I wired it.
Once the wire was through the lid, I cut it down to where I had enough to plug into another battery box with Anderson connectors. As you can see, I have covers on my Anderson plugs. I got those off Amazon when I ordered them last. This is the first time I've used them. Zip tied the wire and installed the clamps.
Congratulations, your halfway there.


Next was the Battery. I opted for a 1.8AH Lithium. I wanted it small so I could attach it to the side of the can. Its on a Velcro tab so I could take it off to charge. The battery is rated to 14 volts. I literally just hooked it up to my trailer battery and left it there for 12 hours (forgot to unhook it). The charged voltage matched my 12.3 trailer voltage and it didn't blow up.
My battery came with a built in on/off switch and led. That told me, the battery was smaller and inside its own box. I wanted better access to the switch so, I opened the box. The actual battery was a bit smaller and was two 6volt Prismatic cells. Not bad.
The battery switch was on the side, I wanted it top and it was a bit awkward. My original plan was, remove it, put it in one of my project boxes with my own switch and light. Fortunately I was able to use both and didn't have to buy anything. At this point you have two choices, mount it anyway (nothing wrong with that) or get a battery with a better located switch.
Here's my battery pic's. I didn't get one of the battery in the original box. You can see it in the link. The battery would fit in my plastic box but I would have had to cut the mount posts off and glue the case together. I notched the lid for the switch, drilled a hole to see the light and a hole for the wire. Added the Anderson Connectors and Velcro.


Test

Final Thoughts.
The pump could be more powerful. Its actually on par with the others I've seen. I ran it long enough to pump the water can half way with juice left in the battery. I didn't anticipate having to mod the battery but I had the extra parts so no big deal. You could save a bit of money by not installing quick connects and do something else for the connectors. You could even get an inline rocker switch to control it.
Over all I think it will work just fine.
Last edited:


