Protector II
- 8,868
- First Name
- Dave
- Last Name
- Addington
- Member #
-
10123
- Ham/GMRS Callsign
- KN6BKH
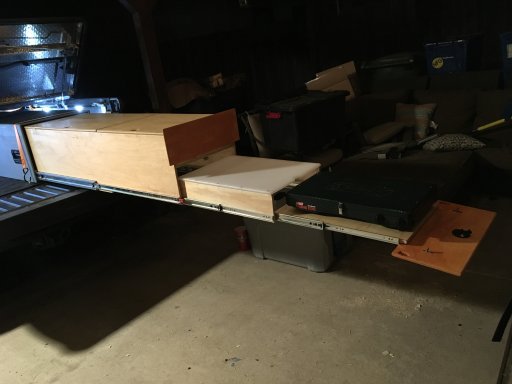
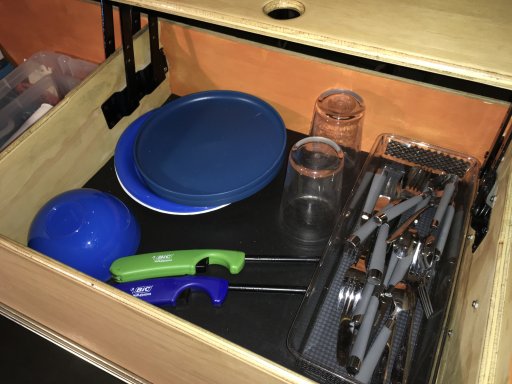
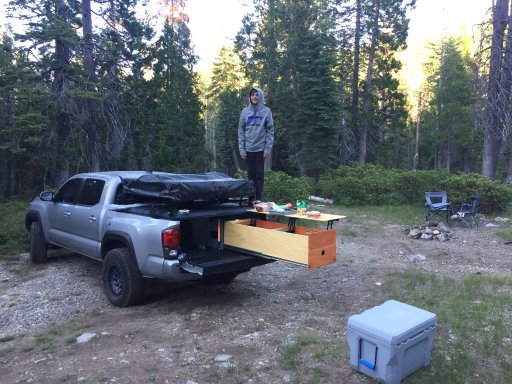
I purchased my 2018 TRD Off-road in February and already have 11k Miles on it as I’ve been all over California hitting trails. I leave in a week for a Canada Road trip up to Whistler BC on a mountain bike trip with my son. Whistler bike park looks amazing and a ski lift to the top so we can ride DOWN sounds about right. I just took my kids up to Bald Mountain above Shaver Lake CA and I gotta say I hate pulling out all the bins and setting up camp, so I decided to build drawers. Technically I think my bins hold more but sliding them out, putting them in the dirt, making dinner then putting them back in at night away from the bears, then back out again for breakfast before heading another 50-60 Miles down a trail is getting old. So though it may hold less stuff the ease of sliding it out and back in means that I pull out sleeping bags, chairs, and slide my cooler to the tailgate. Easy.
I know many others have posted builds but I thought someone might like to see what I’m attempting without just buying a pre-fab solution. I don’t off road all the time and my truck is my DD so my roof top tent and racks come off when I’m at home, and this drawer is going to go in and out as well. Think of it like a truck bed chuck box. I did spend the $$$ on 56” locking drawer slides, I know rails with bearings is an option too but I like the full extension. I am currently in process with this build so as I type it’s not finished.
I work in the medical field and I am quite handy, but I only own a skill and jig saw, so I laid out my plans and had my lumber yard do the cuts that I bought the wood from. $135 for 3 sheets of ACX 1/2 ply, and $80 in labor to make the cuts. $80 for perfect cuts seemed like a good deal to me when cabinets and drawers gotta be square and I don’t own table or chop saws.
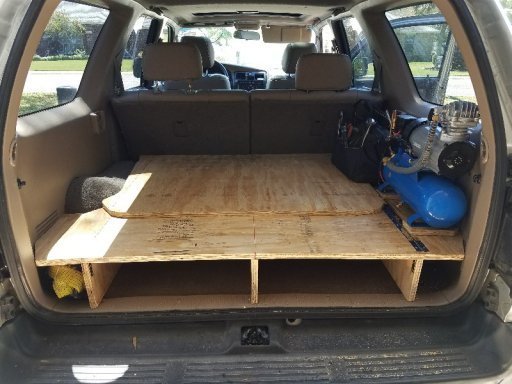
I looked at many designs and decided what was important to me and my set up, and began with the stove measurements first! That was my fixed minimum that I measured up from, working inside out. I am doing butt joints with a borrowed nail gun and glue which allows this build to be light and strong. I definitely had to keep the butt joints in mind when I was laying out my measurements. This set up fits my short bed truck which has a heavy duty Diamondback cover.
So here’s where it gets really sophisticated, my blue prints. Or....my yellow-line prints. Originally I planned 3/4”, but scaled down to 1/2”


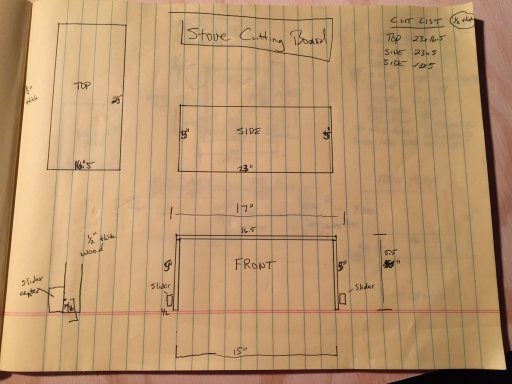

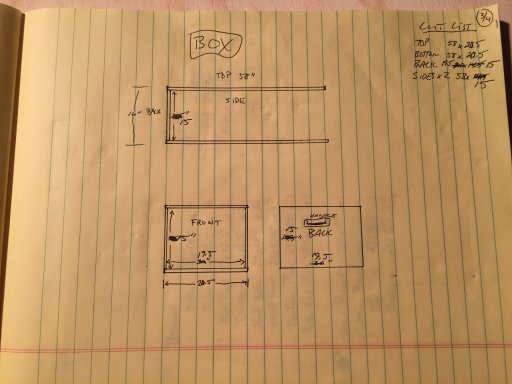
I am doing an external box (carcass) so that I can load on top, to the side, and it doesn’t affect the drawer movement.
Yesterday evening I picked up my 21 cut boards and got to work.


I purchased a 1/2 cutting board that I had to trim down just a little to be my...well my cutting board. The cutting board unit slides out from under the drawer with the stove sliding out from under that.
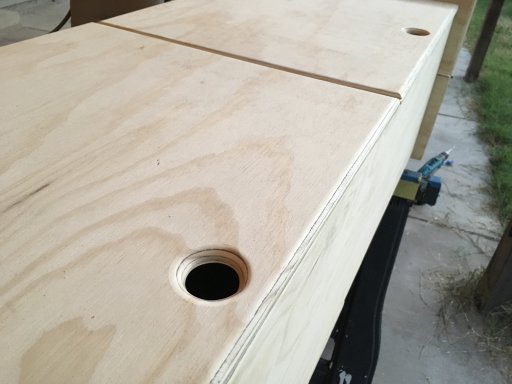
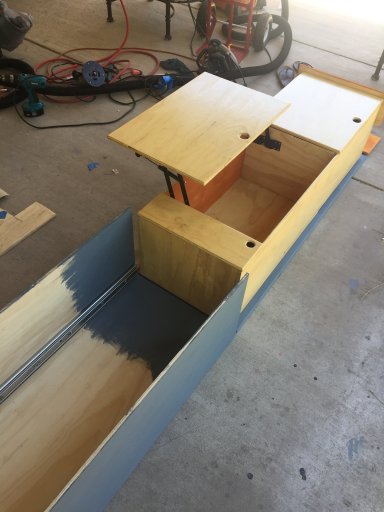
I’m sure others could blow through this fast but as with any build I had some adjustments to make. I borrowed a router and bought an $11 3/8” curved bit to round out the edges of my boxes. Makes it much more friendly to work with. Again I glued and nail gunned all the joints and pockets. I really like the coffee table lifts I got because if a lid were to flip all the way over on a piano hinge for more flat space it would be too far to reach, but the lift can hold a ton ofweight in the lifted position and your items are right there. Flat space is always a premium camping.


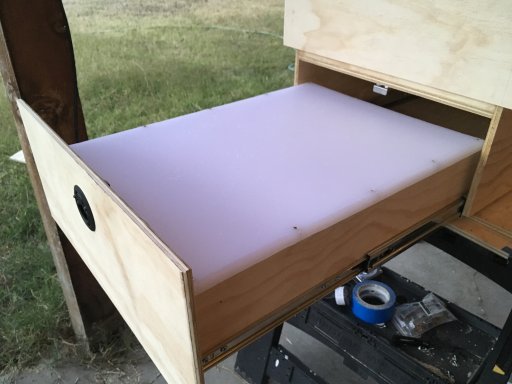


It was last minute that I decided to make the compartment on the left. I knew I didn’t want the lift lid to span all the way to the left side of the drawer because though the drawer sliders are full extension it still might hit the end of the tonneau cover. So instead of 6” of dead space I made a little compartment for random things. Originally I got these hinges for the stove front drawer face but they were too big, but they worked perfectly here. I went with a piano hinge for the drawer face that lays down to give me extra inches to put the Coleman regulator and propane tank on. Waiting on Fedex for my 56” drawer slides, so tomorrow I will build half of my outer carcass box.

Testing the fit of the drawer inside the outer box, but the lid isn’t nailed on yet.

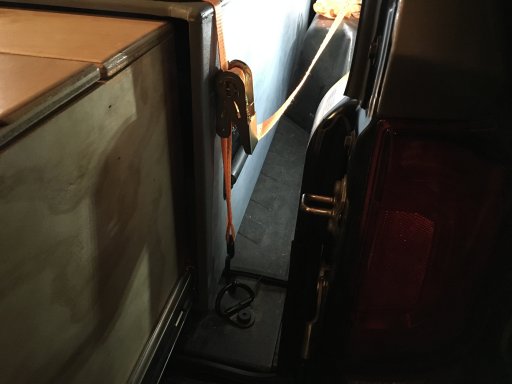
I built the outer box and routered all of the edges so it’s smooth. Still waiting on my 56” drawer slides that come tomorrow EOD. Got my first coats of paint on, Gray for the outer box, rubbed on orange, and clear poly. Using $6 metal bearing wheels on the rear to help slide the box in and a $9 Home Depot mat that I will glue to the top to protect the wood as I load stuff in and out.

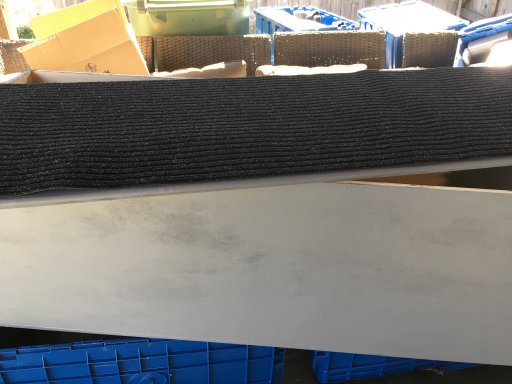


Now just waiting on my slides!
I know many others have posted builds but I thought someone might like to see what I’m attempting without just buying a pre-fab solution. I don’t off road all the time and my truck is my DD so my roof top tent and racks come off when I’m at home, and this drawer is going to go in and out as well. Think of it like a truck bed chuck box. I did spend the $$$ on 56” locking drawer slides, I know rails with bearings is an option too but I like the full extension. I am currently in process with this build so as I type it’s not finished.
I work in the medical field and I am quite handy, but I only own a skill and jig saw, so I laid out my plans and had my lumber yard do the cuts that I bought the wood from. $135 for 3 sheets of ACX 1/2 ply, and $80 in labor to make the cuts. $80 for perfect cuts seemed like a good deal to me when cabinets and drawers gotta be square and I don’t own table or chop saws.
I looked at many designs and decided what was important to me and my set up, and began with the stove measurements first! That was my fixed minimum that I measured up from, working inside out. I am doing butt joints with a borrowed nail gun and glue which allows this build to be light and strong. I definitely had to keep the butt joints in mind when I was laying out my measurements. This set up fits my short bed truck which has a heavy duty Diamondback cover.
So here’s where it gets really sophisticated, my blue prints. Or....my yellow-line prints. Originally I planned 3/4”, but scaled down to 1/2”


I am doing an external box (carcass) so that I can load on top, to the side, and it doesn’t affect the drawer movement.
Yesterday evening I picked up my 21 cut boards and got to work.


I purchased a 1/2 cutting board that I had to trim down just a little to be my...well my cutting board. The cutting board unit slides out from under the drawer with the stove sliding out from under that.
I’m sure others could blow through this fast but as with any build I had some adjustments to make. I borrowed a router and bought an $11 3/8” curved bit to round out the edges of my boxes. Makes it much more friendly to work with. Again I glued and nail gunned all the joints and pockets. I really like the coffee table lifts I got because if a lid were to flip all the way over on a piano hinge for more flat space it would be too far to reach, but the lift can hold a ton ofweight in the lifted position and your items are right there. Flat space is always a premium camping.


It was last minute that I decided to make the compartment on the left. I knew I didn’t want the lift lid to span all the way to the left side of the drawer because though the drawer sliders are full extension it still might hit the end of the tonneau cover. So instead of 6” of dead space I made a little compartment for random things. Originally I got these hinges for the stove front drawer face but they were too big, but they worked perfectly here. I went with a piano hinge for the drawer face that lays down to give me extra inches to put the Coleman regulator and propane tank on. Waiting on Fedex for my 56” drawer slides, so tomorrow I will build half of my outer carcass box.


Testing the fit of the drawer inside the outer box, but the lid isn’t nailed on yet.

I built the outer box and routered all of the edges so it’s smooth. Still waiting on my 56” drawer slides that come tomorrow EOD. Got my first coats of paint on, Gray for the outer box, rubbed on orange, and clear poly. Using $6 metal bearing wheels on the rear to help slide the box in and a $9 Home Depot mat that I will glue to the top to protect the wood as I load stuff in and out.


Now just waiting on my slides!
Attachments
-
554.2 KB Views: 113
-
646 KB Views: 109
-
2.3 MB Views: 119
-
2.4 MB Views: 121
-
990.6 KB Views: 106
-
1.8 MB Views: 102


