Our Tag-A-Long trailer build

  • HTML tutorial

Bri4Runner

Rank IV
Launch Member

Enthusiast II

979
Waco, TX, USA
First Name
Brian
Last Name
Dooley
Member #

21429

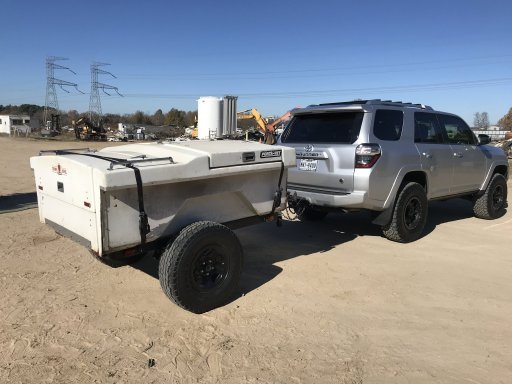
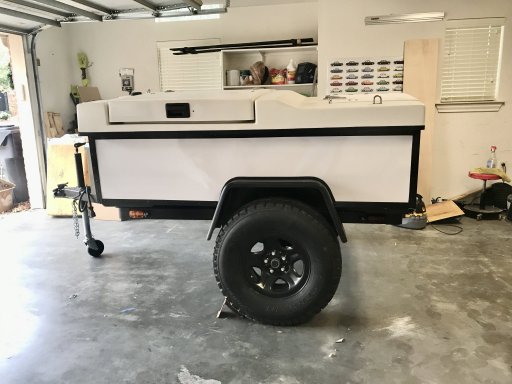
I thought I would share my overland trailer build. I know it's working backwards posting pics of it now vs. build pics, but I didn't think much of making a build post until I started getting questions about it. So here is our Tag-A-Long (home built) trailer as it is now.
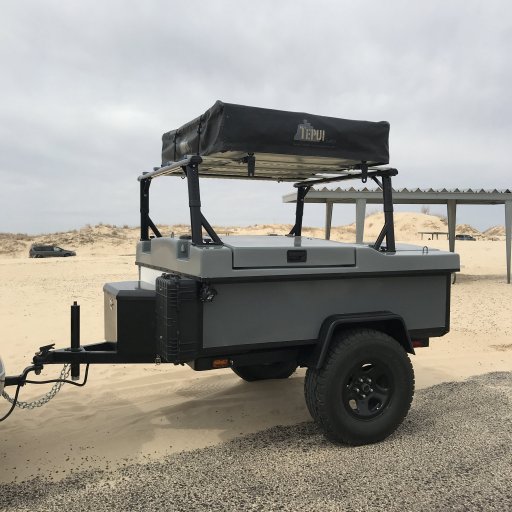
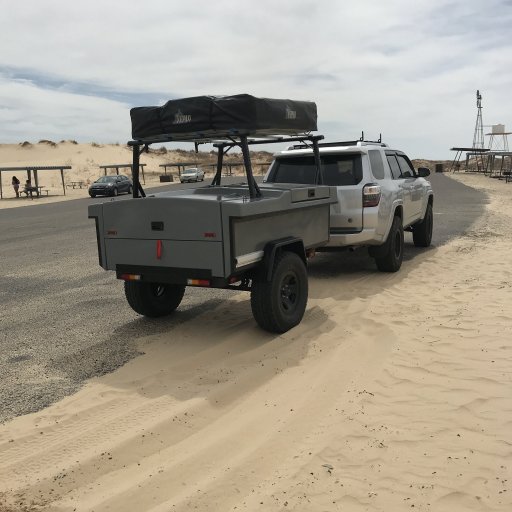
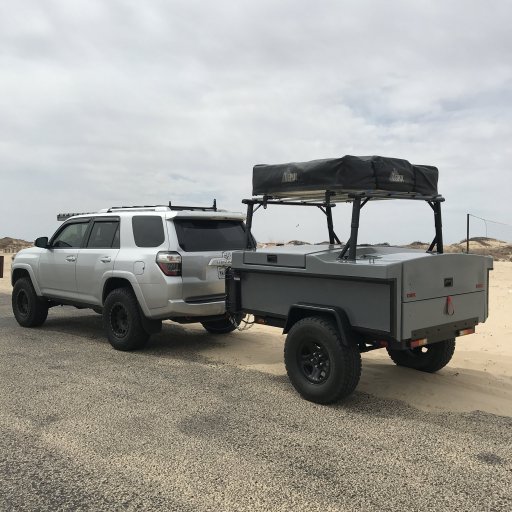
IMG_0567.JPGIMG_0572.JPGIMG_0565.JPGIMG_0302.jpg

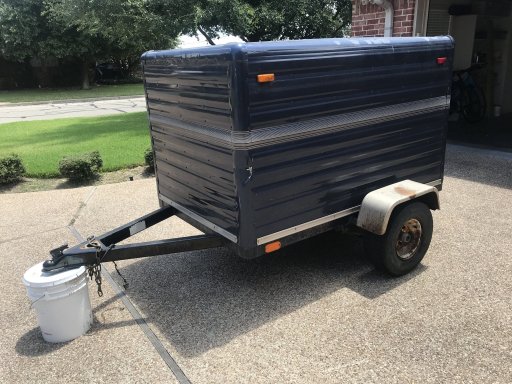
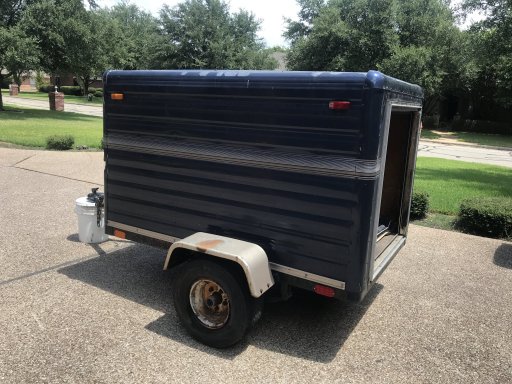
And this is what it started out as...

IMG_9494.JPGIMG_9495.JPG

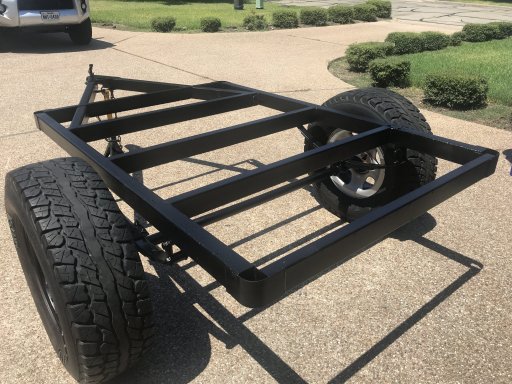
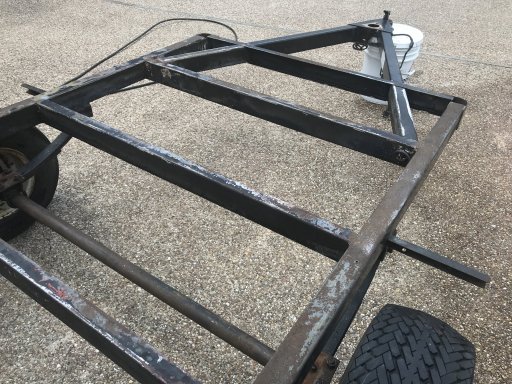
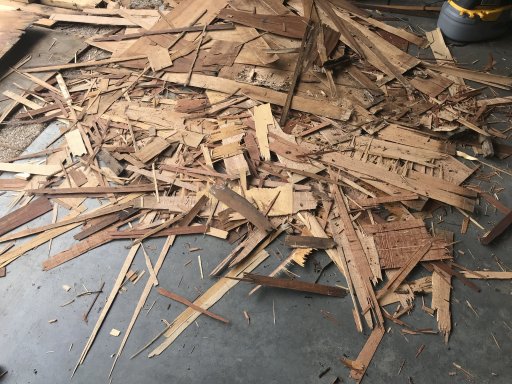
It's been several months in the making but the goal was to build a trailer that can carry all our camping gear and that we could just plan a trip on the spur of the moment. I started with this 4x6 utility trailer knowing I really only needed the frame since the rest of it was pretty rotten. I stripped down and disposed of the "box" part of the trailer and then restored the frame since it had some minor rust. The frame was stripped and treated with POR15 before getting painted with the POR15 rust paint. The pic of the wood shows how it just came apart easily after removing the aluminum outer panels

IMG_9608.JPGIMG_9603.JPG

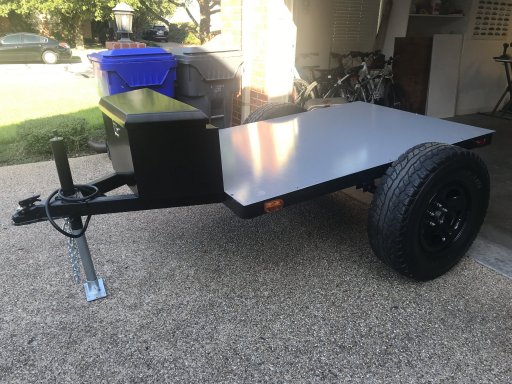
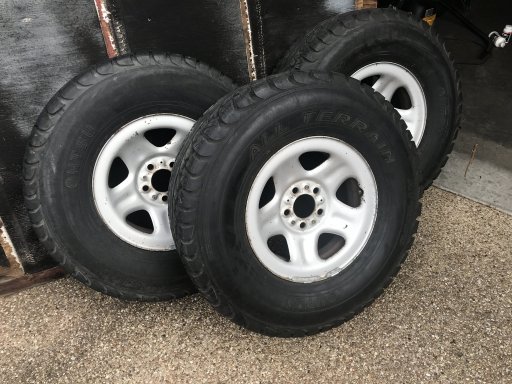
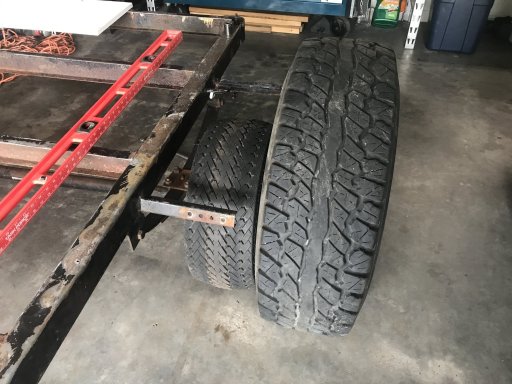
After the frame was treated and painted I welded new spring plates to the axle so I could do the "over under" axle flip which gave it a lift. I also picked up a set of 15" Jeep wheels that towered over the small 10" wheels that were on it. Around this time I also rewired all the lights and added a 12v power system in a tongue box.

IMG_9609.JPGIMG_9610.JPGIMG_9640.JPGIMG_9961.JPG

My original plan was to build the unit out of extruded aluminum since I thought it would be a great way to have a solid structure that I could change around in the future. I was getting ready to place my order when I came across an ad on Marketplace for an old Vet box.
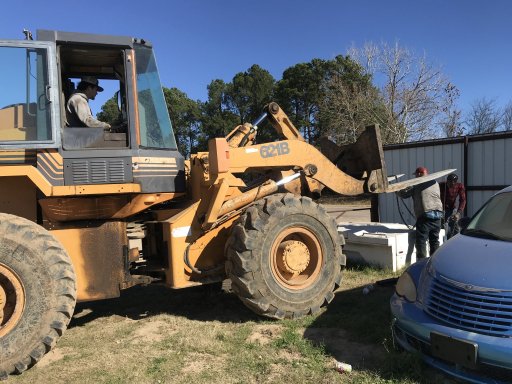
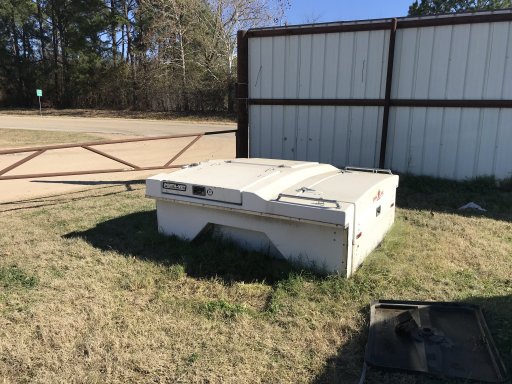
These units are built for the back of a pick up truck for Veterinarians that make house calls. Mainly for farm animals. Seeing this totally changed my plan and I quickly hooked up the trailer and headed out to pick it up. The seller was very helpful with providing me all the dimensions beforehand since it was a 3hr drive and weighed 700lbs. Luckily the specs worked out perfectly and it fit!


I wouldn't have been able to lift this, LOL...


IMG_0527.JPGIMG_0529.JPG
IMG_0533.JPGIMG_0546.JPG

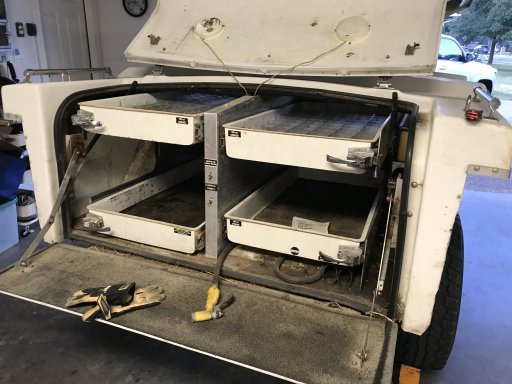
The photo of the back before cleaning does not even begin to show how bad it really was. It was filled with old vet supplies and took 2 solid days of scrubbing and disinfecting... I ended up gutting the entire unit which has 4 drawers in the rear and a large cargo area in the front.

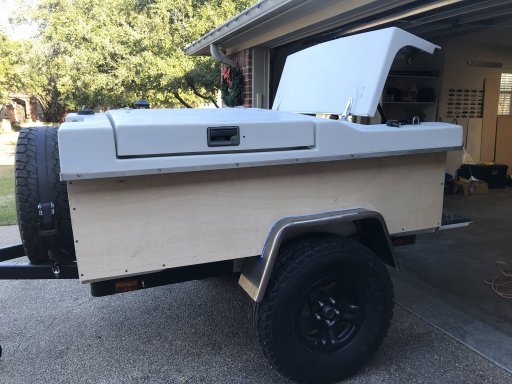
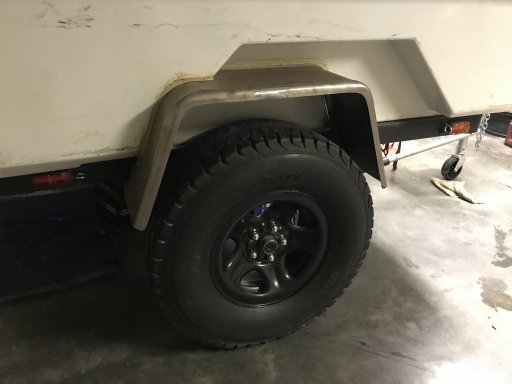
After cleaning and getting it secured to the frame I started to install side panels and fenders.

IMG_0636.JPGIMG_0667.JPGIMG_0777.JPGIMG_0769.jpg

The side panels are plywood that I painted and then formica was glued tot that. Aluminum channels were then screwed in to keep it all in place. It was all sealed up as well.

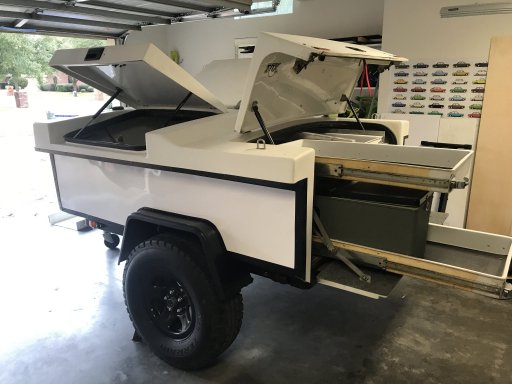
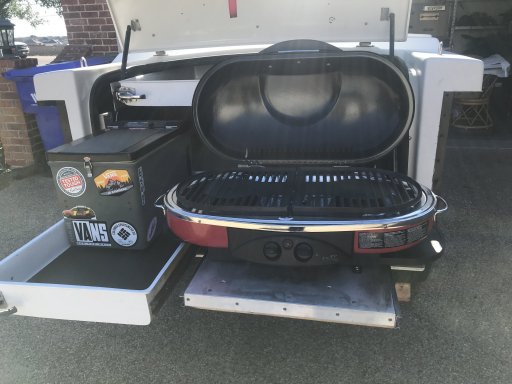
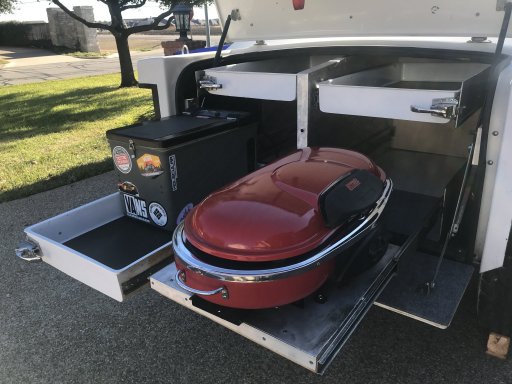
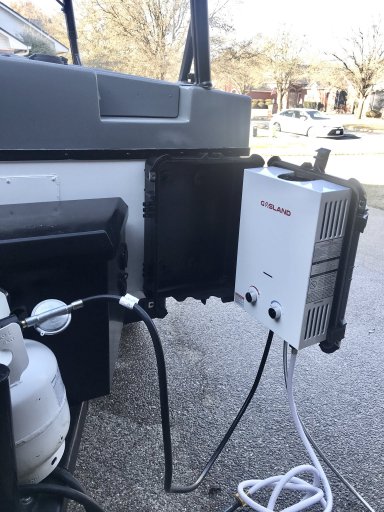
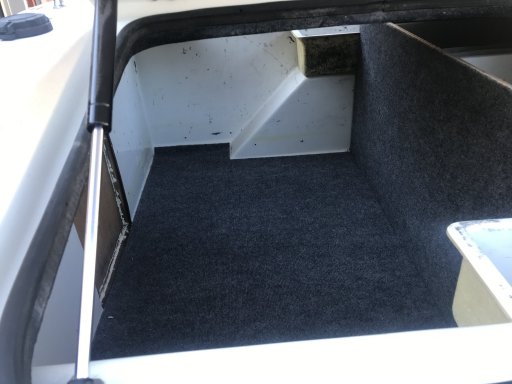
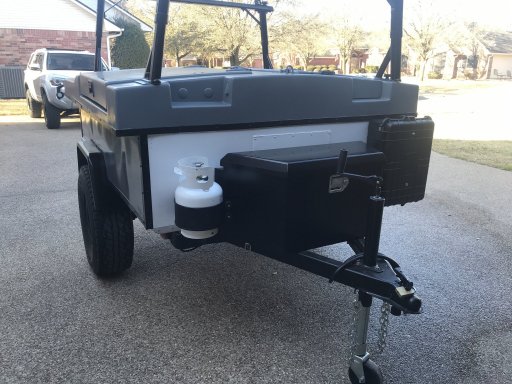
I added the adjustable rack and a hot water unit in the hard case. Also added a 5lb propane tank for the heater. The cargo area was covered with outdoor carpet and the rear drawers hold the freezer/fridge and the grill. The grill is mounted on a lazy suzan so it can be stored. The interior of the trailer is also wired with LED lights as well as the exterior has some LED spot lights. There are a few 12v outlets and USB ports for charging devices.

IMG_0301.JPGIMG_0774.JPG

IMG_0843.JPGIMG_0845.JPG
IMG_0284.jpg

It's definitely a work in progress and I have a few more plans down the road. We've already taken it on a couple trips and it works out great.

This is really the Cliff notes version, LOL. I wanted to keep the initial post short and not too boring :) I could get into tons of the little details but the gist of it is I got a trailer and put a vet box on it. A bunch of details happened in between but ended up with a pretty cool little tag-a-long trailer that completely fits our needs (and then some). Oh, why call it tag-a-long??? That was actually the name of the little blue trailer I started out with. ;)

Thanks for checking it out!
 

Attachments

Bri4Runner

Rank IV
Launch Member

Enthusiast II

979
Waco, TX, USA
First Name
Brian
Last Name
Dooley
Member #

21429

Sweet, but crap that's heavy!
I am waiting to get it titled and weighed but the vet box was around 700 lb before I gutted it. I removed 100+ lbs of drawers and accessories I had no use for. Overall it's still pretty heavy for its size but under 1,200 lbs. I won't know for sure until it is weighed.
 

Lanlubber In Remembrance

Rank V
Launch Member

Member III

2,827
Mimbres, NM, USA
First Name
Jim
Last Name
covey sr
Member #

16986

Ham/GMRS Callsign
none - BREAKER BREAKER HAND HELD CB AND WALKIE TALKIE
I thought I would share my overland trailer build. I know it's working backwards posting pics of it now vs. build pics, but I didn't think much of making a build post until I started getting questions about it. So here is our Tag-A-Long (home built) trailer as it is now.
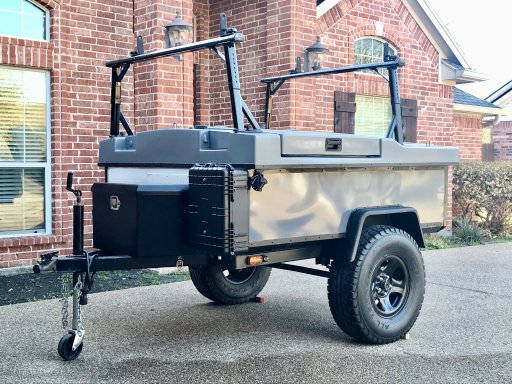

View attachment 192544View attachment 192546View attachment 192545View attachment 192547

And this is what it started out as...
View attachment 192548View attachment 192550

It's been several months in the making but the goal was to build a trailer that can carry all our camping gear and that we could just plan a trip on the spur of the moment. I started with this 4x6 utility trailer knowing I really only needed the frame since the rest of it was pretty rotten. I stripped down and disposed of the "box" part of the trailer and then restored the frame since it had some minor rust. The frame was stripped and treated with POR15 before getting painted with the POR15 rust paint. The pic of the wood shows how it just came apart easily after removing the aluminum outer panels
View attachment 192551View attachment 192552

After the frame was treated and painted I welded new spring plates to the axle so I could do the "over under" axle flip which gave it a lift. I also picked up a set of 15" Jeep wheels that towered over the small 10" wheels that were on it. Around this time I also rewired all the lights and added a 12v power system in a tongue box.
View attachment 192553View attachment 192558View attachment 192554View attachment 192555

My original plan was to build the unit out of extruded aluminum since I thought it would be a great way to have a solid structure that I could change around in the future. I was getting ready to place my order when I came across an ad on Marketplace for an old Vet box.
These units are built for the back of a pick up truck for Veterinarians that make house calls. Mainly for farm animals. Seeing this totally changed my plan and I quickly hooked up the trailer and headed out to pick it up. The seller was very helpful with providing me all the dimensions beforehand since it was a 3hr drive and weighed 700lbs. Luckily the specs worked out perfectly and it fit!


I wouldn't have been able to lift this, LOL...

View attachment 192560View attachment 192559
View attachment 192561View attachment 192562

The photo of the back before cleaning does not even begin to show how bad it really was. It was filled with old vet supplies and took 2 solid days of scrubbing and disinfecting... I ended up gutting the entire unit which has 4 drawers in the rear and a large cargo area in the front.

After cleaning and getting it secured to the frame I started to install side panels and fenders.
View attachment 192565View attachment 192566View attachment 192567View attachment 192568

The side panels are plywood that I painted and then formica was glued tot that. Aluminum channels were then screwed in to keep it all in place. It was all sealed up as well.

I added the adjustable rack and a hot water unit in the hard case. Also added a 5lb propane tank for the heater. The cargo area was covered with outdoor carpet and the rear drawers hold the freezer/fridge and the grill. The grill is mounted on a lazy suzan so it can be stored. The interior of the trailer is also wired with LED lights as well as the exterior has some LED spot lights. There are a few 12v outlets and USB ports for charging devices.
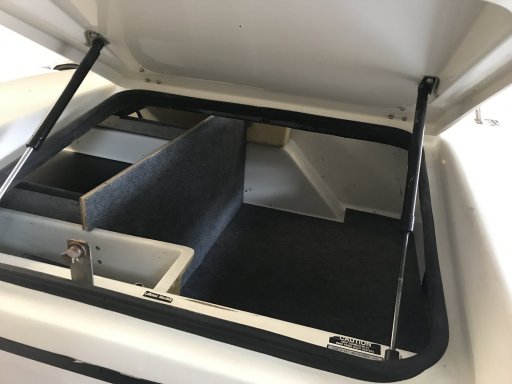
View attachment 192569View attachment 192570

View attachment 192572View attachment 192573
View attachment 192574

It's definitely a work in progress and I have a few more plans down the road. We've already taken it on a couple trips and it works out great.

This is really the Cliff notes version, LOL. I wanted to keep the initial post short and not too boring :) I could get into tons of the little details but the gist of it is I got a trailer and put a vet box on it. A bunch of details happened in between but ended up with a pretty cool little tag-a-long trailer that completely fits our needs (and then some). Oh, why call it tag-a-long??? That was actually the name of the little blue trailer I started out with. ;)

Thanks for checking it out!
Job well done and Thanks for all the great pictures.
 
  • Like
Reactions: Bri4Runner

Bri4Runner

Rank IV
Launch Member

Enthusiast II

979
Waco, TX, USA
First Name
Brian
Last Name
Dooley
Member #

21429

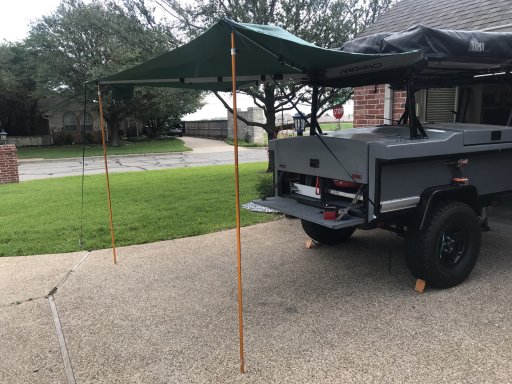
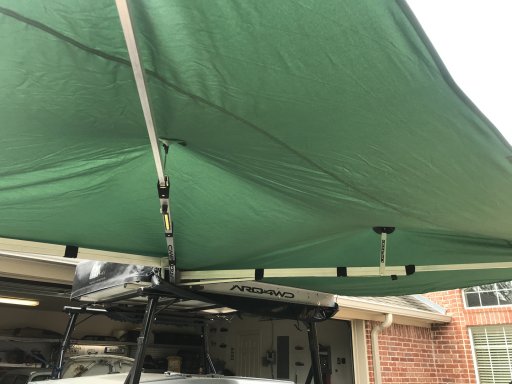
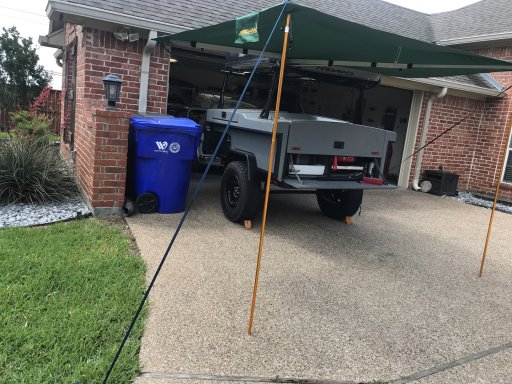
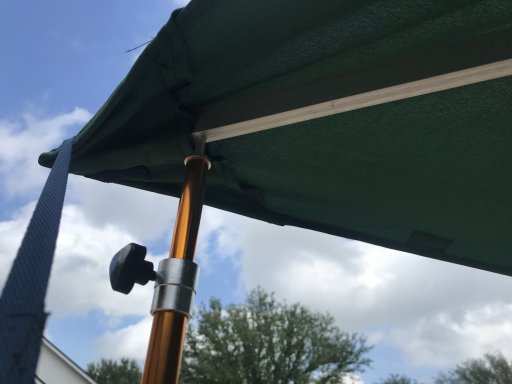
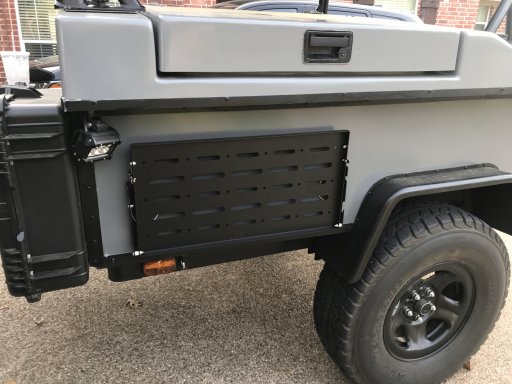
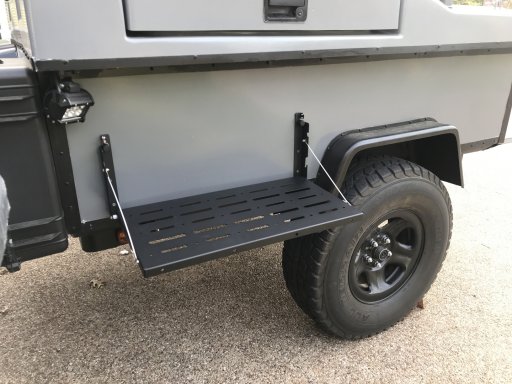
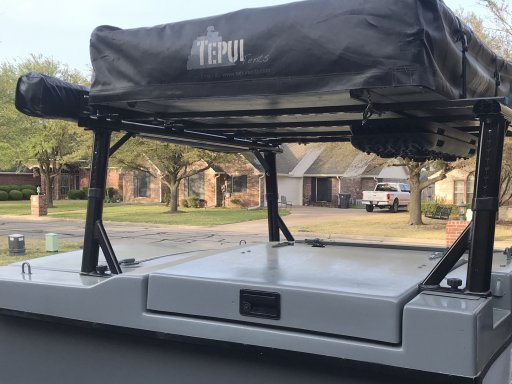
I was able to get a great deal on a ARQ4WD A180* awning but added poles because I did not really trust the support. I found that this awning is probably best mounted to the side of a Prinsu style rack where there is a full frame to support it. I have 3 heavy duty L brackets (lumber mounts) and with wind there was a lot of flex. With the poles it made it a completely different awning. We had a bout 15mph winds and with the poles the awning was solid. A few other small projects were mounting the recovery tracks under the rack, adding a folding table , and a water pump for when we need to use the water containers. Planning on taking it out next weekend to test in not in our driveway, LOL

IMG_1211.JPGIMG_1214.JPG

IMG_1213.JPG

IMG_1212.JPG
IMG_0755.JPG
IMG_0753.JPG
IMG_0750.JPG
 

Danno

Rank 0

Contributor I

60
Arizona
First Name
Dan
Last Name
Salazar
I was able to get a great deal on a ARQ4WD A180* awning but added poles because I did not really trust the support. I found that this awning is probably best mounted to the side of a Prinsu style rack where there is a full frame to support it. I have 3 heavy duty L brackets (lumber mounts) and with wind there was a lot of flex. With the poles it made it a completely different awning. We had a bout 15mph winds and with the poles the awning was solid. A few other small projects were mounting the recovery tracks under the rack, adding a folding table , and a water pump for when we need to use the water containers. Planning on taking it out next weekend to test in not in our driveway, LOL

View attachment 197658View attachment 197660

View attachment 197661

View attachment 197662
View attachment 197664
View attachment 197665
View attachment 197666
That looks awesome! How did your venture out go? Awning hold up for you?
 
  • Like
Reactions: Bri4Runner

Bri4Runner

Rank IV
Launch Member

Enthusiast II

979
Waco, TX, USA
First Name
Brian
Last Name
Dooley
Member #

21429

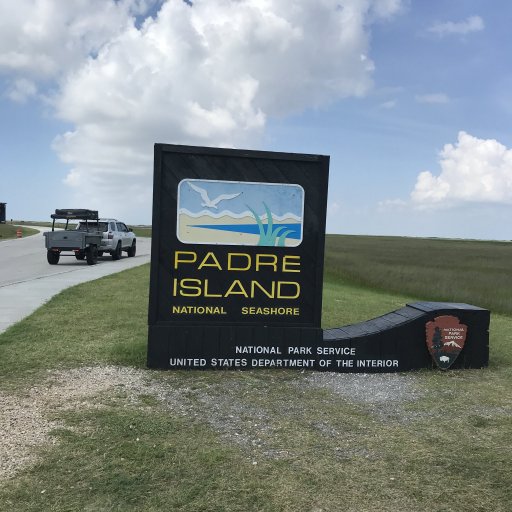
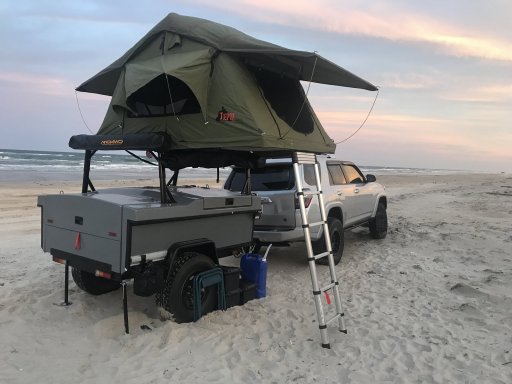
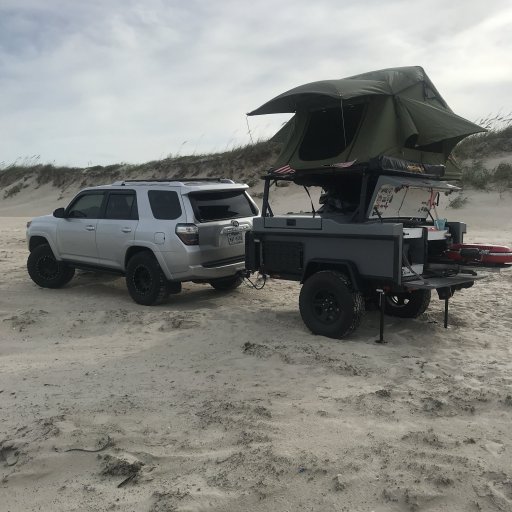
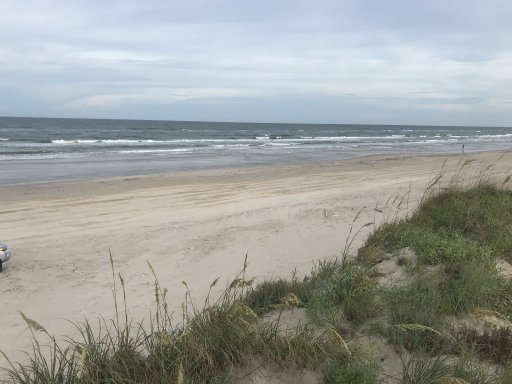
The other weekend we had a successful trip out to Padre Island (PINS). It's hit or miss with the winds at Padre but we were lucky it was not bad at all! We had a great trip and already planning to head back in a few weeks. Getting another trip in on the trailer is great to figure out what works and what doesn't and what we may still need. I'm sure every trip with get easier as all the kinks are ironed out.


If you haven't been to Padre I highly recommend going! The wind could be an issue so be sure to check the weather in advance. It can be brutal on gear and tents. Cooking is also difficult so bring MRE just in case. Our first trip to Padre didn't work out because of our gear and the wind so we ended up heading back home, but if you are prepared and the weather is ideal than it's going to be a trip to remember! Nothing like driving along the beach and camping wherever you decide to stop. No one else is around and you have a lot of privacy. Trash can be an issue since a lot is washed up along the Gulf. We drove down only 7 miles but next trip will plan on going at least 15 just to avoid the trucks coming and going from fishing.

IMG_1848.JPGIMG_1779.JPGIMG_1728.JPGIMG_1774.JPG
 

loper

Rank VI
Launch Member

Advocate II

3,743
Nampa, Idaho
First Name
Carl
Last Name
Hendricks
Member #

24055

Nice set up. I really like to see things people build for themselves, rather than just buying it.
 
  • Like
Reactions: Bri4Runner

Bri4Runner

Rank IV
Launch Member

Enthusiast II

979
Waco, TX, USA
First Name
Brian
Last Name
Dooley
Member #

21429

Nice set up. I really like to see things people build for themselves, rather than just buying it.
Thank you! It's been a fun project that's way more practical than we expected. It's so much easier to keep organized and we actually keep everything we need in it so theres no more loading and unloading when we take a trip. It really makes us want to get out more :)
 

socal geek guy

Rank IV
Launch Member

Enthusiast III

1,116
San Diego, CA, USA
First Name
Chris
Last Name
Walker
Member #

19531

how are those stabilizer jacks? i'm trying to figure that out and the drop leg jacks i was looking at are quite pricey.
 

Bri4Runner

Rank IV
Launch Member

Enthusiast II

979
Waco, TX, USA
First Name
Brian
Last Name
Dooley
Member #

21429

how are those stabilizer jacks? i'm trying to figure that out and the drop leg jacks i was looking at are quite pricey.
The jacks work great. I looked at different types as well and decided to go with these because of the price since I'm on a pretty tight budget. I do plan on getting a couple more for the front even though the tongue jack does a pretty good job of stabilizing when its not hooked up. These are from Amazon:
 
  • Like
Reactions: KonzaLander

KonzaLander

Rank VI
Member

Traveler II

3,402
Junction City, Kansas, USA
Member #

15814

Ham/GMRS Callsign
KE0EBF
The jacks work great. I looked at different types as well and decided to go with these because of the price since I'm on a pretty tight budget. I do plan on getting a couple more for the front even though the tongue jack does a pretty good job of stabilizing when its not hooked up. These are from Amazon:
Thanks for providing feedback on those stabilizing jacks, I have been looking at a set like those myself. Are you able to level the trailer by lifting/decompressing the suspension with them?