Hi All, there have been a number of request to show pictures and discuss my camp kitchen box. I had been for years doing all my kitchen stuff in a Rubbermaid tote, now for a starter this is fine, but for my OCD it was lacking organization! My dad had told me about his old Boy Scout Patrol Box. Much to my surprise when I looked on the internet for ideas and such it was a limited source. Most designs where very similar and not exactly what I had in mind.
Problem:: How to organize all my kitchen stuff and food?
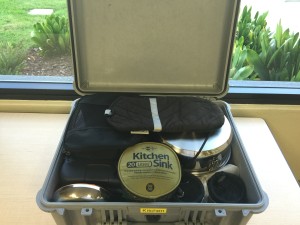
Answer:: Well it may see real logical to just build something, but it took a while to arrive at that answer. I started the journey with a lot of research, form posts, social media digging, etc. I found a few small companies making wooden boxes similar to mine. I found a number of people who turned their Pelican cases into kitchen boxes. I tried that and found it was only slightly better then the Rubbermaid mess I was already dealing with. Granted there are some options for the pelican I didn't try like lid organizers and such. I do still use a pelican style case made by SKB cases for dry goods when I need extra space.
Once I figured out that buying what I wanted didn't exist, I actually approached SKB cases in Orange CA about it. I deal with them on a regular basis through my work so it seemed only natural. After some discussion it didn't seem like they understood the need, so time to venture out on my own.
I started the process by gathering ALL the stuff I wanted to put inside. My partner knock off stove, pots, pans, utensils, containers for food, etc. I laid it out in various storage configurations. I eventually came up with a diagram. From this I made a set of plans. Now on paper this seemed to be a modest size box, in reality it is pretty damn big and really needs to be a two person lift...... But I digress! I am lucky enough to have grown up in a family of contractors and carpenters so I do have some more advanced wood working knowledge. This is not quite a beginners box, but something more simple could be. I was able to use some very rare 1/2" Teak plywood, now this is not what I would recommend to use as it's almost impossible to find and super expensive. I have a bunch left over from my grandfathers old projects so I choose to use it. I was able to use my woodworking shop at my office for the build. It took me and my father who helped me along the way one long day to complete. I cut all the prices on a table saw. I used a narrow crown stapler and glue to assemble the box. It was pretty straight forward.
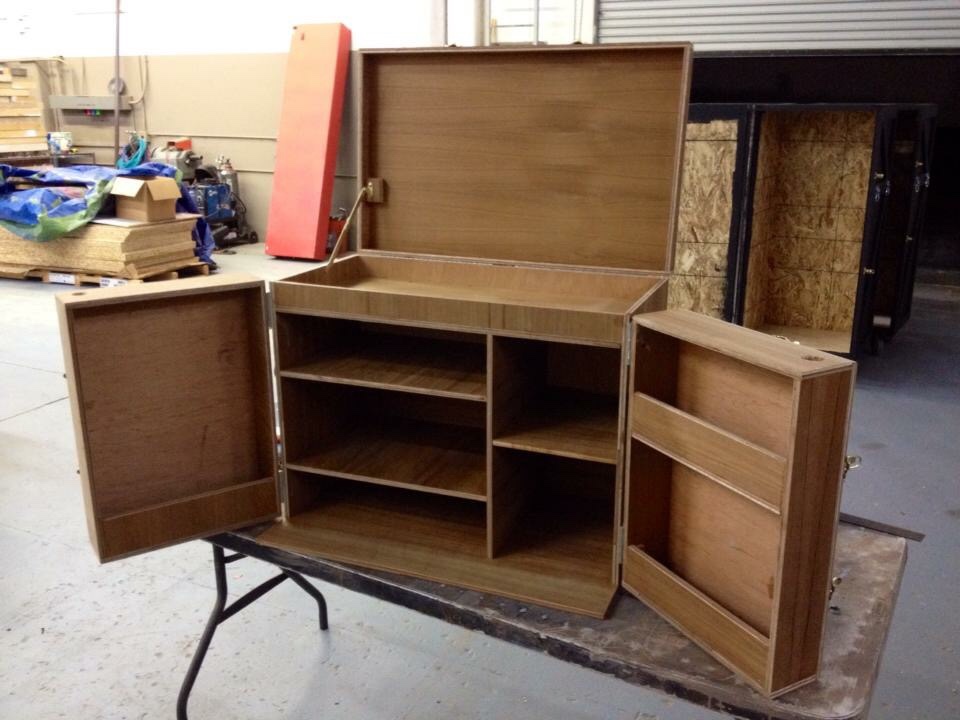
This is the result. The bottom shelf I store the stove on, it's a perfect fit. The two shelves in the right are for pots, pans, bottles, etc. the middle and top shelf hold cans, dry goods, chips etc. each door has shelves for spices, bottles, coffee stuff etc.
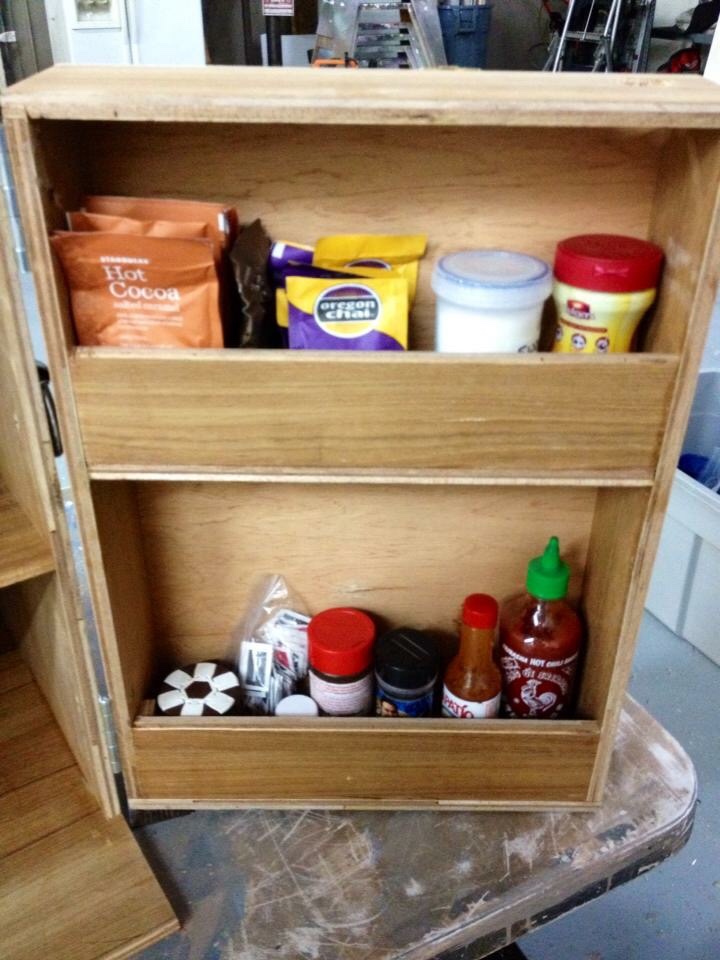

You can see here this is just finished with my contents in it. Pretty good.
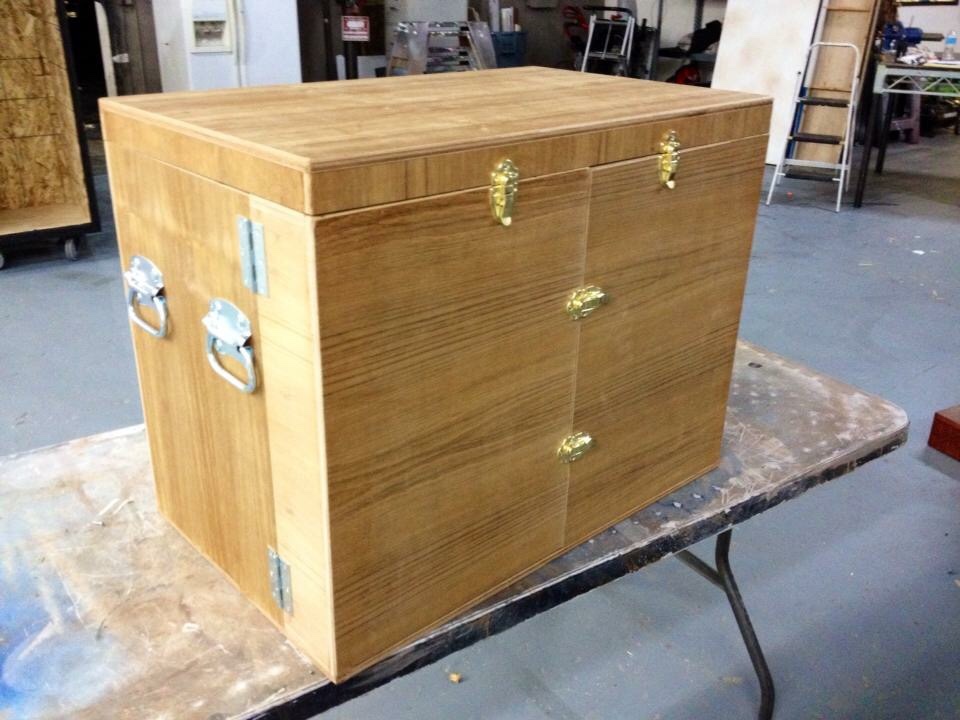
This is the box closed, cheap Home Depot hardware, but it works fine.
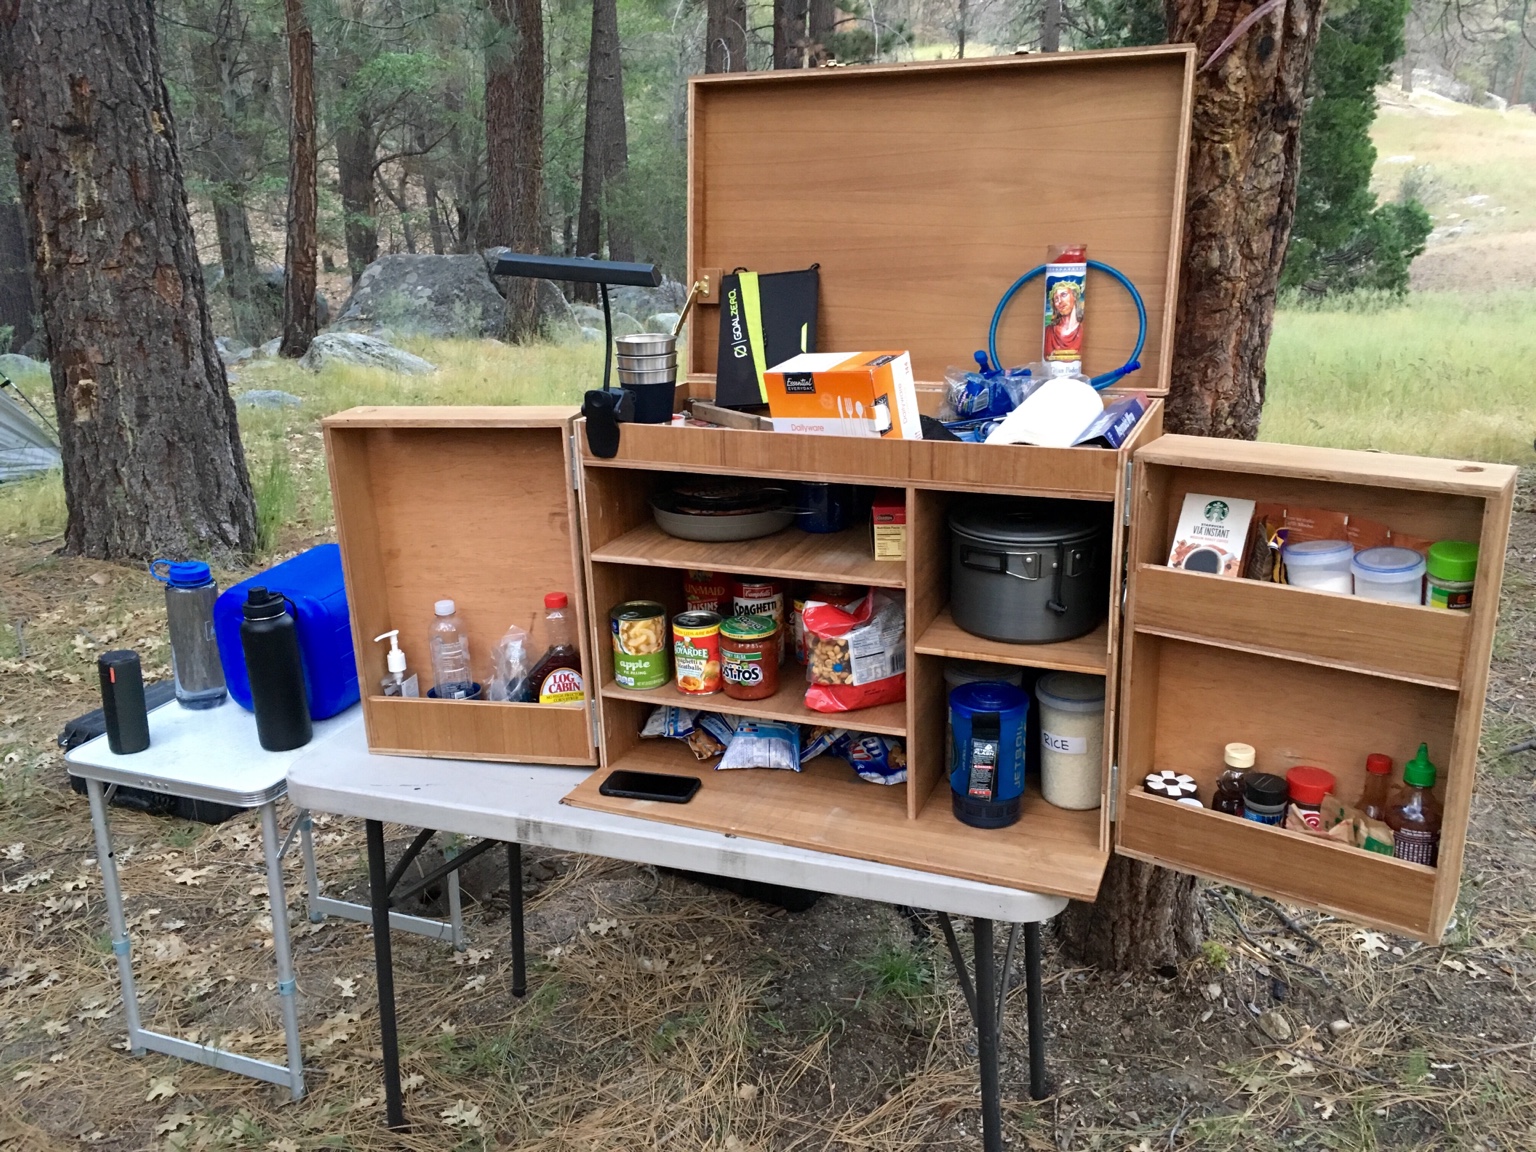
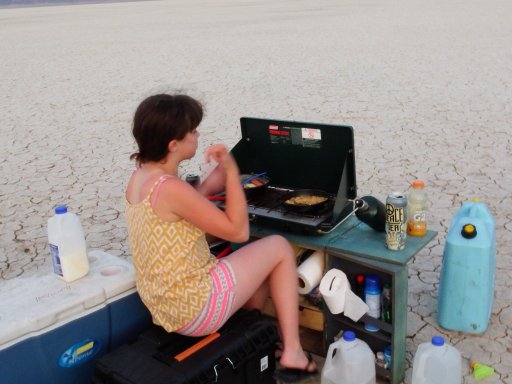
Here is the box in use at camp. I use the top section ad my kitchen junk drawer.....cause we all need a junk drawer! I also bungy a roll of paper towels to the doors when in use.
This has made a massive improvement to the deployment of the kitchen stuff and having everything at the ready it's just great!
I still want to do some things like add a lid organizer and perhaps build another shelf on the left door, but it works for now so it's on the road.
I hope that helps, got questions..... Ask away! :)
Problem:: How to organize all my kitchen stuff and food?
Answer:: Well it may see real logical to just build something, but it took a while to arrive at that answer. I started the journey with a lot of research, form posts, social media digging, etc. I found a few small companies making wooden boxes similar to mine. I found a number of people who turned their Pelican cases into kitchen boxes. I tried that and found it was only slightly better then the Rubbermaid mess I was already dealing with. Granted there are some options for the pelican I didn't try like lid organizers and such. I do still use a pelican style case made by SKB cases for dry goods when I need extra space.
Once I figured out that buying what I wanted didn't exist, I actually approached SKB cases in Orange CA about it. I deal with them on a regular basis through my work so it seemed only natural. After some discussion it didn't seem like they understood the need, so time to venture out on my own.
I started the process by gathering ALL the stuff I wanted to put inside. My partner knock off stove, pots, pans, utensils, containers for food, etc. I laid it out in various storage configurations. I eventually came up with a diagram. From this I made a set of plans. Now on paper this seemed to be a modest size box, in reality it is pretty damn big and really needs to be a two person lift...... But I digress! I am lucky enough to have grown up in a family of contractors and carpenters so I do have some more advanced wood working knowledge. This is not quite a beginners box, but something more simple could be. I was able to use some very rare 1/2" Teak plywood, now this is not what I would recommend to use as it's almost impossible to find and super expensive. I have a bunch left over from my grandfathers old projects so I choose to use it. I was able to use my woodworking shop at my office for the build. It took me and my father who helped me along the way one long day to complete. I cut all the prices on a table saw. I used a narrow crown stapler and glue to assemble the box. It was pretty straight forward.

This is the result. The bottom shelf I store the stove on, it's a perfect fit. The two shelves in the right are for pots, pans, bottles, etc. the middle and top shelf hold cans, dry goods, chips etc. each door has shelves for spices, bottles, coffee stuff etc.


You can see here this is just finished with my contents in it. Pretty good.

This is the box closed, cheap Home Depot hardware, but it works fine.

Here is the box in use at camp. I use the top section ad my kitchen junk drawer.....cause we all need a junk drawer! I also bungy a roll of paper towels to the doors when in use.
This has made a massive improvement to the deployment of the kitchen stuff and having everything at the ready it's just great!
I still want to do some things like add a lid organizer and perhaps build another shelf on the left door, but it works for now so it's on the road.
I hope that helps, got questions..... Ask away! :)


