Land Pirate's 2013 Forester Build

  • HTML tutorial

LandPirate

Rank V
Launch Member

Influencer II

1,977
Fort Collins, CO
Member #

3359

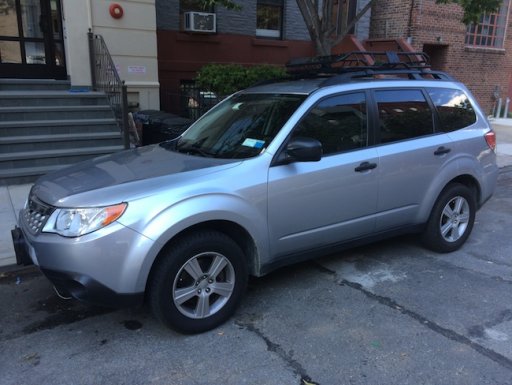
My build has begun on my 2013 Subaru Forester 2.5X.

First, I know what this vehicle is. It's a unibody vehicle without a separate frame, no low gear, limited sized wheel wells, 170 peak horsepower (2.5X version, non-turbo) and without many of the conveniences of true off road vehicles such as factory dedicated recovery points (multiple front and rear), places to easily mount a winch, larger alternators to support said winches and other lights, etc.

All that said, Subaru's All Wheel Drive system is in fact quite good, and the Forester provides me an excellent platform for the type of off road driving I plan on doing. So my plan is to modify the vehicle to get me from point A to point B safely and within a financial range which makes keeping and upgrading the vehicle worthwhile vs. simply selling it and buying a more capable stock vehicle to modify for more advanced off road use. Plus I already own this one, so that's a huge plus in the planning department.

I have currently installed or completed the following:
  1. Yokohama Geolandar GO15 A/T (215 65 16 - stock size) installed.
  2. Full sized matching spare (5th wheel rotation possible but TBD at this point).
  3. Tire patch kit purchased.
  4. On board air purchased (cheapo for now, better pump later).
  5. Wheel changing tools - breaker bar and torque wrench with proper sockets purchased, wheel chocks, etc.
  6. Cross bars install (OEM).
  7. Roof rack purchased and assembled (first mod to roof rack photos in next post).
  8. K&N Air Filter. I now know that they have a dry version which may replace this oiled version at some point, TBD.
  9. LED headlights installed.
  10. LED interior lighting installed & x2 12" LED light strips for the hatch / trunk area (awesome!).
My first thought is that no modification is worth while with bad tires on a vehicle I plan to take off road. No sense in getting a lift kit or skid plates with OEM street tires. Also, it's very important when truly going off road to have a full sized spare. Some people may disagree, but certainly in an always AWD vehicle a full sized matching, identical spare is a must IMO due to the tire diameter similarity requirements for always AWD vehicles like Subaru. Plug / repair kit and air for field repairs if required. Basically, my goal was to tackle basic movement first, then move on to the mods.

This first post is sans photos since at this time it just looks like a stock 2013 Forester. Photos to come as she develops into a more off road worthy vehicle.
 

LandPirate

Rank V
Launch Member

Influencer II

1,977
Fort Collins, CO
Member #

3359

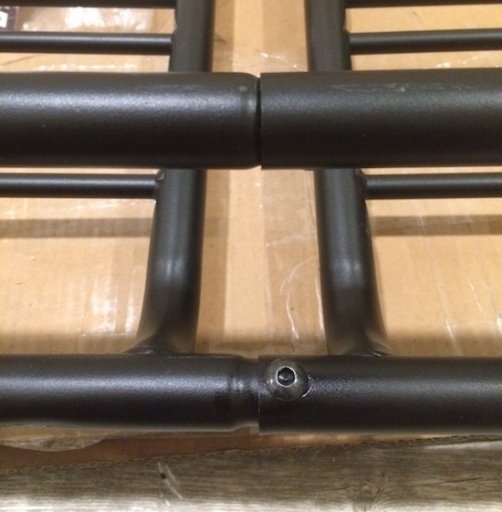
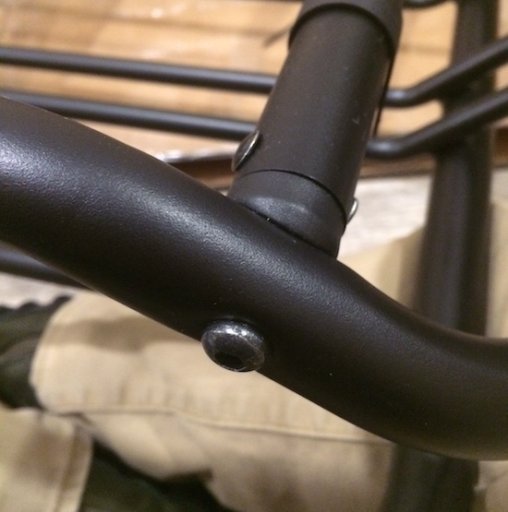
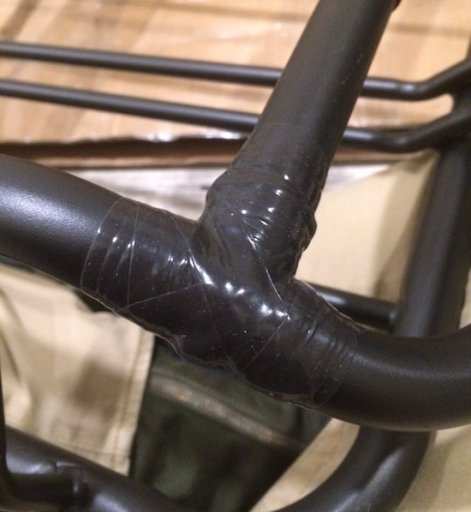
The first modification I had to do that I felt was not common was to my roof rack. I found a steel roof rack that I very much like the look of, however its cheap and the design affords water ingress which will eventually destroy the steel leaving the rack left in a trash pile. Of primary concern was that the tubing was physically capable of flooding internally without ever knowing if there was water inside.

Water ingress points clearly visible, tubes would flood during a rain IMO:

IMG_1265.JPG

Top side bar also with water ingress points:

IMG_1272.JPG

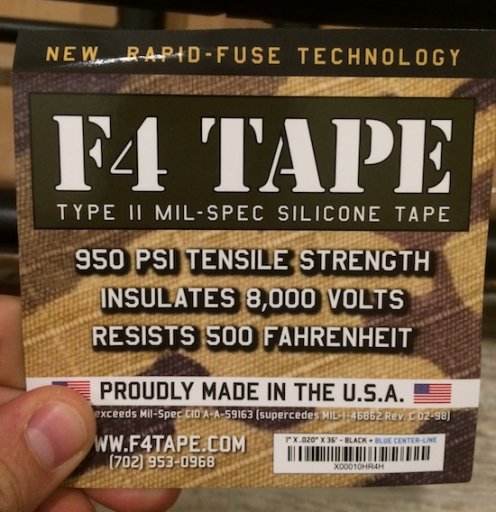
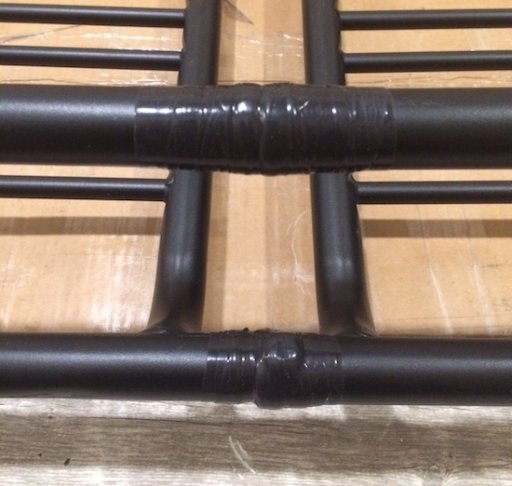
After considering some silly fixes, I opted to use F4 tape. If you've never heard of this stuff, apparently it's awesome and I suggest you check it out. I'm about to find out if this application is a good use for it, but essentially it's a silicone tape that bonds to itself once you stretch it tightly and wind it over itself. It becomes water tight, has an incredibly high temperature rating and very high PSI resistance and also insulates up to 8K volts. Not bad. So I decided to waterproof each of these ingress points with F4 tape and the results of two (2) full wraps over each point of ingress are as follows:

Tape used:

IMG_1266.JPG

Two full wraps on ingress points:

IMG_1267.JPG

And:

IMG_1275.JPG

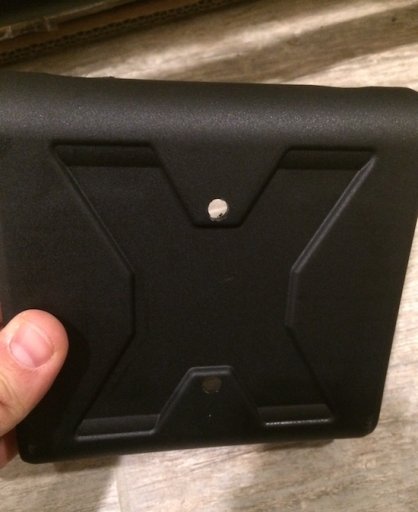
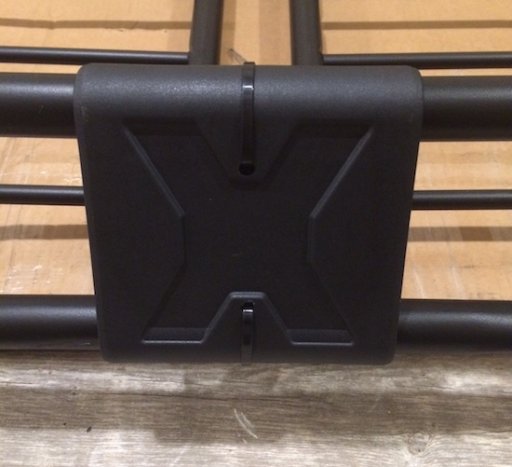
I also did not like that the snap on side covers to this roof rack were not secured, so I drilled holes in them for cable ties to secure them permanently:

IMG_1268.JPG

Affixed to rack:

IMG_1269.JPG

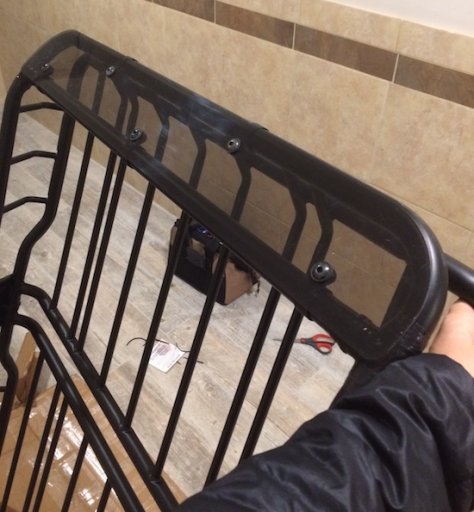
The side covers help disguise the F4 wrap, and so does the wind deflector which I removed the label off of to match my car's gray/black & silver look:

IMG_1277.JPG

In the end it's hard to tell I've wrapped the rack at all, and if the tape is as good as they say I feel I have a shot at keeping this rack a few years. I hope very much that is the case.

The rest of my mods so far are too standard for photos but I'll keep you posted as the vehicle evolves. Thanks for reading.
 

Steve

lost again...
Founder 500
Launch Member

Traveler III

4,312
Lorain County, OH, USA
First Name
Steve
Last Name
None
Member #

202

Nice start! Are the Geolandars the replacement for the A/T-S? If so, that's what I had on my '08 OBXT and I liked them a lot.

My solution for the Yakima LoadWarrior, which assembled the same as you basket, was to seal all joints with silicone sealant, Then, I sprayed the entire assembly with 3-4 coats of chassis paint to seal the joints even better. Altogether, it was on the Outback and then the 4Runner for four or five years with no rust. I did spray it again before moving it to the 4Runner.

My modifications were pretty mild, as I knew I won't going rock crawling with it. Mostly convenience items, although I did add 3/4" spacers, and the tires were taller than stock, plus big mod flaps to keep the stone damage minimized and an aluminum belly pan. Steve's Cross-Country Subaru Outback

I look forward to your progress. There's a small but enthusiastic Subarus contingency here that will be happy to help spend your money for you.
 
  • Like
Reactions: LandPirate

LandPirate

Rank V
Launch Member

Influencer II

1,977
Fort Collins, CO
Member #

3359

Nice start! Are the Geolandars the replacement for the A/T-S? If so, that's what I had on my '08 OBXT and I liked them a lot.
...
Regarding the Geolandars - This is the first set of Yokohamas on this vehicle. I never owned the older model AT/S but people seemed to like them a lot. It is one of the reasons I was comfortable going with their new GO15 A/T model. There is surprisingly little about this tire online in the way of real world experiences and I intend to push these stock tires to their limits before I lift the vehicle and upgrade to larger tires. I did much reading about them and from my highway experience I can say they ride like a dream for an A/T tire.

Re: "...There's a small but enthusiastic Subarus contingency here that will be happy to help spend your money for you." Hahah! I bet. Fun times.
 
  • Like
Reactions: Steve

JeepersForVets

Rank II
Launch Member

Off-Road Ranger I

301
Calgary, AB
First Name
Steve
Last Name
E
Member #

4288

Ham/GMRS Callsign
VE6EVL
The first modification I had to do that I felt was not common was to my roof rack.
In the end it's hard to tell I've wrapped the rack at all, and if the tape is as good as they say I feel I have a shot at keeping this rack a few years. I hope very much that is the case.
Nice, that's exactly what I did to my Rhino Xtray as well. Mine came with some very annoying rubber sleeves that were supposed to "slide" over those joints. I ended up tearing two of them trying to get them on and then just threw the others in the garbage. I've used the silicone tape on a few other things and it's awesome stuff. It's also survived several crazy freeze/thaw cycles with no problems.

I never thought about ziptieing the plastic X brackets in place; that's a good idea. Currently, I'm working on some brackets to hold the MaxTrax onto the rack.
 
  • Like
Reactions: LandPirate

LandPirate

Rank V
Launch Member

Influencer II

1,977
Fort Collins, CO
Member #

3359

Update:
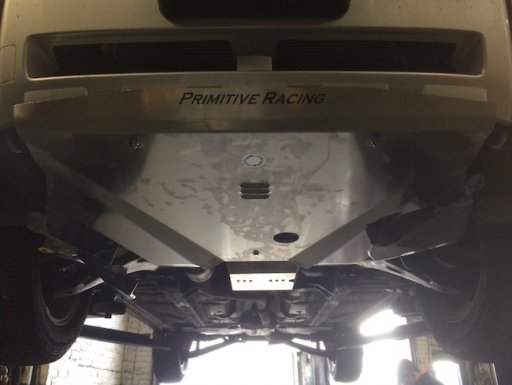
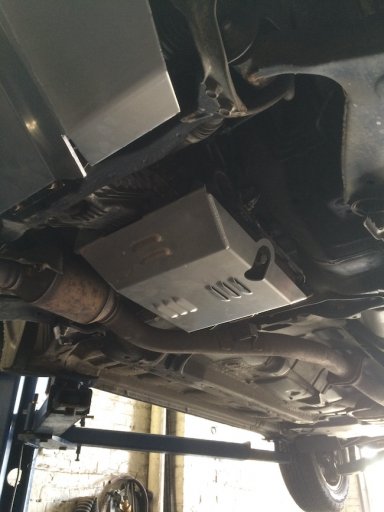
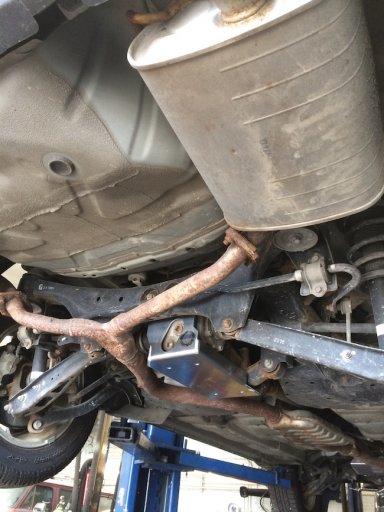
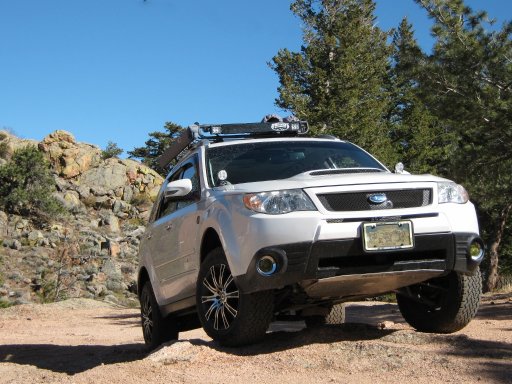
I have now installed a full skid plate set from Primitive Racing and installed the roof rack, plus completed the majority of my recovery kit purchases.

IMG_2234.JPG IMG_2235.JPG IMG_2236.JPG IMG_2369.JPG

Updates since last post:
  1. Full skid plate set from Primitive Racing (Front, Transmission & rear diff plates)
  2. Purchased a Fumoto valve with lock but have yet to install until next scheduled oil change.
  3. Full sized 100% duty cycle air compressor purchased (Viair 450P).
  4. Boulder tools tire deflators purchased
  5. (x2) Bubba Rope 7/16" soft shackles purchased
  6. (x2) Rhino USA D-Ring shackles purchased
  7. Rhino USA 3" x 30' Polyester Tow strap purchased (WLL ~10,000LBS)
  8. ARB Nylon Recovery strap w/20% genuine stretch (100% nylon) (17,500LBS capacity - 2-3/8" x 30')
  9. Short D handle shovel purchased
To Do:
  1. Paint my factory Subaru recovery eye hook black.
  2. Purchase and install 2" trailer hitch.
  3. Purchase MaxTrax or equivalent
  4. CB radio purchase and install
  5. Currently studying for my HAM license
  6. Awning purchase & install
  7. Jack plate & jack research for better off road option
  8. And many more... This will never end will it? :)

Previous Mods:
  1. Yokohama Geolandar GO15 A/T (215 65 16 - stock size) installed.
  2. Full sized matching spare (5th wheel rotation possible but TBD at this point).
  3. Tire patch kit purchased.
  4. On board air purchased (cheapo for now, better pump later).
  5. Wheel changing tools - breaker bar and torque wrench with proper sockets purchased, wheel chocks, etc.
  6. Cross bars install (OEM).
  7. Roof rack purchased and assembled (first mod to roof rack photos in next post).
  8. K&N Air Filter. I now know that they have a dry version which may replace this oiled version at some point, TBD.
  9. LED headlights installed.
  10. LED interior lighting installed & x2 12" LED light strips for the hatch / trunk area (awesome!).
 
  • Like
Reactions: krzyboy2o and Rocky

LandPirate

Rank V
Launch Member

Influencer II

1,977
Fort Collins, CO
Member #

3359

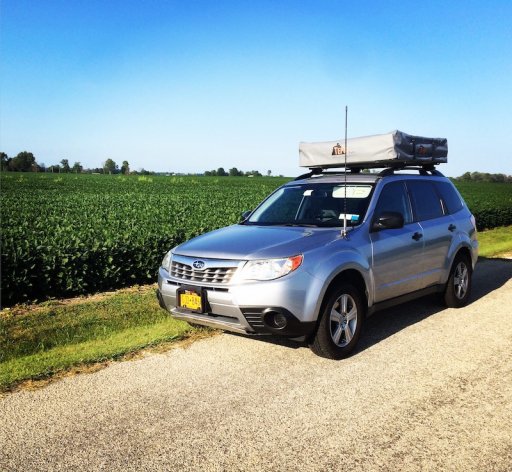
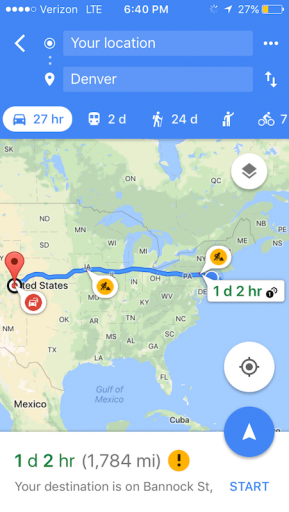
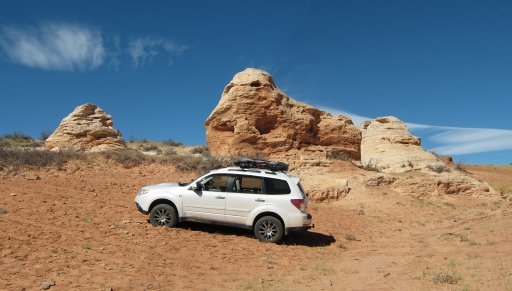
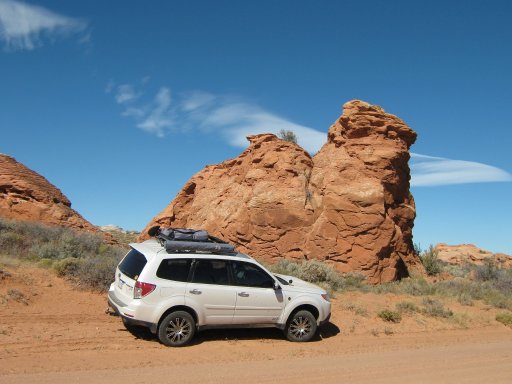
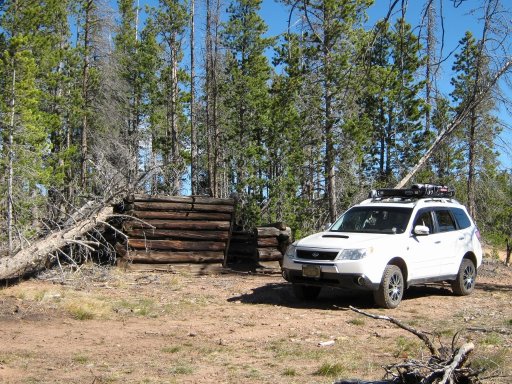
Moved out of NYC. Long ass road trip. Some photos below:

Updates since last post:
  1. Painted my factory Subaru recovery eye hook black.
  2. Purchased and install 2" trailer hitch.
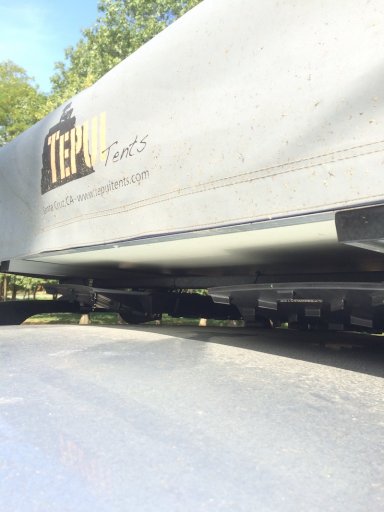
  3. Purchased recovery boards and mounted them underneath the...
  4. Installed Tepui Kukenam Sky RTT
  5. Installed Thule 50" crossbar set (came with my RTT)
  6. Installed CB radio
  7. Bought Wally World sun shade instead of awning install. Couldn't make it happen in NYC.
  8. Installed shovel to roof rails
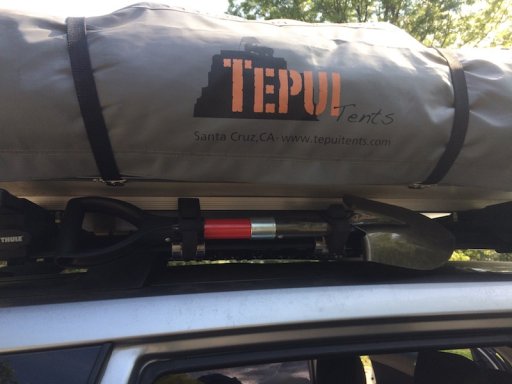
  9. Complete camping / off-grid kit built over the coarse of months.
  10. Moved out of NYC.
  11. Hit the road. In process.
To Do:
  1. Complete 2 month long road trip with wife and dog.
  2. Move in to new house.

Previous Mods:
  1. Yokohama Geolandar GO15 A/T (215 65 16 - stock size) installed.
  2. Full sized matching spare (5th wheel rotation possible but TBD at this point).
  3. Tire patch kit purchased.
  4. On board air purchased (cheapo for now, better pump later).
  5. Wheel changing tools - breaker bar and torque wrench with proper sockets purchased, wheel chocks, etc.
  6. Cross bars install (OEM).
  7. Roof rack purchased and assembled (first mod to roof rack photos in next post).
  8. K&N Air Filter. I now know that they have a dry version which may replace this oiled version at some point, TBD.
  9. LED headlights installed.
  10. LED interior lighting installed & x2 12" LED light strips for the hatch / trunk area (awesome!).
  11. Full skid plate set from Primitive Racing (Front, Transmission & rear diff plates)
  12. Purchased a Fumoto valve with lock but have yet to install until next scheduled oil change.
  13. Full sized 100% duty cycle air compressor purchased (Viair 450P).
  14. Boulder tools tire deflators purchased
  15. (x2) Bubba Rope 7/16" soft shackles purchased
  16. (x2) Rhino USA D-Ring shackles purchased
  17. Rhino USA 3" x 30' Polyester Tow strap purchased (WLL ~10,000LBS)
  18. ARB Nylon Recovery strap w/20% genuine stretch (100% nylon) (17,500LBS capacity - 2-3/8" x 30')
  19. Short D handle shovel purchased
 
Last edited:
  • Like
Reactions: Jimmy P

LandPirate

Rank V
Launch Member

Influencer II

1,977
Fort Collins, CO
Member #

3359

Drove to Kokomo, IN to purchase a used Tepui RTT.
IMG_2764.jpg

It begins.
IMG_2891.PNG

My choice for mounting my recovery boards. So much wasted space beneath RTTs and frankly no other place on my rig.
IMG_2900.JPG

Shovel mounted with Quick Fists and plumbing soft couplers from Home Depot.
IMG_2902.JPG

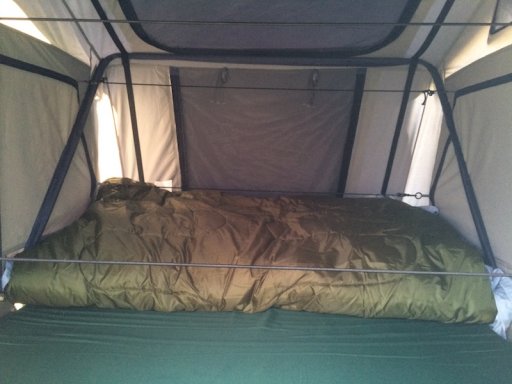
A Tepui RTT can hold a lot. In this photo you see the 'burrito' we make every day when we fold up the tent. Inside are the following items: 1 double sleeping bag, 4 full sized pillows (thin cheap kind from Wally World so they compress small), 2 small pillows for additional support beneath the thin full sized, a sheet, a military style wool blanket and our pajamas.
IMG_2940.JPG

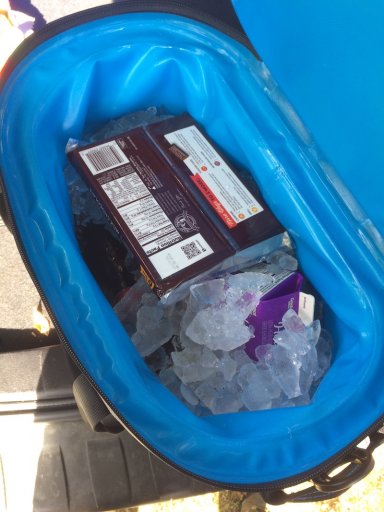
This cooler rocks. Actually keeps ice for 3 days and doesn't leak a drop. Love it.
IMG_2954.JPG

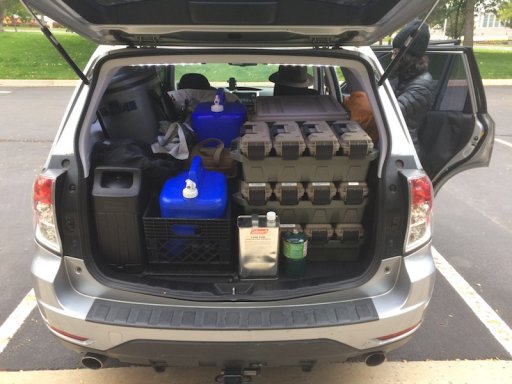
Getting organized was key. These ammo cases from Amazon are awesome. They stack tight and don't shift an inch when driving. Bigger ones in the back behind the ones you see on the right.
IMG_2966.JPG

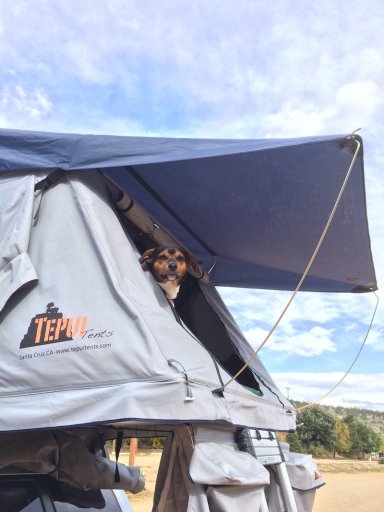
Our dog loves our RTT now. He tries to jump from ground level to the entrance to get inside if the weather kicks up. Haha.
IMG_2998.JPG
 
Last edited:
  • Like
Reactions: Jimmy P