Is Goose Gear worth the money?

  • HTML tutorial

slomatt

Rank V

Influencer I

1,723
Bay Area, CA
I'm curious if anyone has ever used old server rails instead of buying new drawer slides. The ones that come off of the storage arrays are really damned beefy.
I used old server rails when I built my drawers in 2011 and they've held up fine over many miles of dirt/rock roads.

At one point the mounting screws started to get loose, so I reinstalled them with some threadlock which fixed the issue. The "lock at full extensions" mechanism is wearing out a bit and if you bump the drawers they'll close, which can be a minor hassle if I park on a steep hill.
 
  • Like
Reactions: Boort

deFine_overland

Rank III
Launch Member

Enthusiast III

740
Pemberwick Park Lane, Houston, Texas 77070, United States
First Name
Dominic
Last Name
DeFino
Member #

23824

Have you looked at 80/20 stuff.
There are other companies out there too.

I think with some planning you could put it together for much less.
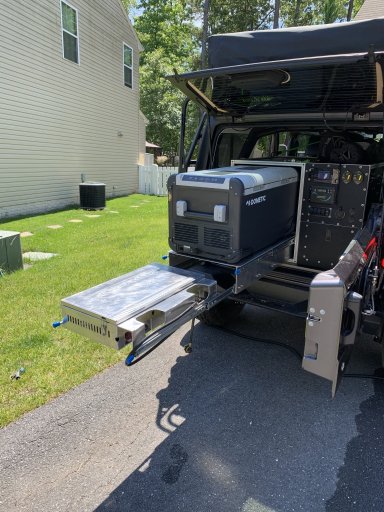
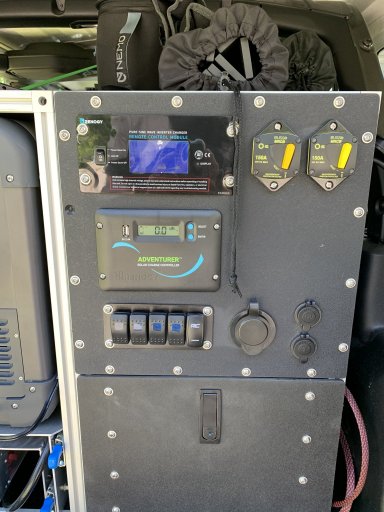
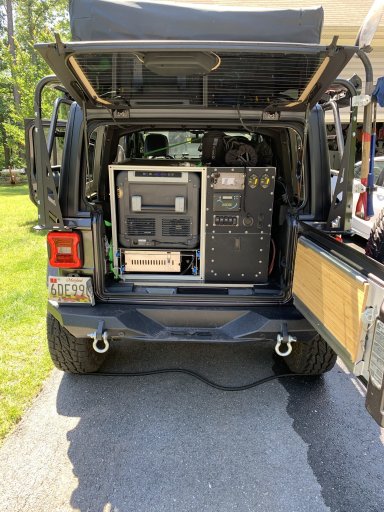
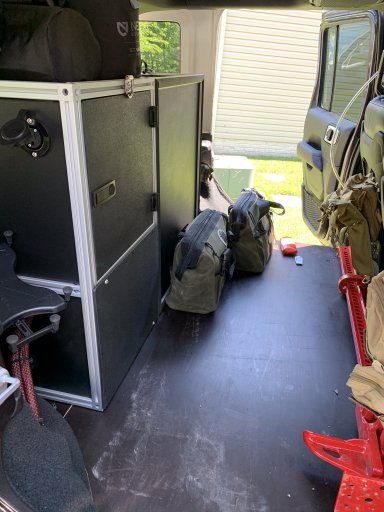
Wanted to share this as I saw someone brought up 8020. I used their stuff for my rear build out. Looked at goose gear, but way too much money for what I felt like I was getting. Plus their kit wouldn’t allow the fridge size I wanted. Running a Dometic 95. Plus I used one of the boxes for storing my rear power. 8020 has some really good stuff. Extrusions are cheap, connectors not so much. But love that it is modular, and I can change it up later.
CF730E39-04D8-479E-8CEB-8239AA82455E.jpeg398F1885-DB46-4C54-B88D-88C2AF70F41E.jpegDBB8777D-76A5-4C3B-915F-E6D34B2B6D1A.jpeg
6120764F-2E84-44B5-BB53-401CD09009B9.jpeg
 

deFine_overland

Rank III
Launch Member

Enthusiast III

740
Pemberwick Park Lane, Houston, Texas 77070, United States
First Name
Dominic
Last Name
DeFino
Member #

23824

Nice job on the 80/20 build!
Thank you. Their equipment made it easy. I am actually working on my solar panel mount for the roof rack using their stuff. Won’t to be able to lay it down when traveling and angle it up once I get to camp. I’ll add pictures on my build thread as I get that done.
-DOM
 
  • Like
Reactions: Boort

Deshi

Rank 0

Contributor I

60
Scottsdale, AZ
First Name
Morgan
Last Name
Butler
Goose Gear is good stuff. Looks great, works great, provides jobs, etc. They have overhead, expensive machines, U.S. manufacturing, etc.

That being said, I personally do not feel their product in its end form is worth the dollar they ask for it...just me personally. I'll build my own or find other solutions. Again, I'm not knocking Goose Gear...just not for me.
 

xplrvr3

Rank I
Member

Member I

233
Orange, CA
First Name
Vittorio
Last Name
Roggero
Member #

24875

I struggle with the lack of tools, time and yes ability. However, I do try. I did order just the GG plate and yes very expensive. What bugged me was the lack of alternatives... with $100 to install the Plate alone and watching video installs, I'm doing it myself. I guess I'll have to reach out to the group when I add the fridge slide. I'm not sure how I would secure the Dometic slide to the GG plate. if any knows or has comments it would be helpful. Thanks,
 

Boort

Rank V
Launch Member

Member III

2,779
Colorado
Member #

9314

I struggle with the lack of tools, time and yes ability. However, I do try. I did order just the GG plate and yes very expensive. What bugged me was the lack of alternatives... with $100 to install the Plate alone and watching video installs, I'm doing it myself. I guess I'll have to reach out to the group when I add the fridge slide. I'm not sure how I would secure the Dometic slide to the GG plate. if any knows or has comments it would be helpful. Thanks,
Not sure if the GG Baseplate has predrilled holes for that slide. If not the basic plan would be
  • Put the GG Baseplate in the rig.
  • Position the Slide and Fridge how you want it (double check this! does everything slide correctly from this position, good ventilation, Cords reach when fully in and out, etc...)
  • Mark the slides' mounting holes on the Baseplate.
  • Remove slide and baseplate from Rig, make sure your marks are all 1/2" or more away from any existing holes in the baseplate.
  • Review slide mounting hardware, purchase the correct size and count of stainless steel t-nuts from local hardware store. (Also pick up some thick 2" diameter fender washers with a hole sized for the mounting bolt to use to install the t-nuts w/o damaging the top of the baseplate.)
  • Drill holes in baseplate where you marked using the correct size bit for the t-nuts shank.
  • Insert the t-nuts in to the holes from the bottom side of baeplate. (you may need to countersink the nuts to be flush with teh surface of the bottom side of the baseplate if your baseplate is not on carpet when in your rig)
  • If using spiked t-nuts predrill with a small bit for each of the spikes so they don't split the baseplate
  • Now insert the t-nut into the bottom of the baseplate, thread the mounting bolt through the fender washers then into the the hole/t-nut from the top of the baseplate. tighten with ratchet till T-nut is fully seated into the bottom of the base plate. Repeat for each hole.
  • Install the baseplate in to Rig.
  • Set slide on to baseplate and align with holes. Install mounting bolts through slide and into the t-nuts. tighten per slide instructions..
  • Install fridge
  • Open a cold one and enjoy the fruits of your labor ;)

Reach out when you have the slide and baseplate if you have more questions.

Boort
 
  • Like
Reactions: xplrvr3

xplrvr3

Rank I
Member

Member I

233
Orange, CA
First Name
Vittorio
Last Name
Roggero
Member #

24875

Not sure if the GG Baseplate has predrilled holes for that slide. If not the basic plan would be
  • Put the GG Baseplate in the rig.
  • Position the Slide and Fridge how you want it (double check this! does everything slide correctly from this position, good ventilation, Cords reach when fully in and out, etc...)
  • Mark the slides' mounting holes on the Baseplate.
  • Remove slide and baseplate from Rig, make sure your marks are all 1/2" or more away from any existing holes in the baseplate.
  • Review slide mounting hardware, purchase the correct size and count of stainless steel t-nuts from local hardware store. (Also pick up some thick 2" diameter fender washers with a hole sized for the mounting bolt to use to install the t-nuts w/o damaging the top of the baseplate.)
  • Drill holes in baseplate where you marked using the correct size bit for the t-nuts shank.
  • Insert the t-nuts in to the holes from the bottom side of baeplate. (you may need to countersink the nuts to be flush with teh surface of the bottom side of the baseplate if your baseplate is not on carpet when in your rig)
  • If using spiked t-nuts predrill with a small bit for each of the spikes so they don't split the baseplate
  • Now insert the t-nut into the bottom of the baseplate, thread the mounting bolt through the fender washers then into the the hole/t-nut from the top of the baseplate. tighten with ratchet till T-nut is fully seated into the bottom of the base plate. Repeat for each hole.
  • Install the baseplate in to Rig.
  • Set slide on to baseplate and align with holes. Install mounting bolts through slide and into the t-nuts. tighten per slide instructions..
  • Install fridge
  • Open a cold one and enjoy the fruits of your labor ;)

Reach out when you have the slide and baseplate if you have more questions.

Boort
Thanks for the details and Help. I'm about 3 weeks away from receiving the baseplate so stay tuned.
 
  • Like
Reactions: Boort

deFine_overland

Rank III
Launch Member

Enthusiast III

740
Pemberwick Park Lane, Houston, Texas 77070, United States
First Name
Dominic
Last Name
DeFino
Member #

23824

Thanks for the details and Help. I'm about 3 weeks away from receiving the baseplate so stay tuned.
What does the GG base plate go for? Are you installing this in the Jeep?
I will never knock on the quality of their products for two reasons. I haven’t ever seen them in person and everyone has different abilities and priorities, however I just can’t seem to stomach the cost.
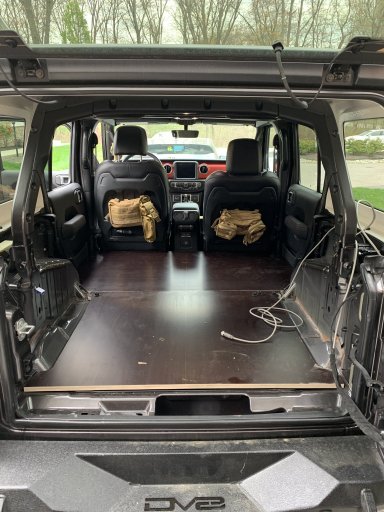
I ended up building the base plate for my Jeep. Took one sheet of plywood and about 6 hours carefully measuring, making templates and cutting.
I did have to fabricate a front mount, but that was relatively straight forward, but someone would need a welder to make what I did.
 

Attachments

Boort

Rank V
Launch Member

Member III

2,779
Colorado
Member #

9314

What does the GG base plate go for? Are you installing this in the Jeep?
I will never knock on the quality of their products for two reasons. I haven’t ever seen them in person and everyone has different abilities and priorities, however I just can’t seem to stomach the cost.
I ended up building the base plate for my Jeep. Took one sheet of plywood and about 6 hours carefully measuring, making templates and cutting.
I did have to fabricate a front mount, but that was relatively straight forward, but someone would need a welder to make what I did.
About $500 depending on vehicle and features some less some more. I thought that was high too but I have access to a full wood working shop. If I have to weld then I gotta start considering who I'll buy from...

(7/9 update: Was looking at some new parts for my roofrack and saw that Sherpa now offers baseplates for 3rd & 4th Gen 4 Runners as wells as the Lexus GX470 for $140-$200. I've been very happy with the cost, fit, finish, and support from them on my RoofRack so for those looking for a more affordable prebuit option I'd recommend them. Their Drawer systems also start at less than $100 more than what it cost me to DIY mine! Drawer Systems — Sherpa Equipment Company No affiliation with them other than as a satisfied customer.)

Boort
 
Last edited:

Kent R

OB Executive Director
Staff member
Mod Team
Moderator
Member

Pathfinder III

5,200
El Dorado, Ca
First Name
Kent
Last Name
Reynolds
Member #

1632

Ham/GMRS Callsign
K6KNT
Service Branch
Retired Firefighter
Pulled the trigger on a full plate system "rear seat delete" for our JKU. I debated about this for a very long time due to the cost, I have a fairly thorough wood shop but there is no way I could match the fit and finish of this product.
Here is the main downside of the product.
There are NO directions that come with the system!!! I had no problem figuring it out using a little youtube education but what a TIME SUCK putting enough information together to figure out how it went together and then how it was installed.
Would I do it again? Yes definitely due to the quality.
 
  • Like
Reactions: Boort

JButtress

Rank VI

Traveler II

4,282
Lubbock, TX, USA
First Name
Jason
Last Name
Buttress
Member #

13002

Attachments

  • Like
Reactions: Sandpoint Steve

Icculus

Rank I

Member I

203
Asheville, NC, USA
First Name
Adam
Last Name
Scarboro
Member #

25061

The Goose Gear stuff is super nice and I've watched the @Wanderlost videos and your mechanical ability blows my mind. Want to hire an apprentice lol.... Anyway my question is does anyone make a product similar to goose but from all synthetic materials? I know its inside but I reference back to something I once heard that most airstreams are still on the road except the wood has had to be replaced. Looking hard at the goose gear base (and the elevated sleeping platform with drawers) but part of me just wishes it was all synthetic materials instead of wood. Options or am I out of luck?

EDIT @Wanderlost Thanks to you I ordered the H3R extenguishers and looking at the always on camera. Thanks
 

Boort

Rank V
Launch Member

Member III

2,779
Colorado
Member #

9314

@Icculus,
I don't think that there is anyone making a product similar to the goose gear base from synthetic materials. Plastics are heavy and will often deform from heat, weight, and vibration. These reasons would make most a poor substitute for a base. Fiberglass or Carbon fiber could be done but the R&D for each vehicle would be expensive and the materials themselves are not inexpensive to produce ESP if you need to get to specialized equipment to mass produce. Aluminum heavy and again prone to bend if not fully supported.

For DIY something like what the "Foamie" vanlife & tear drop folks are doing might be possible. Where you use 3/8 HDU foamboard bonded and pressed between 2 skins of fiberglass or carbon then milled and edges/holes reinforced to spec. Weight would be about the same or lighter than ply but fully synthetic.

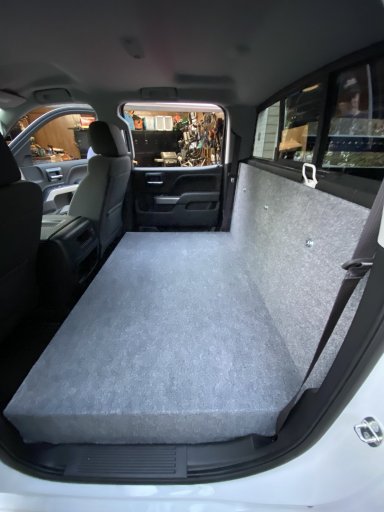
To be honest I would not worry about it. I've had a sleeping patform in the bed of my pickup under the cap, made from crappy pine plywood and leftover 2x4s for over 20 years. Only thing that gave out on that setup after all of these years is the synthetic green carpet that I covered it in.

If you are concerned about the GG base breaking down due to use or exposure. I'd buy it, get some full size paper from the office supply store and trace the platform to the paper so that if it ever fails and GG is not around to buy another one you can make a replacement from the template.

Boort
 
  • Like
Reactions: Icculus

Wanderlost

Rank VI
Launch Member

Member III

3,316
Caledonia, Illinois
Member #

8490

The Goose Gear stuff is super nice and I've watched the @Wanderlost videos and your mechanical ability blows my mind. Want to hire an apprentice lol.... Anyway my question is does anyone make a product similar to goose but from all synthetic materials? I know its inside but I reference back to something I once heard that most airstreams are still on the road except the wood has had to be replaced. Looking hard at the goose gear base (and the elevated sleeping platform with drawers) but part of me just wishes it was all synthetic materials instead of wood. Options or am I out of luck?

EDIT @Wanderlost Thanks to you I ordered the H3R extenguishers and looking at the always on camera. Thanks
Thanks so much for the kind words!

We looked into acrylic, abs, and pvc for the base, but the cost was very high. A good quality plywood is more than adequate, and lighter.

The H#R extinguishers are well worth the cost, and the front camera we installed is worth its weight in gold!

Keep watching! We're working out the details of many, many videos yet to come!
 

Vanhalo

Rank II

Enthusiast III

473
FEMA REGION IV
First Name
Van
Last Name
Halo
I bought the Goose Gear Plate for the JKU.
Totally worth it.
Great product.
However after appreciating their craftsmenship it challenged me to make one myself as a learning experience.
I have spent more in tools now than it would have cost me to install their entire system.
Including their camp kitchen and a fridge.

Tools purchased (some with 0 interest financing)
Rikon 14" Band Saw with Striatech Smart Motor
Nova Voyager 18" Drill Press
Metabo 18g Staple Gun
Grex 23g Pin Nailer
Rikon Spindle Sander
Countless other items considered woodworking accessories (drill bits, drill press laser, clamps, router bits, DP fence, etc.)
Not even counting material.

Probably $6000 in tools alone if I had to guess.

This was all to make 1 board. lol. Totally irrational I know.

So if you consider the cost if you are tool-less.

It is worth it.

Or maybe you just needed an excuse to complete your woodworking shop. :grin:


Last edited:

Vanhalo

Rank II

Enthusiast III

473
FEMA REGION IV
First Name
Van
Last Name
Halo
I'm curious if anyone has ever used old server rails instead of buying new drawer slides. The ones that come off of the storage arrays are really damned beefy.

I have considered this with Dell Poweredge Server rails.
Probably will try it.
 

Boort

Rank V
Launch Member

Member III

2,779
Colorado
Member #

9314

@Vanhalo

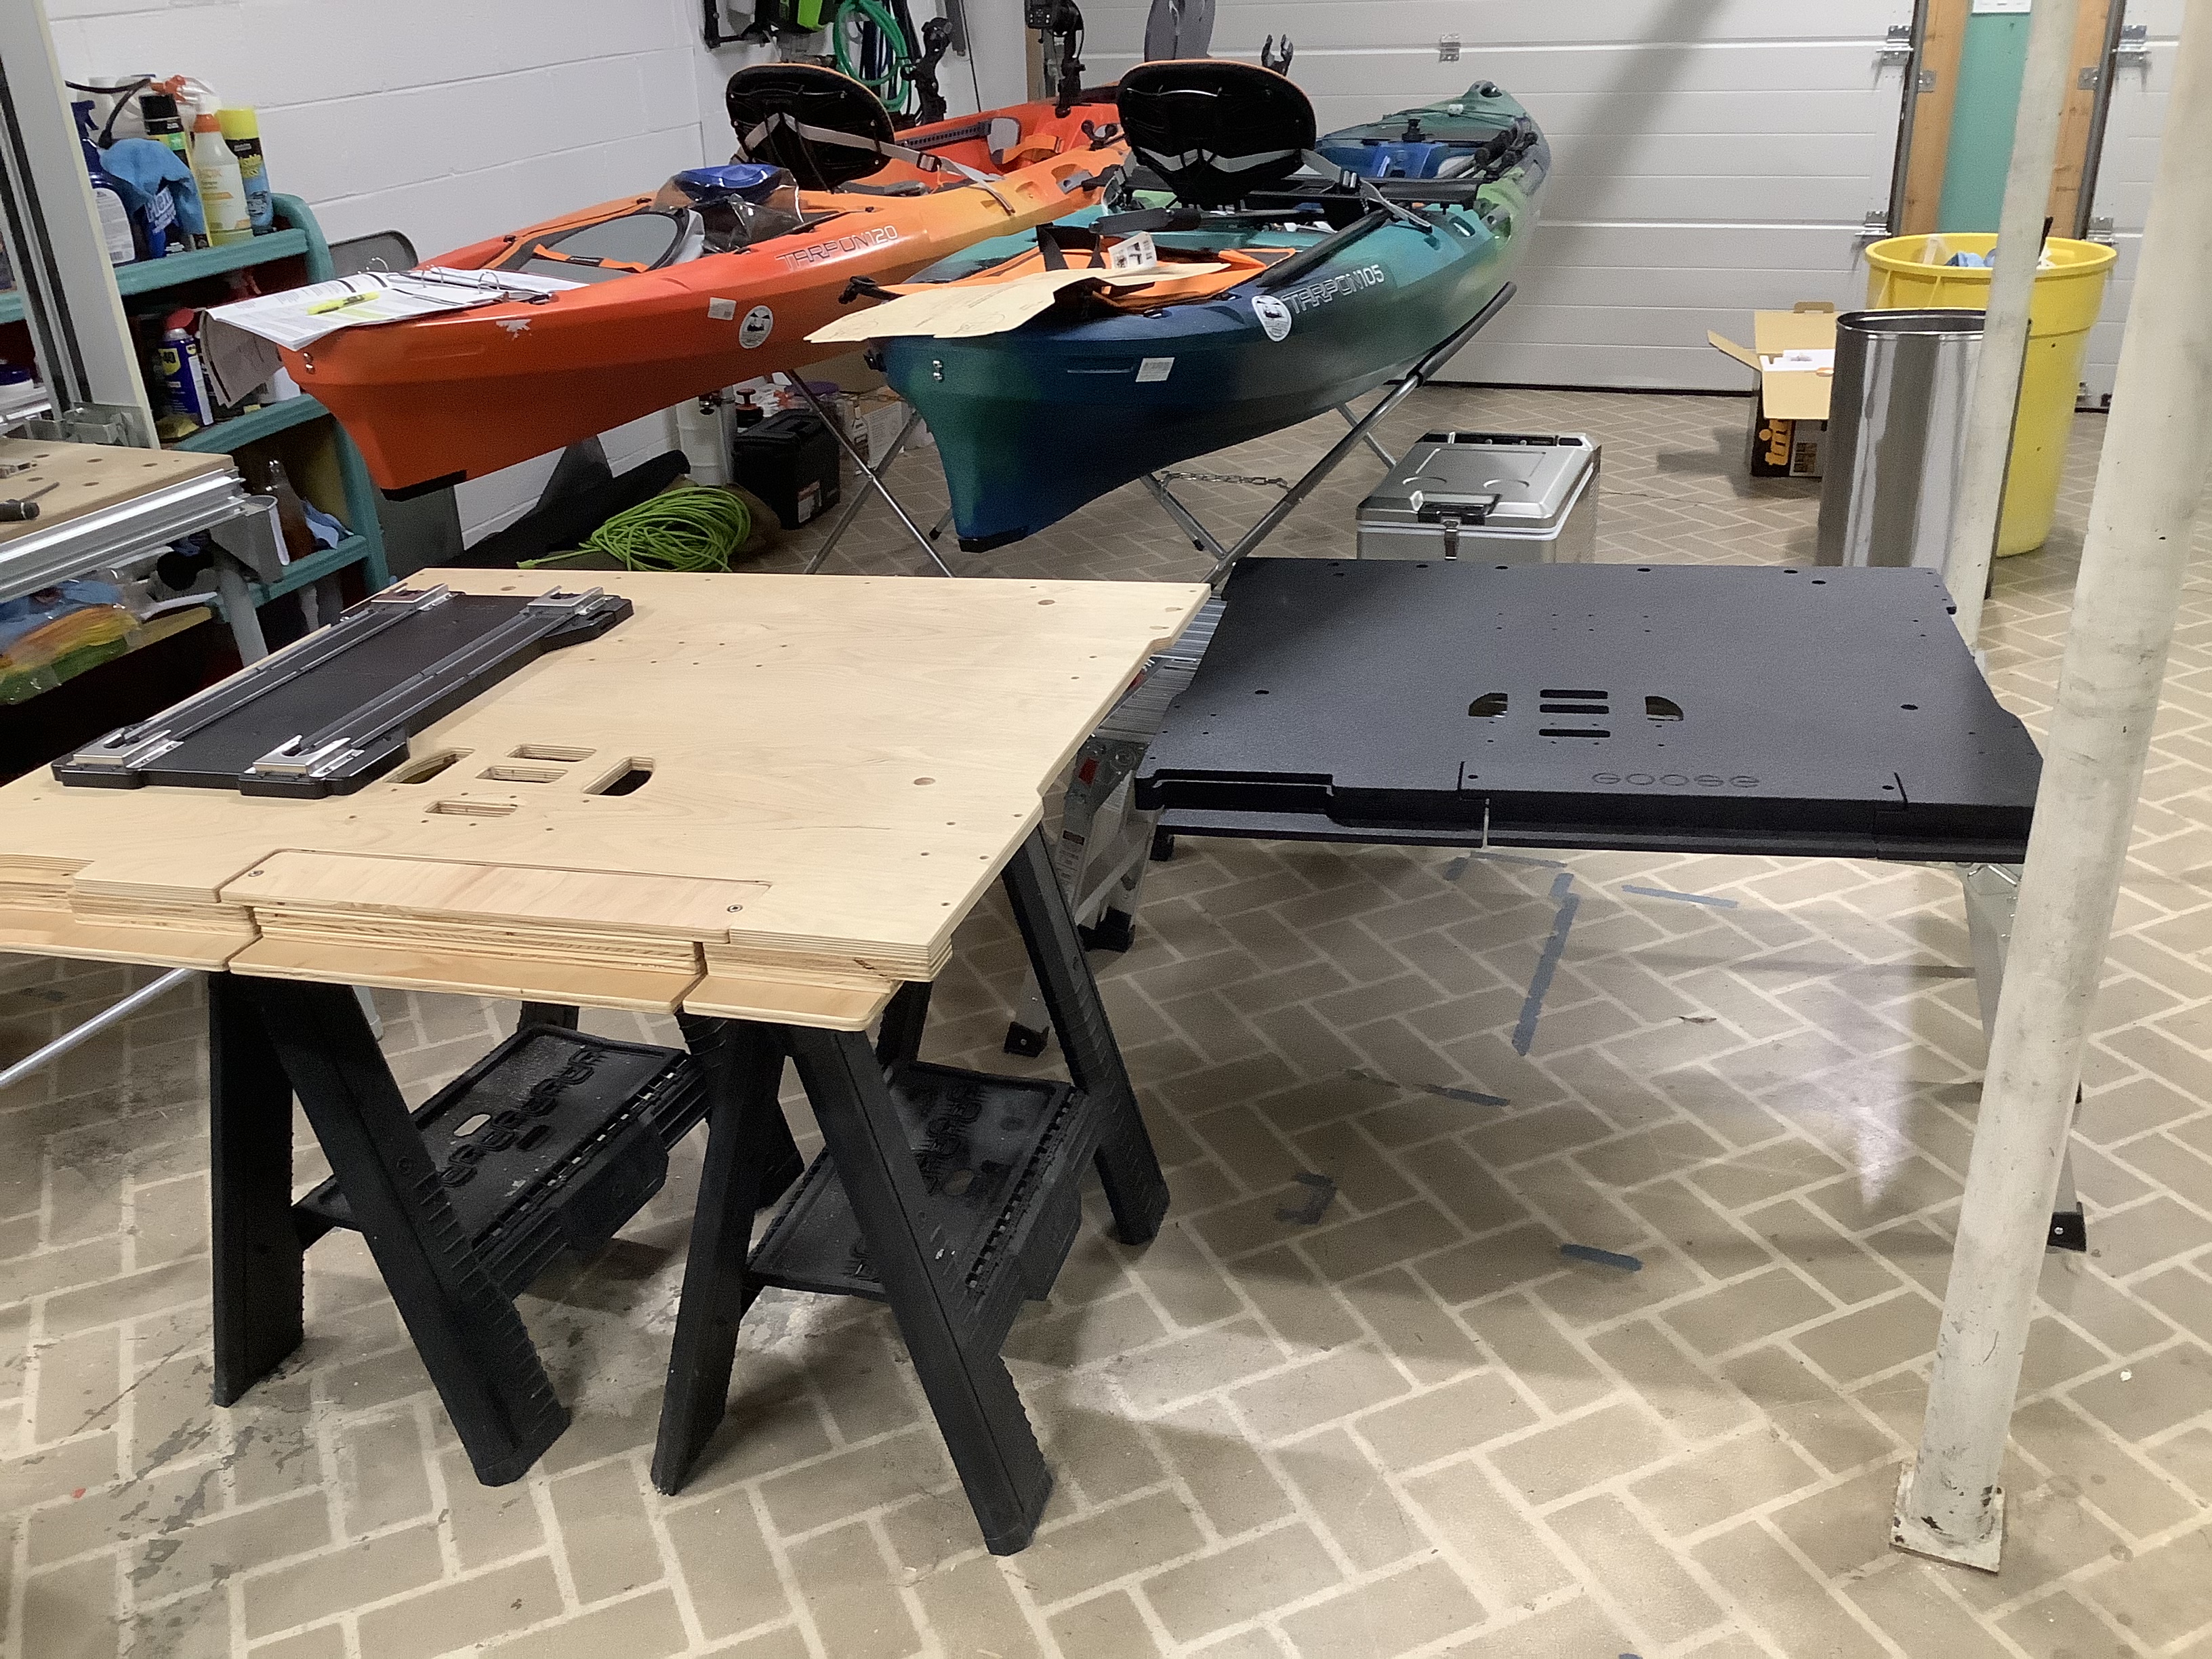
Hide this message from your SO. :) As the baseplate could be made with a jigsaw, handdrill/driver, some drillbits, hardware, glue, and sanding paper/block. If this was all you were building you can get all the tools for under $100 at china freight/princess auto.

Heck for under a grand you could get a maslow cnc, router, and computer to run it.

Boort