Interstate 5x8 Enclosed Multi-Use Trailer

  • HTML tutorial

socal geek guy

Rank IV
Launch Member

Enthusiast III

1,116
San Diego, CA, USA
First Name
Chris
Last Name
Walker
Member #

19531

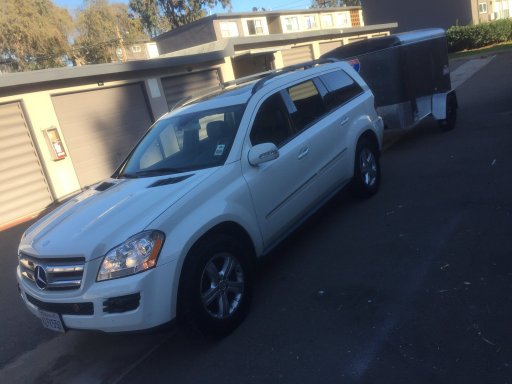
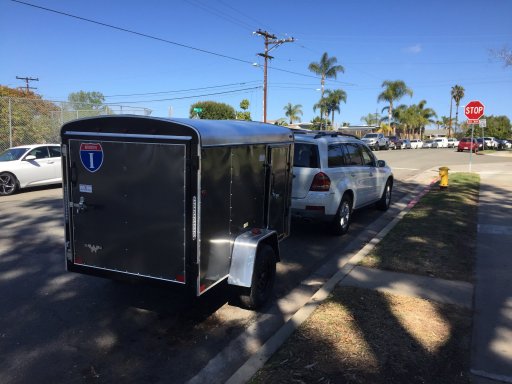
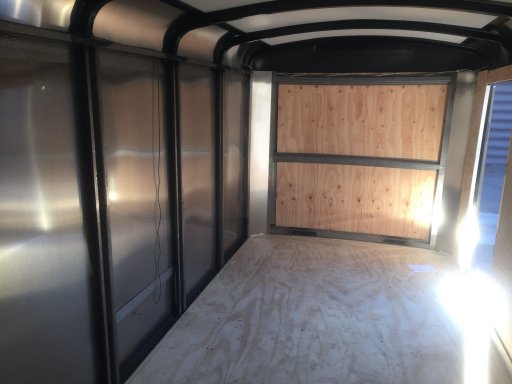
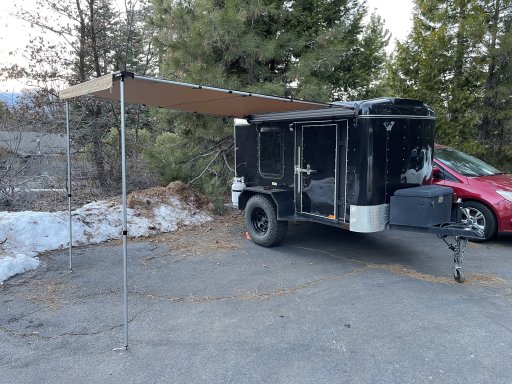
I picked up an Interstate Victory 5x8 enclosed trailer this past weekend and I'm excited to get started on this. After spending probably the better part of 2 years checking out different options and assessing if they would work for me, the last 6 months I came to the realization that an enclosed trailer would be the direction to go. I did make the deal with myself that if I was able to find a Nucamp Tag trailer for under $10k, or a tear drop that I really liked for around $5k, that I would primarily focus on an enclosed trailer. My thought process with the enclosed trailer is that if I can make it modular, I could use it for camping and if needed, remove the camping setup and utilize the trailer for moving stuff. I liked the idea of being able to use it for more than just camping, but it would primarily be used for camping. I don't plan on any gnarly off roading with the trailer, so it will be a semi mild build.

To be fair, this will be a slow build for a while. I want to use the trailer in a super basic setup to not only keep costs down initially, but also get used to the trailer and have time to figure out what features I would really use. Once I have better ideas of what all I want to add, then that gives me a starting point to work on designs to make it work well.

First on my list is to get some smooth flooring (looking at linoleum) and work on insulating the walls. I'm not too worried about electrical systems yet as I have my Jackery to get me by. I do want the floor to be smooth for an air mattress and also fairly water resistant for easier cleaning. I'm still working out if i want to do foam board insulation or if I should go the traditional style insulation. i'm also considering building up a floor platform so that I can insulate the floor as well.

Should be fun, hopefully I can get some good ideas on here to see what works well and what would work/not work for my preferences.
 

Attachments

DRAX

Rank V
Member

Advocate I

1,451
Monticello, IL
First Name
Hogan
Last Name
Whittall
Member #

28590

Ham/GMRS Callsign
W9DRX
Sounds like a fun project! For the insulation I'd definitely stick with the rigid foam and not fiberglass batt or rolls, less risk of damage/mold/mildew from moisture/condensation and don't have to worry about it detaching due to vibrations and then falling down inside the walls. The foam you can just trim and insert, and if it has a reflective layer then it'll insulate even better.

If you have enough headroom then I highly suggest putting the bed on a platform with drawers underneath, it'll be much more convenient and livable if you don't have to unload or move things around in the trailer in order to set up the bed. Drawers, slide-out table, various mounts/accessories on the door(s)...

Try to visualize how you plan to use the trailer for sleeping and cooking, and what you want to bring. Then visualize how to get everything to work with the least effort and set-up time. Also, I'm sure you're all over it but YouTube is a great place to get ideas as well.

Good luck!
 

socal geek guy

Rank IV
Launch Member

Enthusiast III

1,116
San Diego, CA, USA
First Name
Chris
Last Name
Walker
Member #

19531

awesome input, especially on the rigid foam. i had been thinking about the mold/mildew issue, but didn't really think about road vibrations potentially causing the soft roll insulation shifting or settling down in the wall. sounds like the rigid foam is the better option for what i want to do.

another thing i need to work on is how to mount my awning to the trailer, but keeping it even with or slightly lower than the roof line so that it clears the garage door.
 

bgenlvtex

Rank V
Launch Member

Member III

2,268
Texas
First Name
Bruce
Last Name
Evans
Member #

19382

I have long envisioned a build on one of these with a bed that lifts to the ceiling, and a giant slide out framed with aluminum extrusion that had all of the storage,kitchen,power,etc mounted in it, all under a reinforced batwing effectively doubling the size of the trailer.

I wait as the market for offroad capable micro-trailers continues to evolve. If something else that will work for me doesn't appear I may just build one.
 

eriefisher

Rank III

Advocate I

778
Southern Ontario, Canada
First Name
Dan
Last Name
LaForme
any recommendations for a durable undercoating for the frame and the floor boards? i'm planning on pulling up the floor boards to coat both sides before laying down permanent flooring.
The metal parts can be coated with any product but I would not cover the wood portion. The wood needs to breath. If you coat it underneath and then add a surface on top you will likely get some swelling then eventually rot. Wood will not last forever but it should last a good long while if it's allowed to breath and dry if needed.
 
  • Like
Reactions: grubworm

socal geek guy

Rank IV
Launch Member

Enthusiast III

1,116
San Diego, CA, USA
First Name
Chris
Last Name
Walker
Member #

19531

good to know, i'll do a little more research and see what will work with the frame and hold up. good thing with the floor board is that it should be easy to replace every couple years and the floor isn't huge. i wonder if it would be worth putting something like tyvex on one of the sides to protect against moisture?
 

bgenlvtex

Rank V
Launch Member

Member III

2,268
Texas
First Name
Bruce
Last Name
Evans
Member #

19382

I'd put Raptor liner on the bottom, there are tons of teardrops that are sealed inside and out. Swelling in untreated plywood comes from moisture intrusion, failing to seal it invites moisture intrusion.
If the floor is construction grade plywood I would replace it with a zero void ply like Baltic birch.
If you are legitimately concerned with sealing it, put a floated laminate floor on the inside which would also provide some modest R value.
 

socal geek guy

Rank IV
Launch Member

Enthusiast III

1,116
San Diego, CA, USA
First Name
Chris
Last Name
Walker
Member #

19531

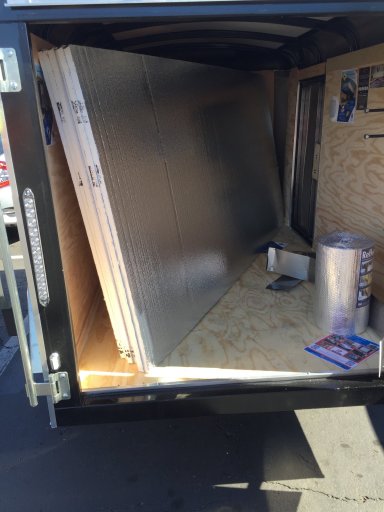
picked up some of the r tech white foam board insulation from home depot today to get started on insulating the walls of the trailer. had to use the trailer to get the 4' x 8' sheets and it worked out pretty nice. i also got to use the new trailer light adapter (my suv has a 7 pin plug, trailer has a 4 pin). the one i got when i picked up the trailer did not want to play well with the suv and the trailer led lights. the one i ordered online was made to get the two to work and i was happy to see that it actually made the lights operate correctly. here's the link if anyone is interested.


Attachments

eriefisher

Rank III

Advocate I

778
Southern Ontario, Canada
First Name
Dan
Last Name
LaForme
If you look at many RV's the have an exposed floor(pop ups for example) the underside is not coated/sealed. Usually if there is an issue it's from a leak in the side or roof and it not being able to dry out. I sold a 20 year old Starcraft pop up last year, the underside looked almost as it did when it came from the factory. The metal had been coated but the wood was left bare. The only spot of concern was a bit of staining where it lined up with the door. The door or screen was likely left open in the rain at some point.
 

socal geek guy

Rank IV
Launch Member

Enthusiast III

1,116
San Diego, CA, USA
First Name
Chris
Last Name
Walker
Member #

19531

i guess my concern with the under part aside from rust prevention on the metal is limiting water intrusion from the floor. i don't plan on trying to cross the colorado river with this, but if i go through a creek, i don't want to flood the inside of the trailer. i'm pretty "mild" with off-roading, so i am usually only comfortable crossing water that's maybe a foot deep.
 

socal geek guy

Rank IV
Launch Member

Enthusiast III

1,116
San Diego, CA, USA
First Name
Chris
Last Name
Walker
Member #

19531

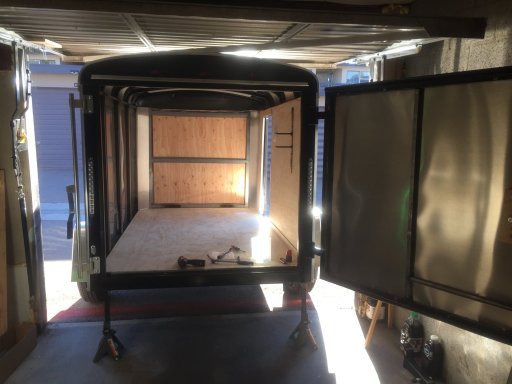
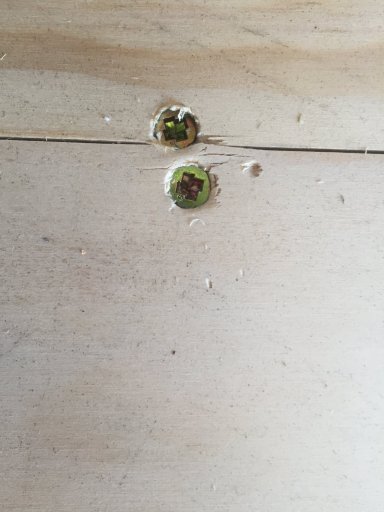
started pulling out the plywood walls in order to put in the insulation sheets, also looking to pull up the floor. they used philips head screws for the walls, but used LOX head screws for the flooring. i'd never heard of LOX before, so it took me about 30 minutes of searching the interwebz to find the name of the strange screw heads. i ordered some LOX bits online since they were not readily available in my area.

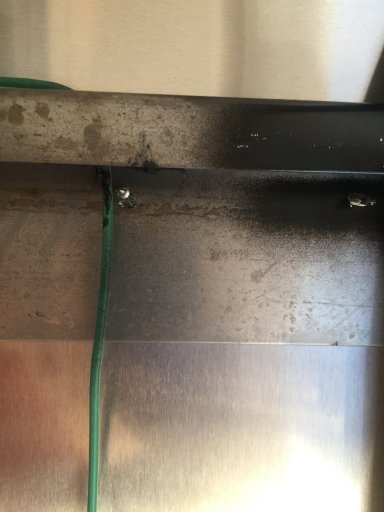
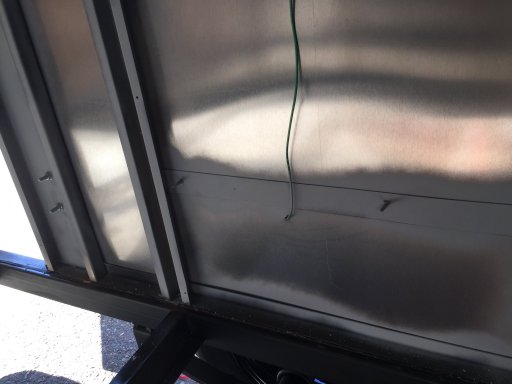
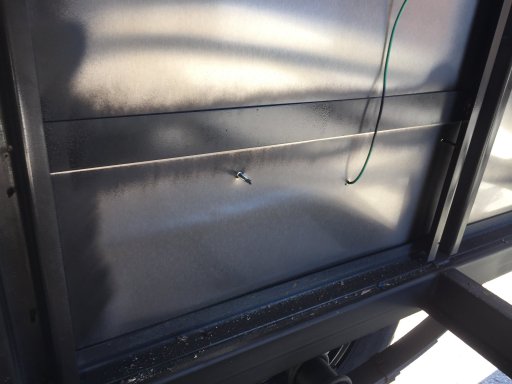
with the walls opened up, i started finding some issues i need to take care of before putting things back together. one is the wiring, which is pretty crappy in my opinion. for example, they just drilled a hole through the sheet metal for the wiring feeding the lights on the fenders. no grommet or sealant used, so i want to do something better where i don't have to worry about vibrations cutting the wire sheath and shorting out all the lights. looks like the lights are mostly in series, so i may look at better options. i did order some protective sheathing to go over the wires and it will show up with the LOX bits.

i'm also seeing some gaps with daylight between the frame and sheet metal exterior skin. i already picked up some caulk to seal up those small gaps.

i did notice the fenders are just screwed into the exterior skin, so i'm going to work on secure mounts on the inside for the fenders.
 

Attachments

socal geek guy

Rank IV
Launch Member

Enthusiast III

1,116
San Diego, CA, USA
First Name
Chris
Last Name
Walker
Member #

19531

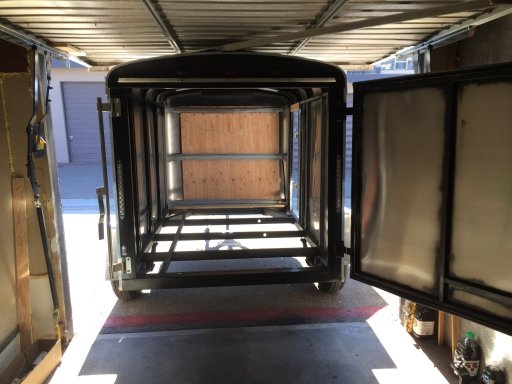
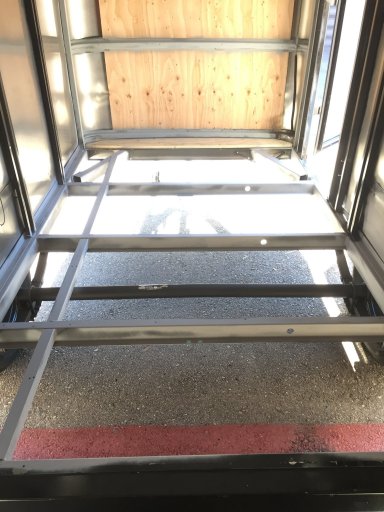
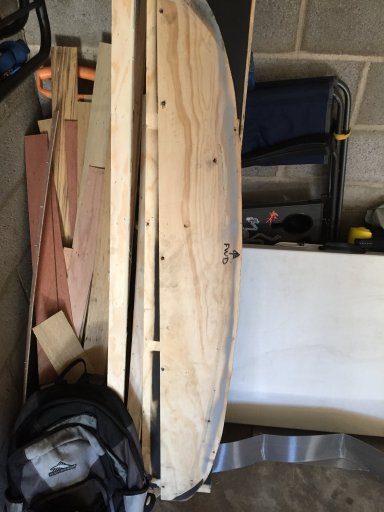
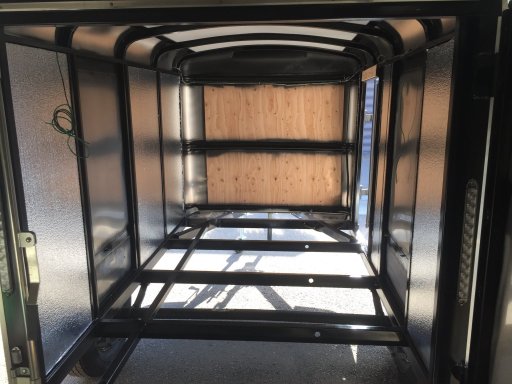
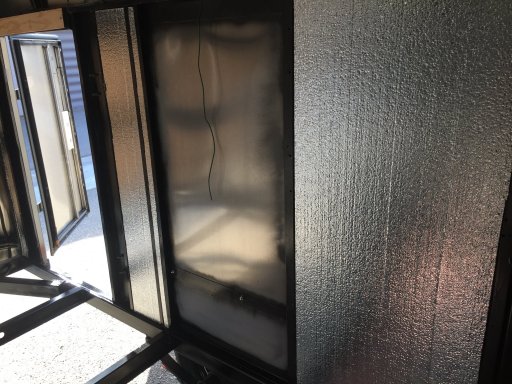
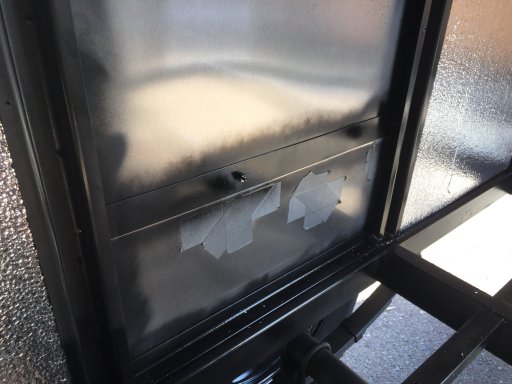
floor is out, started going over the bare metal with primer and spray paint. need to cut a new piece of wood for the front of the trailer to actually seal up where the floor meets the front end cap.

in one picture you can see where they actually got the self tapping screws in the cross bar to hold the fender on. in another picture you can see that they were way off.
 

Attachments

socal geek guy

Rank IV
Launch Member

Enthusiast III

1,116
San Diego, CA, USA
First Name
Chris
Last Name
Walker
Member #

19531

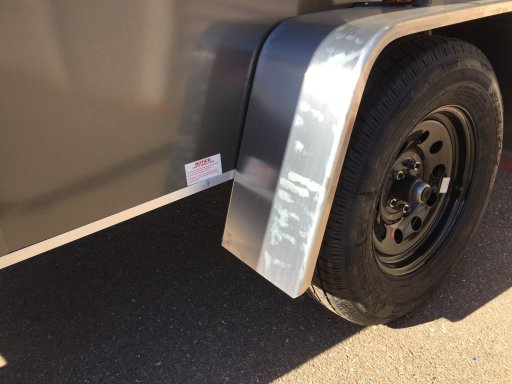
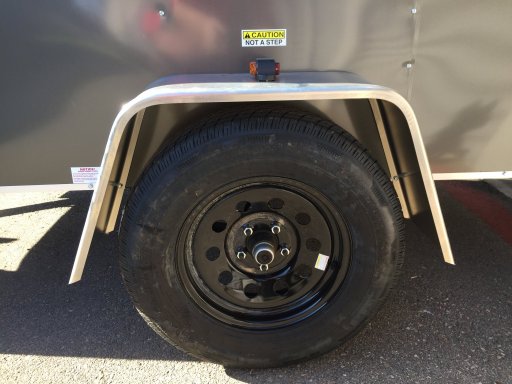
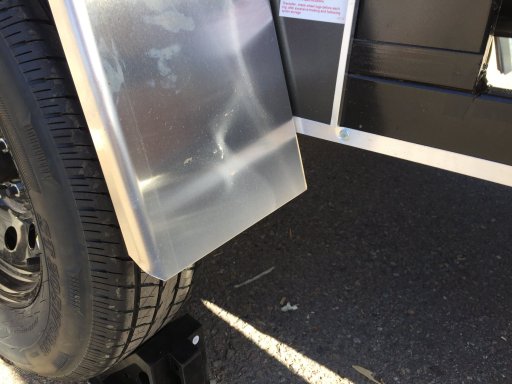
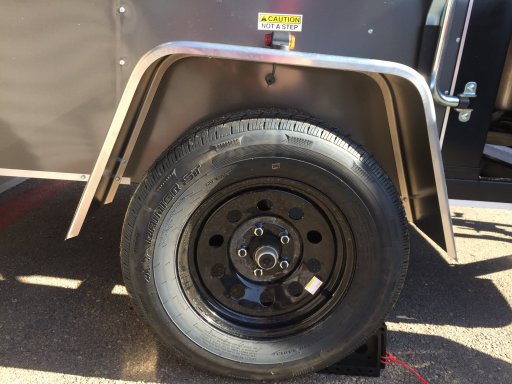
got a coat of paint on the frame and wall beams. also took a closer look at the fenders while the trailer was out of the garage. so the left side is for sure installed way too low. it's about 4 inches lower than the right side. the right side is where the fender height should be, so i'll be pulling the left off and moving it up to the correct height. in the pictures you can see the obvious tire gap difference. also, the fender on the left extends about 6.5 inches lower than the frame. on the right side, the fender only extends lower than the frame by about 3 inches. the first two pics are the left side, the 3rd and 4th are the right side.

i'm also contemplating taking out the fender lights and eliminating the wiring to simplify things. i just need to see if they are mandatory to have.
 

Attachments

  • Like
Reactions: bgenlvtex

bgenlvtex

Rank V
Launch Member

Member III

2,268
Texas
First Name
Bruce
Last Name
Evans
Member #

19382

Clearance markers are pretty handy in reduced visibility conditions.
 
  • Like
Reactions: Jim SoG

socal geek guy

Rank IV
Launch Member

Enthusiast III

1,116
San Diego, CA, USA
First Name
Chris
Last Name
Walker
Member #

19531

got the low fender moved up and changed the self tapping screws out for nuts and bolts on both sides yesterday. started getting the insulation panels cut to fit as well, gonna pick up where i left off a little later.

i looked at the wiring for all the lights, and ultimately, i'm going to re-do all the wiring to get rid of the daisy chain mess. for now it will stay as it is until i can map it out and then get the supplies i need.

i'd like to figure out a better way to seal up the holes from the original fender mounting, but for now i just used duct tape to at leas block anything from coming in. i'm thinking of getting either some other sheet metal or a better metal plate to cover the holes with adhesive on the back to seal from water/dust, and maybe rivet it to the exterior skin. definitely something i'll come back to. i want to get it back to road worthy for a camping trip in a couple weeks.
 

Attachments

MMc

Rank V

Influencer II

1,749
San Dimas, Ca.
First Name
Mike
Last Name
McMullen
Member #

18647

Seal the holes with Silicone not caulk, the caulk will shrink and expand with temp. you will not be able to paint it however.
They daisy chain the light because of cost, you are right to replace with more circuits and a TB board with fuses.