
Trail Blazer III
I’d like to show you how to properly rehandle a tool. This method is not the fastest but it will be effective for a lifetime of use. I restore vintage axes and hatchets as a side business, I’ve done well over 100 tools with zero repairs from a loose head. I make my own handles sometimes, others I use Beaver Tooth Handle Company blanks which I’ve found are the best.
I use simple hand tools, power tools can ruin your project too quickly, don’t risk it. I really enjoy using a spoke shave but it’s not critical, a good wood file is your best friend.
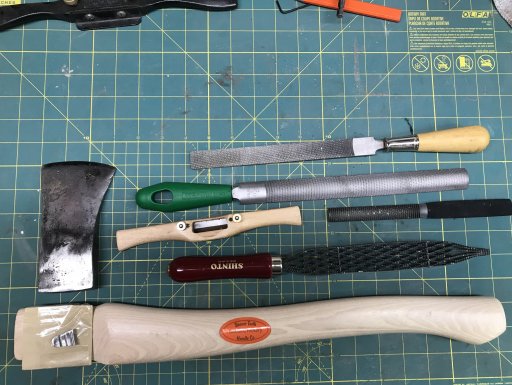
Use your file to shape the handle to fit the eye of your tool, take your time, you’ll likely refit the head many times to get it right.
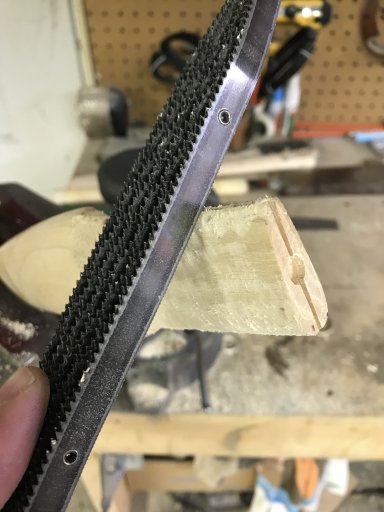
Press the head into the handle and hold like seen in the pic below. Hit the handle sharply with a rubber mallet to seat the head.
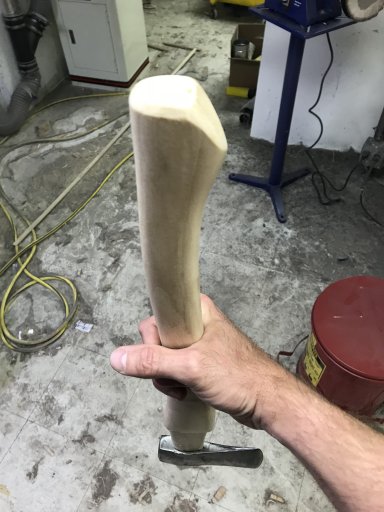
Repeat the steps above until the head of the tool sits on the shoulder or swell of the handle like below.
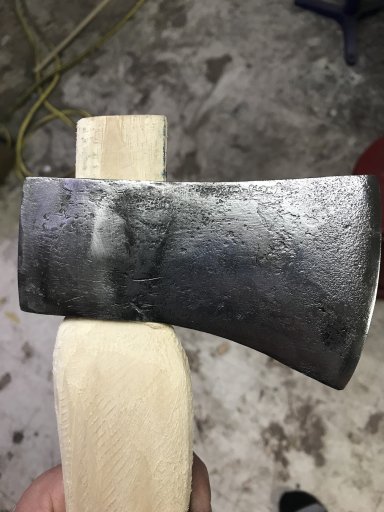
When you remove the head for fitting you will notice dark coloring, this is the contact points from the head that you need to file down. Repeat until coloring is equal around the handle.
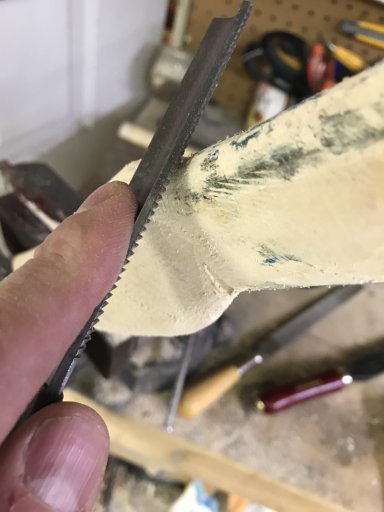
Seat the head once again on the handle striking the butt sharply.
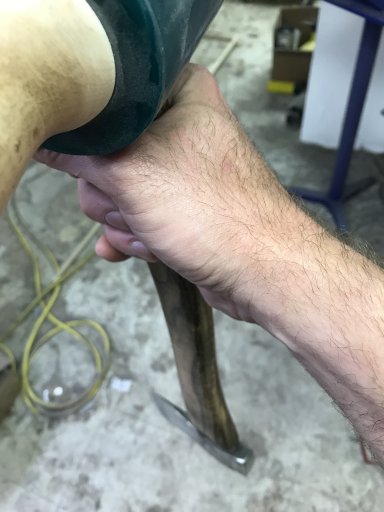
You should see curling from the head aggressively seating on the handle. There should be zero gaps anywhere around the head. If there are gaps, continue to fit with the file.
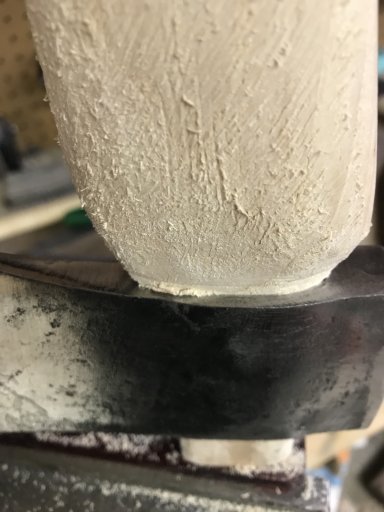
Remove the head and use a hand saw or band saw to expand the cut which will hold the wedge. I’ve never had one from any factory that didn’t need this after fitting. The cut should stop just above the bottom of the head when seated.
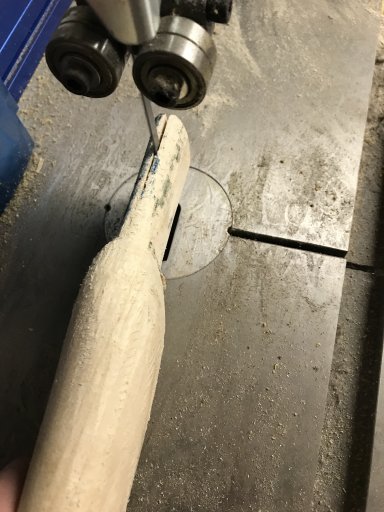
Using a saw(I love the Japanese pull saws) remove all but 1/4”-3/8” of the handle that is above the top of the head. If you prefer a flush look you can do this however you lose holding strength. At this time I sand the whole handle starting with 80 grit and progressing threw 120, 220, 400, and 1000 grit. You can stop at 400 but I like to go the extra step. (You will notice in the following pics that I also burn my handles for aesthetics as well as brand it with my Maker’s mark)
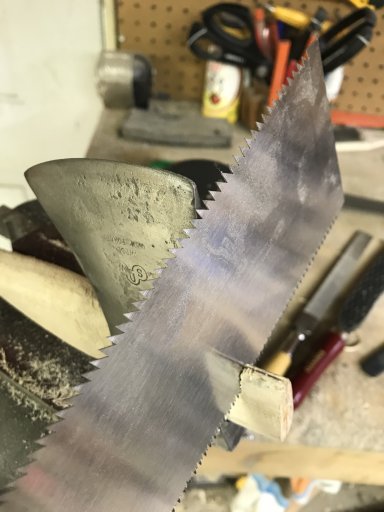
Fit your wedge to the eye of your tool head, you will have to cut the wedge down. A secret to make sure the wedge will fully seat is to push a jig saw blade into the cut that holds the wedge, it should be able to barely move. Use the blade to check the depth to make sure your wedge is fully seated once you install.
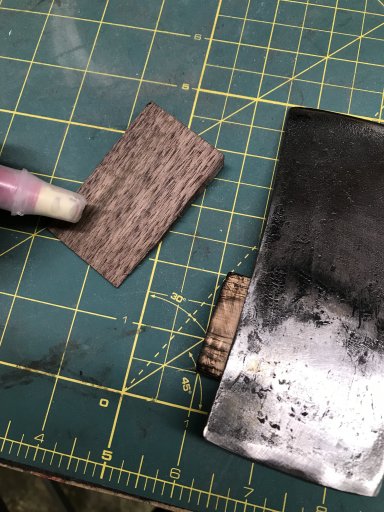
Wipe a quality outdoor grade wood glue on the wedge, both sides. It doesn’t take much but will increase holding strength significantly.
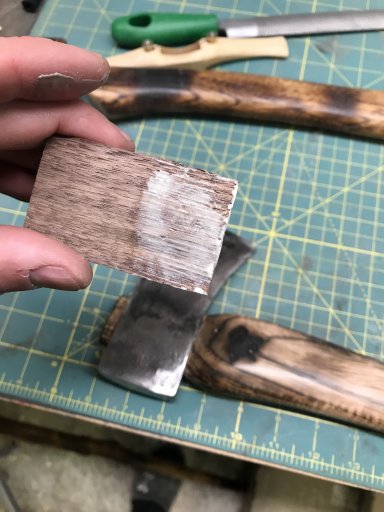
Carefully pound the wedge into the handle by tapping it on the floor. You will be able to hear when the wedge is foully seated, the noise it makes when hitting the floor will change. DO NOT USE A HAMMER, your wedge will split and pop out and not seat properly. If you get a split on the floor meathod it’s ok as long as the wedge doesn’t pop out.
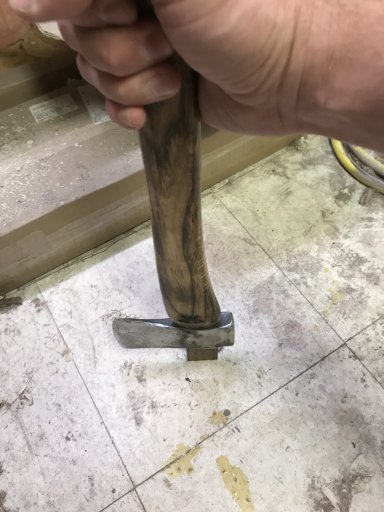
Use your saw to remove excess wedge material.
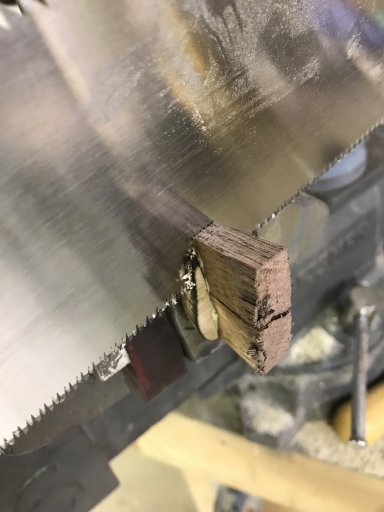
The wedge should completely fill all gaps at the top of the head.
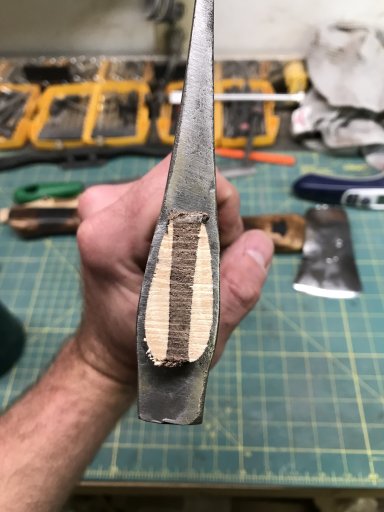
Almost all handles come with a softwood wedge and a step wedge. I prefer to use walnut wedges for looks and round safety wedges. This is where it’s ok to use a hammer. Pound the wedges into the wood until flush. The wood will split, this is ok.
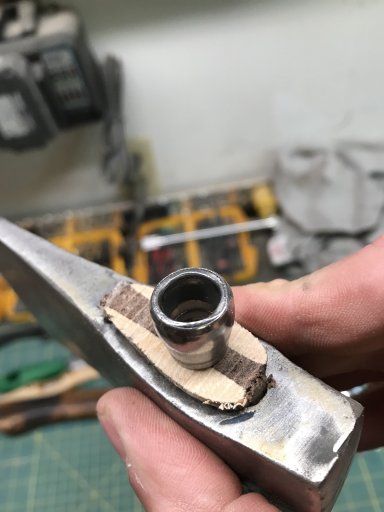
I prefer to use 2 safety wedges. Not completely necessary however it’s cheap insurance to make sure my tools never wiggle.
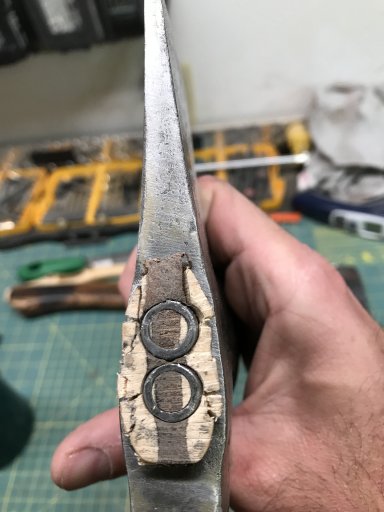
Note the “mushrooming” effect that the wedges provide. This demonstrates the increased holding power using these meathods.
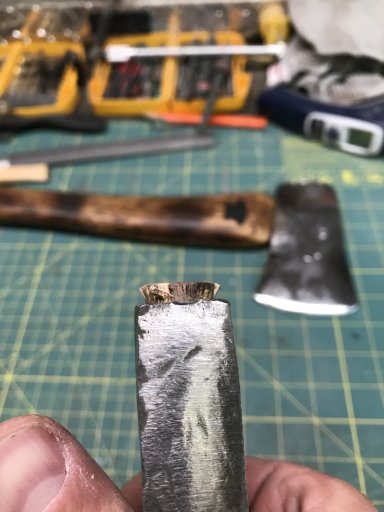
Time for the finish. I use boiled linseed oil or Watco Danish Oil. Lacquer on hand tools stinks, it cracks and only sits on the surface not protecting your handle. Lacquer also promotes blisters.
Apply a liberal amount of oil using a rag and rubbing it into the wood once a day for a week, once a week for a month, and once a month for a year. After that you apply once a year and the handle will last for generations. The benefit to the oils I use is that they penetrate deep into the wood and they plasticize creating a very durable and protective finish.
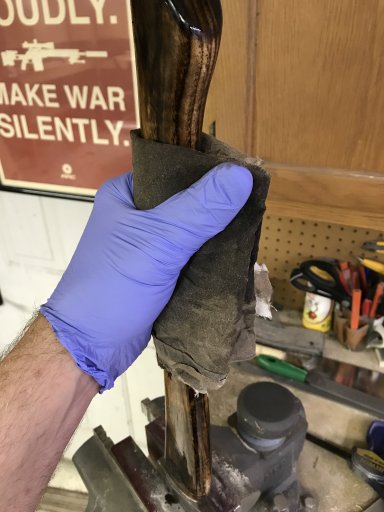
Use a q tip to apply the oil at the base of the handle and head as well as the top of the tool.
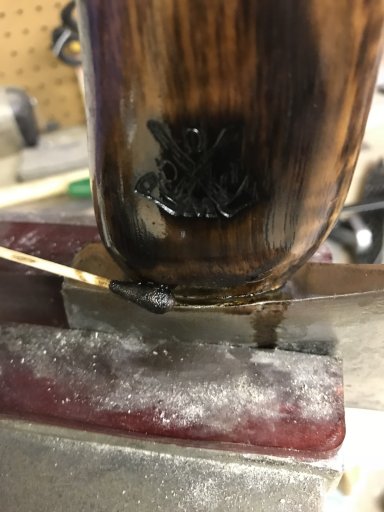
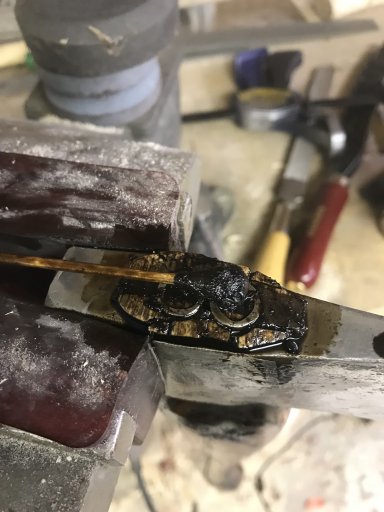
Now you’ll have a tool that is both beautiful and useful. Using this meathod should allow your tool to become a functioning heirloom. Enjoy!
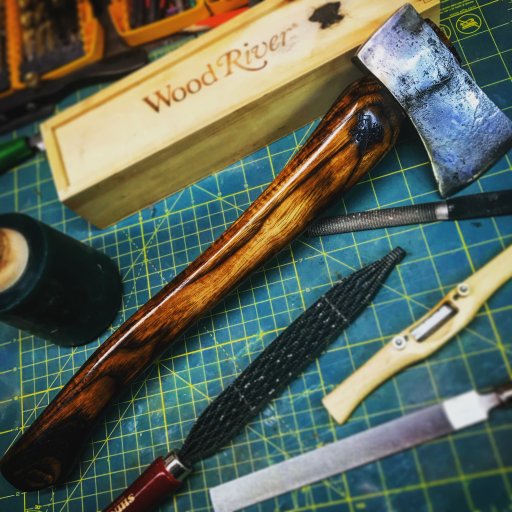
I use simple hand tools, power tools can ruin your project too quickly, don’t risk it. I really enjoy using a spoke shave but it’s not critical, a good wood file is your best friend.

Use your file to shape the handle to fit the eye of your tool, take your time, you’ll likely refit the head many times to get it right.

Press the head into the handle and hold like seen in the pic below. Hit the handle sharply with a rubber mallet to seat the head.

Repeat the steps above until the head of the tool sits on the shoulder or swell of the handle like below.

When you remove the head for fitting you will notice dark coloring, this is the contact points from the head that you need to file down. Repeat until coloring is equal around the handle.

Seat the head once again on the handle striking the butt sharply.

You should see curling from the head aggressively seating on the handle. There should be zero gaps anywhere around the head. If there are gaps, continue to fit with the file.

Remove the head and use a hand saw or band saw to expand the cut which will hold the wedge. I’ve never had one from any factory that didn’t need this after fitting. The cut should stop just above the bottom of the head when seated.

Using a saw(I love the Japanese pull saws) remove all but 1/4”-3/8” of the handle that is above the top of the head. If you prefer a flush look you can do this however you lose holding strength. At this time I sand the whole handle starting with 80 grit and progressing threw 120, 220, 400, and 1000 grit. You can stop at 400 but I like to go the extra step. (You will notice in the following pics that I also burn my handles for aesthetics as well as brand it with my Maker’s mark)

Fit your wedge to the eye of your tool head, you will have to cut the wedge down. A secret to make sure the wedge will fully seat is to push a jig saw blade into the cut that holds the wedge, it should be able to barely move. Use the blade to check the depth to make sure your wedge is fully seated once you install.

Wipe a quality outdoor grade wood glue on the wedge, both sides. It doesn’t take much but will increase holding strength significantly.

Carefully pound the wedge into the handle by tapping it on the floor. You will be able to hear when the wedge is foully seated, the noise it makes when hitting the floor will change. DO NOT USE A HAMMER, your wedge will split and pop out and not seat properly. If you get a split on the floor meathod it’s ok as long as the wedge doesn’t pop out.

Use your saw to remove excess wedge material.

The wedge should completely fill all gaps at the top of the head.

Almost all handles come with a softwood wedge and a step wedge. I prefer to use walnut wedges for looks and round safety wedges. This is where it’s ok to use a hammer. Pound the wedges into the wood until flush. The wood will split, this is ok.

I prefer to use 2 safety wedges. Not completely necessary however it’s cheap insurance to make sure my tools never wiggle.

Note the “mushrooming” effect that the wedges provide. This demonstrates the increased holding power using these meathods.

Time for the finish. I use boiled linseed oil or Watco Danish Oil. Lacquer on hand tools stinks, it cracks and only sits on the surface not protecting your handle. Lacquer also promotes blisters.
Apply a liberal amount of oil using a rag and rubbing it into the wood once a day for a week, once a week for a month, and once a month for a year. After that you apply once a year and the handle will last for generations. The benefit to the oils I use is that they penetrate deep into the wood and they plasticize creating a very durable and protective finish.

Use a q tip to apply the oil at the base of the handle and head as well as the top of the tool.


Now you’ll have a tool that is both beautiful and useful. Using this meathod should allow your tool to become a functioning heirloom. Enjoy!

Last edited:

