D
danbrown
Guest
Hello!
For those of you who have a Smitybilt compressor you know how annoying it is to have it run constantly. Here is a quick DIY project where you can add a pressure switch to it, and move away from the Japanese fittings to standard NPT.
Parts needed:
(1) Pipe 1/4" NPT Female x M12 X1.25 Male adapter. This is used to adapt from the M12 female thread at the handle of the compressor to 1/4" NPT female.
Link to fitting
(1) Pressure switch (I used one rated for 70-100psi)
Link to pressure switch
(1) Tee fitting 1/4NPT M x 1/4NPT F X 1/4NPT F
Link to Tee Fitting
(1) ARB Portable inflation kit. This is not necessary. I bought it to change from the Smitybilt yellow hose to the ARB hose which included the 1/4" quick disconnect fittings.
Link to ARB Tire Inflation kit
For wiring you will need some wire and spade connectors. I do believe i used 16 gauge.
Assembly (Note: use teflon tape on all air fittings)
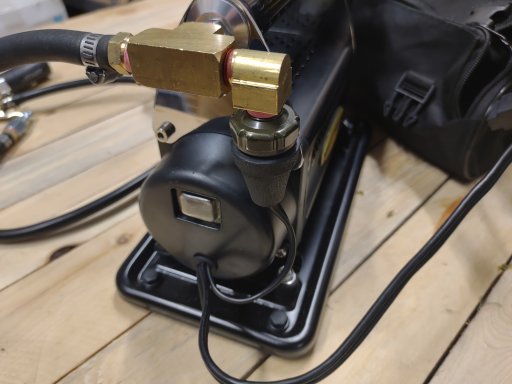
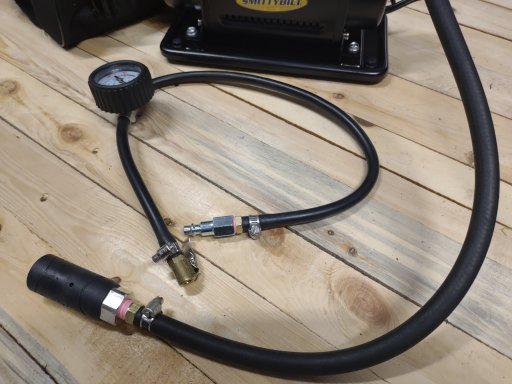
1. Remove the air hose attached to the compressor.
2. The M12 M to 1/4" NPT female screws into where the old hose was just removed.
3. From here it's pretty straightforward. The Tee goes into the adapter, the Pressure Switch goes into one of the female ports of the Tee, and your quick disconnect goes into the other female port (refer to picture if needed).
Wiring
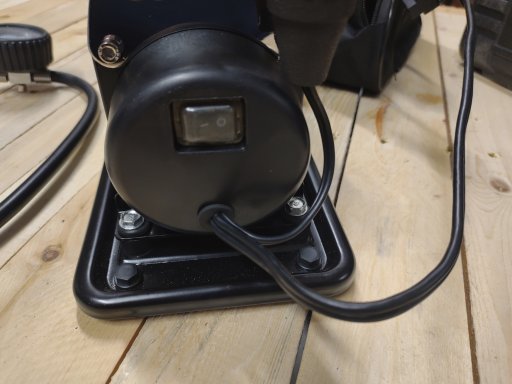
1) Remove the base.
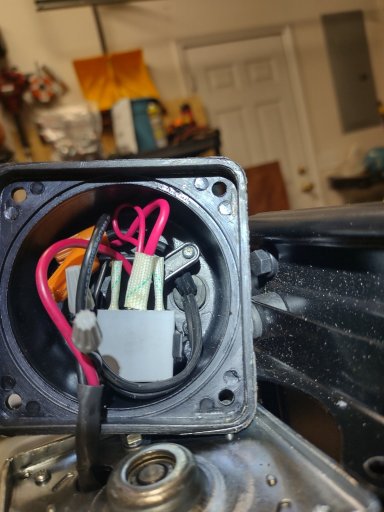
2) Remove the end cap where the on/off switch is.
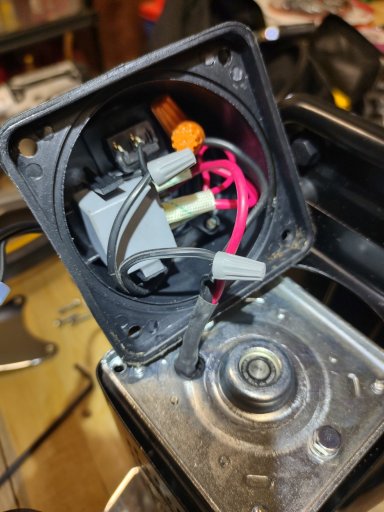
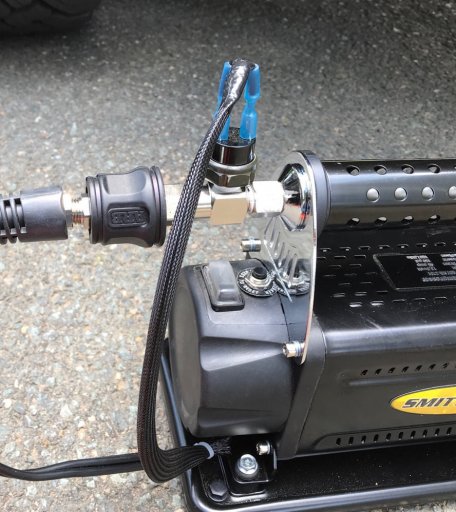
3) Cut 2 pieces of wire 12" long (you can trim them later) and put a spade (female) connector on one end of both wires. These will plug into the pressure switch (see picture for reference).
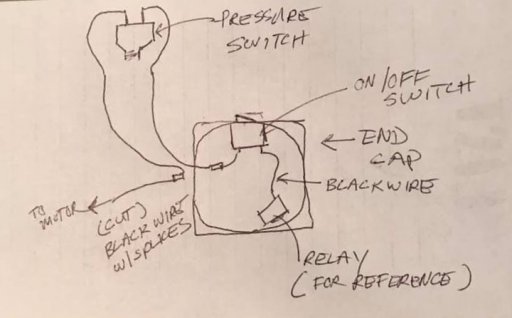
4) What you are going to do is wire the pressure switch, the two wires you just put connectors on, in series with the on/off switch.
5) The on/off switch (located in the end cap) has two wires attached to it.
6) Cut the wire coming out of on/off switch towards the middle. You want to leave enough room to splice in the two wires coming from the pressure switch
7) Splice in the two wire from the pressure switch. (please refer to my badly drawn wiring diagram!)
8) At this point neaten up your wiring, put the end cap and base back on.
Test
Connect the compressor up to 12VDC and turn it on. It should run for a couple of seconds and shutoff once there is enough pressure to trip the pressure swich. Once air starts to flow, the pressure switch will close allowing air to flow.
(Note; the wiring diagram shows a lead going from the on/off switch, through the pressure switch to the motor. This is actual the feed to the relay. The power to the motor is handled by the relay)
For those of you who have a Smitybilt compressor you know how annoying it is to have it run constantly. Here is a quick DIY project where you can add a pressure switch to it, and move away from the Japanese fittings to standard NPT.
Parts needed:
(1) Pipe 1/4" NPT Female x M12 X1.25 Male adapter. This is used to adapt from the M12 female thread at the handle of the compressor to 1/4" NPT female.
Link to fitting
(1) Pressure switch (I used one rated for 70-100psi)
Link to pressure switch
(1) Tee fitting 1/4NPT M x 1/4NPT F X 1/4NPT F
Link to Tee Fitting
(1) ARB Portable inflation kit. This is not necessary. I bought it to change from the Smitybilt yellow hose to the ARB hose which included the 1/4" quick disconnect fittings.
Link to ARB Tire Inflation kit
For wiring you will need some wire and spade connectors. I do believe i used 16 gauge.
Assembly (Note: use teflon tape on all air fittings)
1. Remove the air hose attached to the compressor.
2. The M12 M to 1/4" NPT female screws into where the old hose was just removed.
3. From here it's pretty straightforward. The Tee goes into the adapter, the Pressure Switch goes into one of the female ports of the Tee, and your quick disconnect goes into the other female port (refer to picture if needed).
Wiring
1) Remove the base.
2) Remove the end cap where the on/off switch is.
3) Cut 2 pieces of wire 12" long (you can trim them later) and put a spade (female) connector on one end of both wires. These will plug into the pressure switch (see picture for reference).
4) What you are going to do is wire the pressure switch, the two wires you just put connectors on, in series with the on/off switch.
5) The on/off switch (located in the end cap) has two wires attached to it.
6) Cut the wire coming out of on/off switch towards the middle. You want to leave enough room to splice in the two wires coming from the pressure switch
7) Splice in the two wire from the pressure switch. (please refer to my badly drawn wiring diagram!)
8) At this point neaten up your wiring, put the end cap and base back on.
Test
Connect the compressor up to 12VDC and turn it on. It should run for a couple of seconds and shutoff once there is enough pressure to trip the pressure swich. Once air starts to flow, the pressure switch will close allowing air to flow.
(Note; the wiring diagram shows a lead going from the on/off switch, through the pressure switch to the motor. This is actual the feed to the relay. The power to the motor is handled by the relay)
Last edited by a moderator: