
Traveler III
I posted this in Tacomaworld but figured I would crosspost here since others may also be interested.
BLOT: I decided to remove my passenger seat and build out a deck with storage and a drawer.
This was done on a 1997 SR5 4WD Access Cab but could be done in just about any vehicle.
I decided to post this after wanting to do a front seat delete noticed there were no good resources online where this had been done. There were a ton of rear seat delete resources but I’m guessing I’m a minority for wanting to get rid of the front seat.
I guess I should start there. Why would anyone want to remove their passenger seat? After all, what if you need to carry someone in the case of an emergency? In my case, this isn’t my daily driver. I bought it just before covid with the intention of using it for a camping/fishing truck. During the past 5yrs of owning the truck, I have had exactly 2 people in it. In both instances I was dropping my daughter off while my daily driver was in the shop. She is now of driving age and is saving for her own vehicle. Worst case, there is Uber. In the dozens of trips taken in this truck, I’ve always been solo. That’s not to say there weren’t other people in their vehicles, just that I don’t carry a passenger. In the event I have to carry a passenger, I could move things around and they’ll simply have to ride on the deck until we can get to safety. After all, it would only be in an emergency situation.
The other reason I wanted to remove the seat is so that I could put my 12V fridge there. I had previously had it in the rear seat of the access cab but it was a pain to get in and out of. By moving it to where the passenger seat is, I can easily access it from either side.
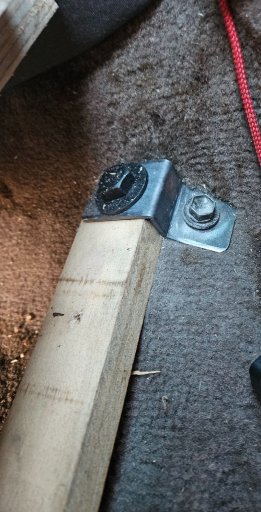
I want to state that I didn’t have any plans nor do I have any to offer. I started by mocking things up in cardboard and then moving to plywood. I used ¾“ for the decking and ½“ for the rear wall. I had a few good sized scraps left from a previous project. The carpet is just generic automotive carpet that I found at my local big box hardware store. It came in a 8x5 roll and I used 3M spray on adhesive to stick the carpet to the wood. I also had to make my own mounts to bolt to the original seat holes. This keeps the unit secured to the vehicle. I made this out of 1/8” steel heated and bent in a vice. I drilled holes big enough to used the original seat mounting bolts.
One last consideration I had when I built this is that I wanted it to be removable in the event I need to put the seat back. I built it modular so that a few bolts and screws and it will come out.
I started by removing the front seat and placing a board about where I wanted the deck to get an idea of where my fridge would sit and ensure I would be able to open it.
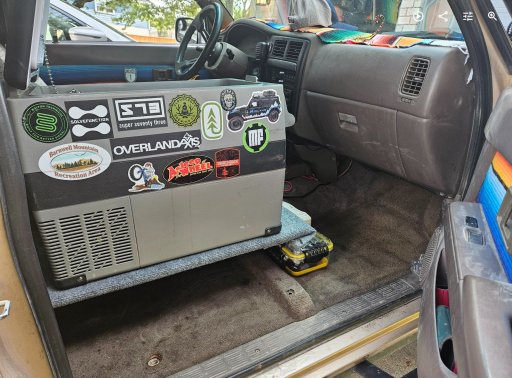
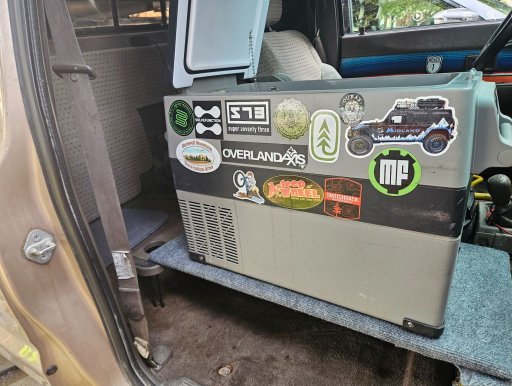
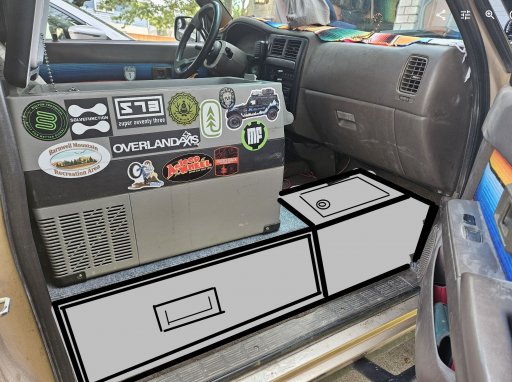
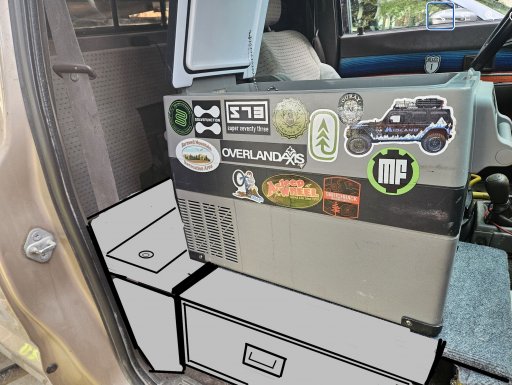
I then used my Microsoft paint skills to mockup an idea of what I thought I wanted. This helped me mentally commit to the project.
I used one of those as-seen-on-tv things that measures curves and odd shapes for getting the curves around the door speaker and shifter console. I got it in my stocking a couple years ago and finally came in handy.
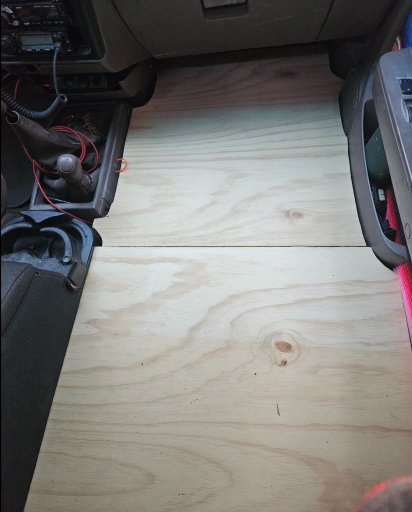
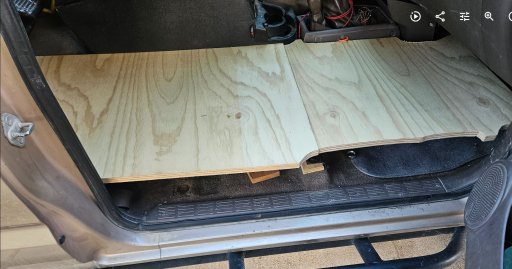
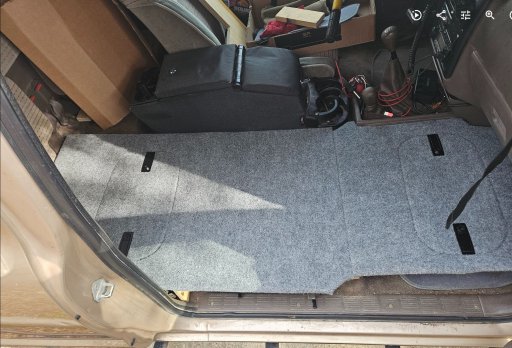
I wish I would have done a better job documenting cutting the hatches. Here is the front section after I cut the hatch and wrapped in carpet. The board you see is bolted to the vehicle on the other side. The bolts can be removed by accessing though the hatch.
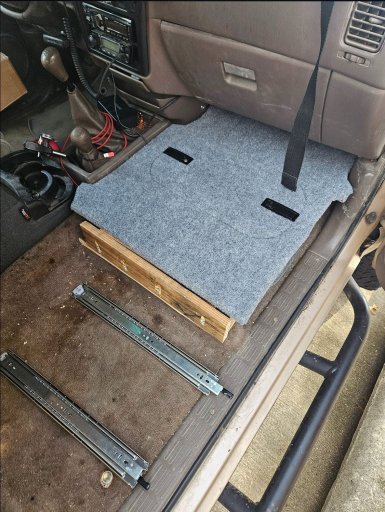
I then cut the hatch in the rear section and wrapped it in carpet. There is a board standing vertical underneath. This serves as a support as well as provides a side for the drawer slide. You can see this in the second photo. I also wrapped a small piece to block the side of the front section. Ignore the gaps. I’m working with scraps here.
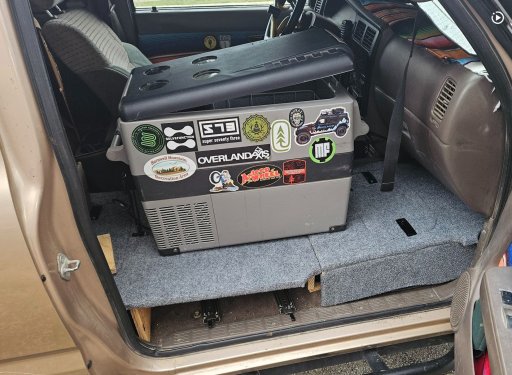
Next, I built a drawer. I had room to build an 15 x18x 5” drawer for storage. This is where I intend to keep pantry foods and snacks.
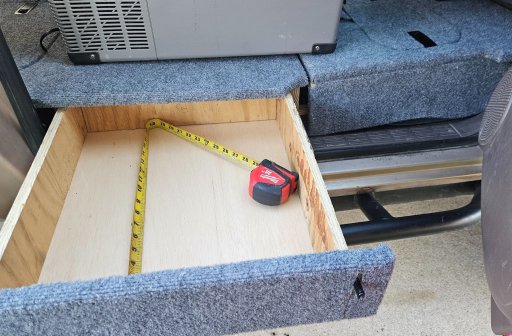
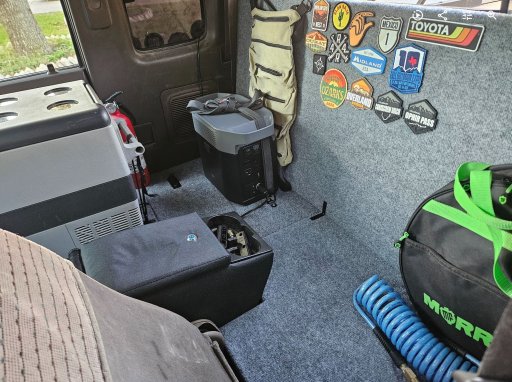
Next I set out to finish the deck across the back seat. Since I use an aftermarket center console, I had to cut around that. I also didn’t want to lose access to the storage under the rear drivers side so I cut a panel that can be easily removed to provide access. I drive with the seat all the way back so I cut the deck to fit this. There is some storage under the deck now if I slide the seat forward.
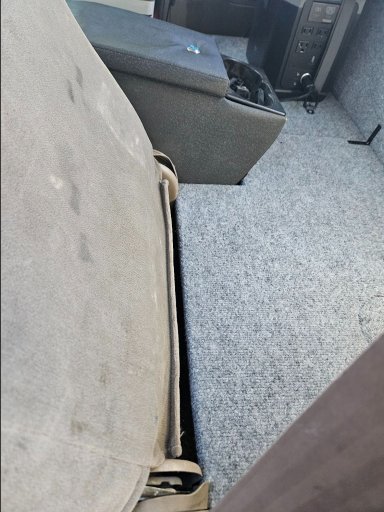
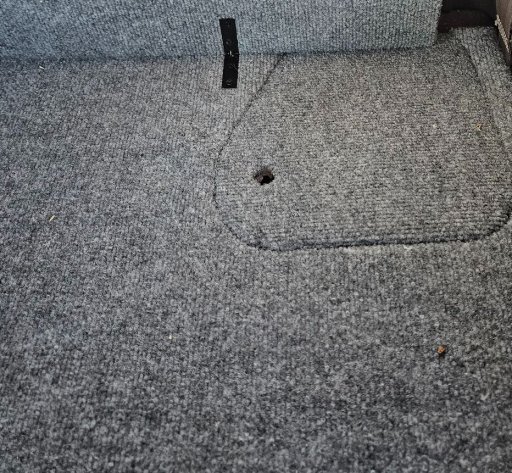
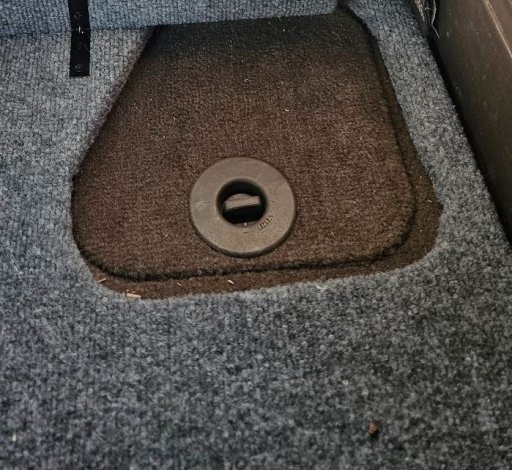
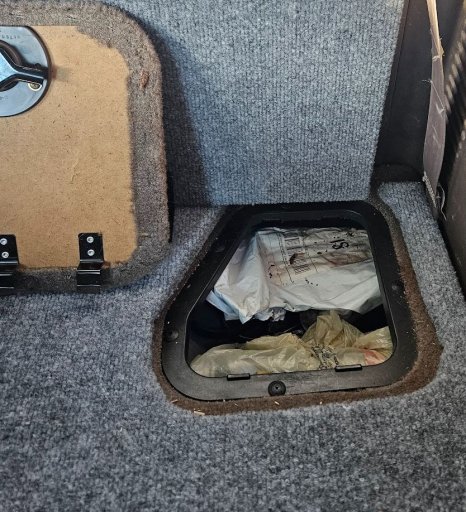
Lastly, I secured a small 1x2 to the rear trim using screws. That made the back wall flat and gave me something to screw a piece of plywood to. I wrapped some ½” plywood and screwed it to the 1x2 across the top and used angles to secure the bottom to the rear deck.
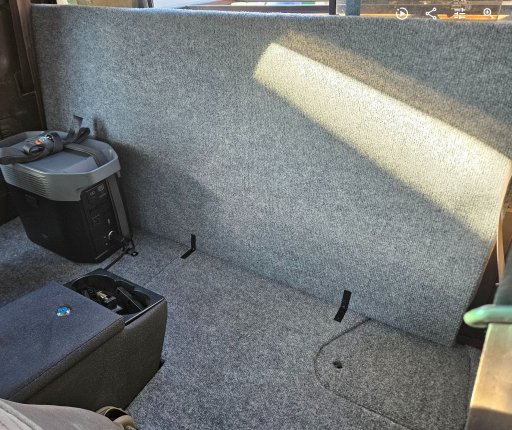
Added some D-rings to secure my fridge and battery bank and that’s it.
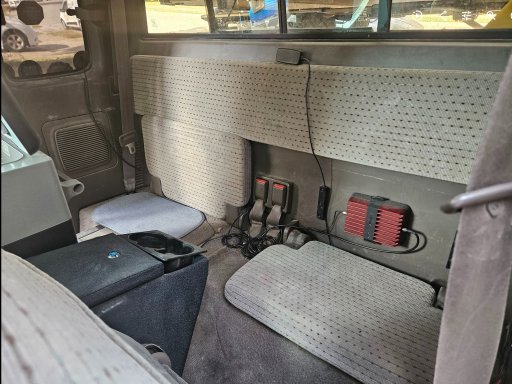
Before:
Hope this helps someone who may be considering something similar.
BLOT: I decided to remove my passenger seat and build out a deck with storage and a drawer.
This was done on a 1997 SR5 4WD Access Cab but could be done in just about any vehicle.
I decided to post this after wanting to do a front seat delete noticed there were no good resources online where this had been done. There were a ton of rear seat delete resources but I’m guessing I’m a minority for wanting to get rid of the front seat.
I guess I should start there. Why would anyone want to remove their passenger seat? After all, what if you need to carry someone in the case of an emergency? In my case, this isn’t my daily driver. I bought it just before covid with the intention of using it for a camping/fishing truck. During the past 5yrs of owning the truck, I have had exactly 2 people in it. In both instances I was dropping my daughter off while my daily driver was in the shop. She is now of driving age and is saving for her own vehicle. Worst case, there is Uber. In the dozens of trips taken in this truck, I’ve always been solo. That’s not to say there weren’t other people in their vehicles, just that I don’t carry a passenger. In the event I have to carry a passenger, I could move things around and they’ll simply have to ride on the deck until we can get to safety. After all, it would only be in an emergency situation.
The other reason I wanted to remove the seat is so that I could put my 12V fridge there. I had previously had it in the rear seat of the access cab but it was a pain to get in and out of. By moving it to where the passenger seat is, I can easily access it from either side.
I want to state that I didn’t have any plans nor do I have any to offer. I started by mocking things up in cardboard and then moving to plywood. I used ¾“ for the decking and ½“ for the rear wall. I had a few good sized scraps left from a previous project. The carpet is just generic automotive carpet that I found at my local big box hardware store. It came in a 8x5 roll and I used 3M spray on adhesive to stick the carpet to the wood. I also had to make my own mounts to bolt to the original seat holes. This keeps the unit secured to the vehicle. I made this out of 1/8” steel heated and bent in a vice. I drilled holes big enough to used the original seat mounting bolts.
One last consideration I had when I built this is that I wanted it to be removable in the event I need to put the seat back. I built it modular so that a few bolts and screws and it will come out.
I started by removing the front seat and placing a board about where I wanted the deck to get an idea of where my fridge would sit and ensure I would be able to open it.


I then used my Microsoft paint skills to mockup an idea of what I thought I wanted. This helped me mentally commit to the project.


I used one of those as-seen-on-tv things that measures curves and odd shapes for getting the curves around the door speaker and shifter console. I got it in my stocking a couple years ago and finally came in handy.


I wish I would have done a better job documenting cutting the hatches. Here is the front section after I cut the hatch and wrapped in carpet. The board you see is bolted to the vehicle on the other side. The bolts can be removed by accessing though the hatch.


I then cut the hatch in the rear section and wrapped it in carpet. There is a board standing vertical underneath. This serves as a support as well as provides a side for the drawer slide. You can see this in the second photo. I also wrapped a small piece to block the side of the front section. Ignore the gaps. I’m working with scraps here.


Next, I built a drawer. I had room to build an 15 x18x 5” drawer for storage. This is where I intend to keep pantry foods and snacks.

Next I set out to finish the deck across the back seat. Since I use an aftermarket center console, I had to cut around that. I also didn’t want to lose access to the storage under the rear drivers side so I cut a panel that can be easily removed to provide access. I drive with the seat all the way back so I cut the deck to fit this. There is some storage under the deck now if I slide the seat forward.


Lastly, I secured a small 1x2 to the rear trim using screws. That made the back wall flat and gave me something to screw a piece of plywood to. I wrapped some ½” plywood and screwed it to the 1x2 across the top and used angles to secure the bottom to the rear deck.

Added some D-rings to secure my fridge and battery bank and that’s it.

Before:

Hope this helps someone who may be considering something similar.


