Defender winch bumper build

  • HTML tutorial

paul87250

Rank VIII
Launch Member

Off-Road Ranger III

10,095
Folles, Haute-Vienne, France
First Name
paul
Last Name
Newbold
Member #

18967

Okay so it's early days and I'm in the planning stage CAD (Cardboard Assisted Design) so be gentle with me.

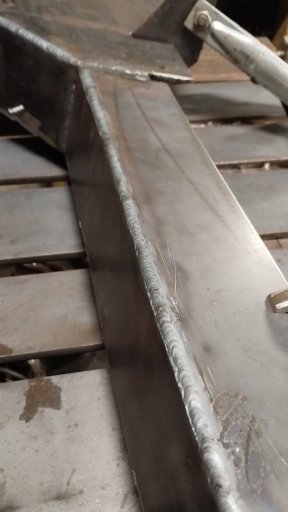
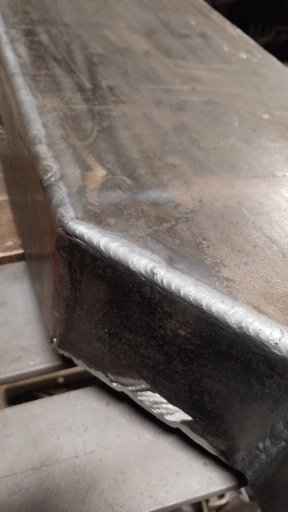
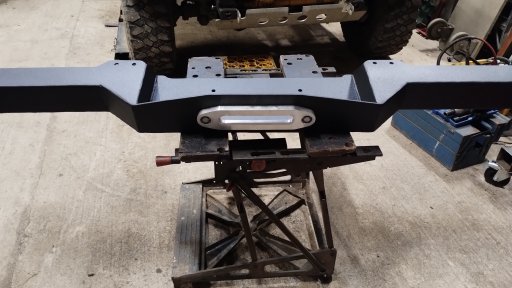
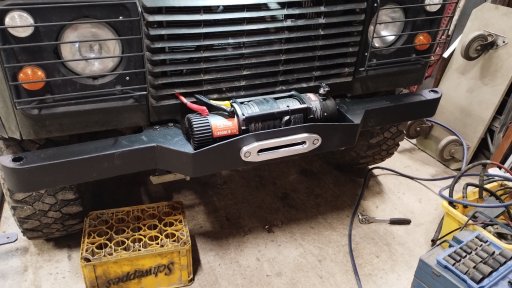
The idea is to fabricate a winch bumper as close to the original as possible using plate steel 6mm for the tray and 3mm for the extremities.

The first battle is a mental one psyching out the project and building up the courage to take the first step, which in my humble opinion is the hardest usually.

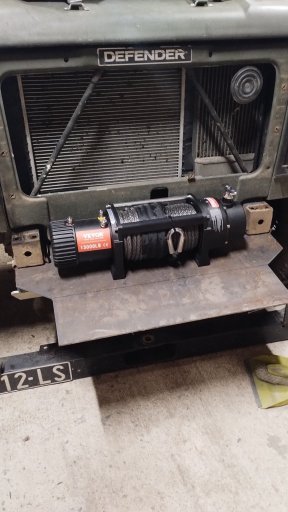
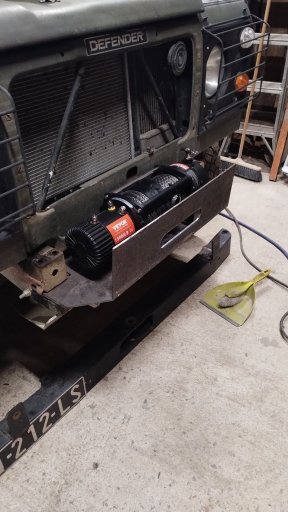
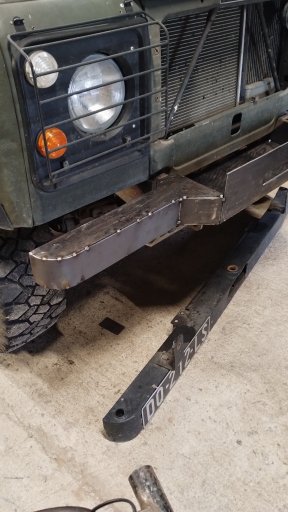
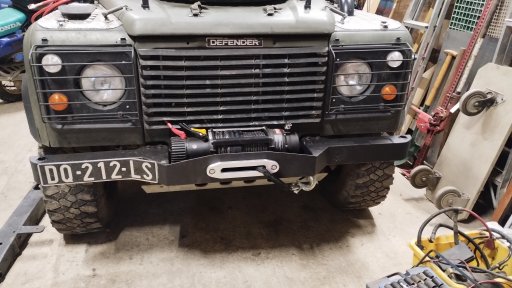
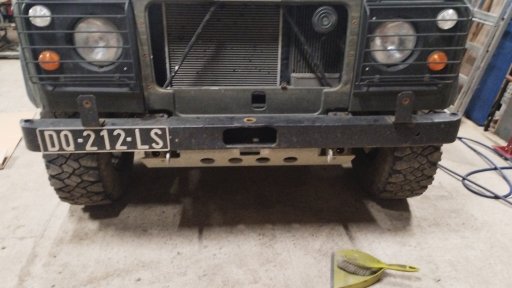
So step one is to remove the original bumper which has been on for 30+ years and surprisingly it came off ....... without taking the lord's name in vain.

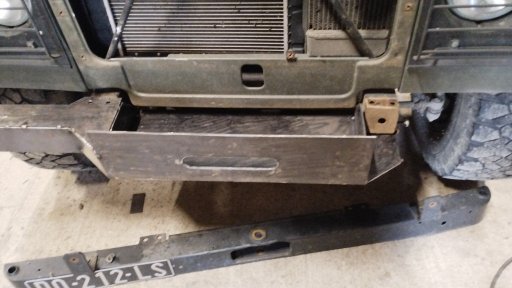
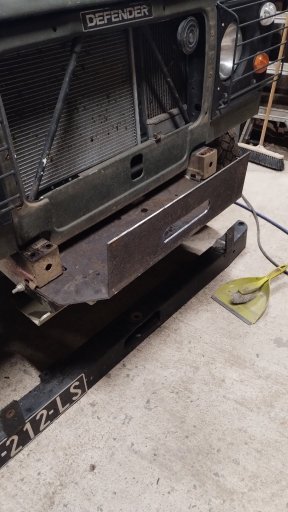
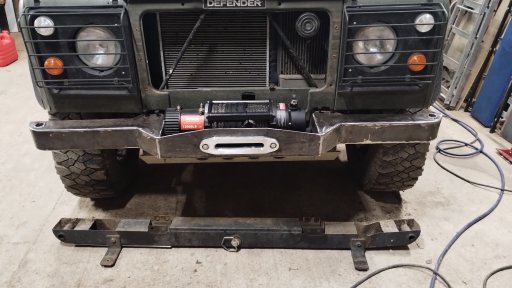
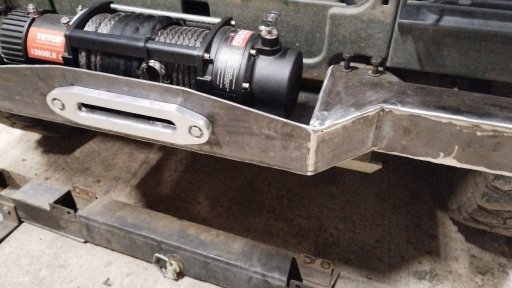
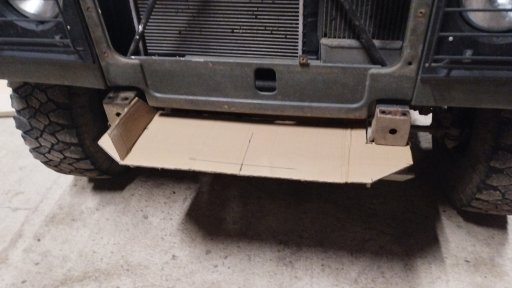
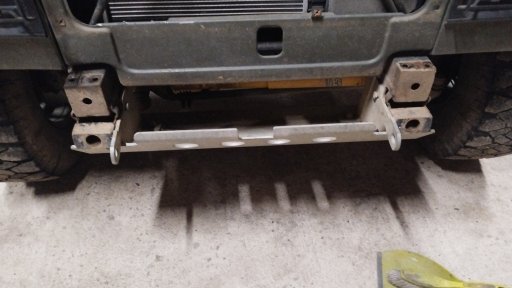
Now it's time for a mock up to see how things may work out and start the precision planning (cardboard templates) pic3&4

Tomorrow I will be starting to cut the steel plates so I will post some more progress info.

I'm off to watch the rugby 6 Nations
 

Attachments

El-Dracho

Ambassador, Europe
Moderator
Member
Supporter
Investor

Inventor I

13,232
Lampertheim, Germany
First Name
Bjoern
Last Name
Eldracher
Member #

20111

Ham/GMRS Callsign
DO3BE
This will be a great winch bumper. Looking forward to what happens next. Have fun with the project.
 
  • Like
Reactions: paul87250

paul87250

Rank VIII
Launch Member

Off-Road Ranger III

10,095
Folles, Haute-Vienne, France
First Name
paul
Last Name
Newbold
Member #

18967

So today was a lot of plasma cutting and trimming cardboard templates, the end result for today is two thirds of the bumper is cut out and tacked together.

The next step is to finish the left hand side of the bumper and shape the front over the fairlead then a big clean up and out with the Tig welder to stitch it up.

It's easy if you say it quickly.

Happy weekend everyone. Cheers
 

Attachments

paul87250

Rank VIII
Launch Member

Off-Road Ranger III

10,095
Folles, Haute-Vienne, France
First Name
paul
Last Name
Newbold
Member #

18967

That's amazing. Outstanding design and execution. I did the same on my f250 and you just have to go for what "YOU THINK" looks good. But. I'm right with you on this.
It's great.
Zim

View attachment 275262
I did not make the brush guard. Just the bumper and winch plate.
Looks good Zim, what coating is on it? I'm thinking of some type of bed liner paint over an epoxy primer for durability.
 

El-Dracho

Ambassador, Europe
Moderator
Member
Supporter
Investor

Inventor I

13,232
Lampertheim, Germany
First Name
Bjoern
Last Name
Eldracher
Member #

20111

Ham/GMRS Callsign
DO3BE
For painting - I made good experiences with Brantho-Korrux 3 in 1, both in the spray can and for painting with a brush. If something is rusty, I use Brunox epoxy first. Simple and good, it can always be easily painted over if a scratch happens or the paint chips off.
 
  • Like
Reactions: paul87250

paul87250

Rank VIII
Launch Member

Off-Road Ranger III

10,095
Folles, Haute-Vienne, France
First Name
paul
Last Name
Newbold
Member #

18967

So this weekend I managed to finish the fabrication of my winch bumper and test fitted the winch, thankfully everything is ok, so now I have to clean and prep for paint next weekend.

Cheers Paul
 

Attachments

paul87250

Rank VIII
Launch Member

Off-Road Ranger III

10,095
Folles, Haute-Vienne, France
First Name
paul
Last Name
Newbold
Member #

18967

Finally the bumper is finished.!!

After some grinding and a good wipe down with acetone I applied a coat of 2k epoxy primer and two coats of raptor bed liner in black. Leaving it to cure properly for three days held me up, I was excited to get it mounted on the defender.

The final fit was nerve wracking, but all went according to my very fluffy plan.....I fitted the solenoid remotely inside the wing behind the headlight to protect it from the worst of the weather so needed to extend the factory cables. For the wiring I used 35mm2 welding cable and crimped on the fittings with a hydraulic crimper, connecting to the battery via a 500amp isolator.

The wiring took a while but it was a long run to the battery box under the passenger seat in a land rover.

Now it just needs a serious test, we verified that it works spooling in and out with both the remote and wired controls.

We are really pleased with the results and hope we never need to use it in anger.

Thanks for the interest and nice comments.

Cheers Paul and Nicky
 

Attachments

  • Like
Reactions: MMc and El-Dracho

hrichard

Rank V
Member

Off-Road Ranger III

2,381
Camden, DE, USA
First Name
HARRY
Last Name
RICHARD
Member #

47651

Ham/GMRS Callsign
KC3UVV
That came out really slick!! Good idea remote mounting the solenoids, not only are they protected but you gave the whole bumper a much lower profile
 

El-Dracho

Ambassador, Europe
Moderator
Member
Supporter
Investor

Inventor I

13,232
Lampertheim, Germany
First Name
Bjoern
Last Name
Eldracher
Member #

20111

Ham/GMRS Callsign
DO3BE
This turned out really, really well. Looks spot on. Great craftsmanship, great design based on the original - I really like it. Thanks for sharing here @paul87250
 
  • Like
Reactions: paul87250